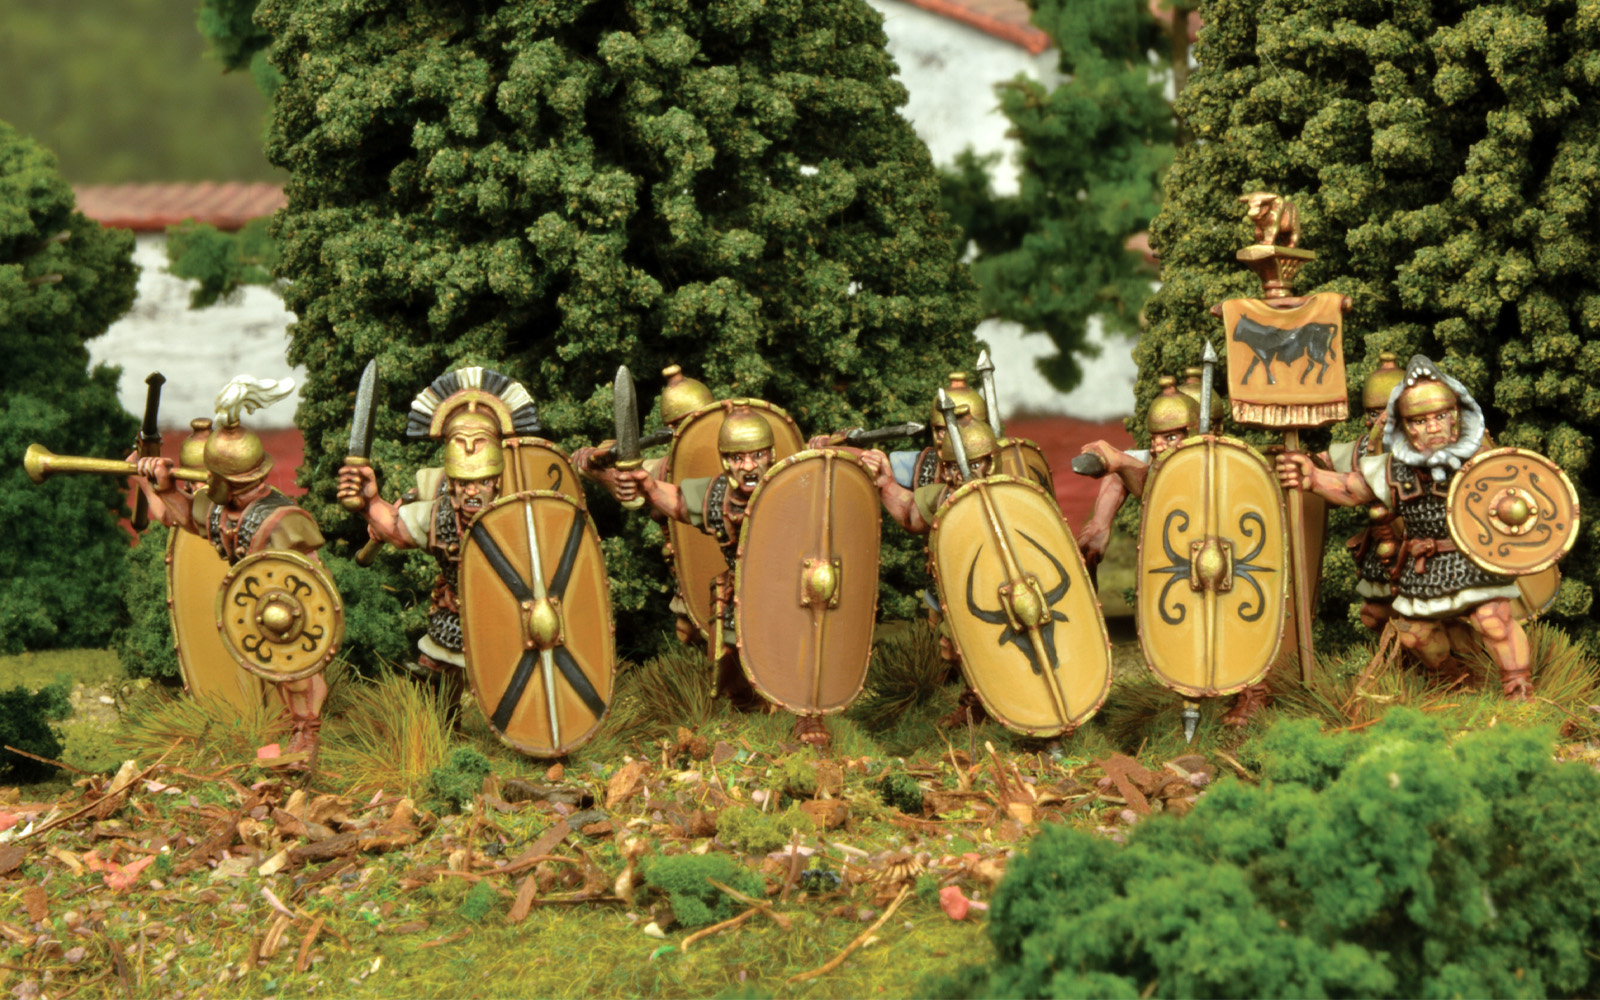
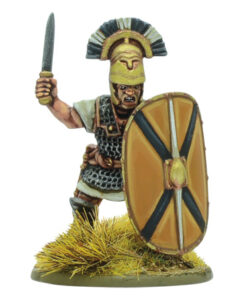
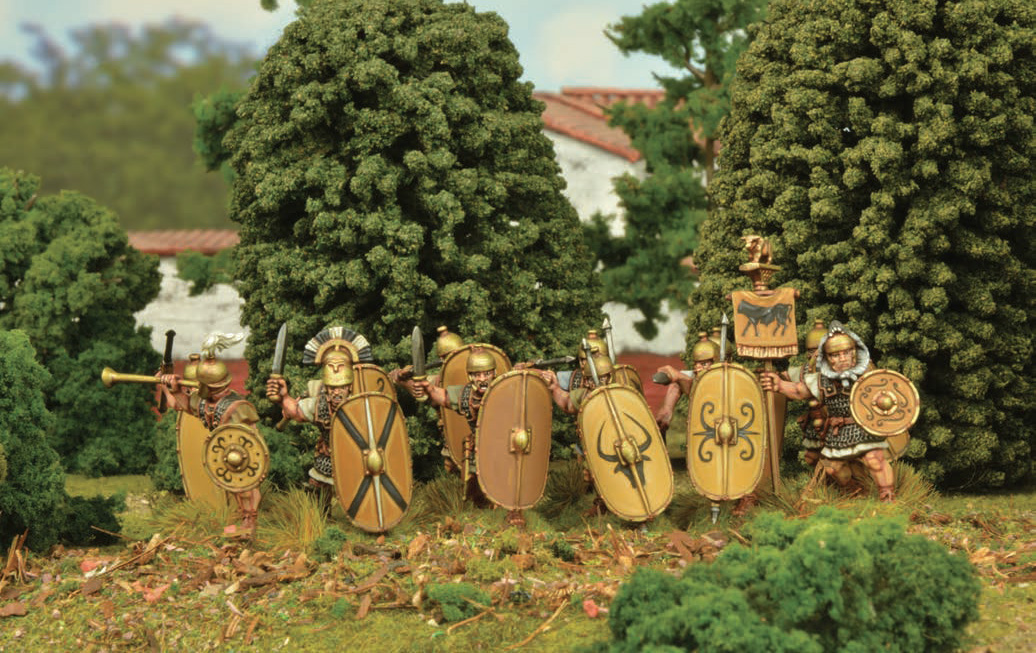
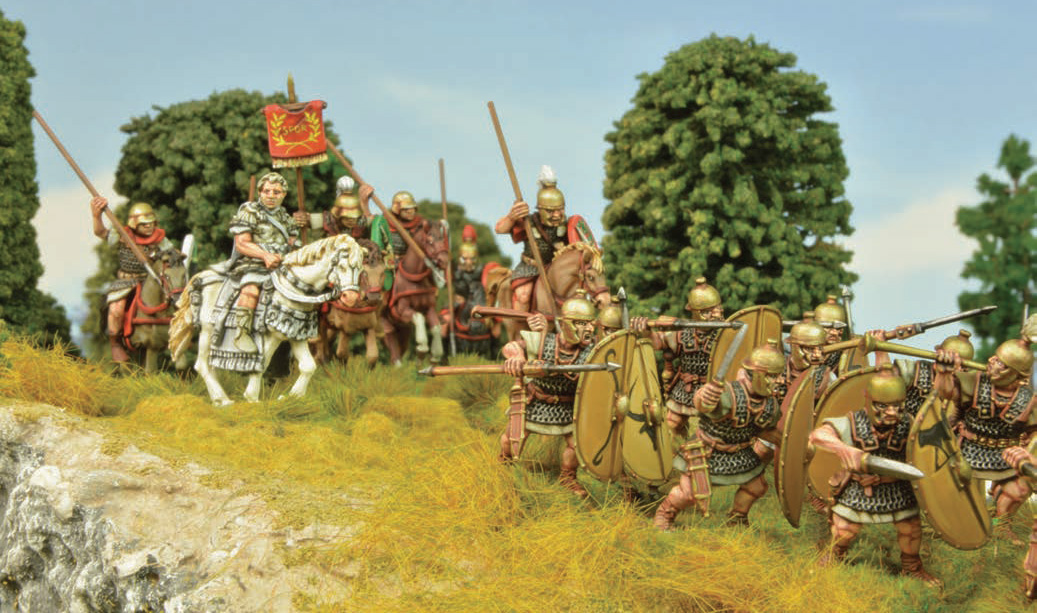
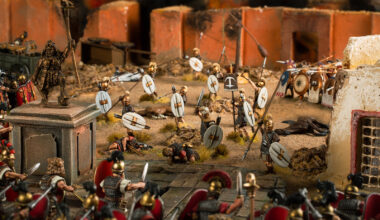
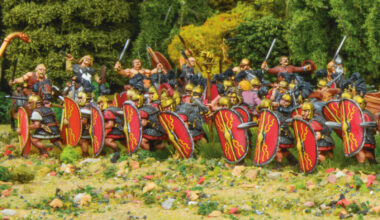
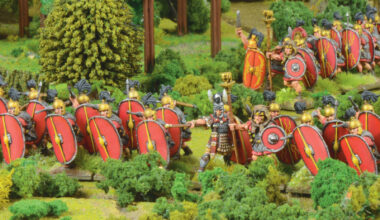
Andrés: As wargamers who like to paint and collect Roman armies, we’re very used to the traditional Caesarean Romans with big red shields sporting yellow wings and red dyed clothes and brown leather armour. I decided to paint mine using a different colour palette, using different shield designs and different tones of the same colour throughout the unit.
I have always liked to do this. When painting WWII miniatures, for example, I prefer to mix several shades of the same colour on a model, and within a unit, to make the final result a bit more interesting. It gives a more real feeling – showing that a unit has experienced wear and tear and isn’t simply off the factory floor. With no soldier identical to another, it really helps my models stand out from one another on the table.
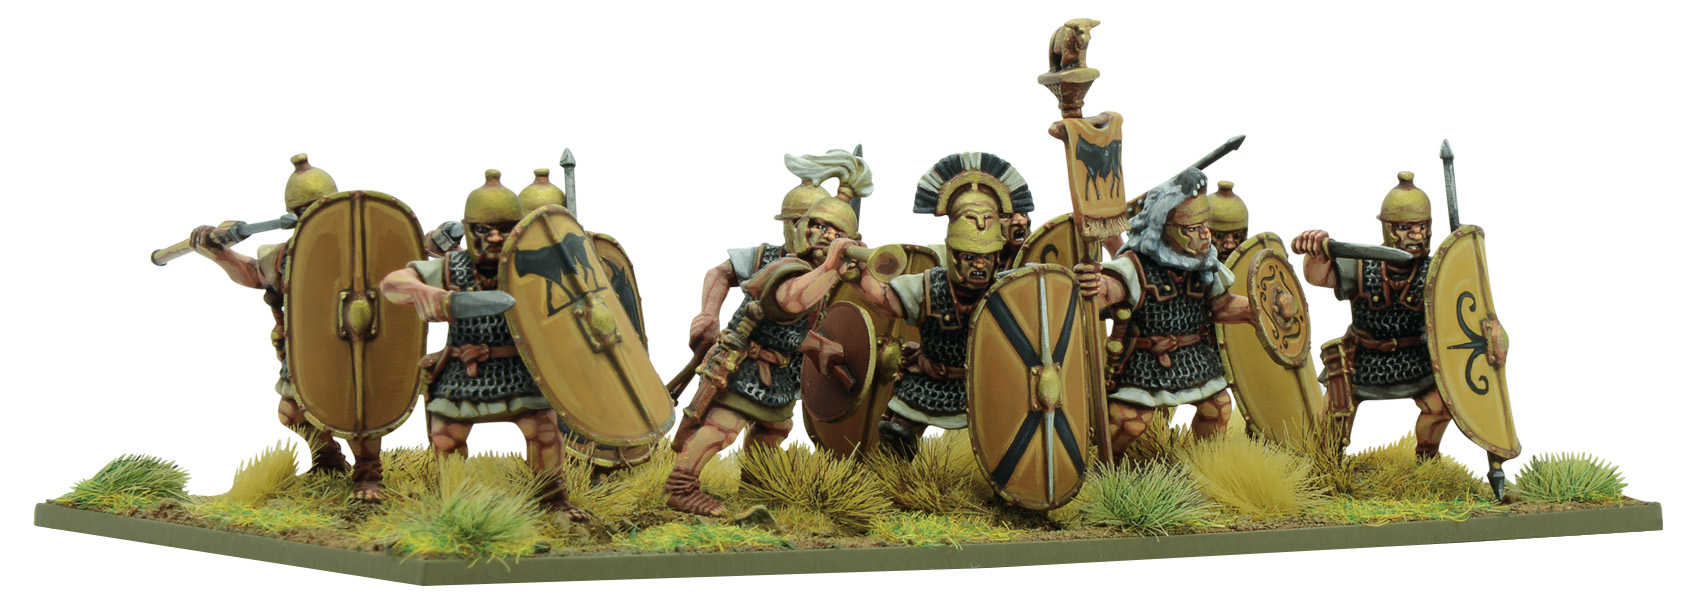
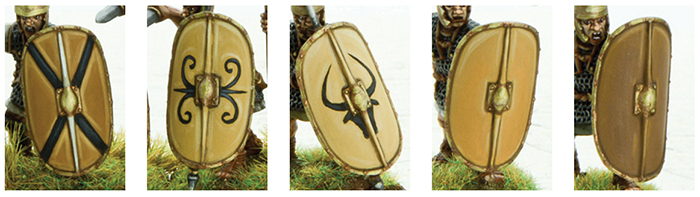
Historically, it is known that Pompey’s legions carried yellow and white shields, amongst other colours, hence I chose to use this as a unifying focus point for the force as a whole, whilst injecting individual variety via the tunics – whose colours range from creams and beiges to greens and greys.
Preparation
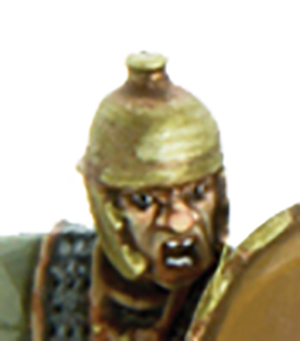
The first task was to make some minor and easy modifications to the miniatures. To represent a legionary of Pompey rather than Caesar I needed to remove the horse tails on most of the legionaries’ helmets. It’s a very easy thing to do because there are hardly any contact points between the horsetail plume and other parts of the helmet. So, with a bit of care, and cleaning the cuts with a file, this was done swiftly and easily.
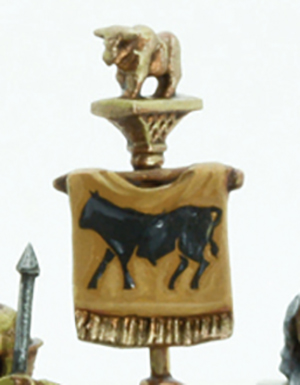
Another very easy conversion was to use a spare vexillum. I had one of these in my bits box (always worth keeping those little pieces) and glued it just under the bull icon part of the standard pole. For the musician, I used a normal legionary head but didn’t cut the horsetail plume this time, just to make him stand out a bit more.
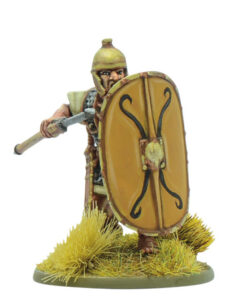
The last thing I did was cut the hilts on all the miniatures that were attacking with their gladius. If you don’t do that, the miniature will have a sword in the hand and another one in the scabbard!
Painting
I trick I’ve always used to speed up my painting is to paint the heads detached from the bodies – it just makes my life easier. Once everything is finished I glue them carefully with superglue (or you can scratch the paint a little off all the contact parts, and then use plastic glue – though this could get messy).
After the whole day painting as part of Warlord Games’s studio team, and with family life, there isn’t much time left (or eyesight!!) for me to do big personal projects. So I tend to focus on fast but effective ways of painting units, even if that means not painting eyes (yes I know I did end up painting eyes on these, but I couldn’t resist).
I find it very useful to prime miniatures in the main base colour. In this case, I chose Army Painter Fur Brown spray. It gives me a good base colour that works very well for flesh tones as well as the brown parts of the miniatures like sandals and pilum shafts; it can also be covered easily with bronze and steel paints.
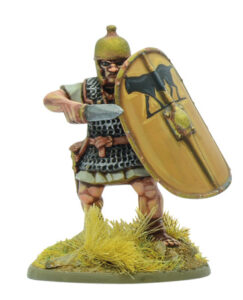
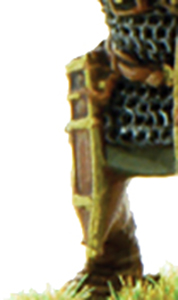
I used a dark metallic colour for the chainmail, sword blades and pilum metal heads. You can get this dark colour simply by mixing Gun Metal with Black paint. I left the primer colour on all the leather edges around the chainmail as well as the belt, the sandals and the pilum shaft and because I was going to use Fur Brown as the base colour for my flesh tone, I left it as it was too. I painted all the Bronze parts, like the helmet, scabbard decorations, buckle, shield edge and boss. I finished by painting the sword pommel Charred Brown. For the hair I used various colours
After this, I gave the chainmail and other dark metal areas a Dark Tone Ink wash. I used Strong Tone all over the bronze parts, the face, the sandals and the brown areas. I kept the rest of the flesh relatively clean, with a very light wash, just allowing a little to settle in the deepest recesses.
Fast & Easy Highlighting
For the flesh, I started with AP Barbarian Flesh, followed by VMC Flat Flesh on the raised parts like cheeks, chin, tip of the nose, knuckles, fingertips, kneecaps and so on. I painted the stubble using AP Monster Brown and then highlighted it with a bit of VMC Flat Flesh to blend it with the colour of the cheeks. To highlight the other parts of the miniature, I used the following:
| Chainmail and other dark metallic parts: | VMC Metallic Grey, followed by AP Gun Metal. |
| Bronze: | In this case I used AP Bronze followed by AP Shiny Gold. |
| Leather: | I just highlighted the edges of the belts and the sandals with AP Monster Brown. |
| Weapon shafts: | Just some long strokes of AP Desert Yellow. |
I think the final result is quite good for the amount of time spent on them. You can paint eyes easily (because they are well-defined on these miniatures) but it’s not necessary.
Shields
For the shields, I just used a range of ochres and yellows to give an irregular look to the unit, whilst retaining a very Roman feel. On some of them, I painted free-hand designs, on others I used decals from our vast range of Roman Shield Designs. The main motifs were bulls and spirals.
After that, I varnished them with a coat of AP Warpaints Anti Shine matt varnish (with a brush, since I prefer to control where the varnish goes and how much goes on).
Bases
The bases are just covered with PVA glue & dipped in sand. Once dry they were painted with VMC Charred Brown, followed by a VMC Khaki drybrush. I used a bit of grass and a couple of Summer Tufts.
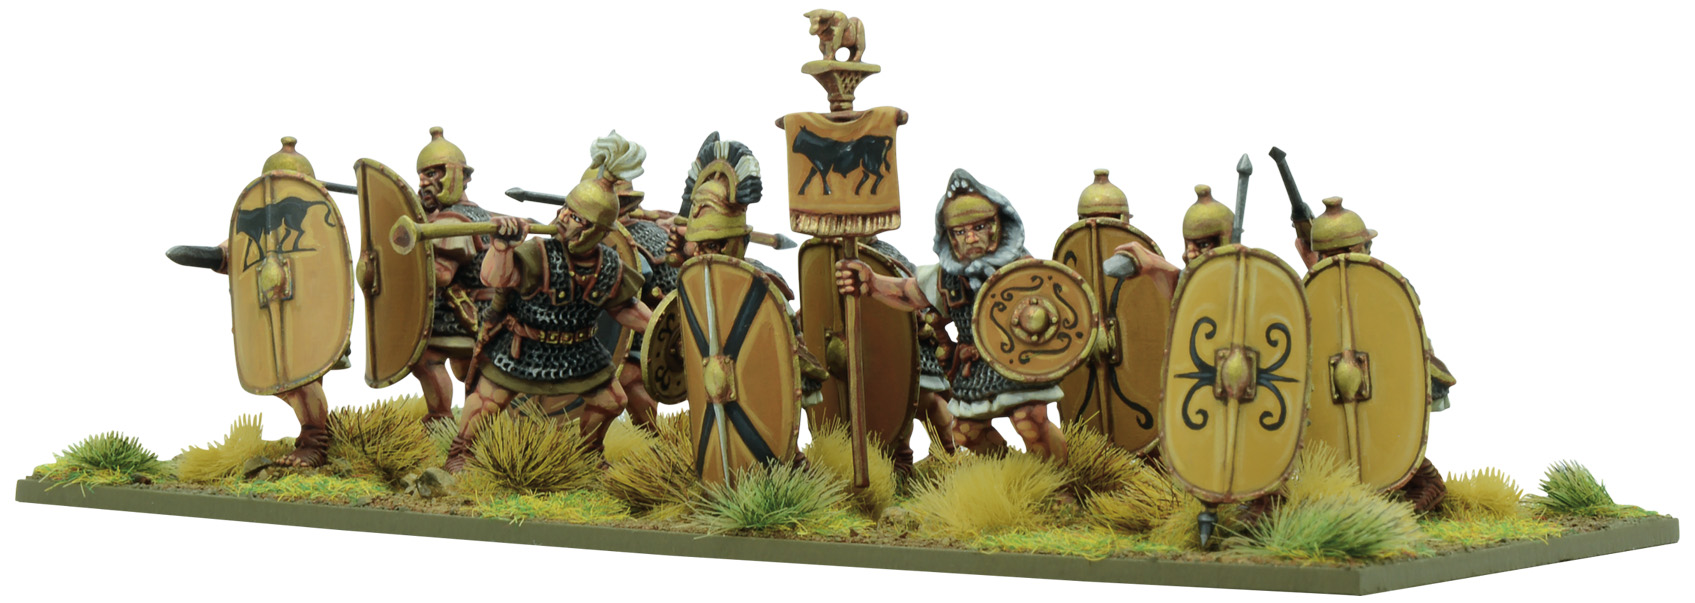
That’s it! Enough to field my first small unit of legionaries for my Pompeian army – because Caesar needed enemies after all. And perfect to pair with some Spanish auxiliaries!
–AA
Try your own hand at Andrés’ conversions and take on Caesar’s Legions! The ideal place to begin is with the Late Republican Roman Starter Army (don’t be fooled by the ‘Caesar’s Legions’ on the box!).
Each Roman legionary is protected by chain armour and Scutum shield and armed with Gladius stabbing sword and Pilum javelin. Renowned for their discipline and training, the Roman legionaries are implacable in the face of the enemy – crushing all beneath their unrelenting advance!
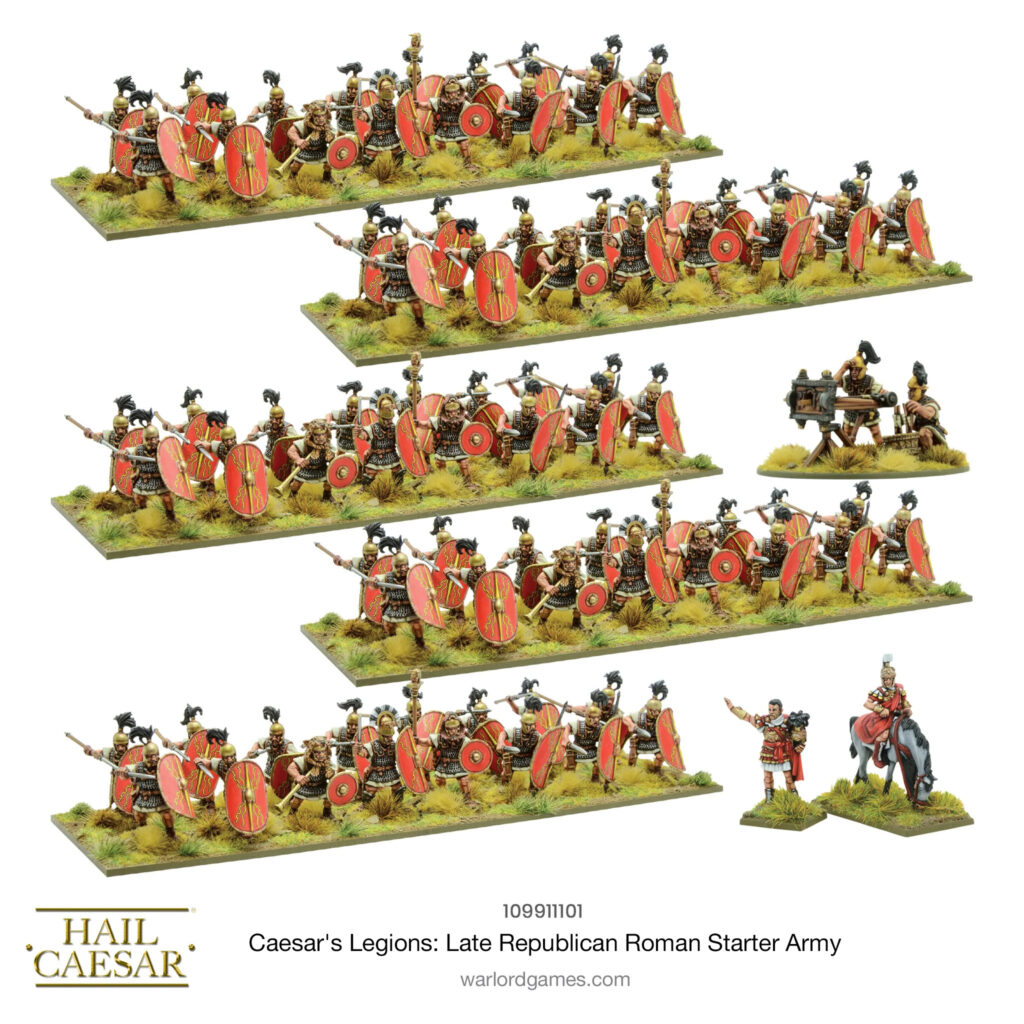
This starter set contains enough units for one complete Hail Caesar Late Republican Roman army division.
Contents:
- 2x Roman officers (metal)
- 96x Roman legionaries with command figures (plastic)
- 1x Scorpion bolt thrower (Warlord Resin™)
- Full-colour waterslide shield decals
- Plastic bases
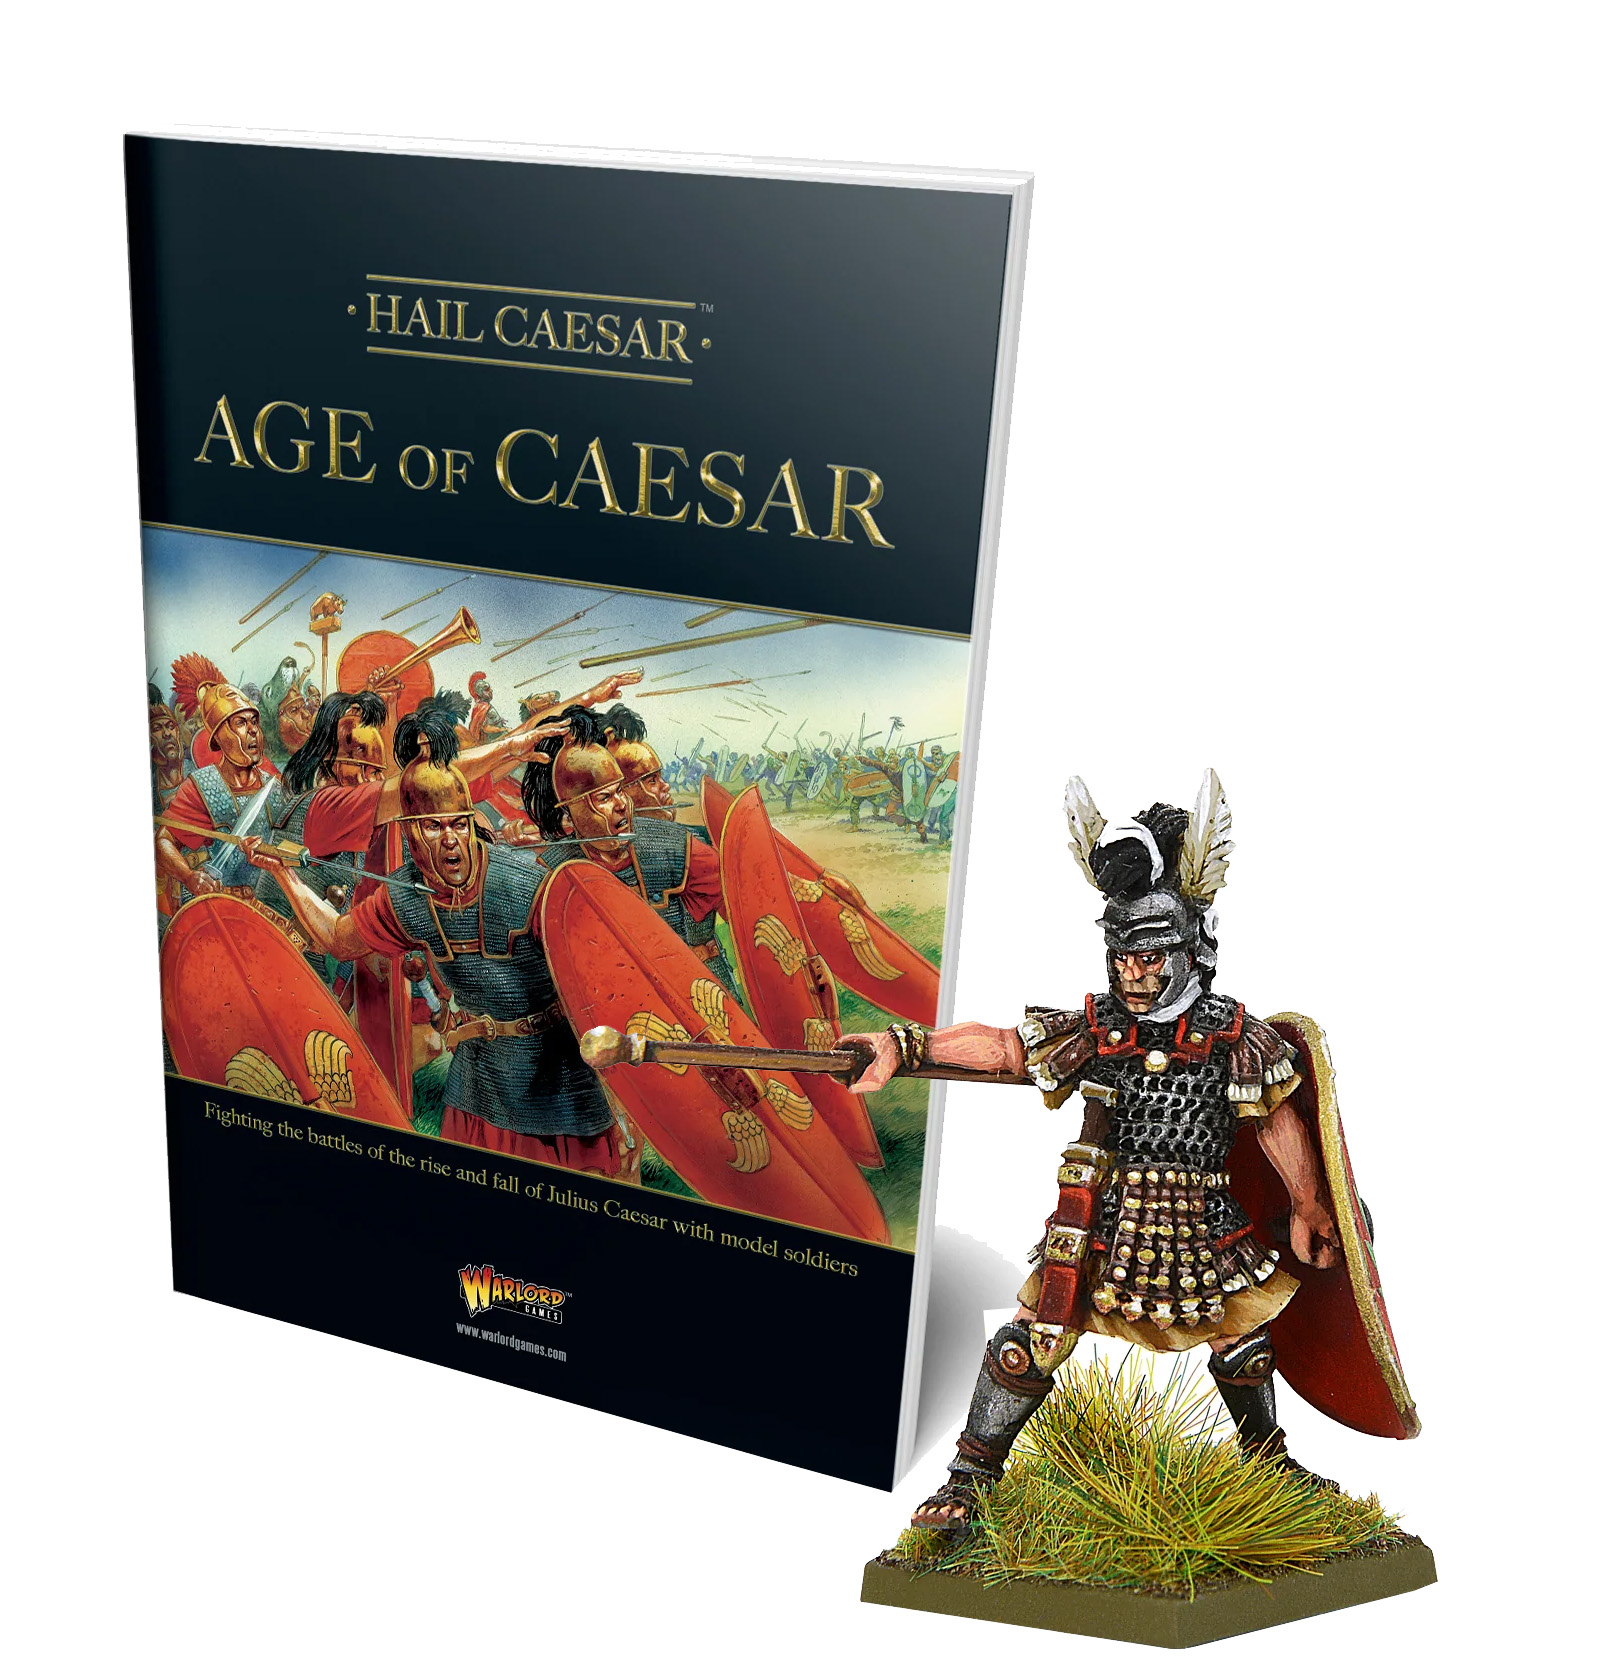
Age of Caesar
Cross the Rubicon and cast your own dice as Caesar pursues his rival Romans across continents in the Roman Civil War, facing his most deadly challenge yet in the form
of famed conqueror of the East, Pompey the Great. Fight either by Caesar’s side or against him as he wages war for mastery of the Roman World upon battlefields soaked in Roman blood.
You’ll find plenty of guidance for fighting the battles of Caesar’s war against Pompey (and much more besides!) in the Age of Caesar supplement, and you’ll get a free Optio Maximus Gluteus special miniature only when your order from the Warlord Games Webstore!
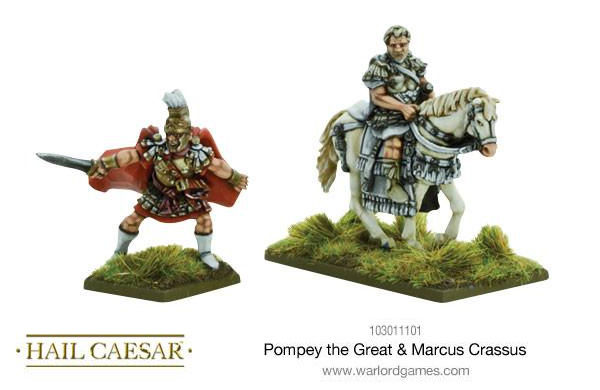
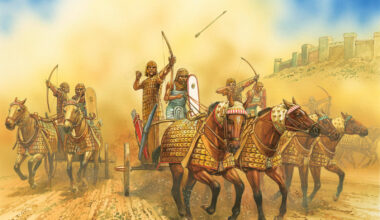
Pompey the Great
Gnaeus Pompeius Magnus (29 September 106BCE – 29 September 48BCE) – from rich Italian stock and the old families of Rome, he was a controversial figure prone to bouts of military genius then towering moods of petulance and paranoia. Pompey earned his spurs under Sulla and his civil war against Marius where he was granted the title “magnus”, “the great”. He was also instrumental in the crushing defeat of the Sicilian pirates and the forces of Mithridates VI. He took the plaudits for defeating the renegade slave Spartacus causing a rift that was never to heal with Marcus Crassus.
As Caesar led his forces against the senate, Pompey stood against his former friend. At several points Pompey could have turned the war but for the dithering and interference of the bickering senate. His life ended in ignominy at the hand of an assassins blade in Pelusium after his final defeat against Caesar at Pharsalus.


1 comment
Love the article.
I’d love to know your references for the colour of Pompeian shields?
Thanks!
Comments are closed.