Fresh from painting up his Spanish Blue Division for Bolt Action, the insatiable hobbyist Andrés, Warlord Games Studio Painter, is back with another hobby project. This time he’s tackling Epic Battles Romans, something he’s well versed in already thanks to his day job, and is set on making them stand out from the crowd with bold shield designs and the use of decals. Over to you Andrés…
AF – After a few months of painting nothing but figures for the Hail Caesar Epic Battles studio collection, I found myself unable to stop. So, in my own time, I continued exploring the possibilities of the range, for my own personal collection, unbound by the requirements of deadlines and particular colour scheme requirements.
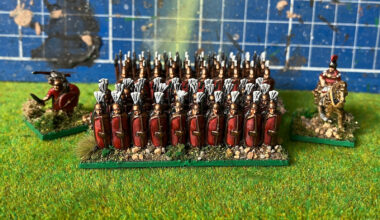
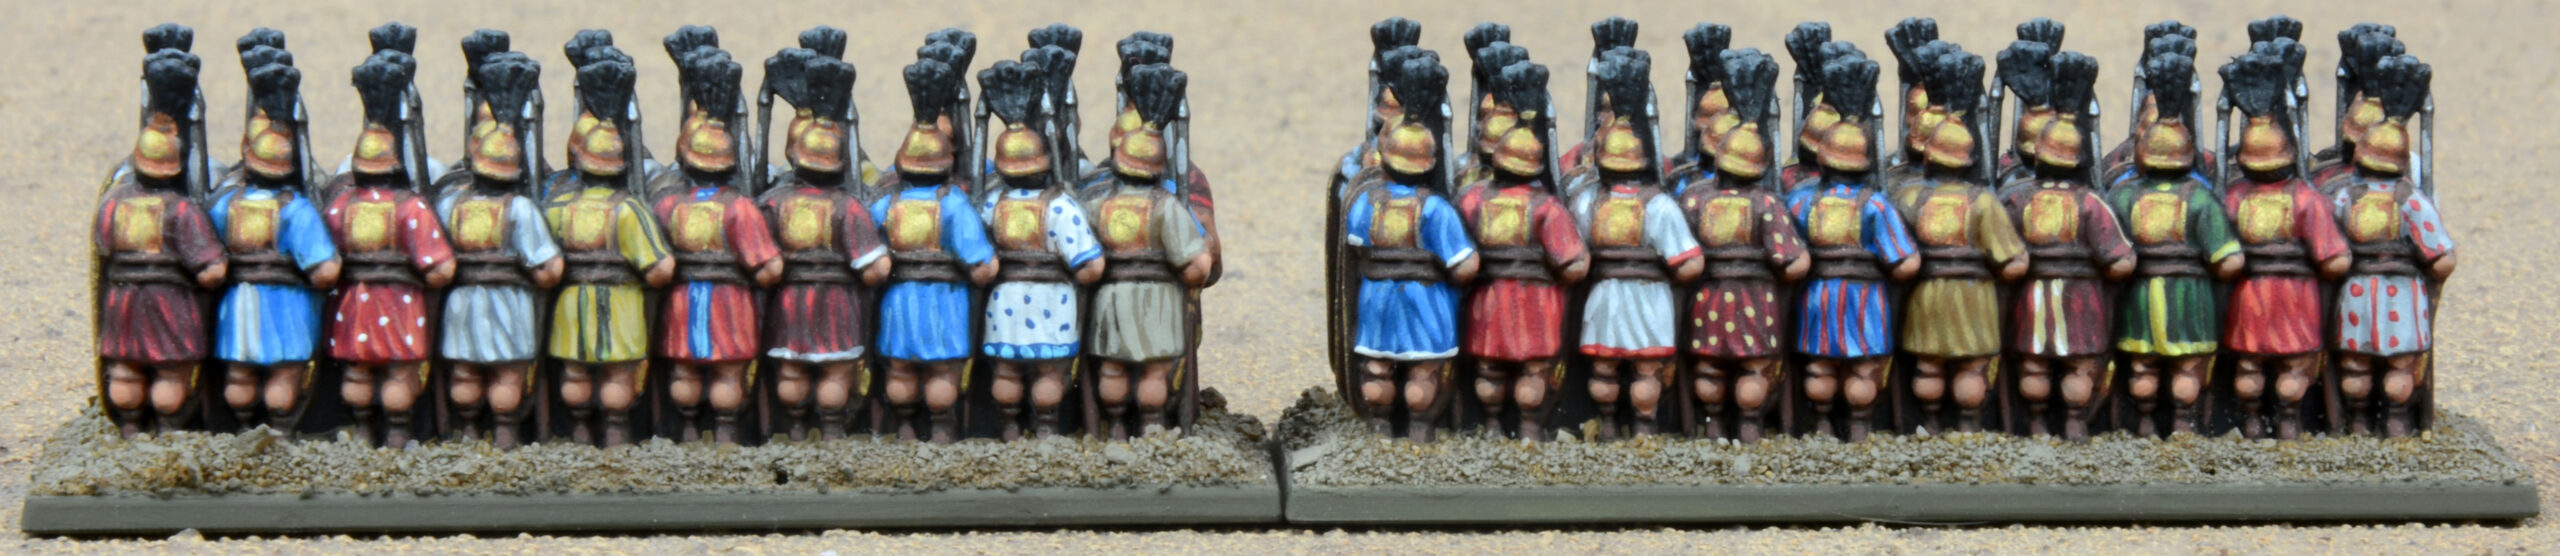
It can be difficult to break away from the traditional uniform look when painting Romans, specifically those wearing red and carrying red shields. That’s one of the reasons I painted the Studio models with slightly different tones of red, to add variety and interest within the boundaries of the required uniform look.
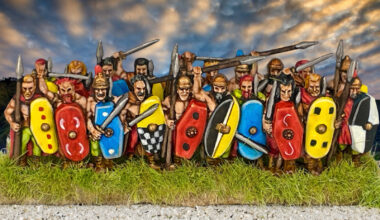
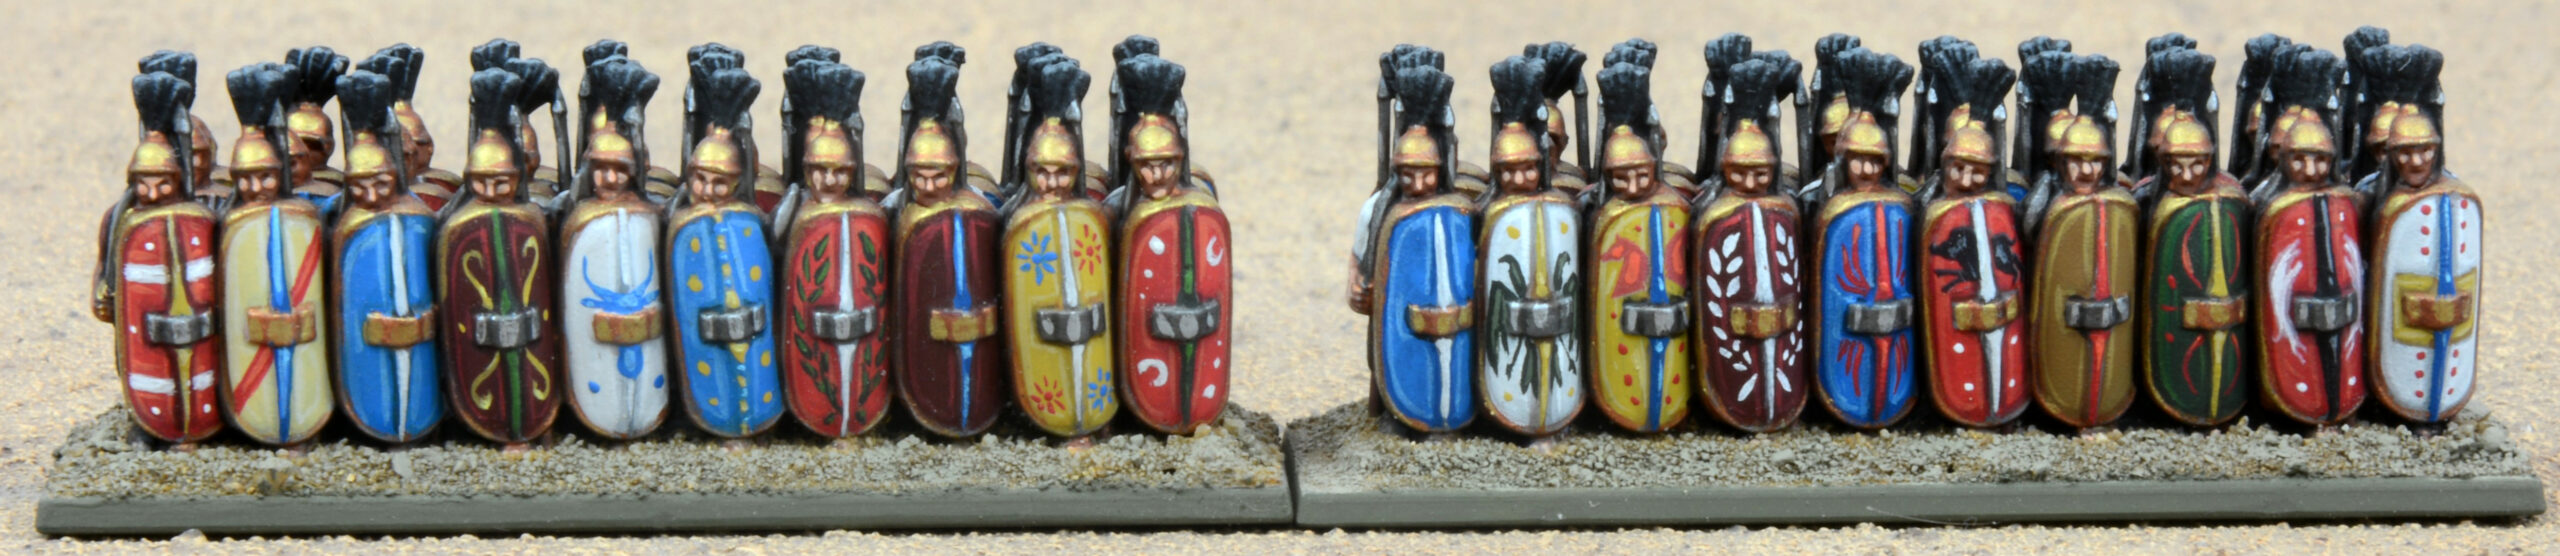
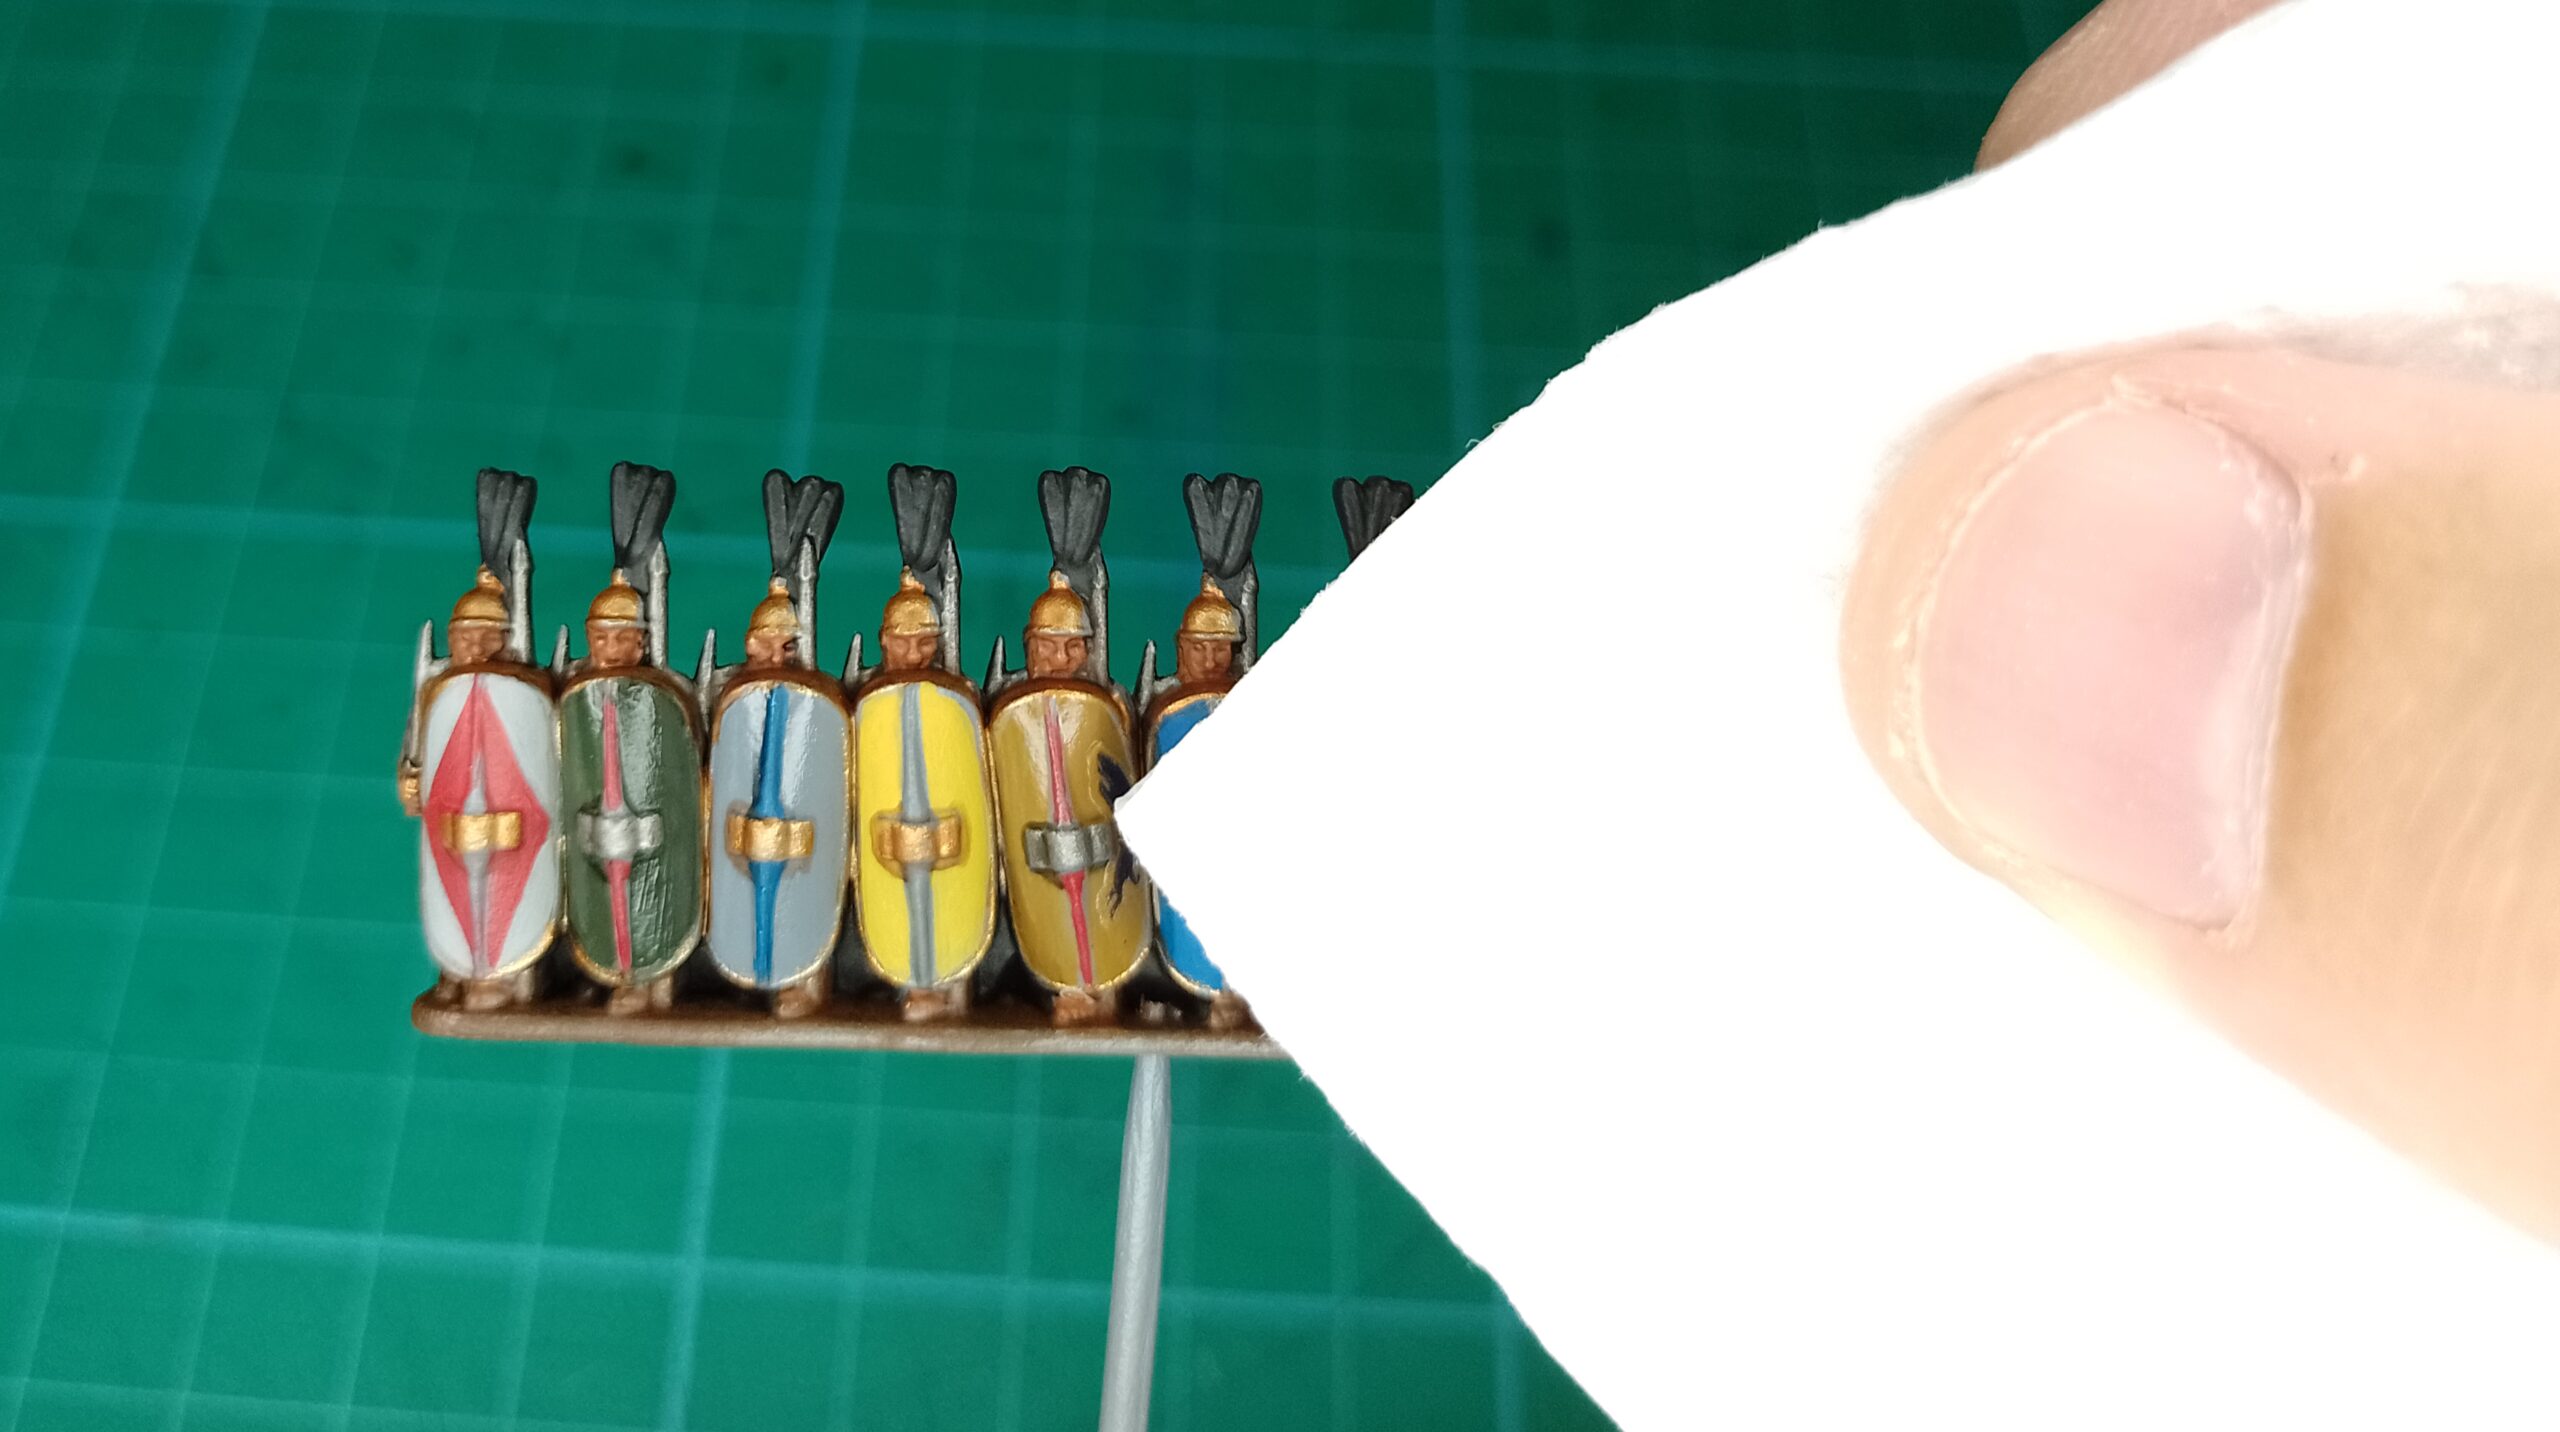
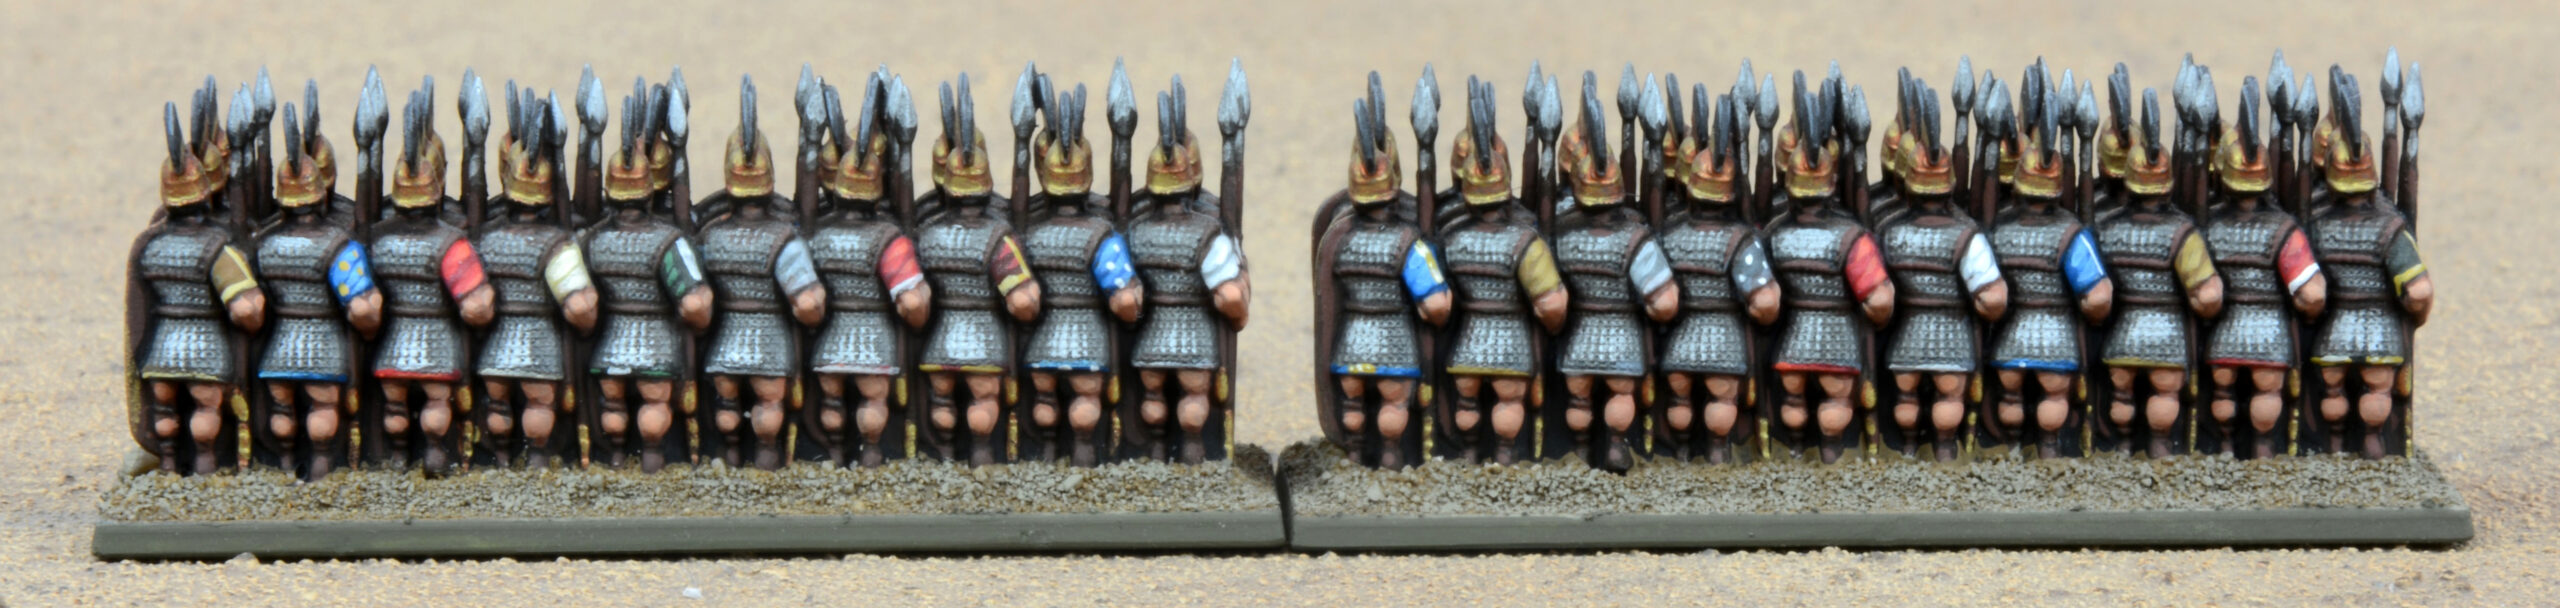
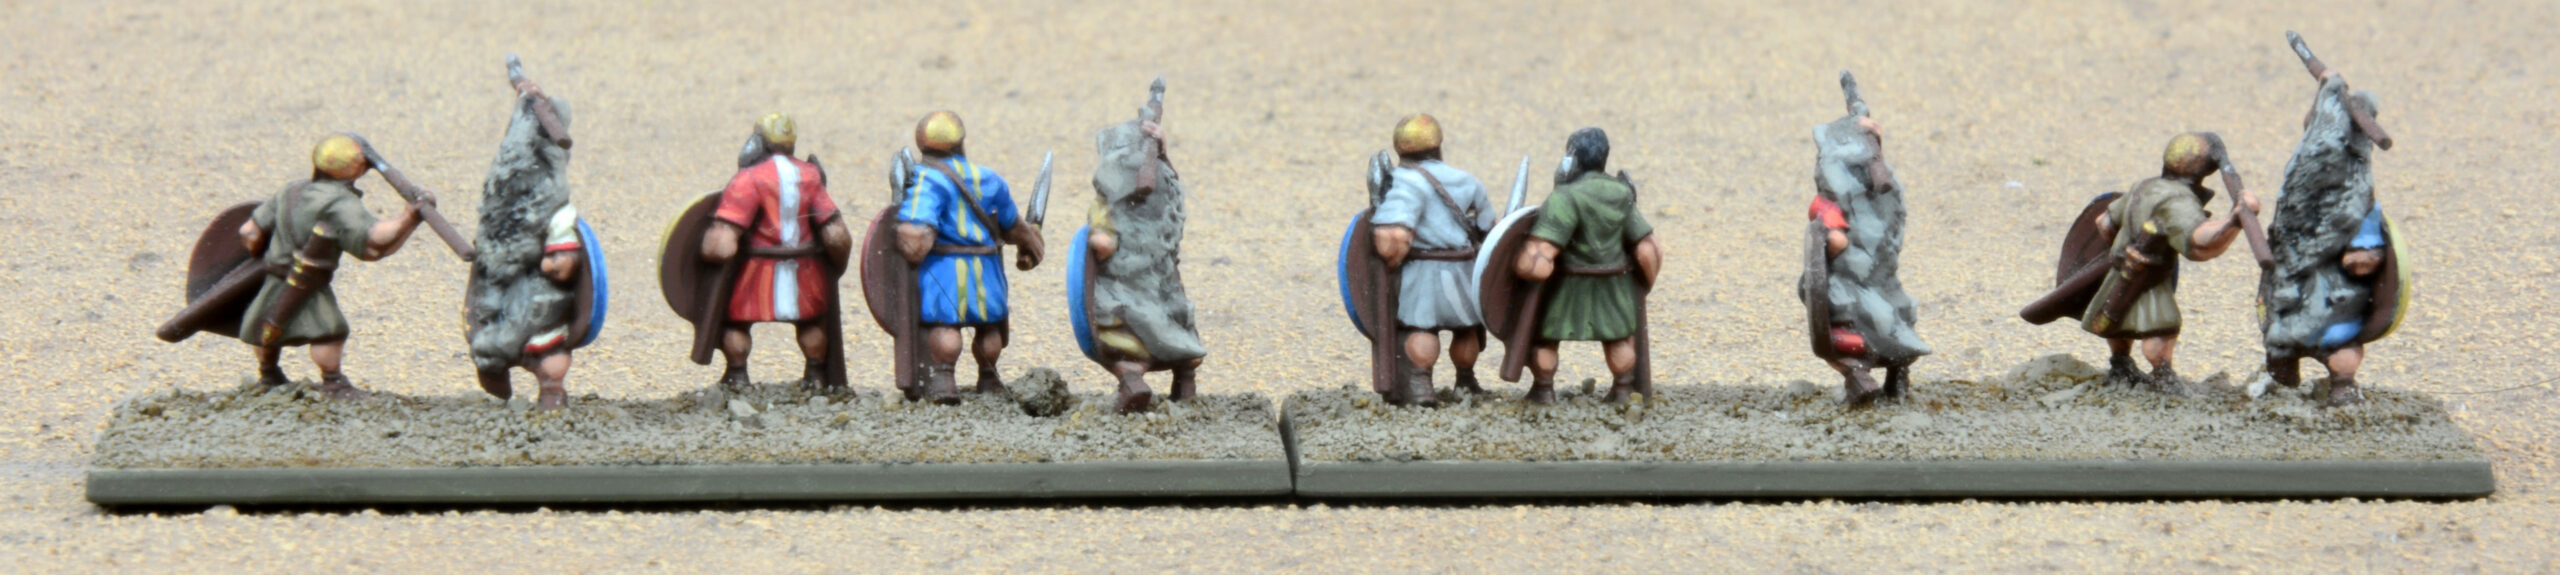
So for this little project, I decided to go for a completely heterogeneous look. All the shields would be different, and all the tunics painted with different colours or even different patterns. That way they could represent an allied legion or even just regular Roman legionaries, but with the individuality between figures suggestive of warriors that had to pay for their own panoply (with symbols to represent his family). The only thing they have completely in common is their helmet plumes – these would all be painted all the same so that each legion can be easily distinguished at a glance on the tabletop.
I’m always impressed by the illustrators of Warlord’s box and book art, and often use them as direct reference for some of my colour schemes. On this occasion I followed some of Peter Dennis’ paintings. Many are probably already familiar with Peter Dennis’ ‘Paper Boys’, whether through his books or his colourful army sheets. He has an extensive collection of Punic Wars regiments, and they were a fantastic source of inspiration for this project. Every sheet shows tens of colour combinations for both shields and tunics. These are very different Roman looks from the ones we are used to seeing (thanks in no small part to the silver screen!). From plain colour designs, to illustrations portraying beasts and gods of myth, all mixed with various geometrical shapes – I wanted to recreate this feel for my Epic Battles figures, and Peter’s art gave me the basis for my designs.
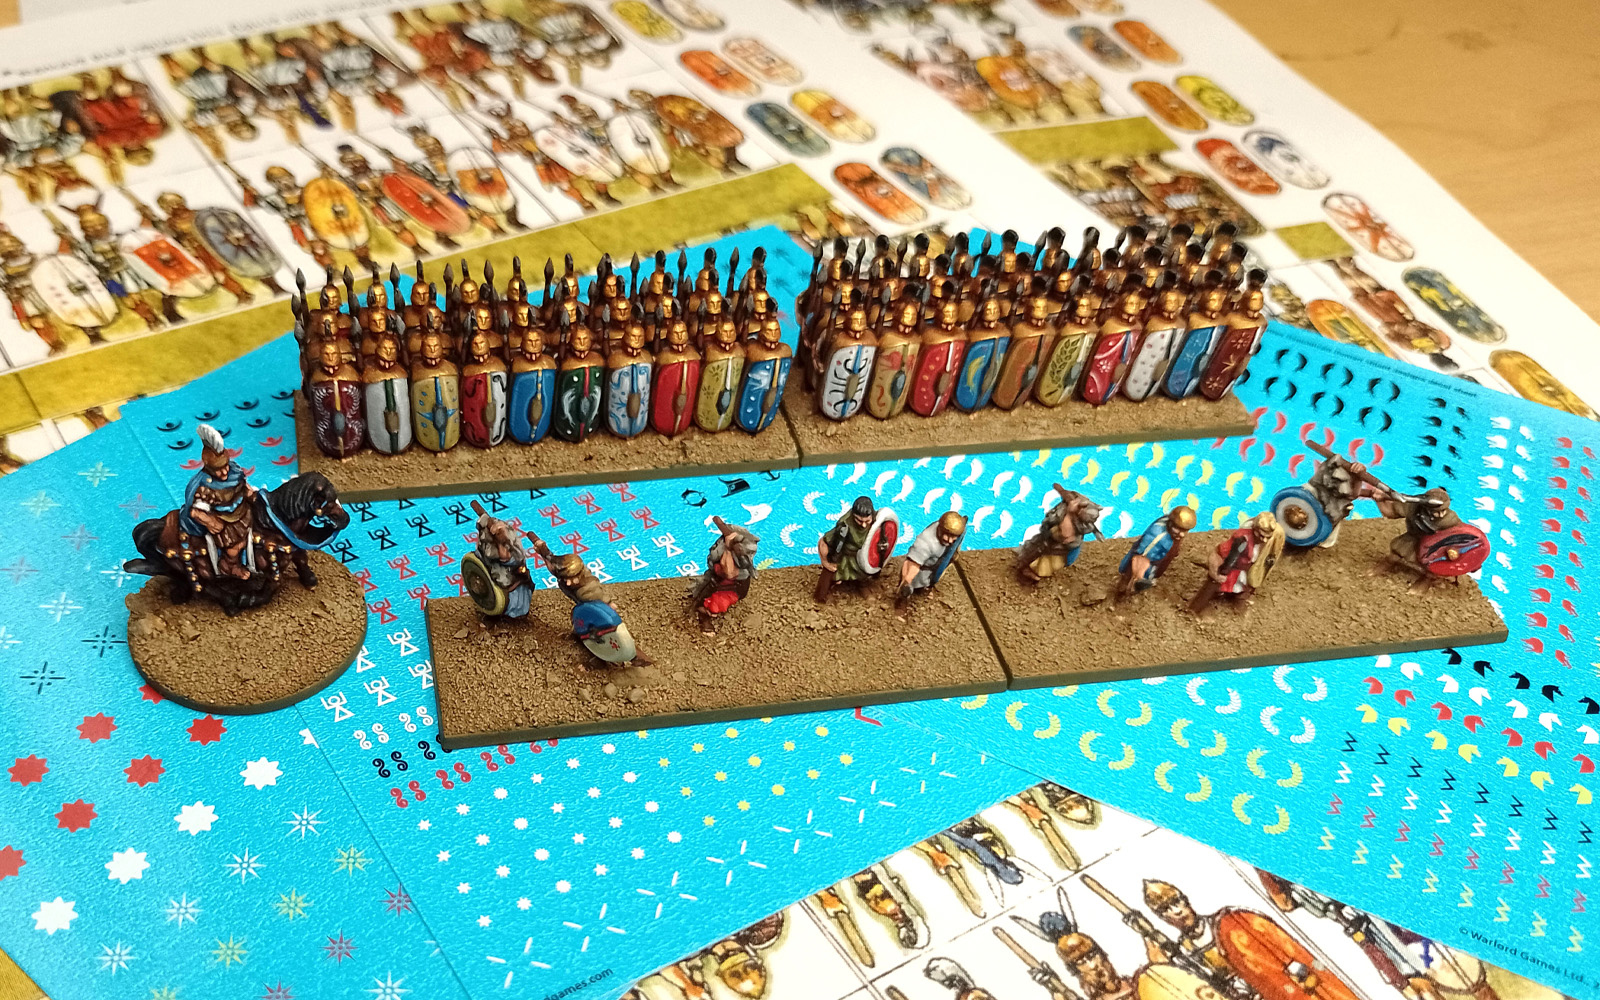
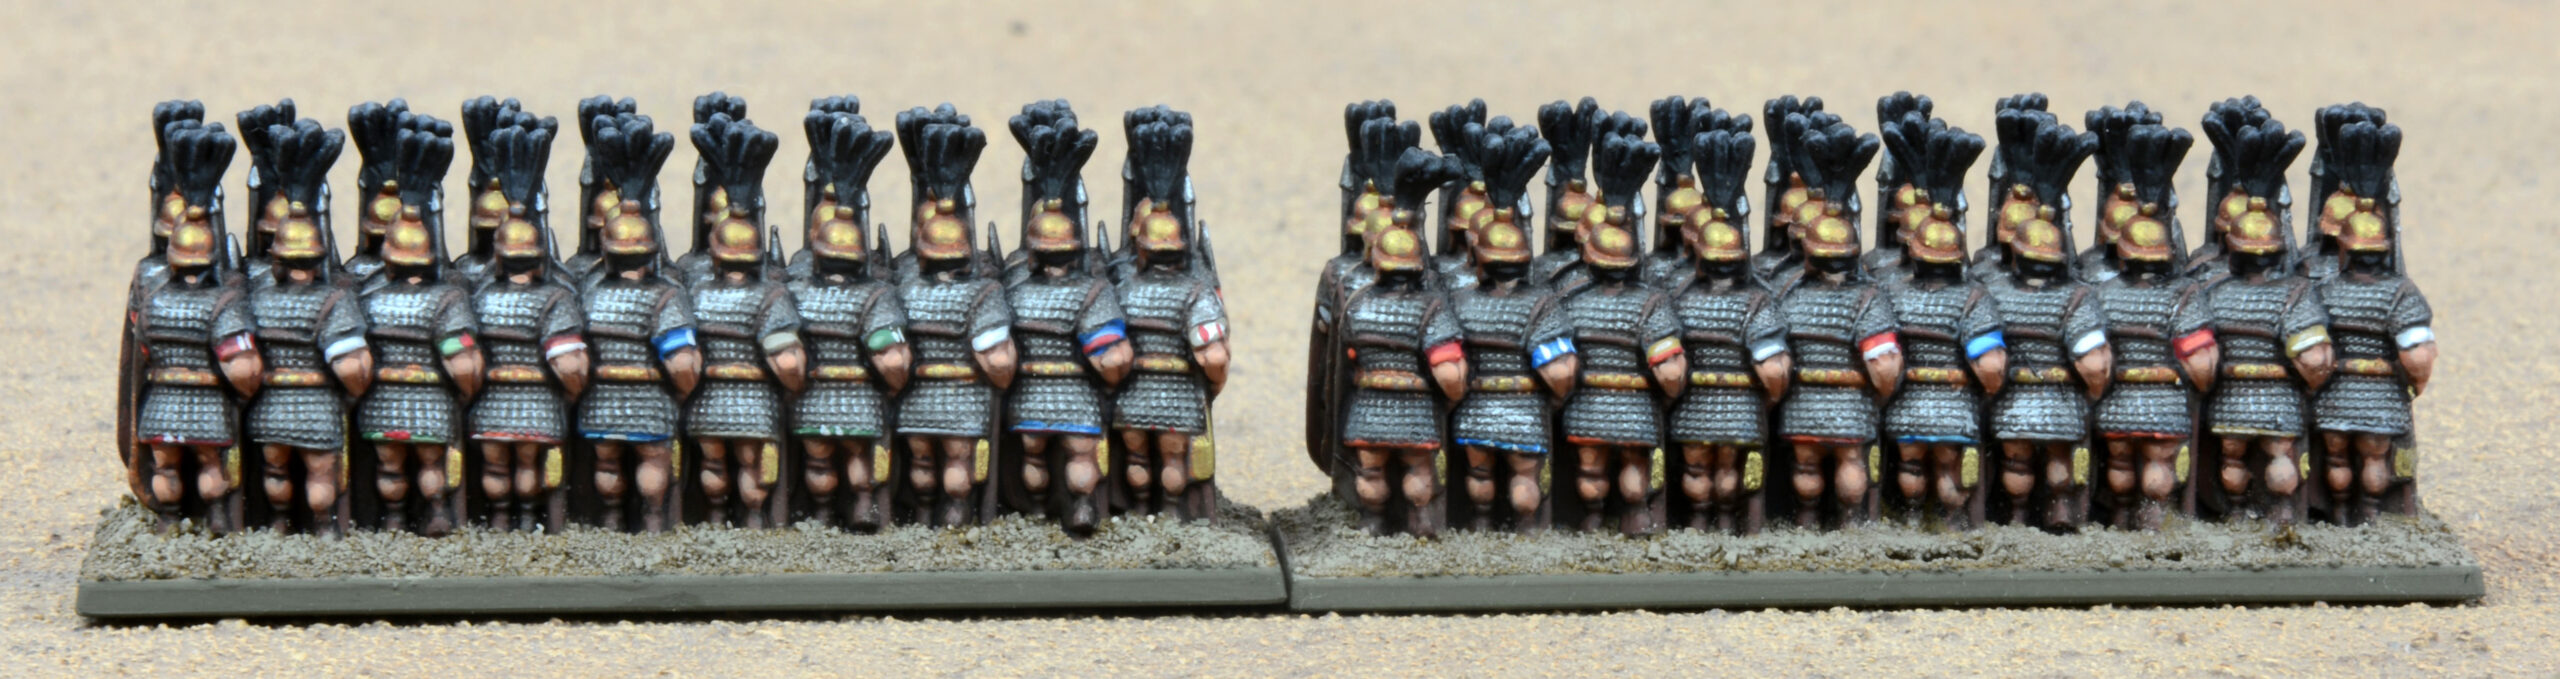
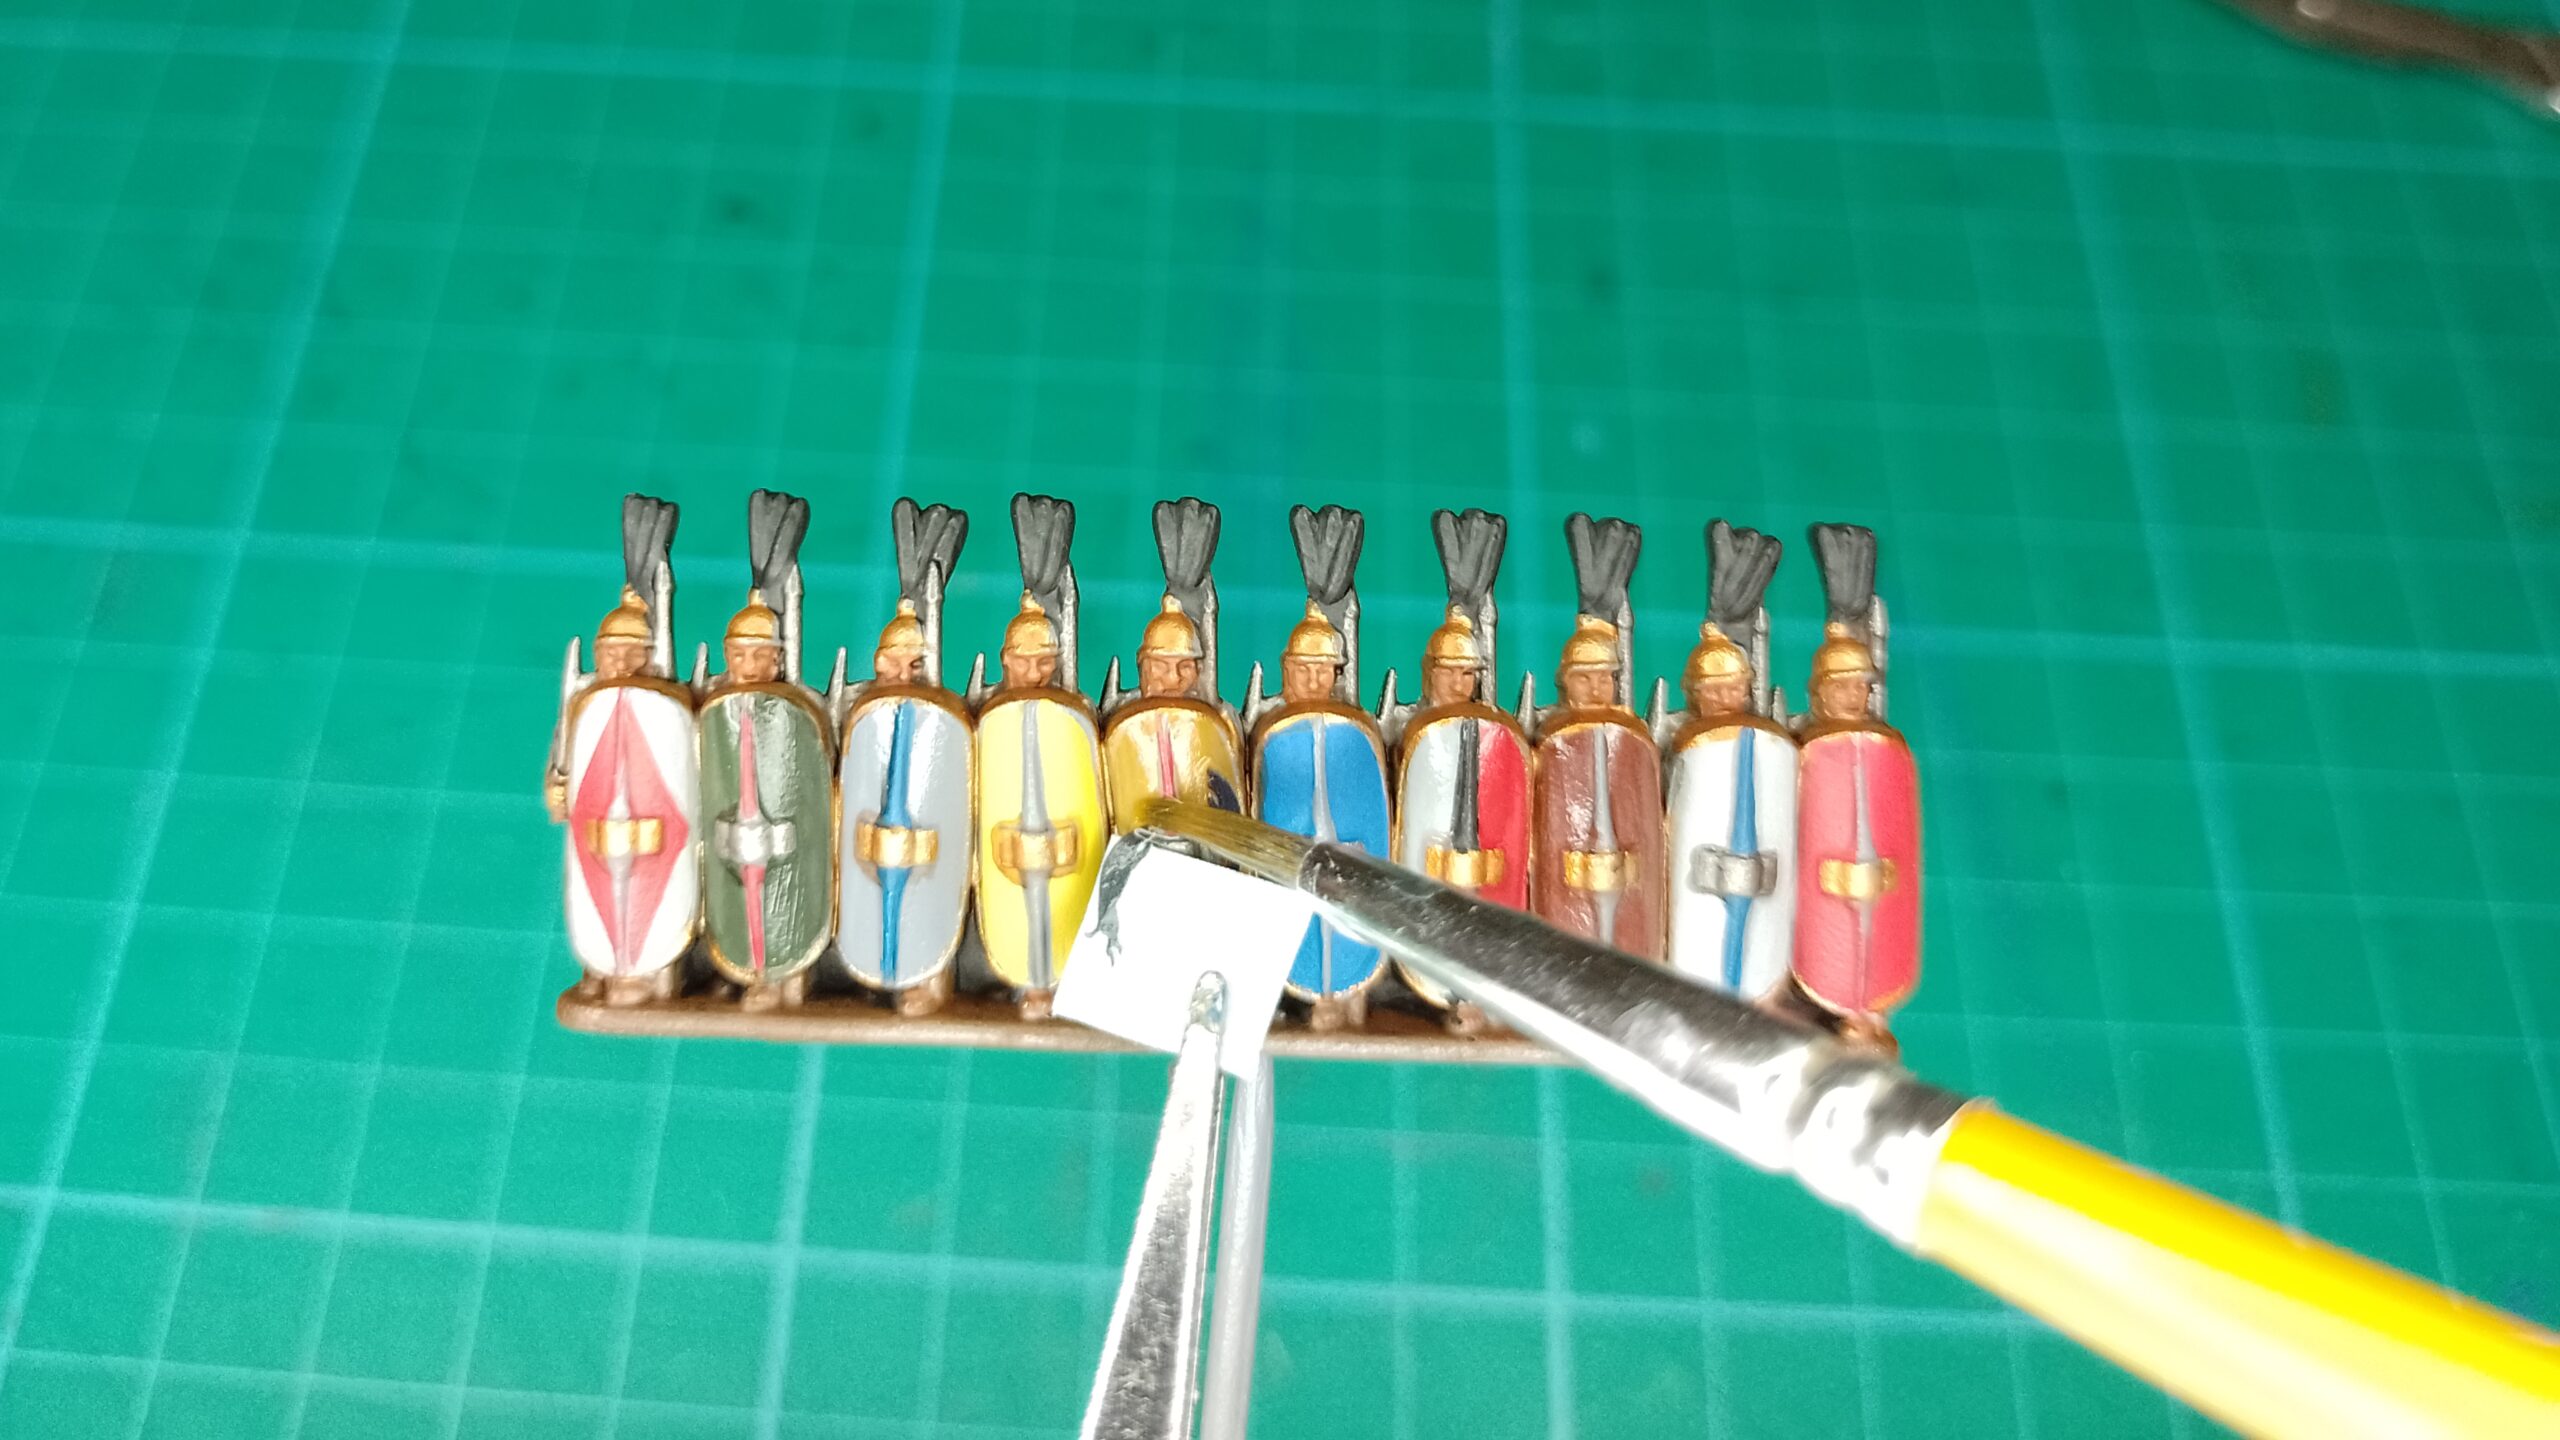
There is no fast way of doing this, but with patience and perseverance, I manage to get a few bases of legionaries done at a reasonable rate. Most of my effort goes into the shields, as I can cut corners on other parts of the infantry block. For example, I only block in the base colours and ink the heads of the troops in the second and third row, since they will only be partially visible anyway. The only thing I made sure got equal treatment across all the ranks was their plumes – painted in black and drybrushed grey at the top.
When it came to the shields, I took some of Peter Dennis’ designs and simplified them somewhat. The easiest ones, naturally, were the plain ones, but since there is a main colour in even the more complex designs, I started by base coating all the shields in their respective colours, alternating between red, yellow, blue, white and green, before applying one or two highlights as required.
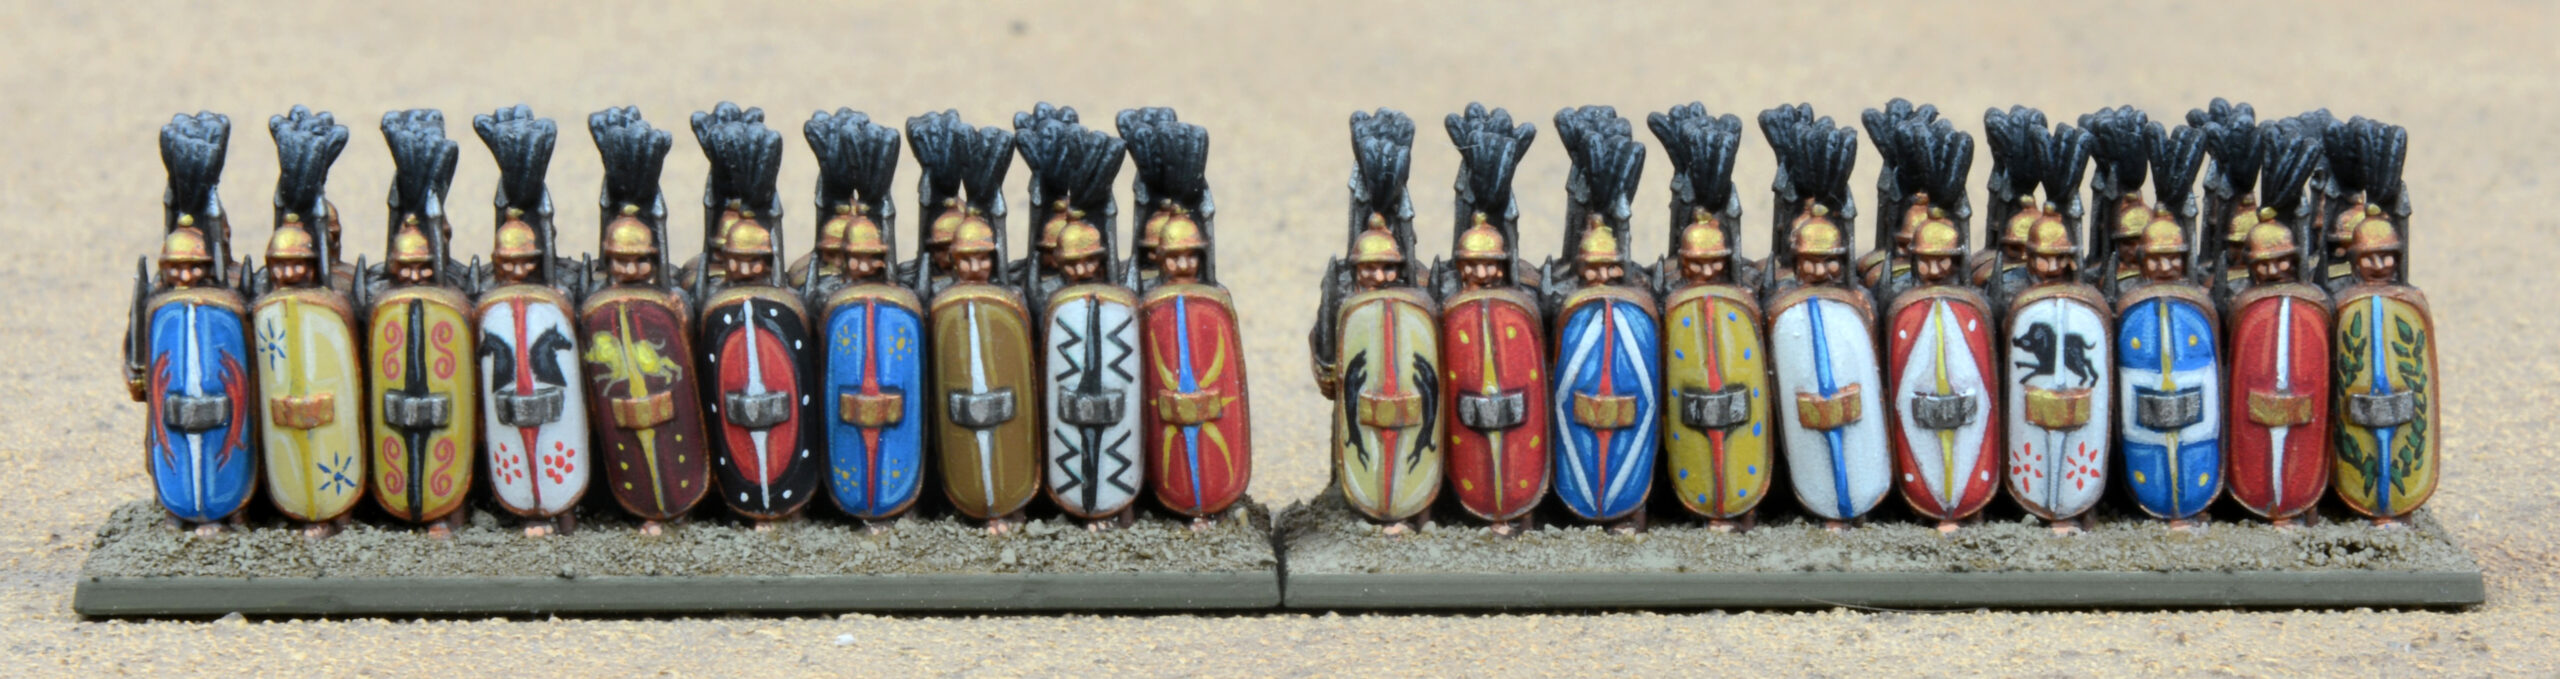
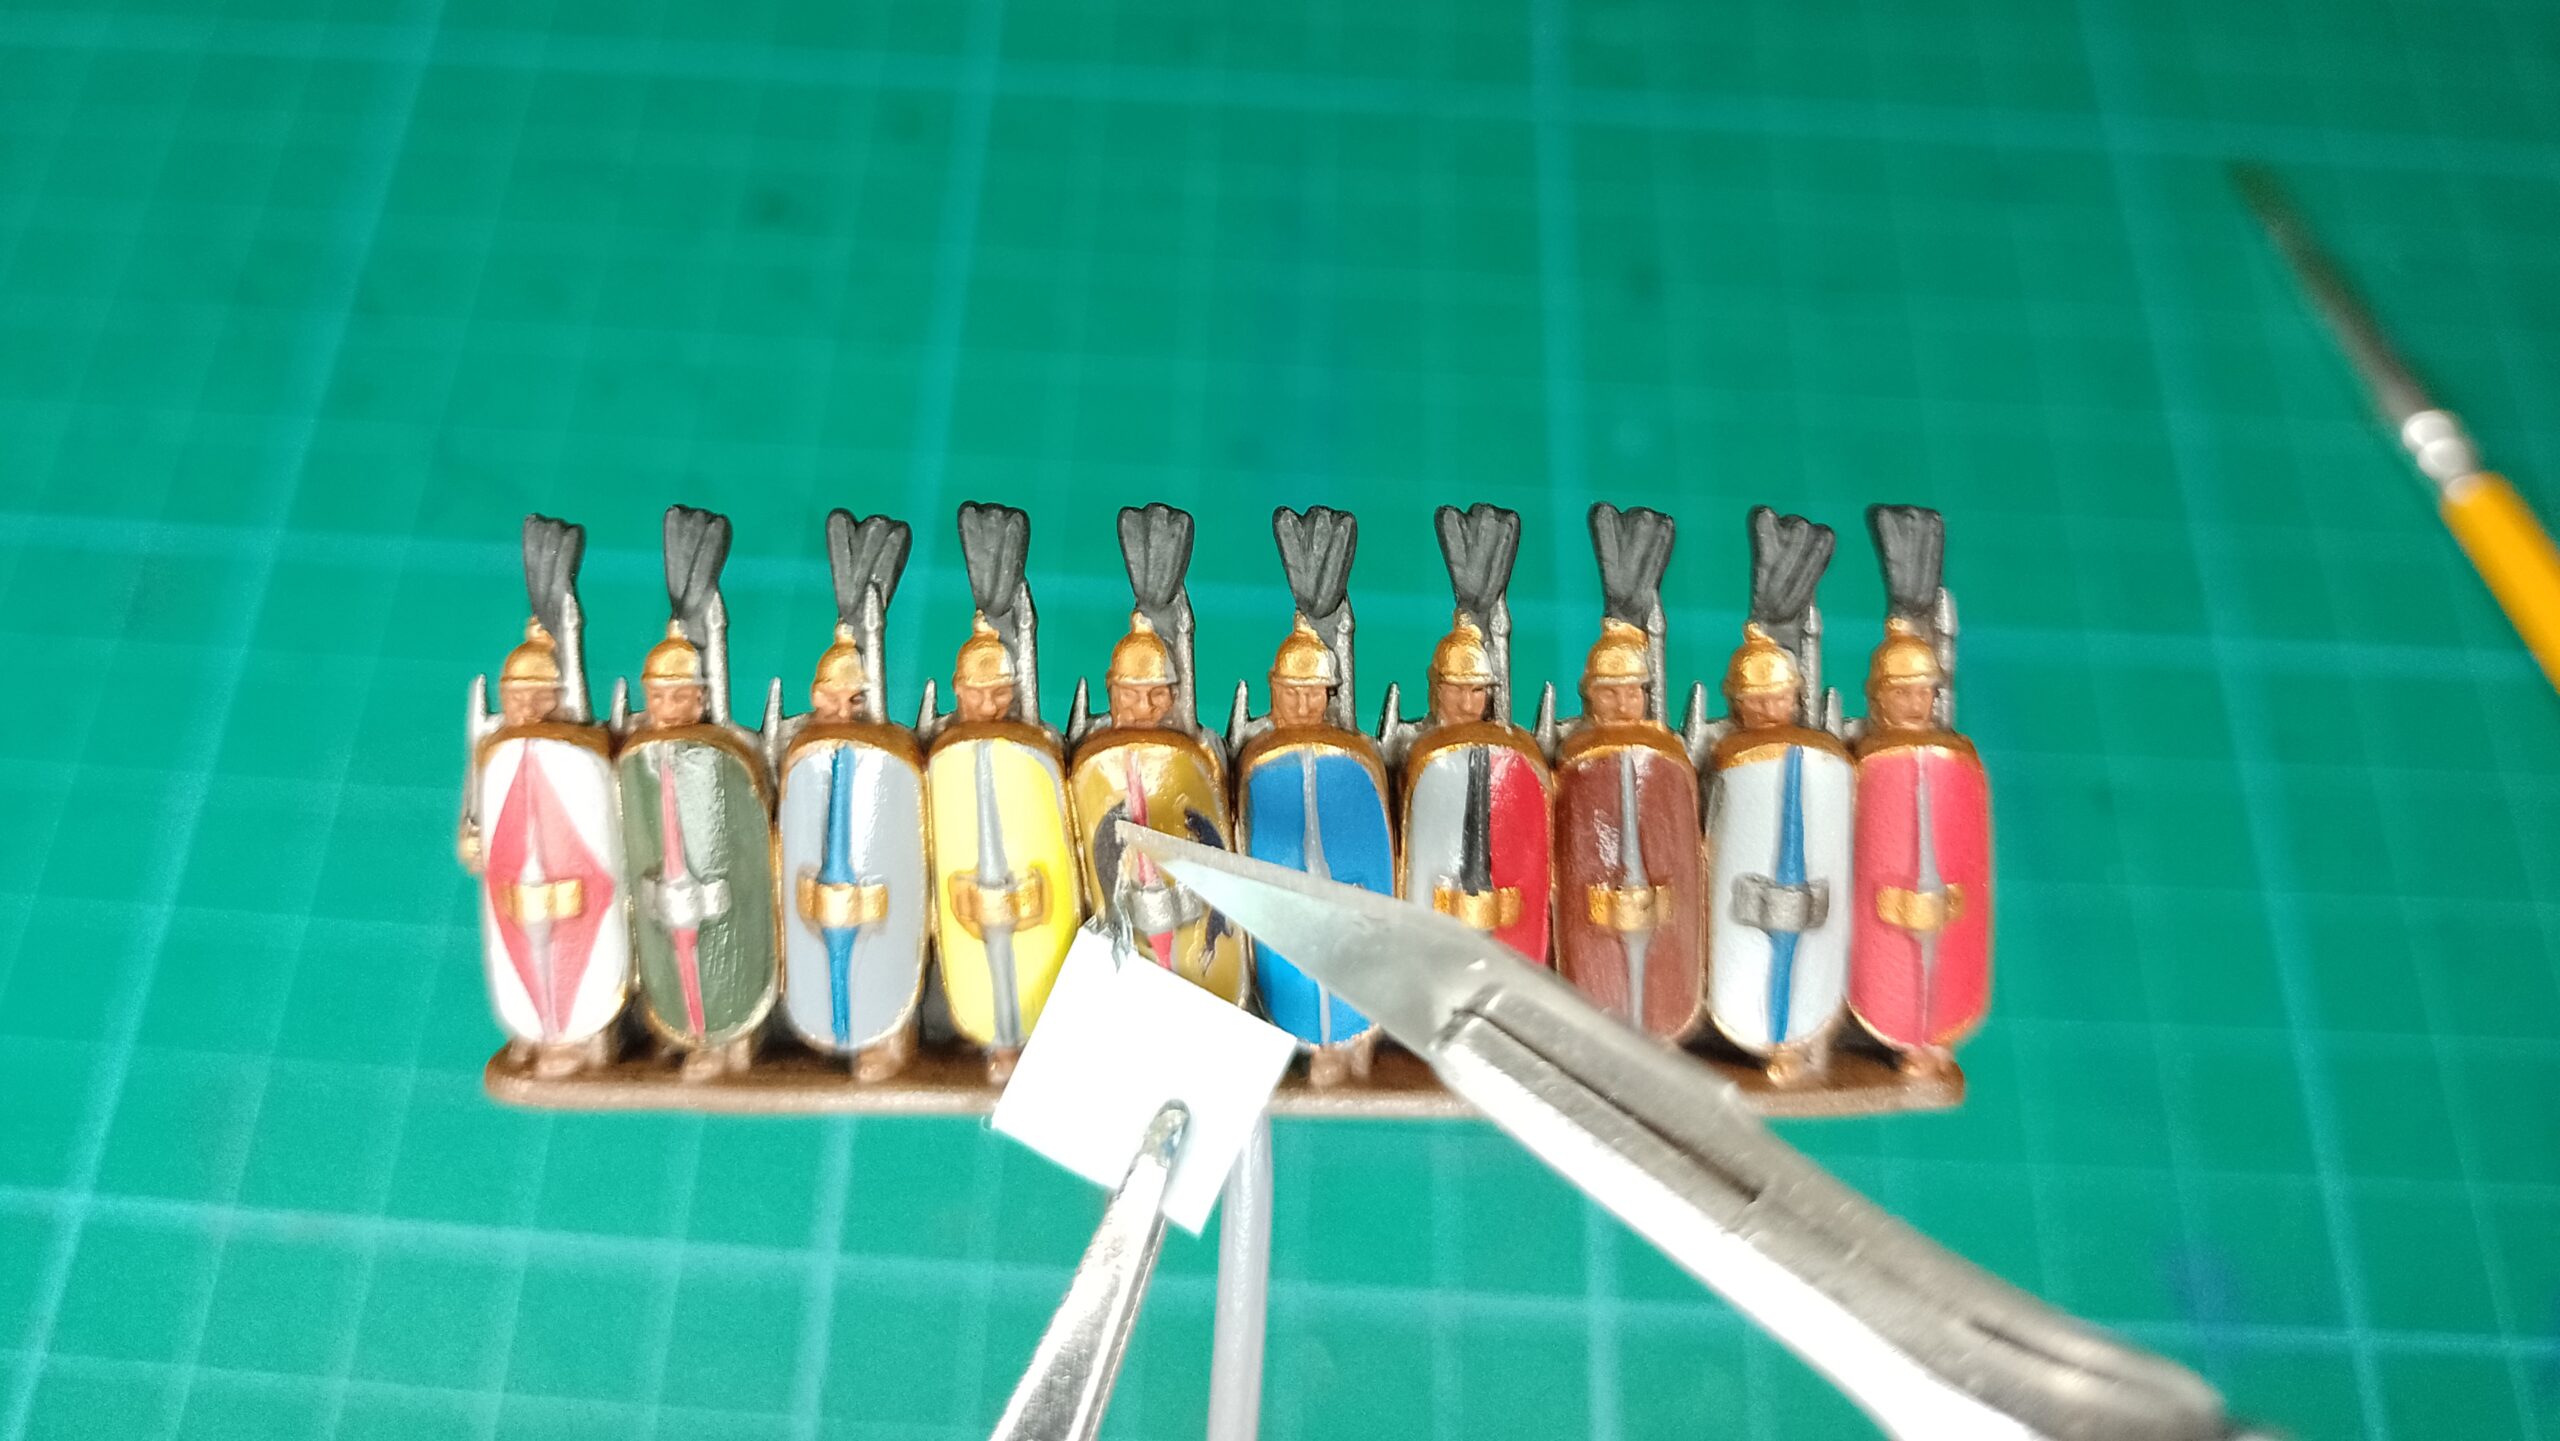
Then I took some of the decals that come with the Epic Battles figures, not restricting myself to only using Roman ones, but also motifs from some of the other warriors – stars from the Celts, and swirls from the Iberians, as examples. I even managed to use some of the cavalry decals by splitting them in two and placing each half either side of the shield’s central spine.
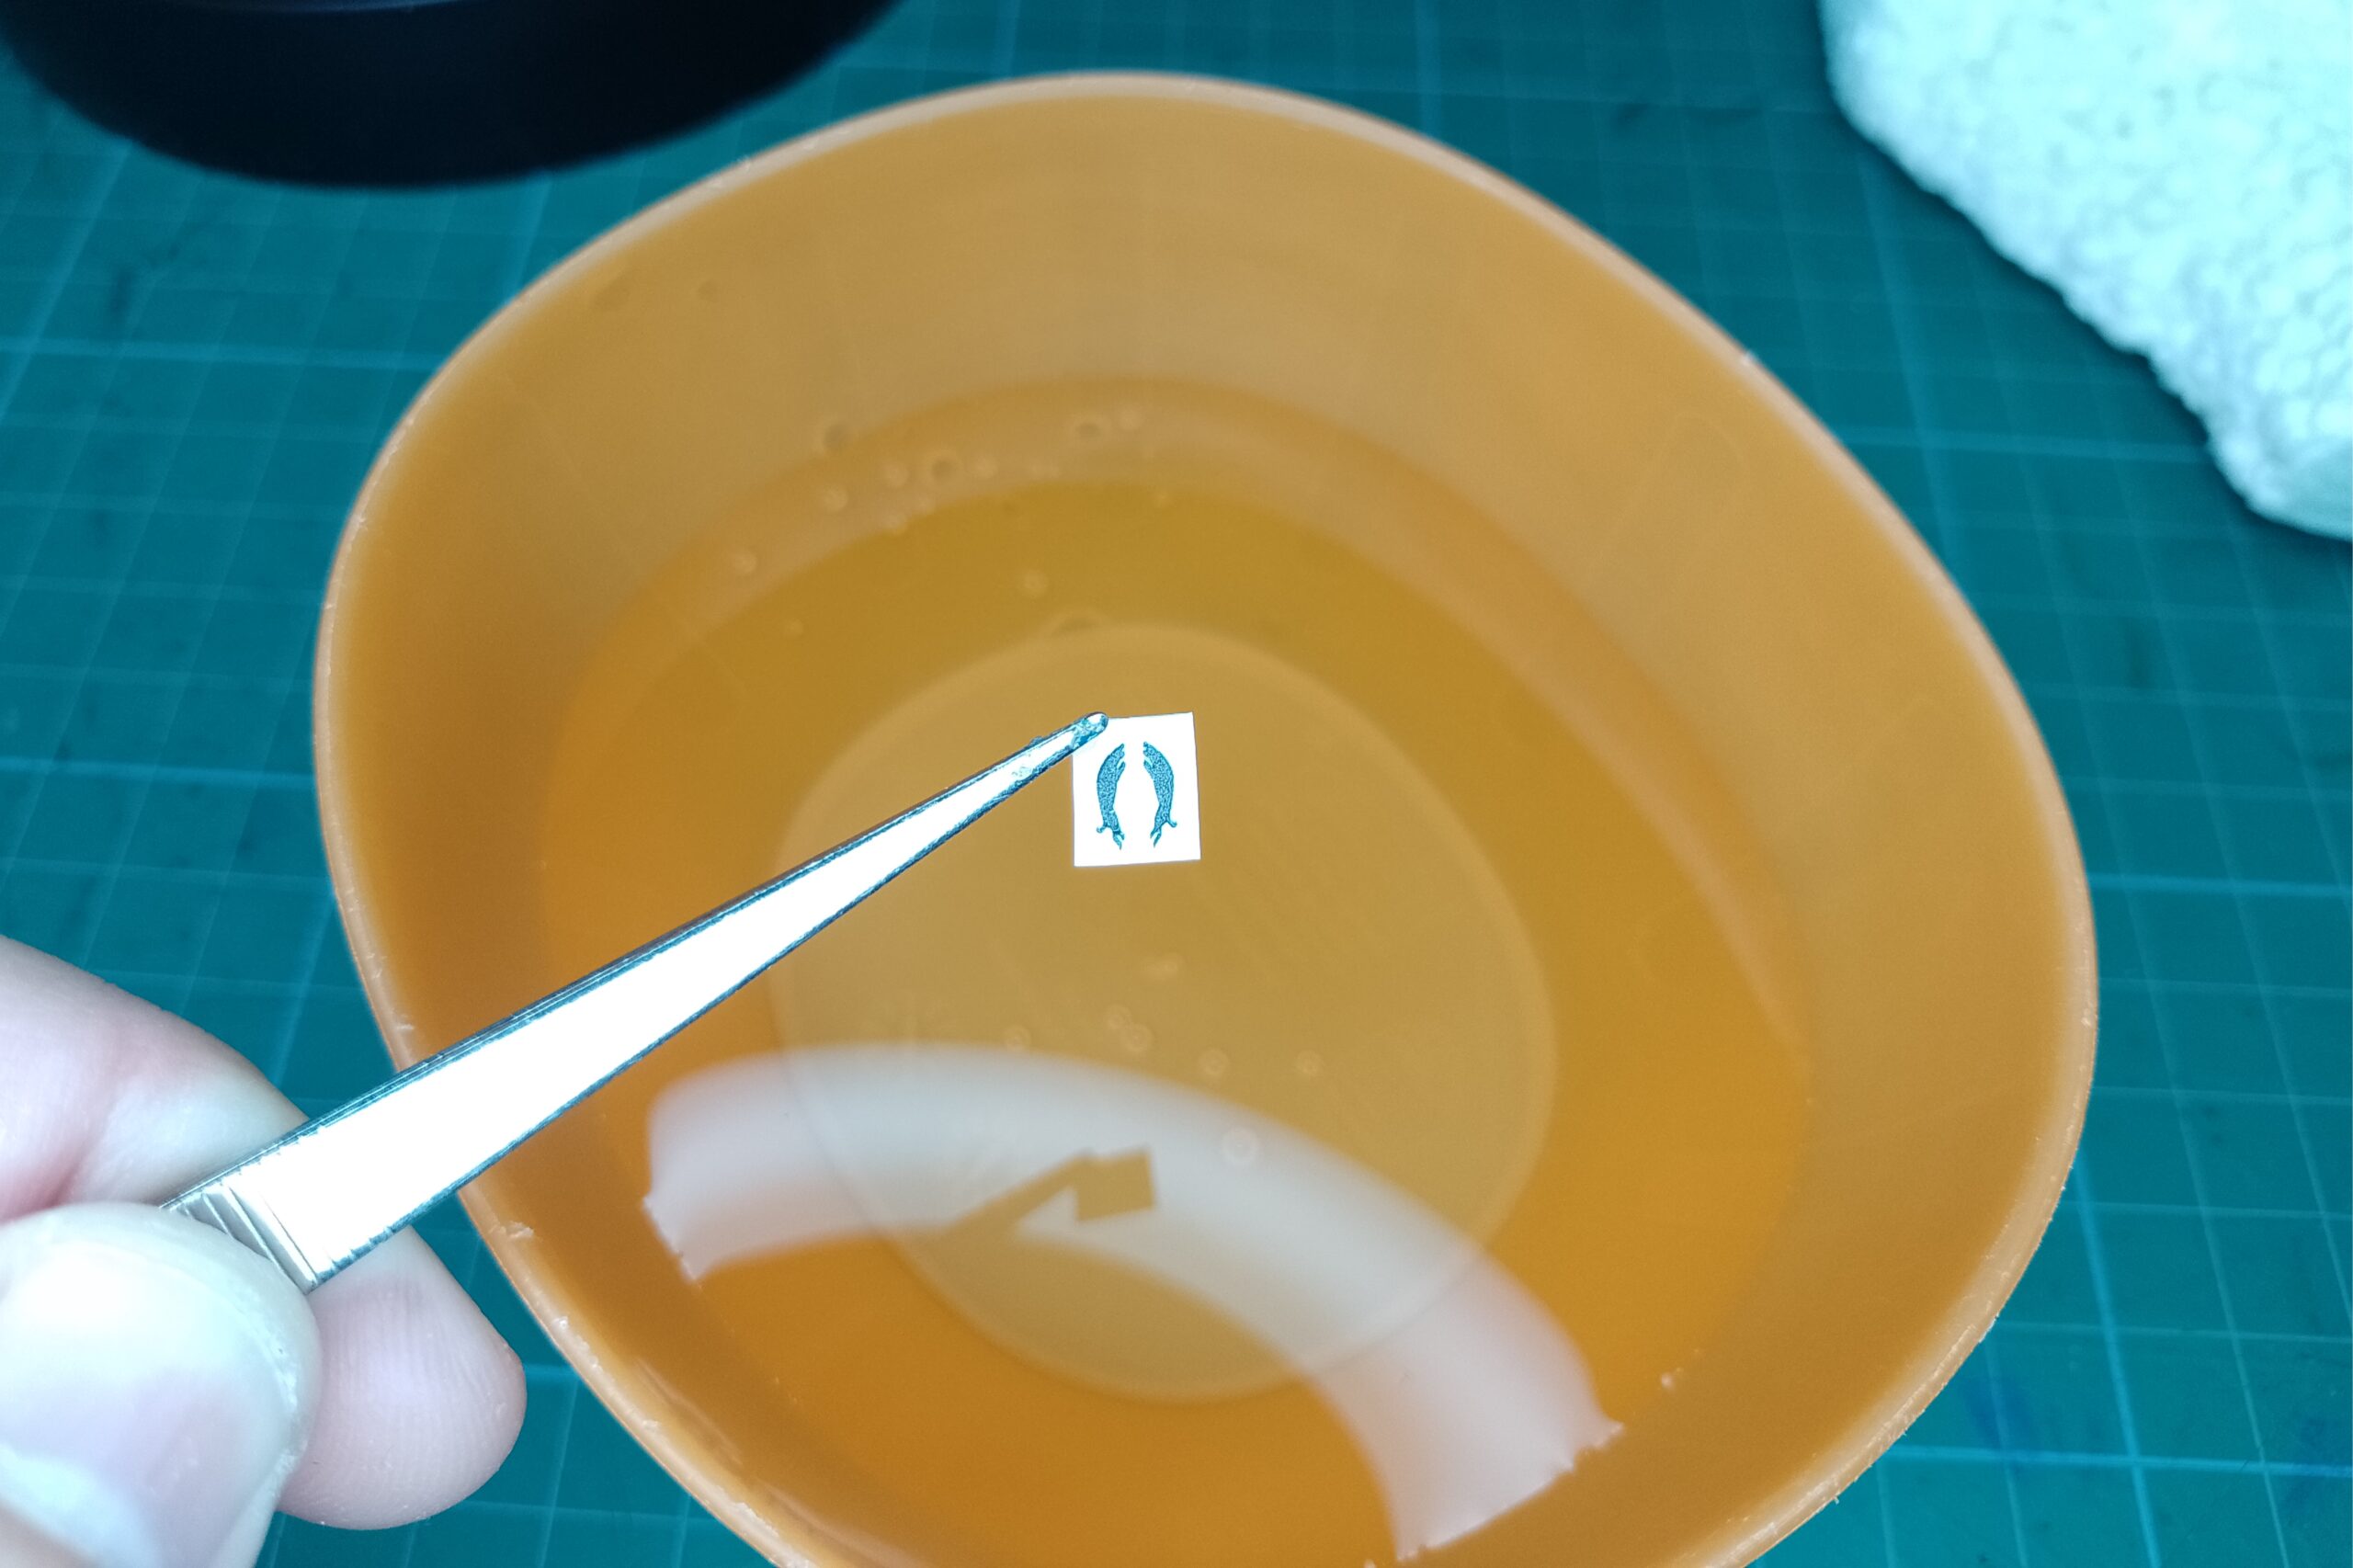
Before applying the waterslide transfers I gave the whole shield a coat of gloss varnish; this helps the decals to stick better and makes them easier to move around whilst still wet. Then I would cut around my chosen symbol, add a couple of drops of water, then wait a few seconds before checking it with a brush. Once I’m confident they’re moving freely, I transfer it, with the brush, to the shield. By putting a bit of water on the shield’s surface you an move the decal around to the desired position and then carefully press on it with a tissue to soak up all the water. The below gallery shows each step:
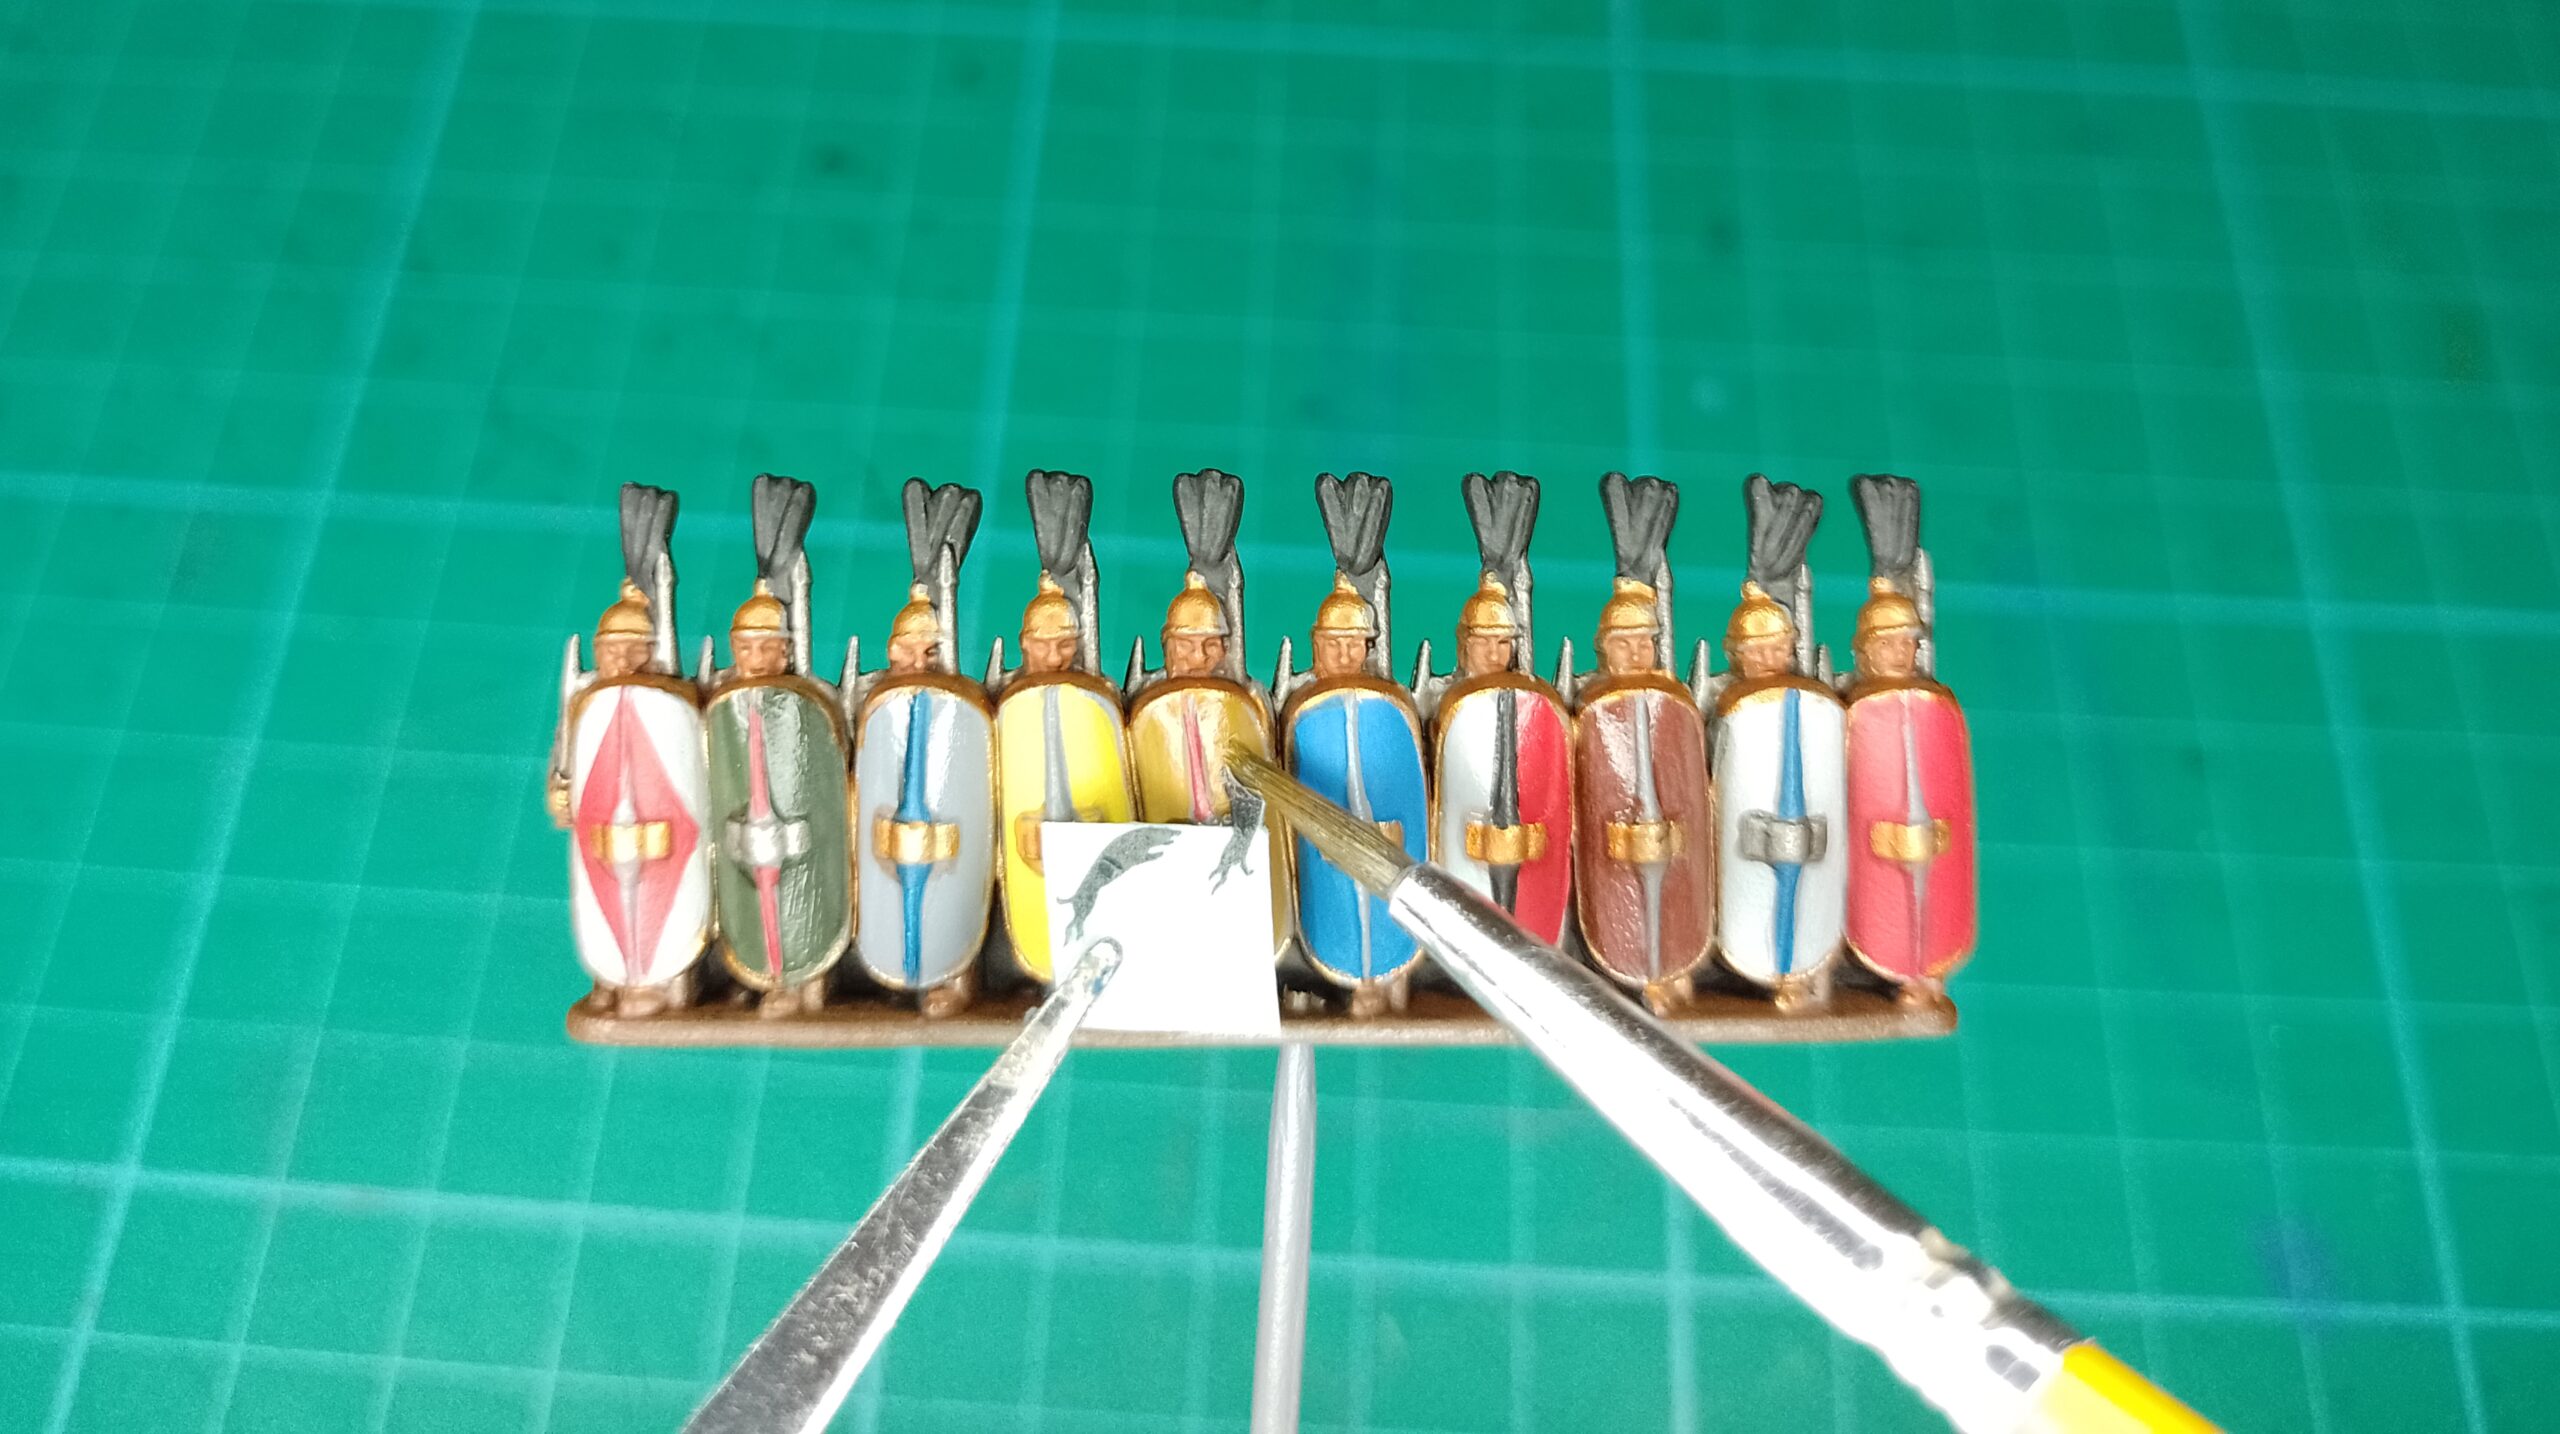

Alternatively you can see an application in action the video below.
Once dry, I would then highlight the decal, this helps to give it a painted appearance – making it stand out less ‘as a decal’.
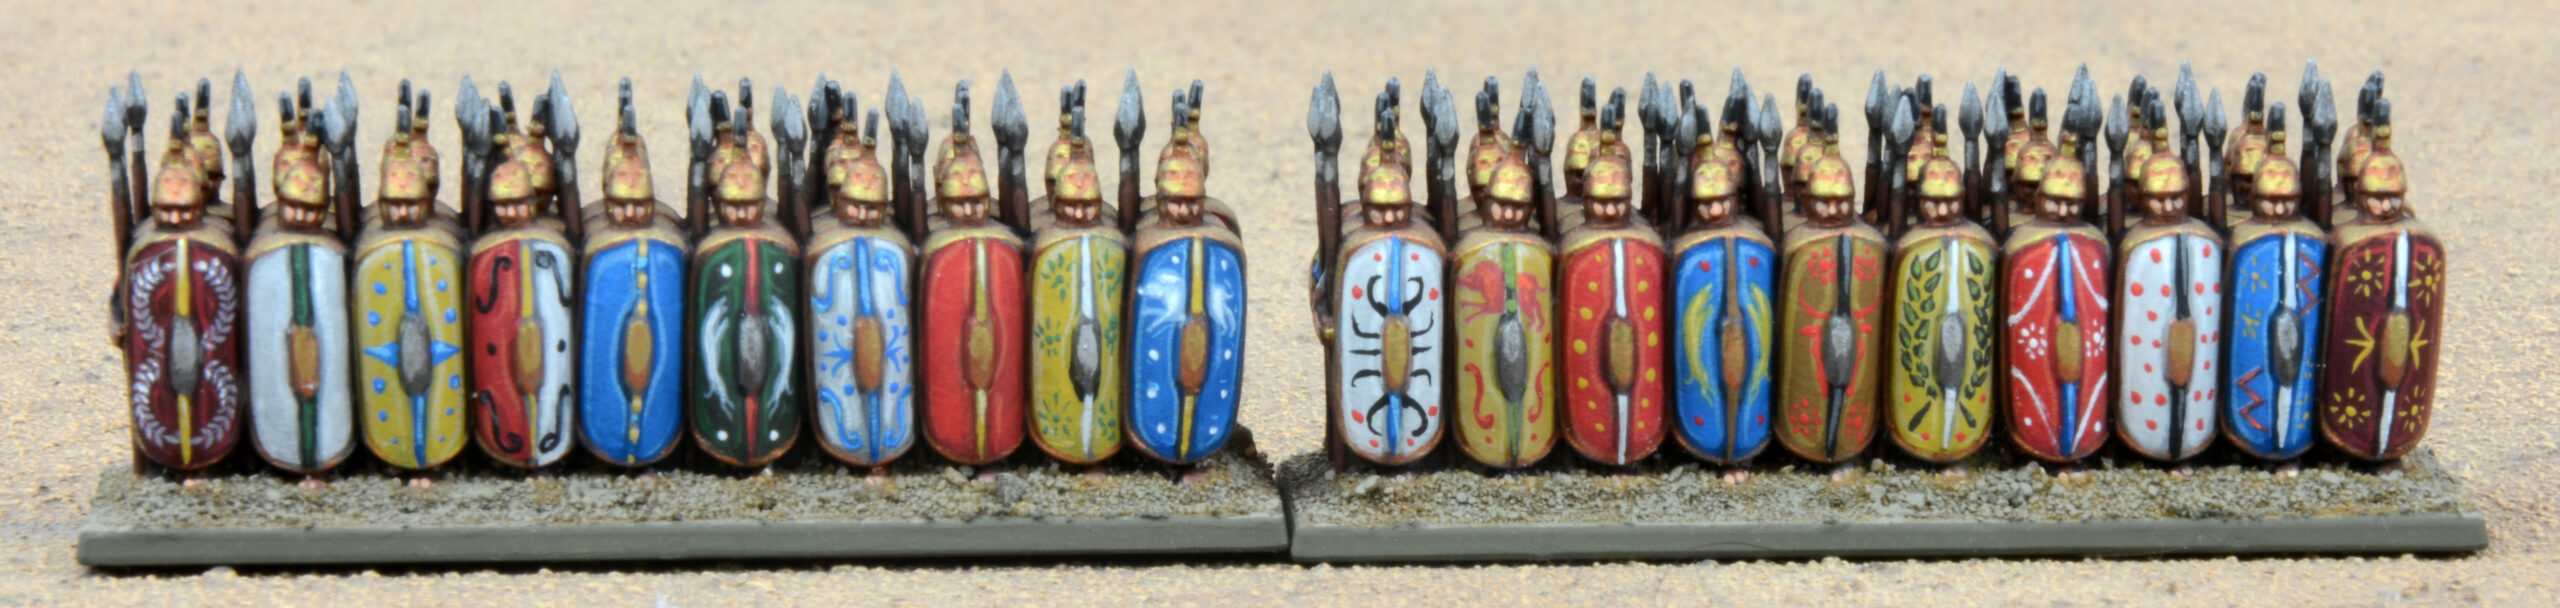
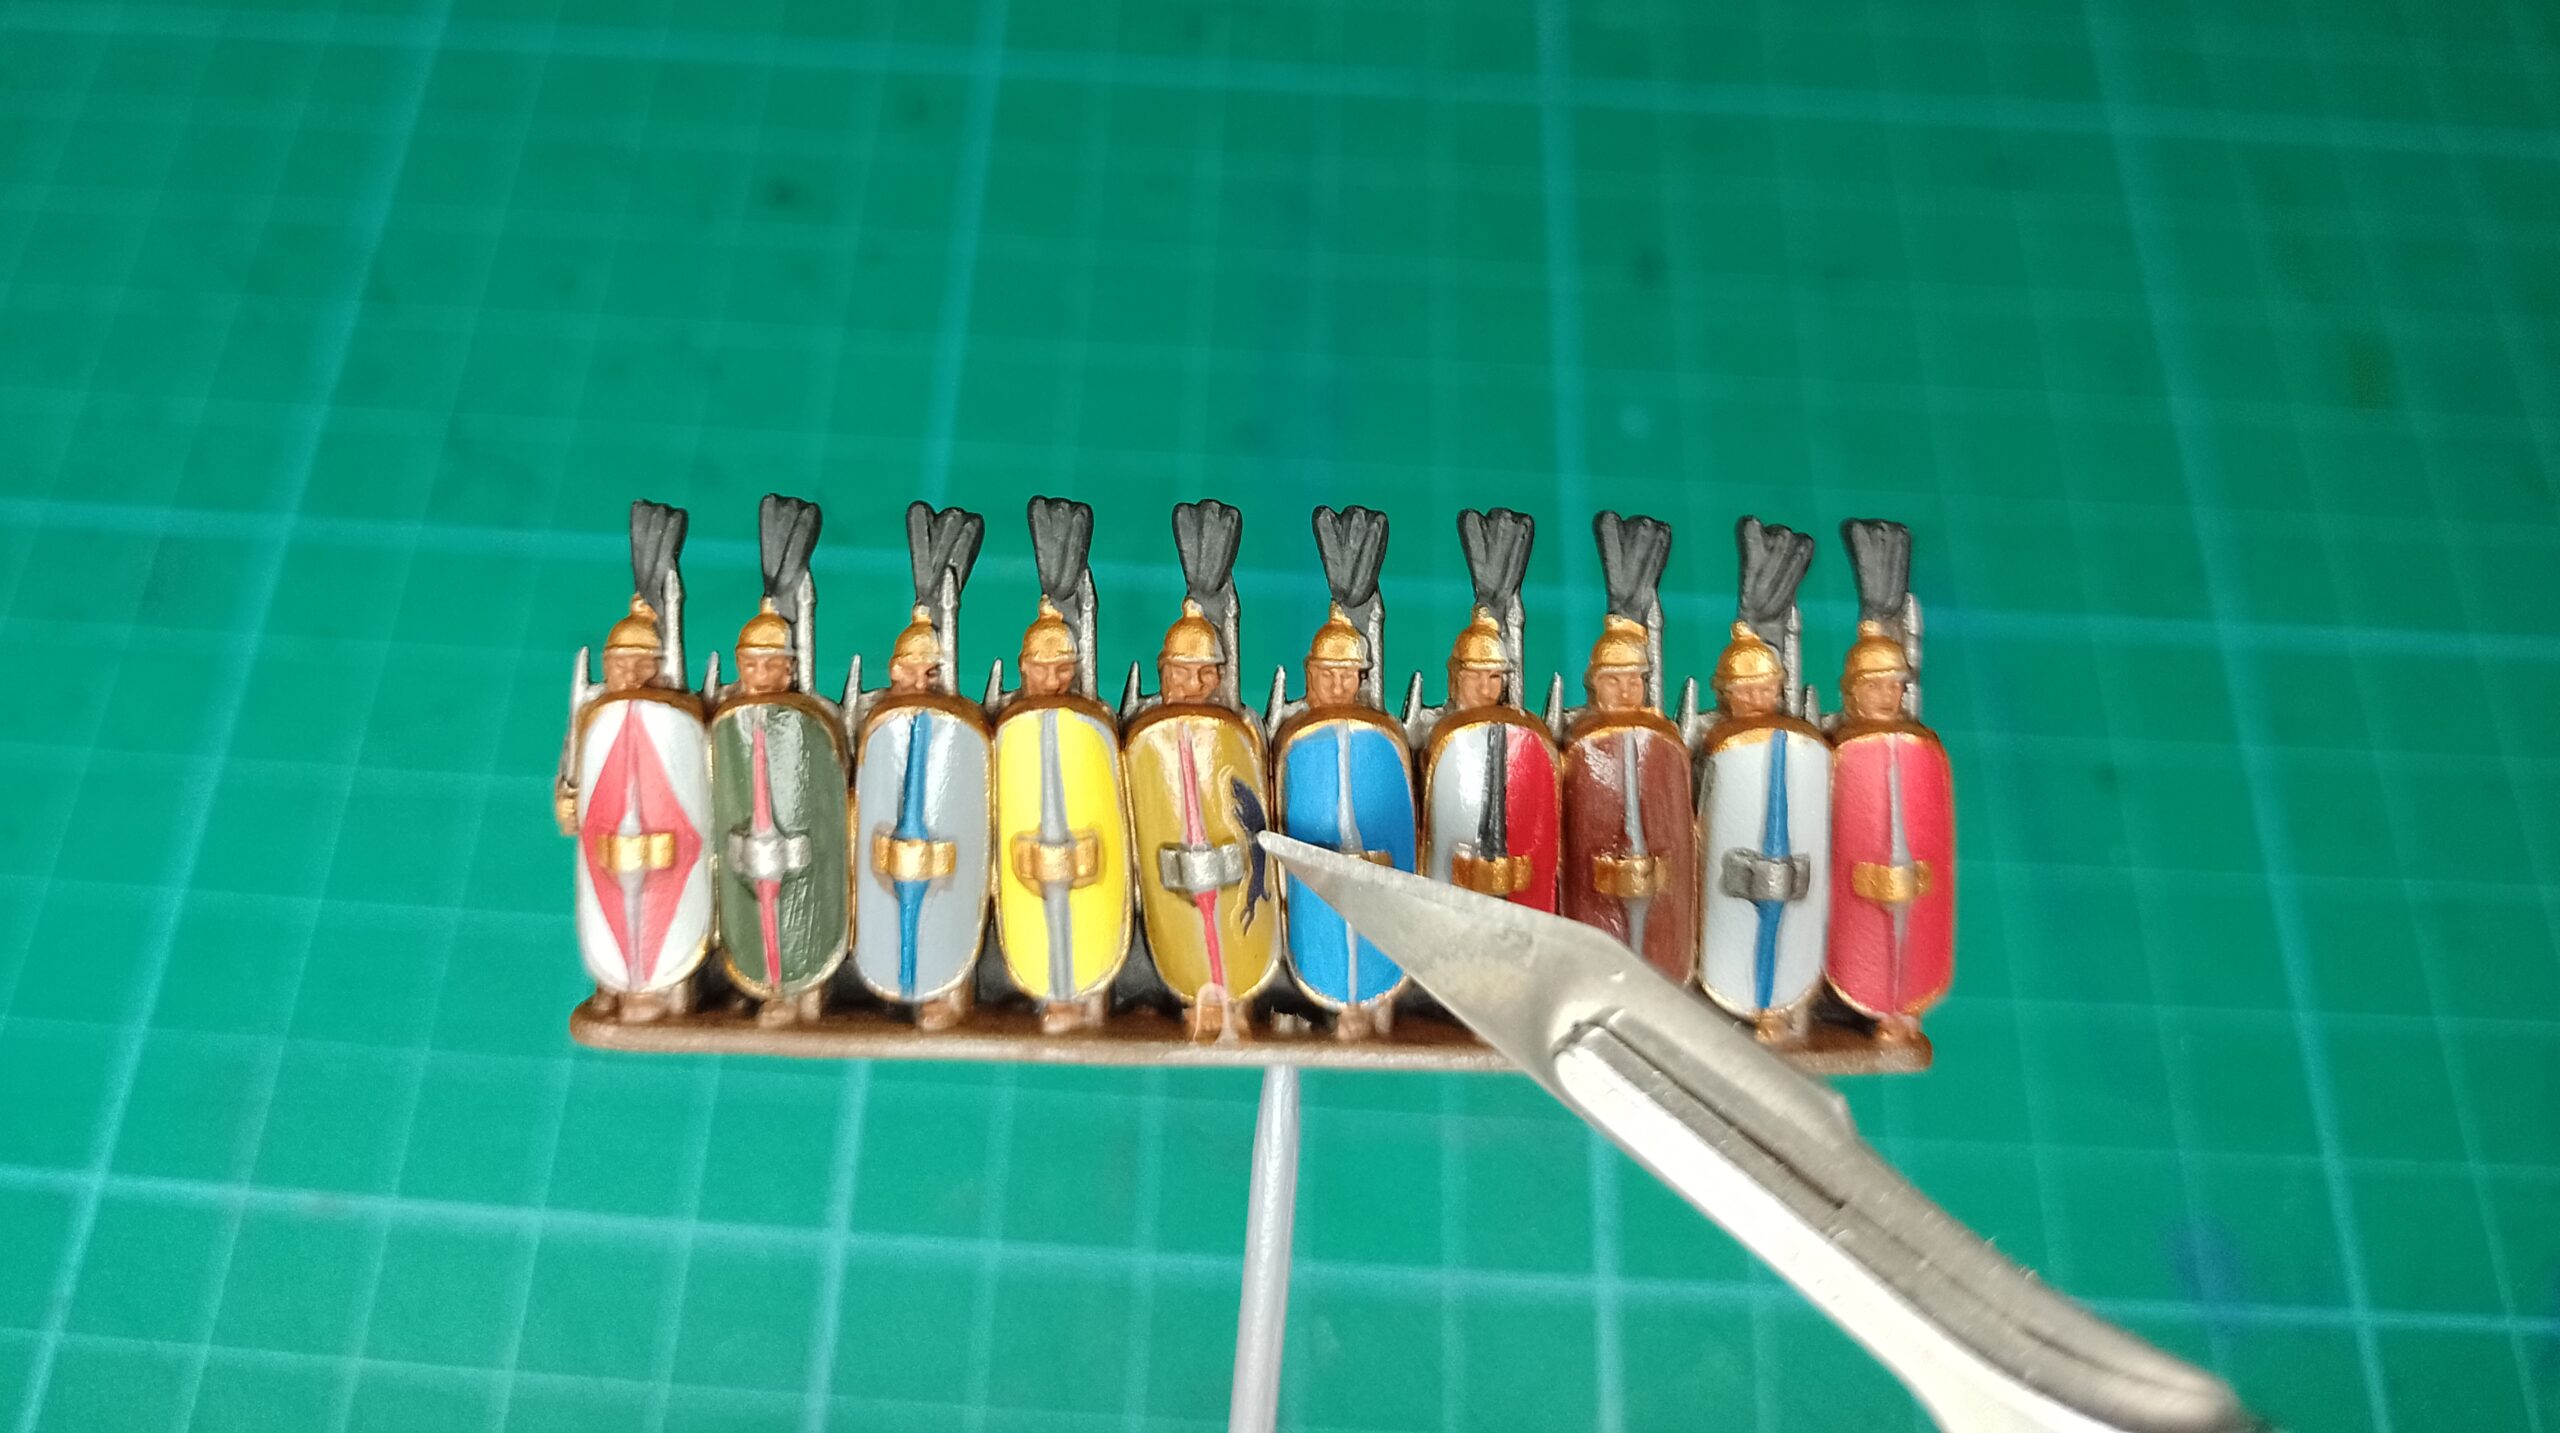
To enrich the shield further I painted dots or lines around the decals, or even on the plain designs. The tunics had a similar treatment, some got edges, some got stripes or dots, and some got nothing. By pre-planning this you can get almost endless variation. For example, you can combine the different colour options that you get on the decal sheet with different background colours, orient them differently, cut them into sections – it’s really up to you.
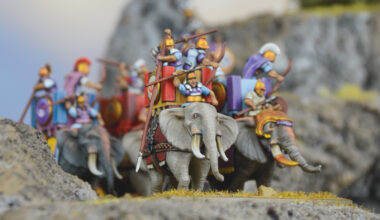
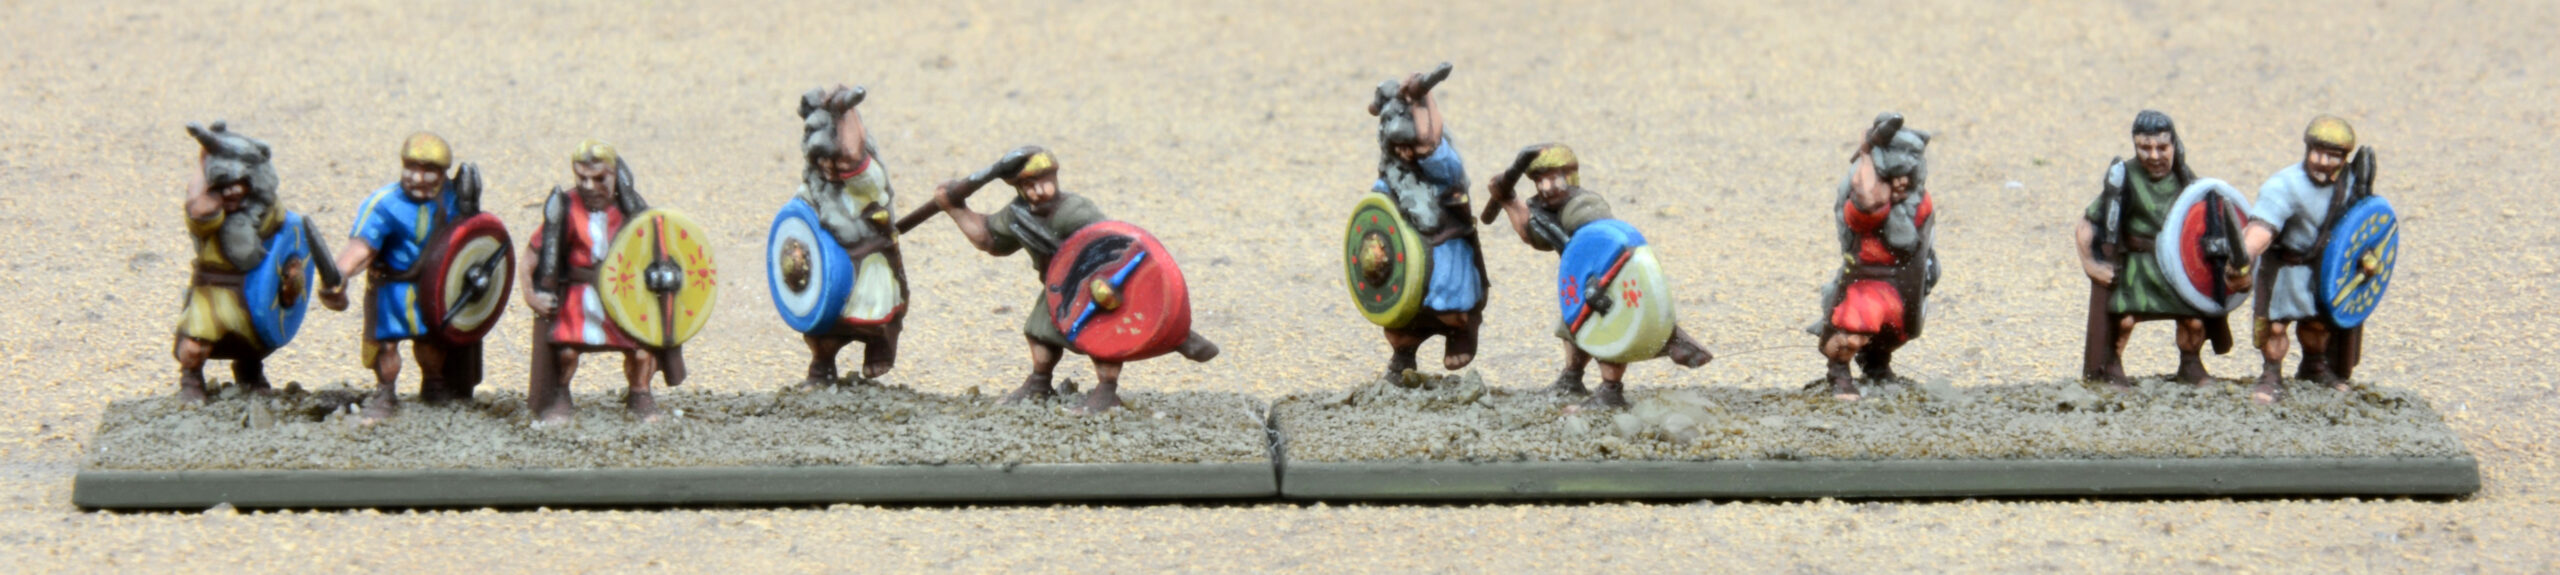
I used the same principles on single figures such as the skirmishing velites and cavalry. You’ll note I haven’t based any of them yet – I much prefer to do this at the end when I can apply it to a whole army and keep it consistent. There’s more to come soon!
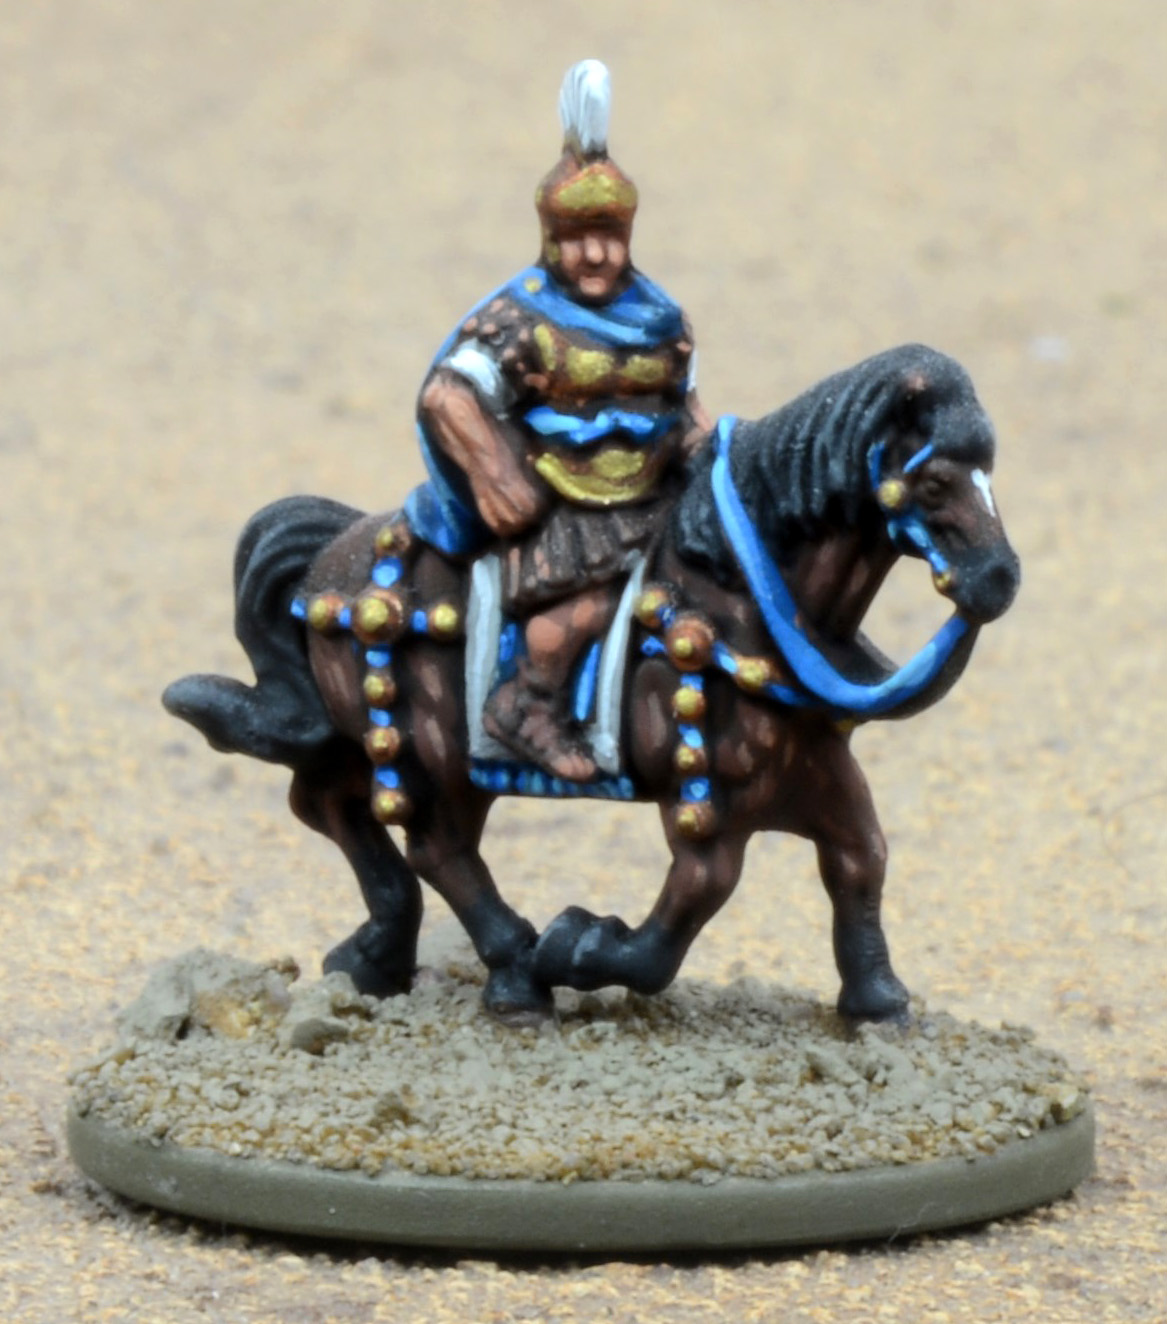
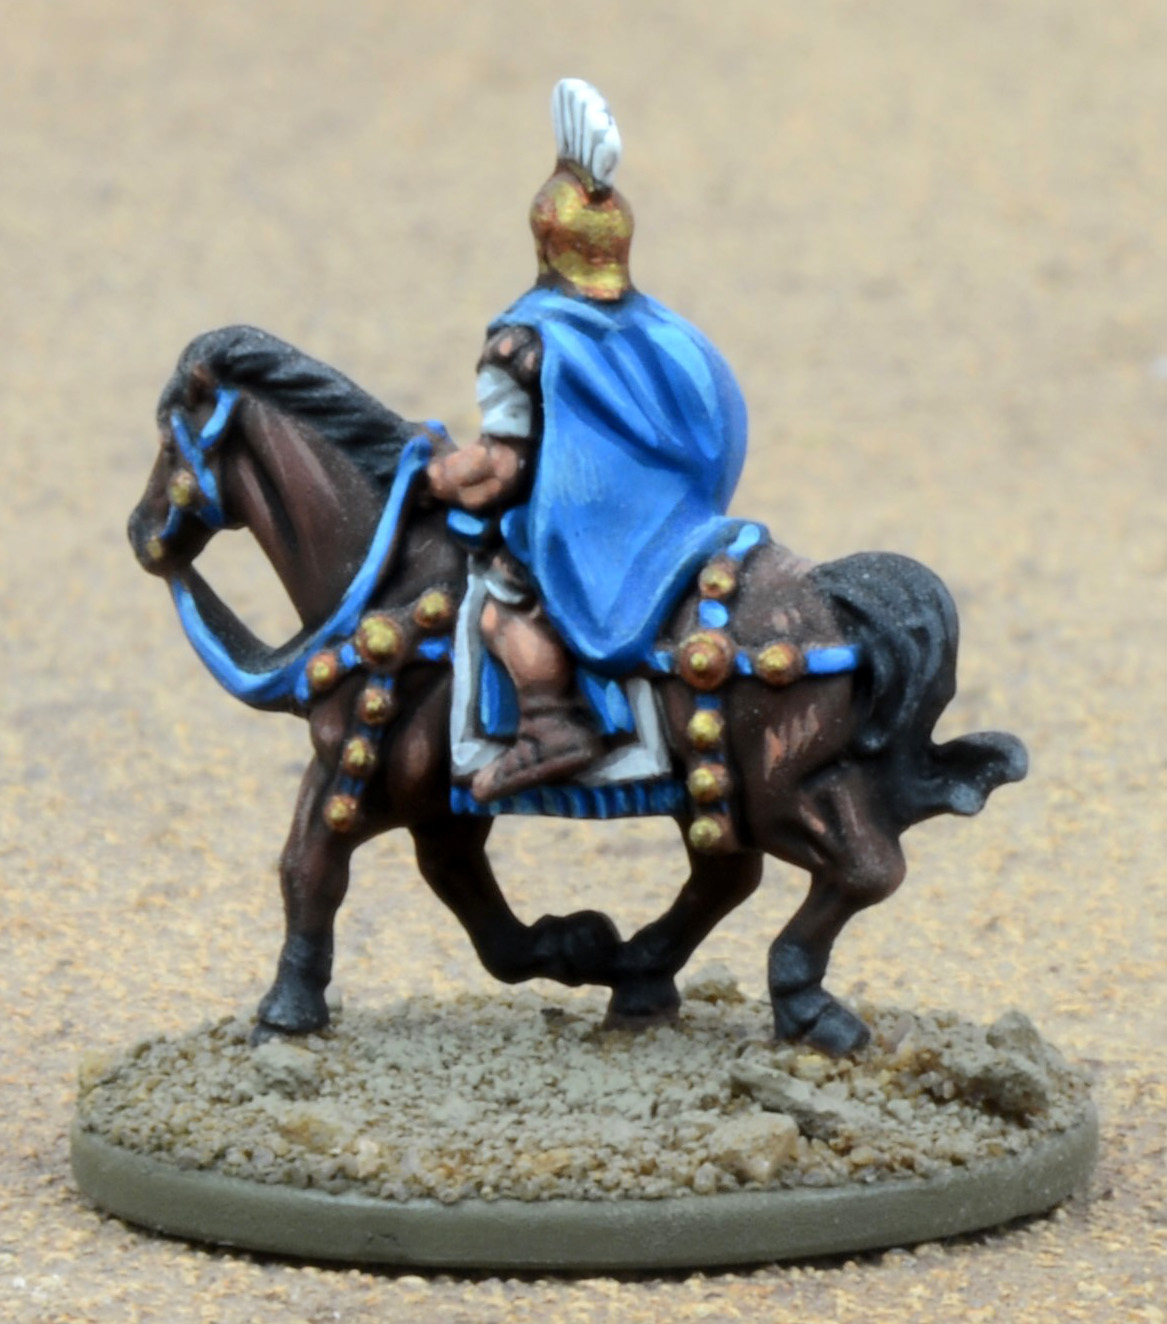
My advice, for anyone wanting to do similar, is to use good colour references, keeping in mind that at the Epic Battles scale, bright colours and strong contrasts really serve to make the figures stand out on a tabletop.
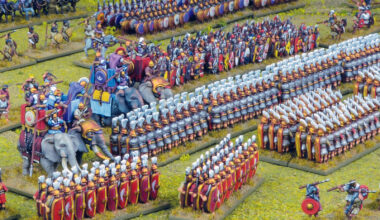
Want to follow Andrés’ example? The Punic Wars range is rife with choice, from the aforementioned Romans, the forces of the Carthaginians and the many and varied allies available to both sides. Make your own mark with Hail Caesar Epic Battles!