Welcome back, tankers. I hope there aren’t too many sore heads after last night’s Mess drinks… because it’s going to get noisy today! Grab your notebooks and follow me – we’re heading out to the range for a demonstration and lecture on the fundamental principles of tank gunnery!
Last week we discussed the basics of tank movement, which are essential for getting into a good shooting position. It’s no good being in perfect position, however, if you can’t hit the broad side of a barn at fifty yards! Now, this trusty six-pounder is much the same as a good old pistol when you really boil it down – if you want to score a hit, it needs to be pointed in the right direction, at a target you’ve properly identified and estimated range to, and you need to be aiming down the sights! Sounds simple enough, doesn’t it? Trust me, it won’t seem so easy when you’re hunting Panthers through a village, or setting up an ambush from a concealed position, when your first shot simply must hit, and hit well! This is why we train, train, and train some more – so that when it’s all on the line, you get it right when it really matters!
Remember, you get one Tactical Action per Action Phase, and there are three Action Phases per turn – it’s good to keep the number three in your head, along with the useful little acronym ‘S-A-S’ – nothing to do with a certain infantry unit you might have heard about which definitely doesn’t exist anyway, but rather ‘SPOT – AIM – SHOOT’. This governs the core principles of effective gunnery, and while it might sound rather obvious, you’d be amazed at how often nervy commanders waste good ammunition (and opportunities) shooting at nothing. No matter how hairy it might get out there, remember ‘S-A-S’ and you’ll not go far wrong!
In our briefing on movement, we talked about the ‘Pivot’ action as a useful way to get your vehicle lined up in a firing position, but let’s not forget the turret! As part of your Movement you can set the facing direction of your turret into the left, right, forward or rear arc – essentially setting the rough direction you think you’ll want to be shooting in! Now, before you chaps assigned to turretless vehicles start grousing, don’t worry – if your vehicle has the Turretless trait, you’ll get to make an extra Pivot action for free, without a Crew Check, as part of your aiming or firing action!
Now you’ve got your tank into position, a round in the chamber, and your turret facing the right way, you’ll want to find a target – here comes the first ‘S’ in ‘S-A-S’: Spot Target!
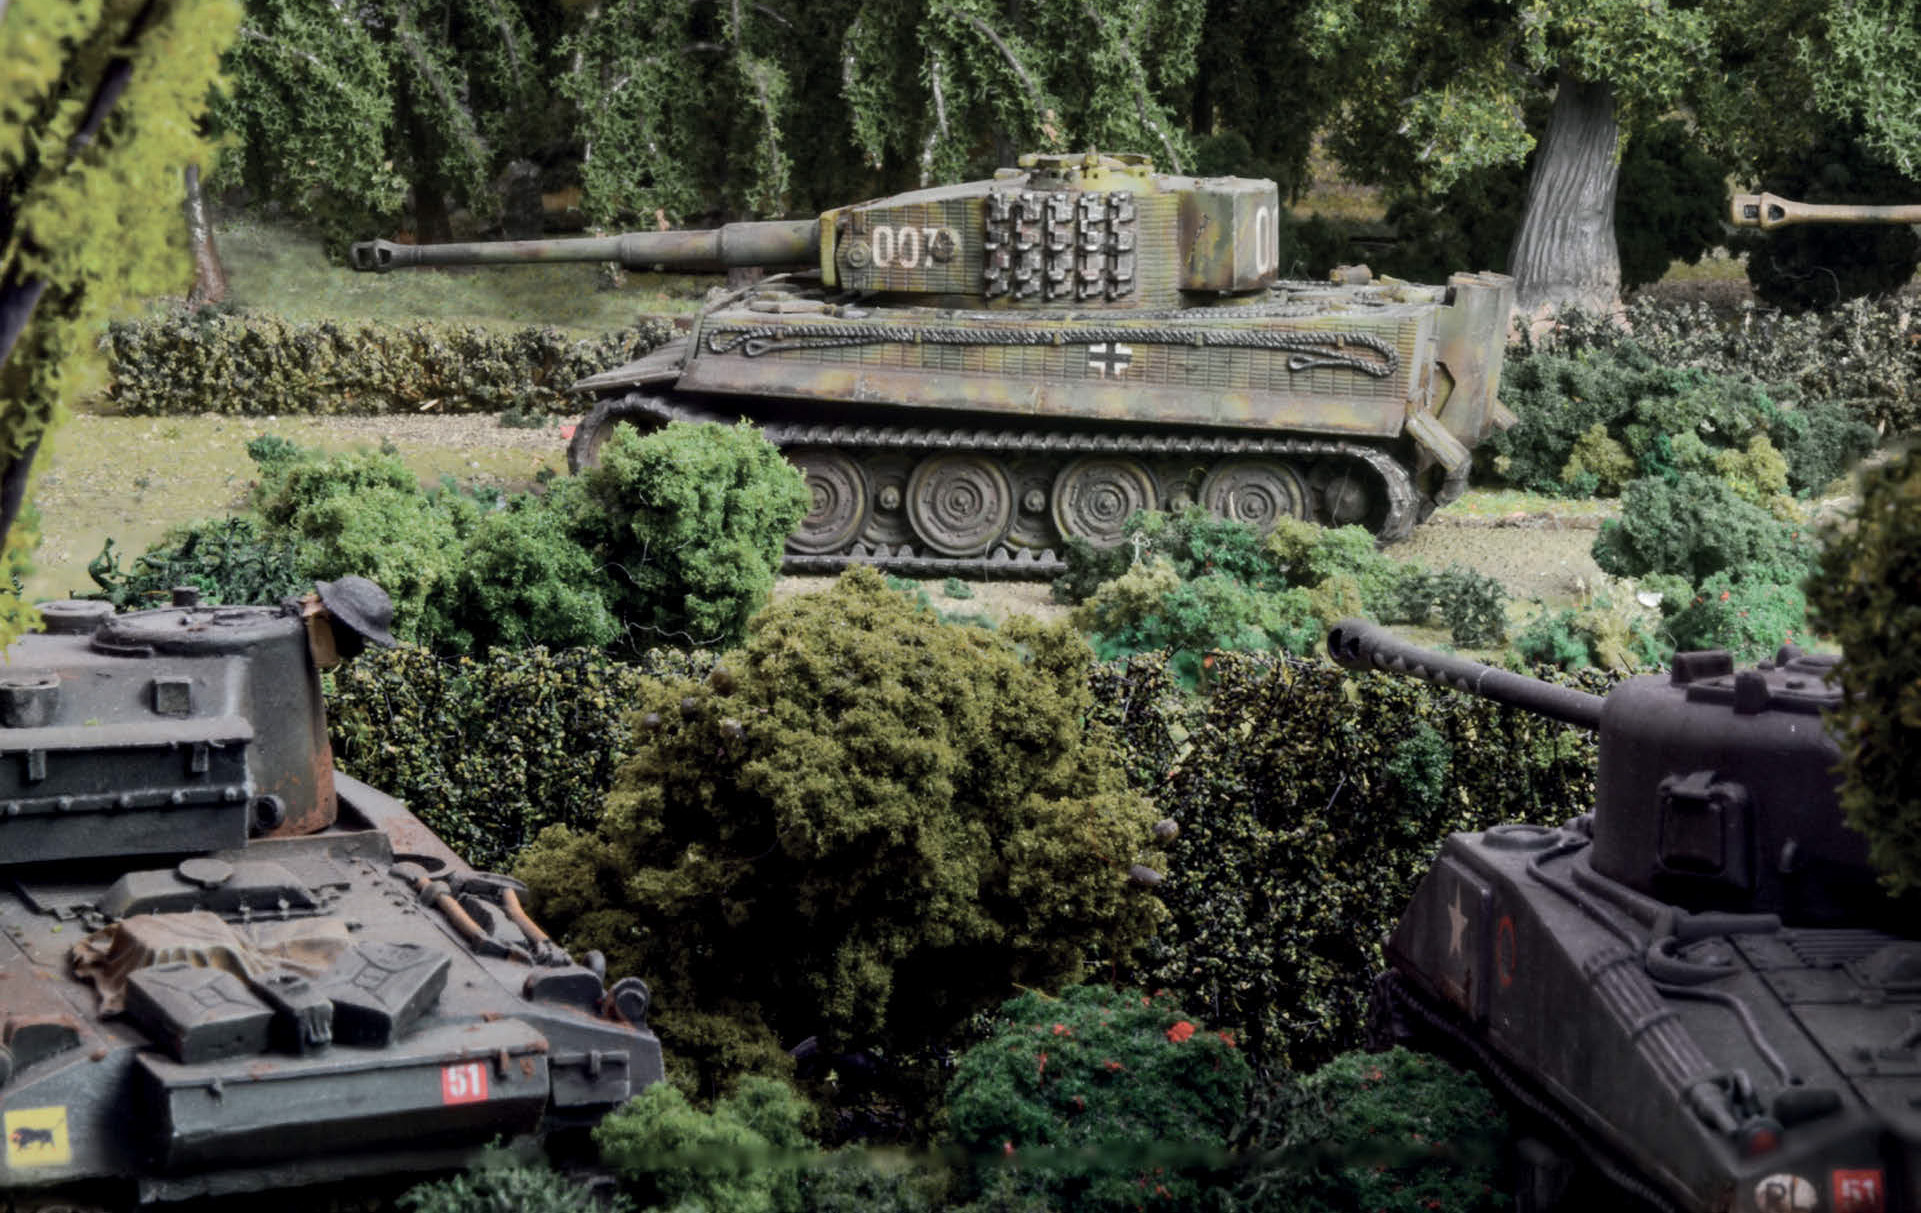

Spot Target is the first step in destroying an enemy tank – after all, you can’t hit what you can’t see! If you can draw line of sight from your commander’s cupola (indicated on your tank card) to any part of an enemy tank’s structure (this excludes things like whip aerials, the very tip of the gun barrel, and the like – you need to be sure of what you’re shooting at!), then you can perform Spot Target as your Tactical Action for that round, and place the appropriate marker by your tank. Now, here’s a wrinkle – if you’re Unbuttoned, and have your head (and binoculars!) out of the turret, you can make a Commander Crew Test. If passed, then that Spot Target becomes a free action, allowing you to make another Tactical Action right away!
Once you’ve got your target spotted, it’s time for ‘A’ – Aim! If your target is Spotted, your turret is facing the right way, and you’ve still got line of sight, then you can perform the Aim at Target Tactical Action. Remember, if you’re quick and manage to pass your Crew Test after using Spot Target, you can make a second Tactical Action in that round – this means you can jump right to Aimed with a good crew and a bit of luck. This is just one of the many reasons we’re drilling you so hard now – so that when you spot that Panther or Tiger lurking in the bushes, you can line it up in your sights and be ready to fire before it even knows you’re there!

So, you’ve Spotted (S), Aimed (A), and you’ve got a round loaded. There’s only one thing left to do – take the shot! While you can fire if you’ve only Spotted the enemy (or even in desperation without that, known as a ‘Snap Shot’), for optimum shooting conditions you’ll want to be stationary (on a ‘Halt’ order), Spotted, and Aimed. Once you’ve met all the conditions you need to shoot, there are four steps: Expend Ammunition, Hitting the Target, Hit Location, and Damaging the Target – let’s go through them in order!
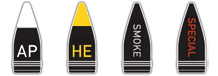
Expending Ammunition goes without saying – once that round has gone downrange, remove it from your tank’s card. If it’s a standard shell token, then it goes back into the ammo rack, but if it’s a Special Ammunition token, then it’s gone for the game – hopefully you hit with it!
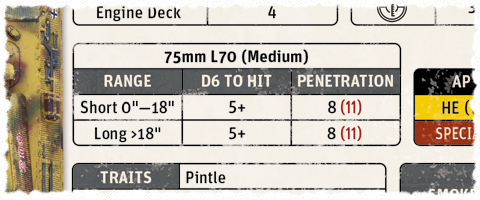
There are a whole host of factors that play into actually making the hit – whether your target is merely Spotted or you’ve taken Aim, the calibre of your gunner, and the range to target, among other things – and these will affect the number of dice you roll, but at the core of the matter is this principle: you’ll have a ‘target’ number (let’s say 5 as an example), and you’ll roll a number of dice. So long as one of them (in this case) is a 5 or 6, you’ve hit! You’ll want to try and hold your fire until you can roll the maximum number of dice, though the throes of battle can make fools of any plan and you may need to improvise in the heat of the moment!
There’s more to it than that, of course, but remember – this is just the beginning, and you’ve got plenty of time to refine your technique on the ranges! Once you’ve worked out if you’ve hit or not, it’s time to determine exactly where the shot impacted the enemy tank! This is based simply on the facing and direction of the oncoming round, and a simple D6 roll to determine whether you’ve got the running gear, hull, or turret! Now, if your opponent is Hull Down it gets a bit more difficult, but that static range target over there is clearly visible – it should be no problem for our demonstration team!
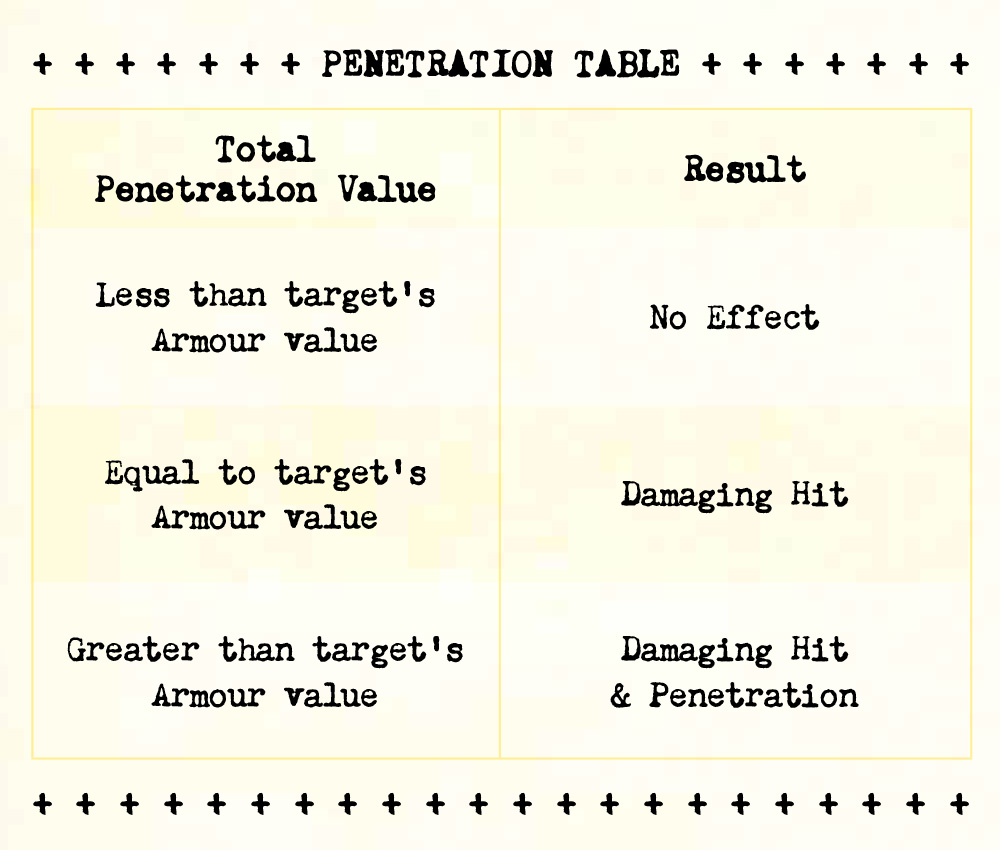
Once you know that you’ve hit, and where, it’s time to see how much damage the shot has done! Roll a d6, add the Penetration value of your gun, and compare it against the target’s armour – the below chart will give you the result, and you might find it handy to paste inside your turret!
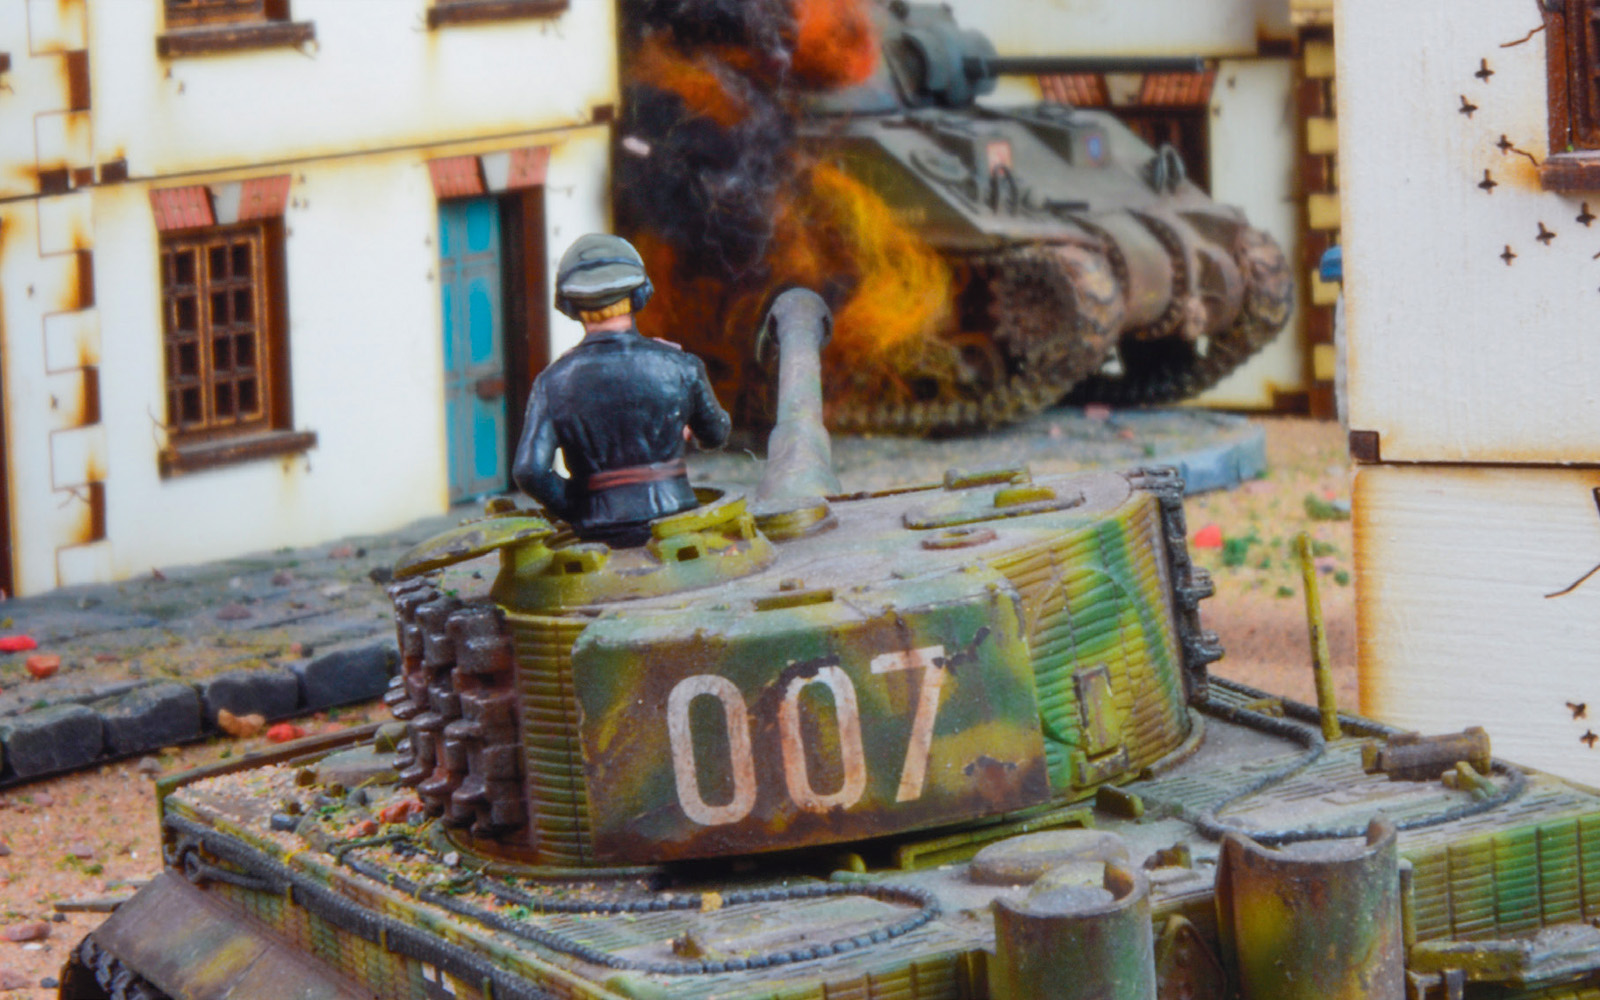
If you manage to score a Damaging Hit, then place a damage token on the area of the tank you hit – remember, these will impact the performance of the enemy vehicle, and three Damaging Hits will destroy it outright! This is certainly an effective way to knock enemy tanks out, particularly if the Initiative goes your way and you can get a few shots off in quick succession. The most surefire way to destroy an enemy tank, however, is with a Penetration – get a round through the armour and into the vitals, and all sorts of nasty things start happening! There’s more to it than just this, but for this lecture series we’re concentrating on the very basics, to make sure you’ve got them firmly fixed in your mind for when the time comes. Now, observe as the demonstration team lines up and fires on the static range target – in your own time, Sergeant, carry on!
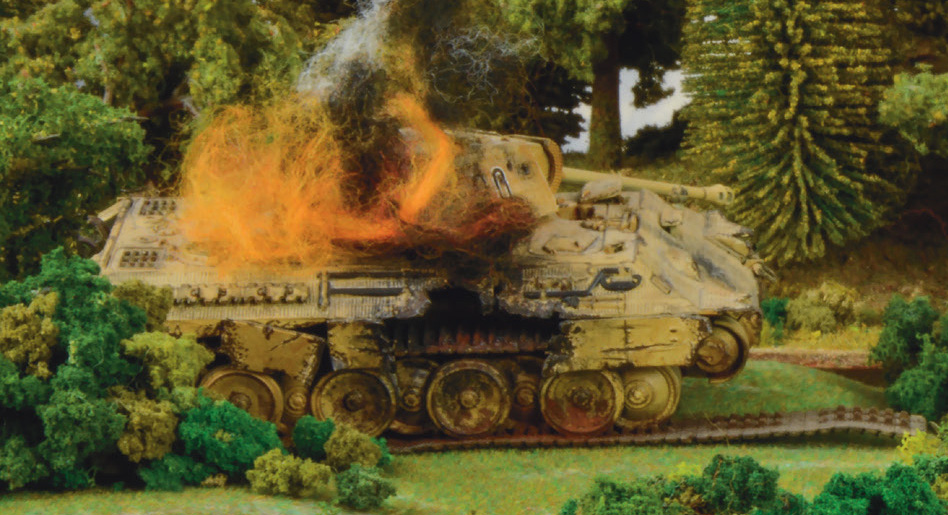
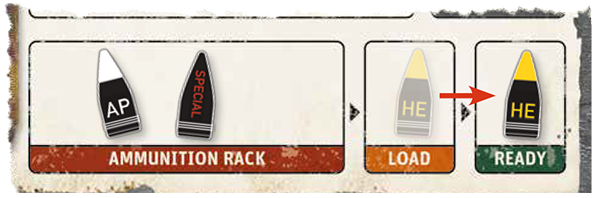
Nicely done, Sergeant! As you can see, it’s made rather a mess of the target – these are serious bits of kit you’ll be commanding, so give them the respect they’re due! Now they’ve fired, the next thing our demonstration team need to do is reload – can’t be caught flat-footed when there might be more enemy tanks just around the corner! For larger guns like this one, loading is a two-action process. The first moves the round from the Ammunition Rack to the ‘Loading’ box on the Datacard, and the second moves it into the ‘Ready’ section – then it’s good to go! If you need to speed the process up, you can try for a Forced Load, which requires a Gunner Crew Test, but beware – while this can give you a one-action reload, you really don’t want to fumble a shell in the heat of battle, particularly if it’s one of your specials!
There are some other uses for the variety of weapons mounted on your vehicles, but we’ll be covering them in next week’s lecture which is all about cards – no, not that dodgy six-ace deck you were using in the NAAFI last night, Trooper Jenkins, but those wonderful assets and events that make the Achtung Panzer! battlefield so wonderfully complex. Tankers – dismissed!
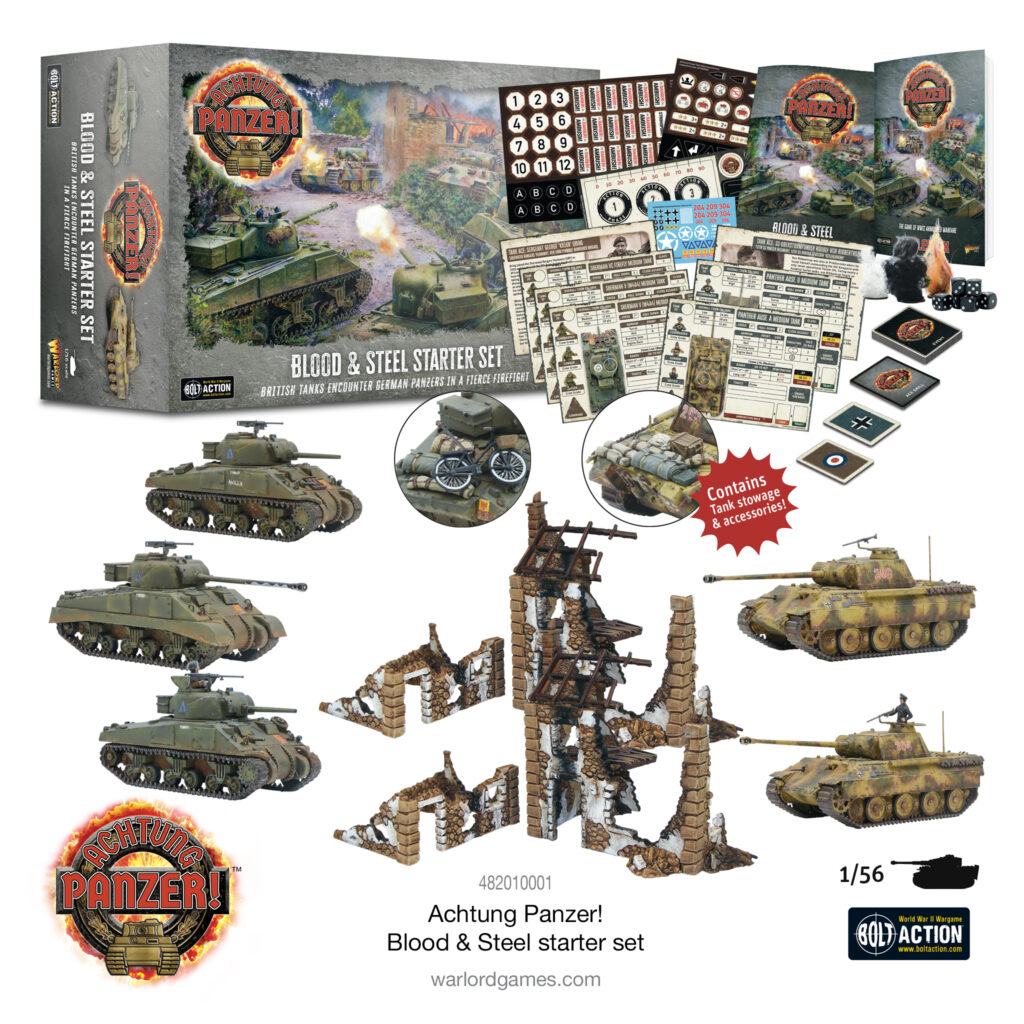
Blood & Steel!
Command a platoon of armoured vehicles on the battlefields of World War II in Achtung Panzer!
The Blood & Steel starter set contains highly detailed plastic tanks for British and German forces, plastic ruined scenery and a host of event and asset cards add further atmosphere and jeopardy to your games. The rulebook explains how to recruit your crew, select your tanks, assault guns or armoured cars and introduces a campaign system that allows your crew to progress after each encounter and your tanks to be upgraded to be more effective in the next battle.
Missions are close-quarter engagements between opposing armoured vehicles on battlefields dominated by buildings, ruins, woods and other terrain – battles are close and deadly firefights!
The player who best exploits the strengths of their tanks and crews, who plans their movement carefully and uses the terrain to their advantage will prevail – will your tactical prowess and the fighting aptitude of your tank crews win the day?
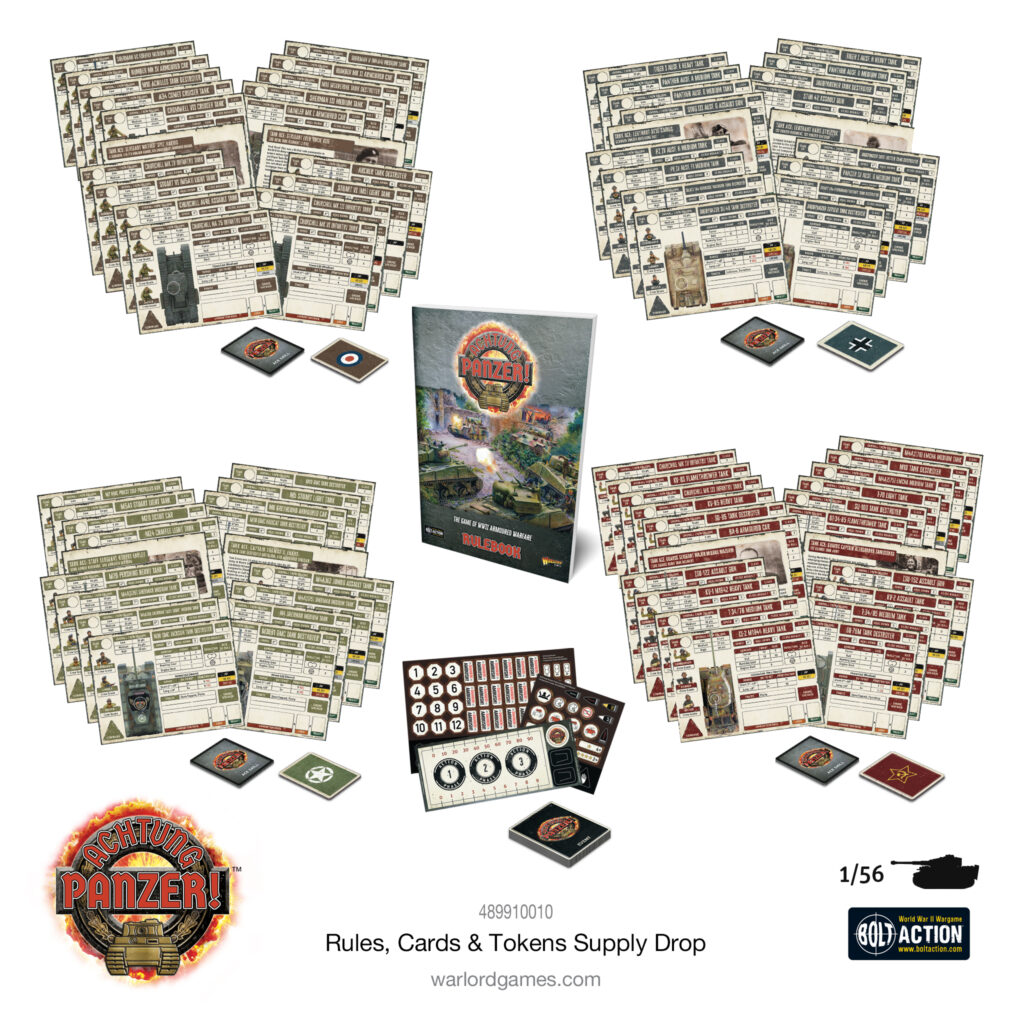
Rules, Cards & Tokens Supply Drop
Already own a veritable horde of tanks? Jump straight into the action with the Achtung Panzer! supply drop. This awesome, great-value, Warlord Webstore-exclusive bundle nets you the rulebook, essential tokens, and every single tank Data, Ace, Ace Skill, Asset, and Event card produced for the game’s launch!
With this supply drop your late-war British, US, German and Soviet forces will have everything they need to do battle on the Achtung Panzer! tabletop!
1 comment
Are you going to post a playthrough on your You tube channel? I think it would be beneficial for people to see how all this meshes together.
Comments are closed.