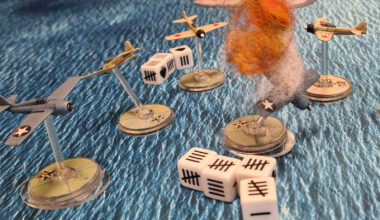
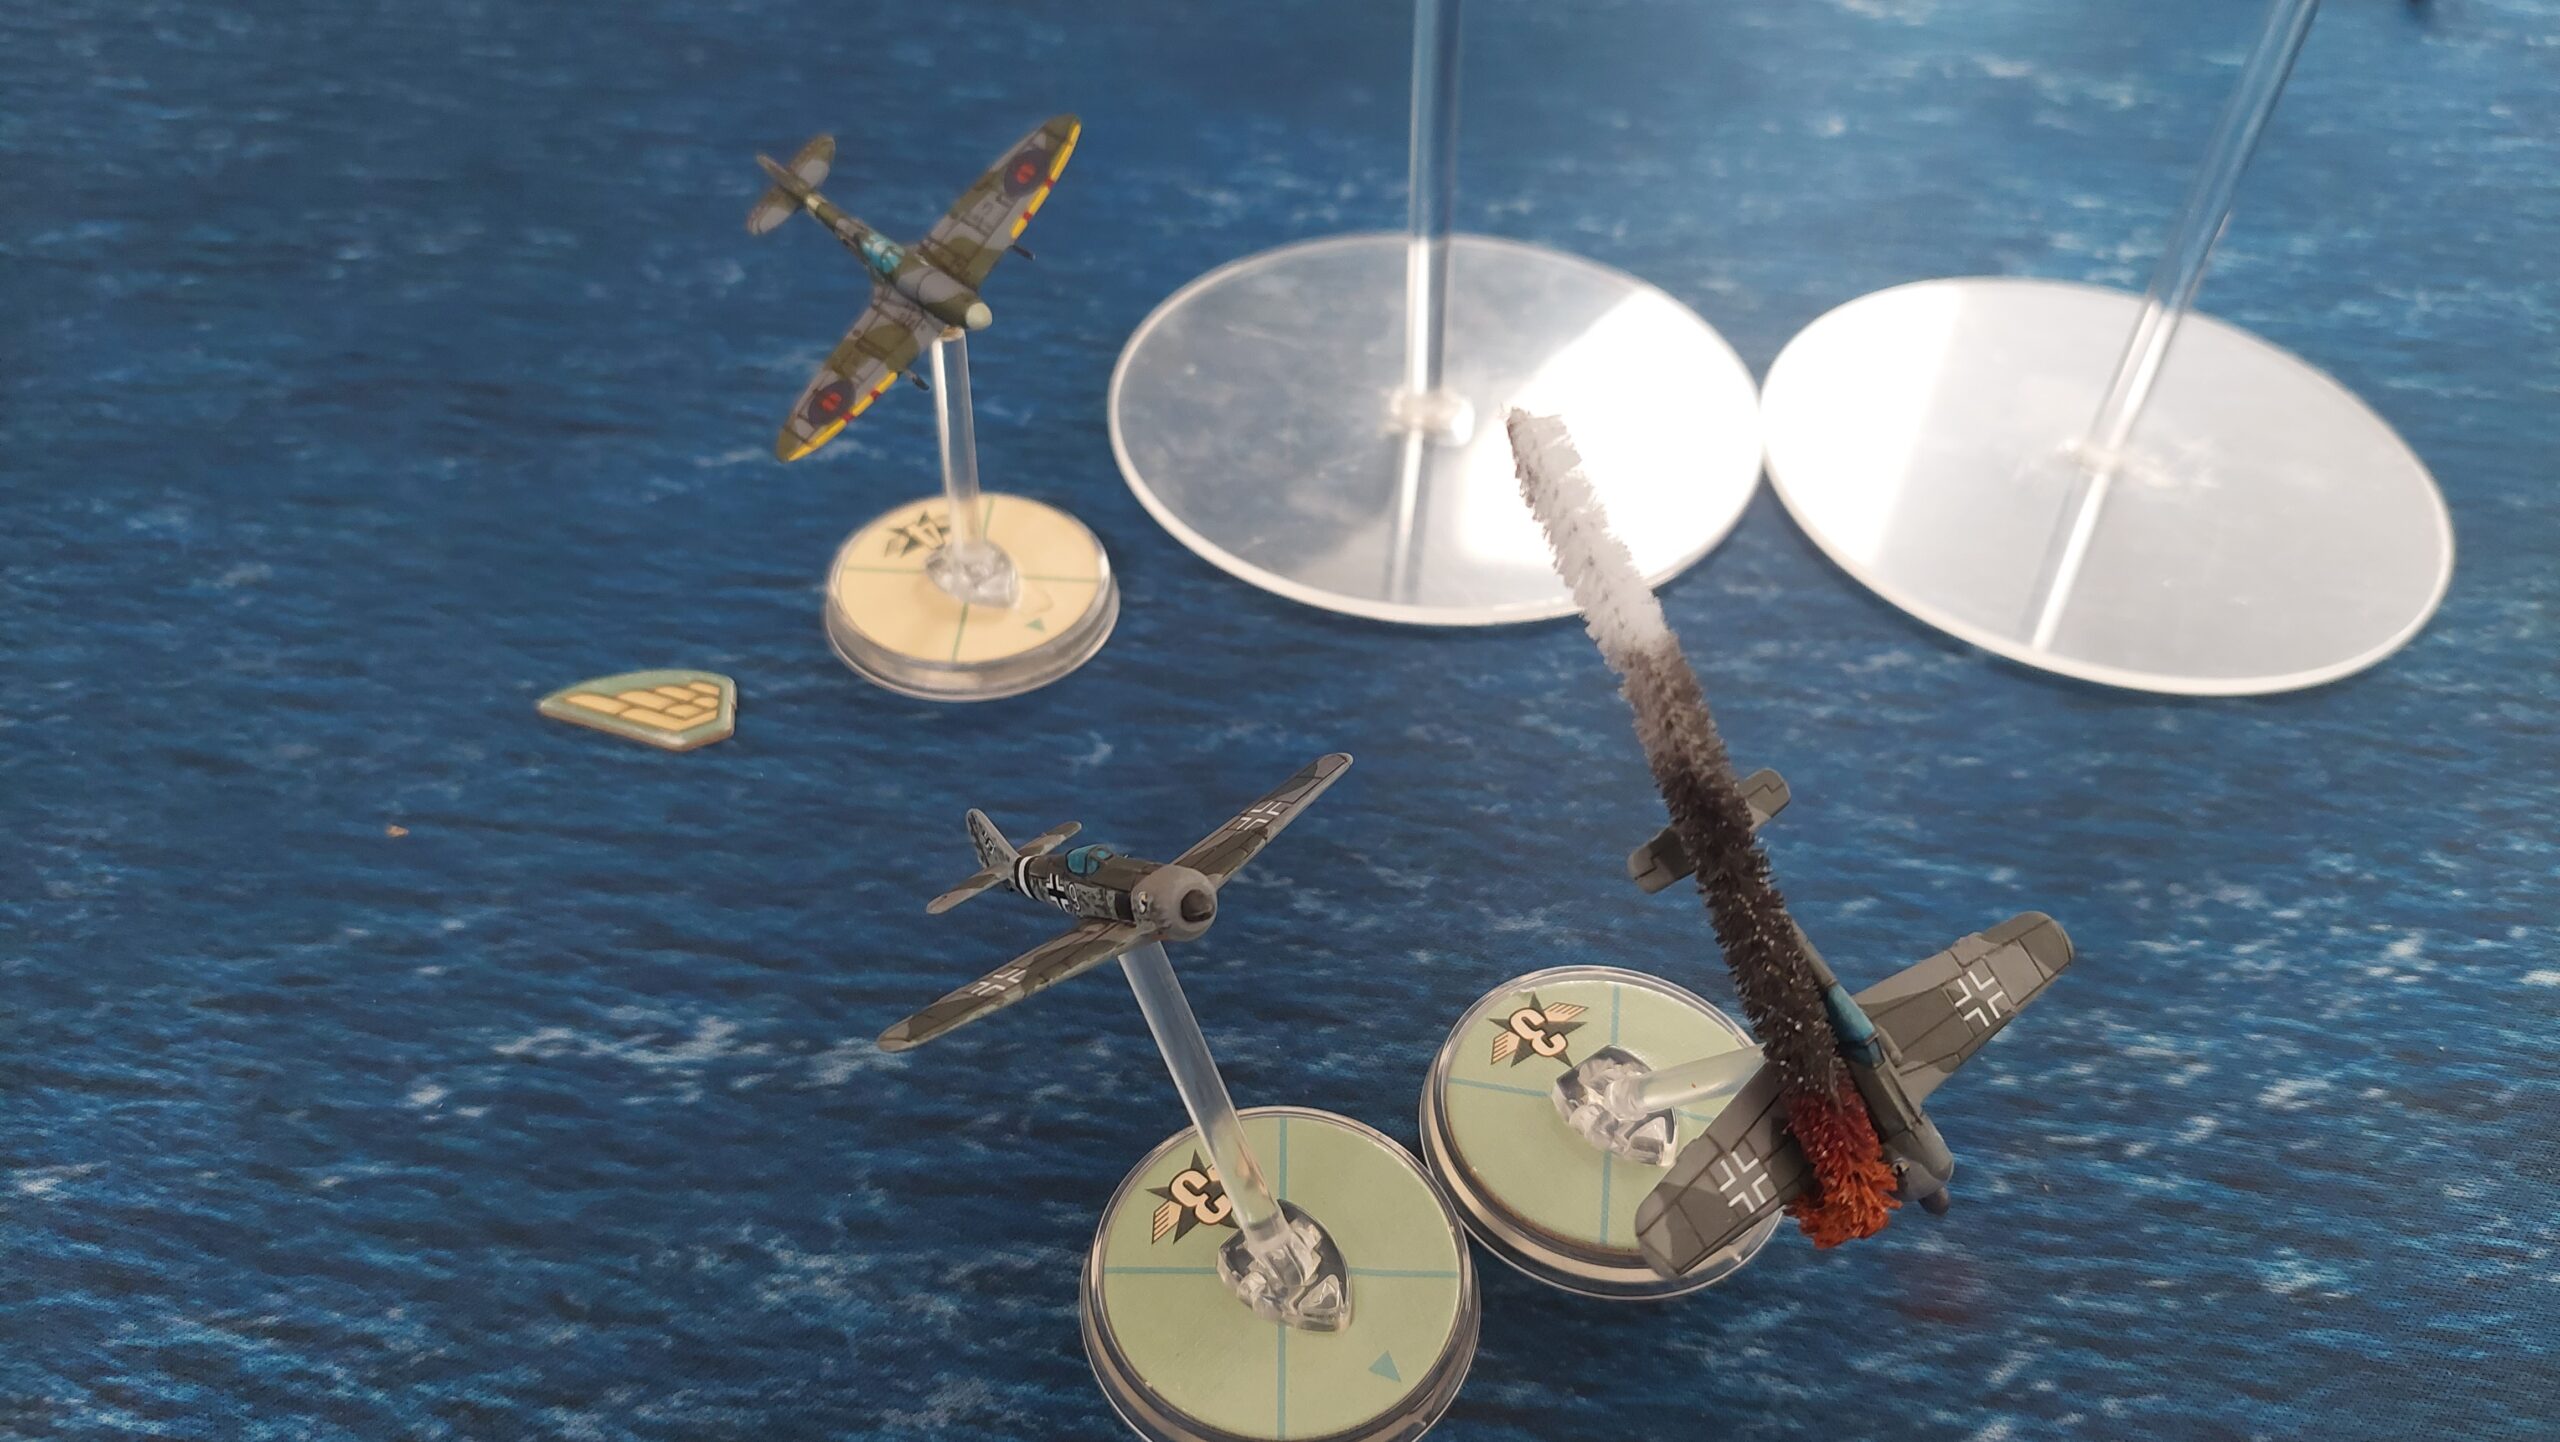
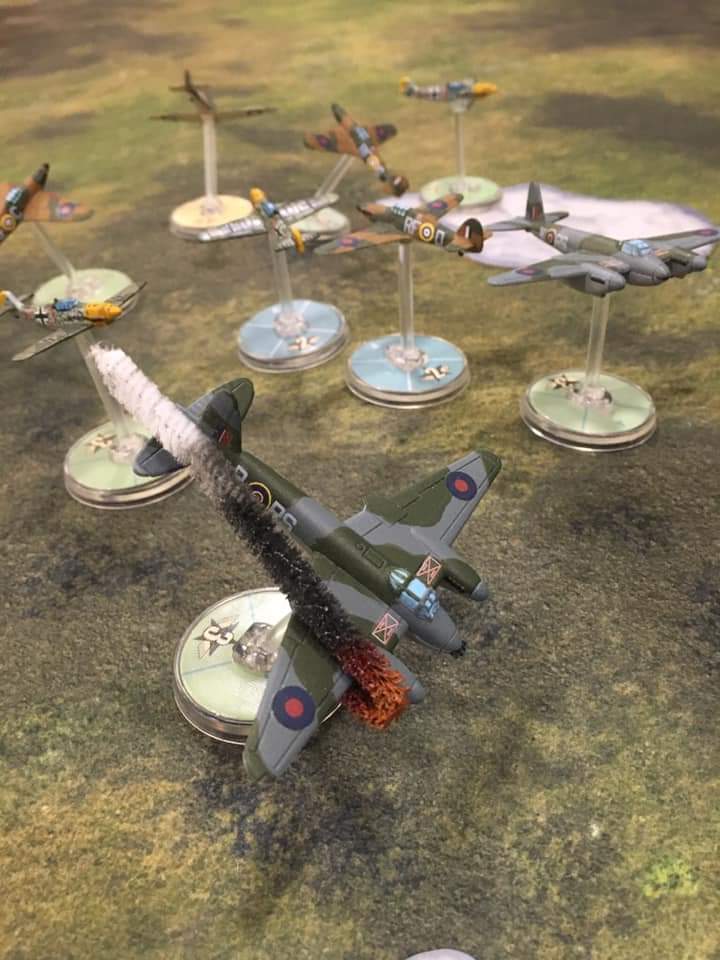
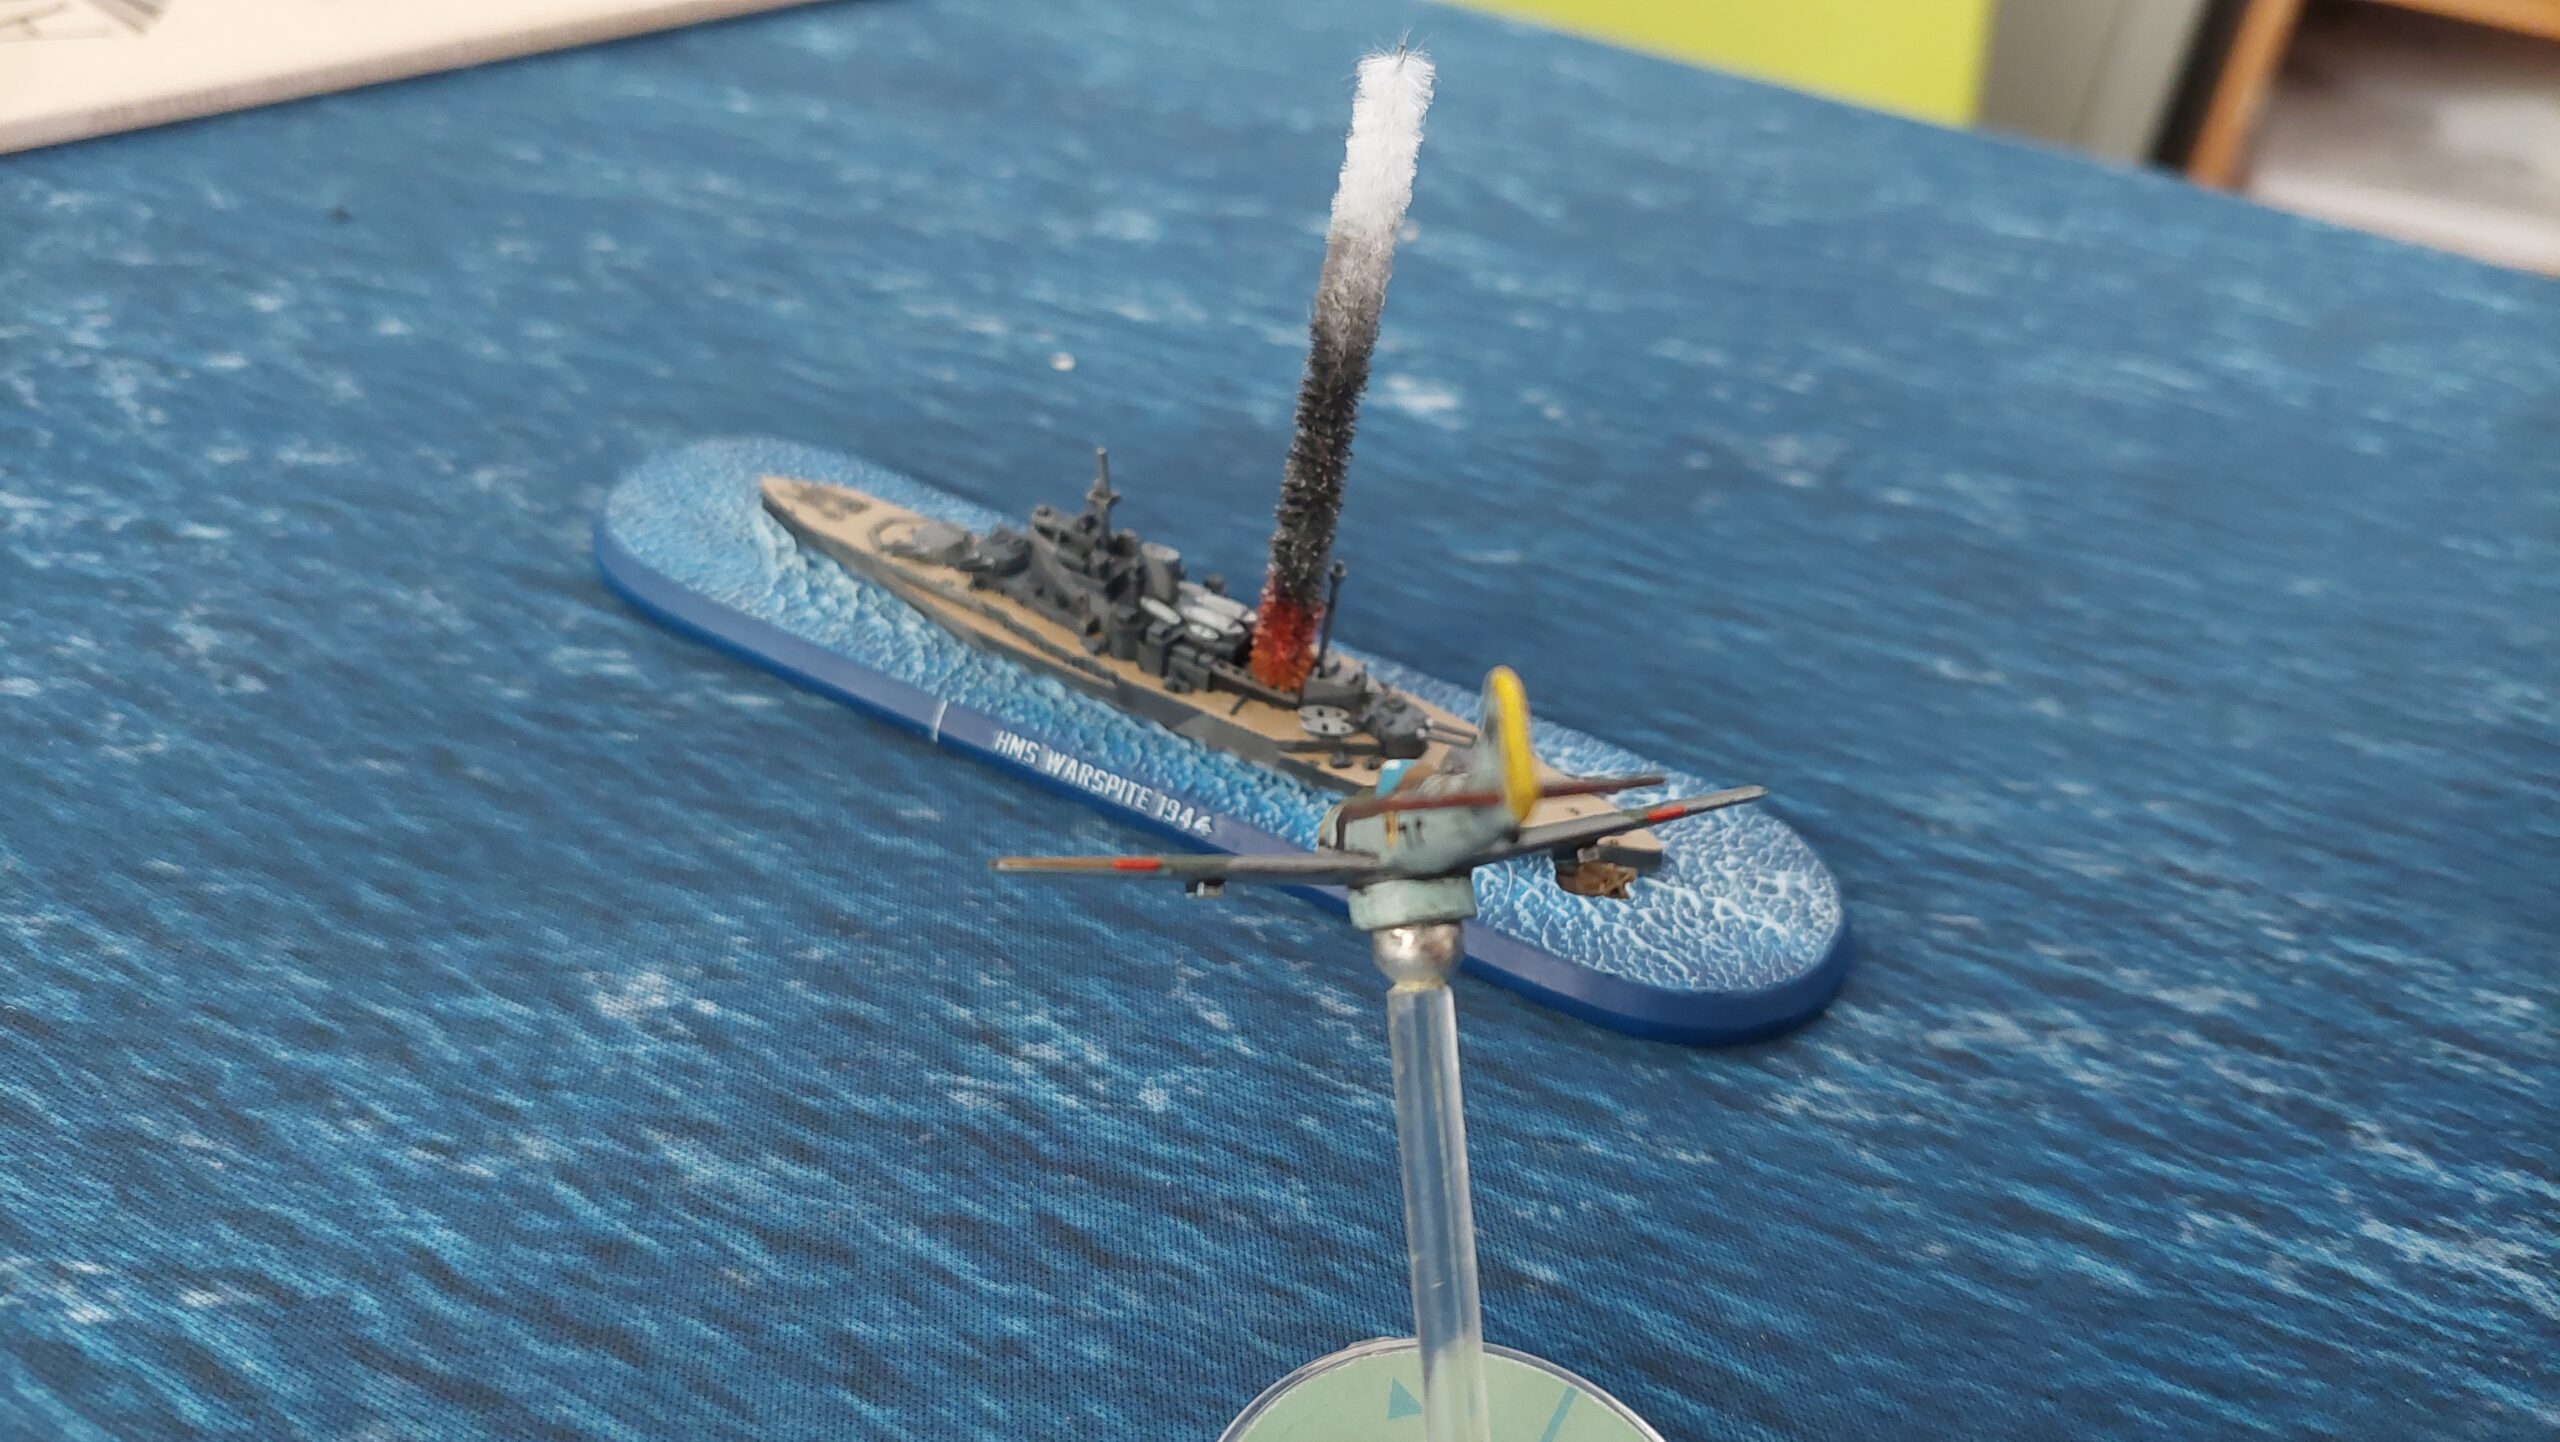
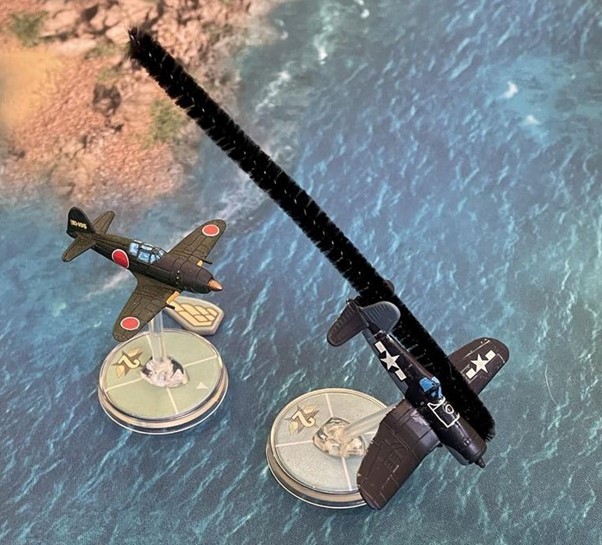
One nice visual addition to your Blood Red Skies games are smoke and flame markers. These have been around in the community for quite some time so I think it is impossible for any one person to claim credit for their invention, but they are very useful both practically and aesthetically; they can be used to mark which multi-engine plane has an engine out, and they also look cool when taking that obligatory “shot down” picture for your club or store page! They make frequent appearances on Blood Red Skies Ready Room (a highly active Blood Red Skies Facebook group, for which Ken is an admin – ed.) after-action reports!
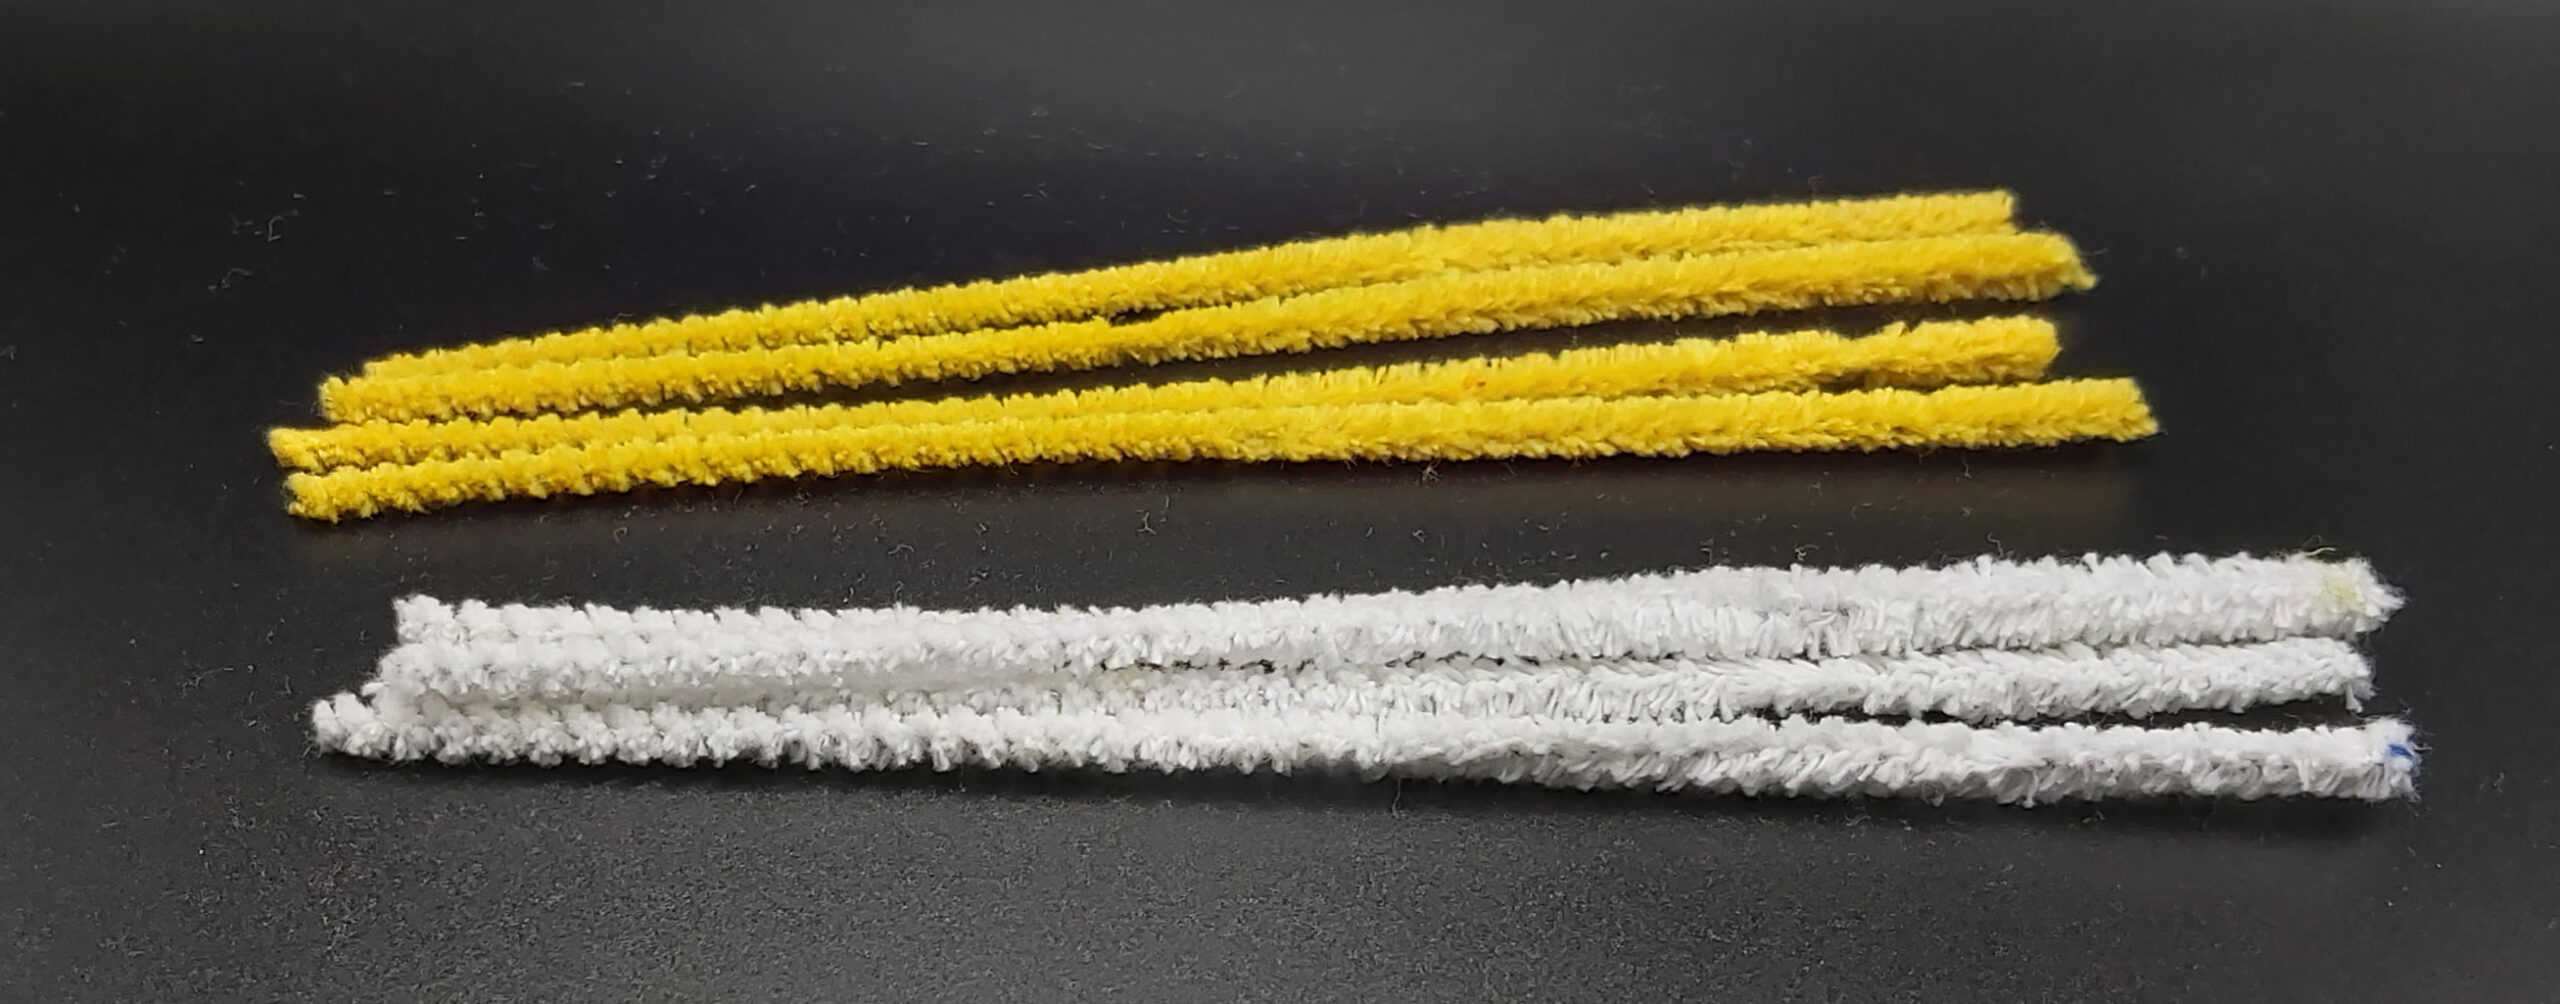
Making them is very easy. All you need are pipe cleaners (get them from your local hobby or craft shop) and paint. Actually, you can just use black pipe cleaners and not bother with paint if all you want is a smoking engine, but they’re not quite as pretty.
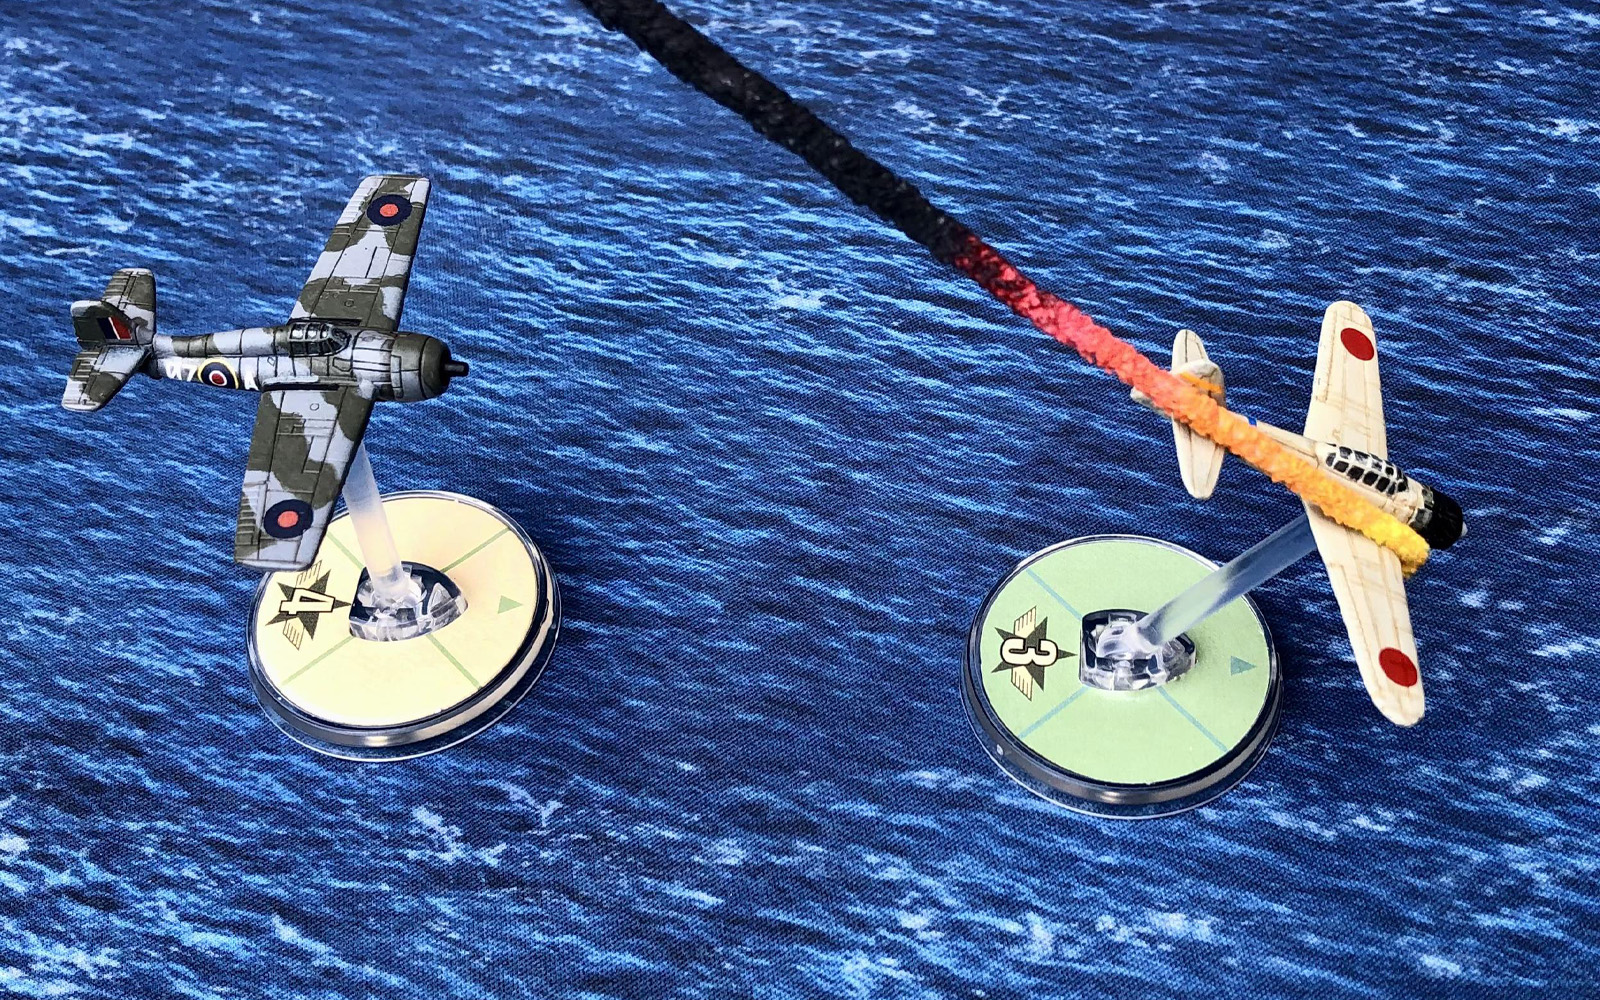
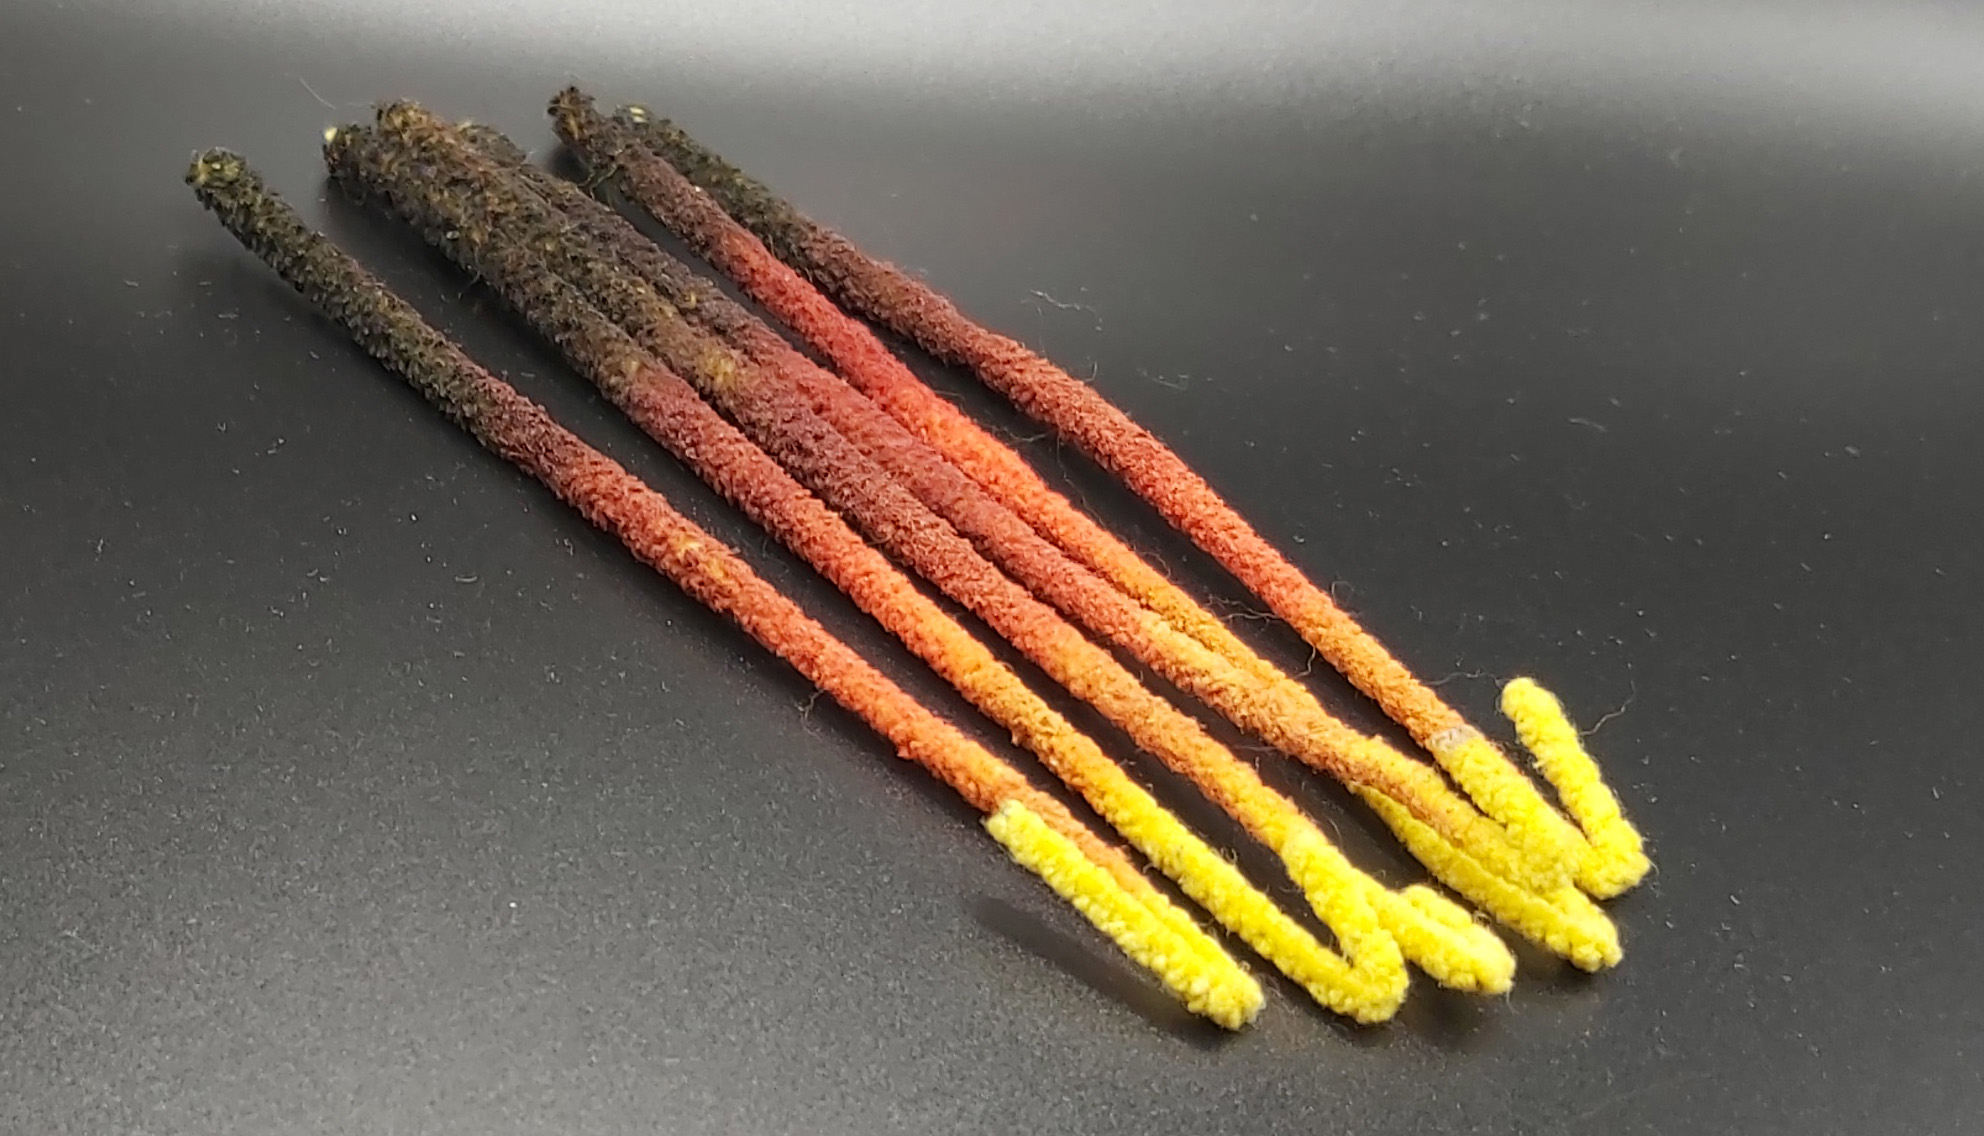
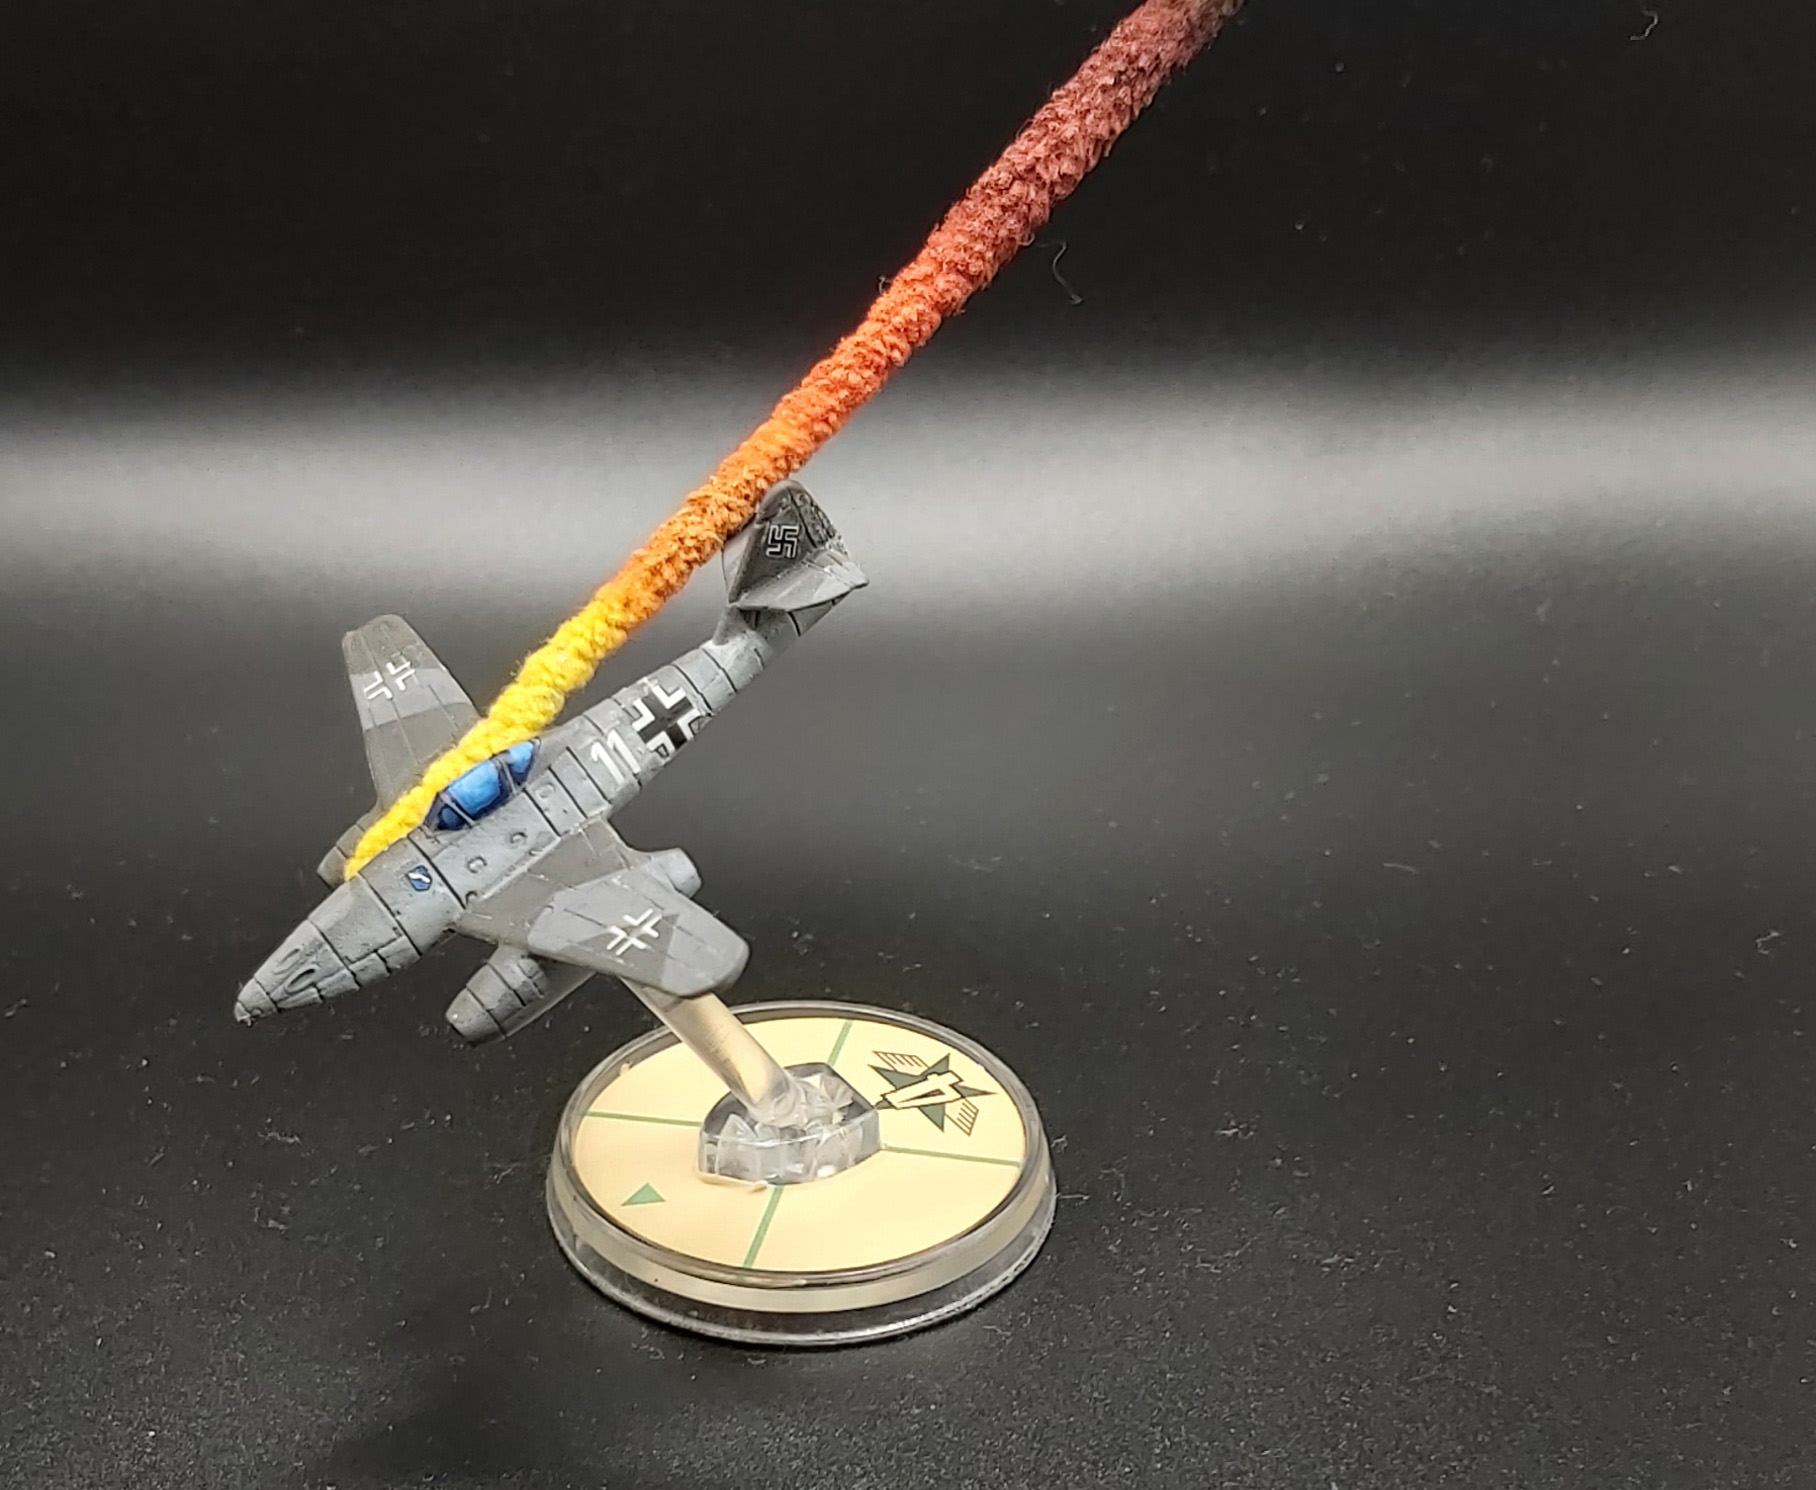
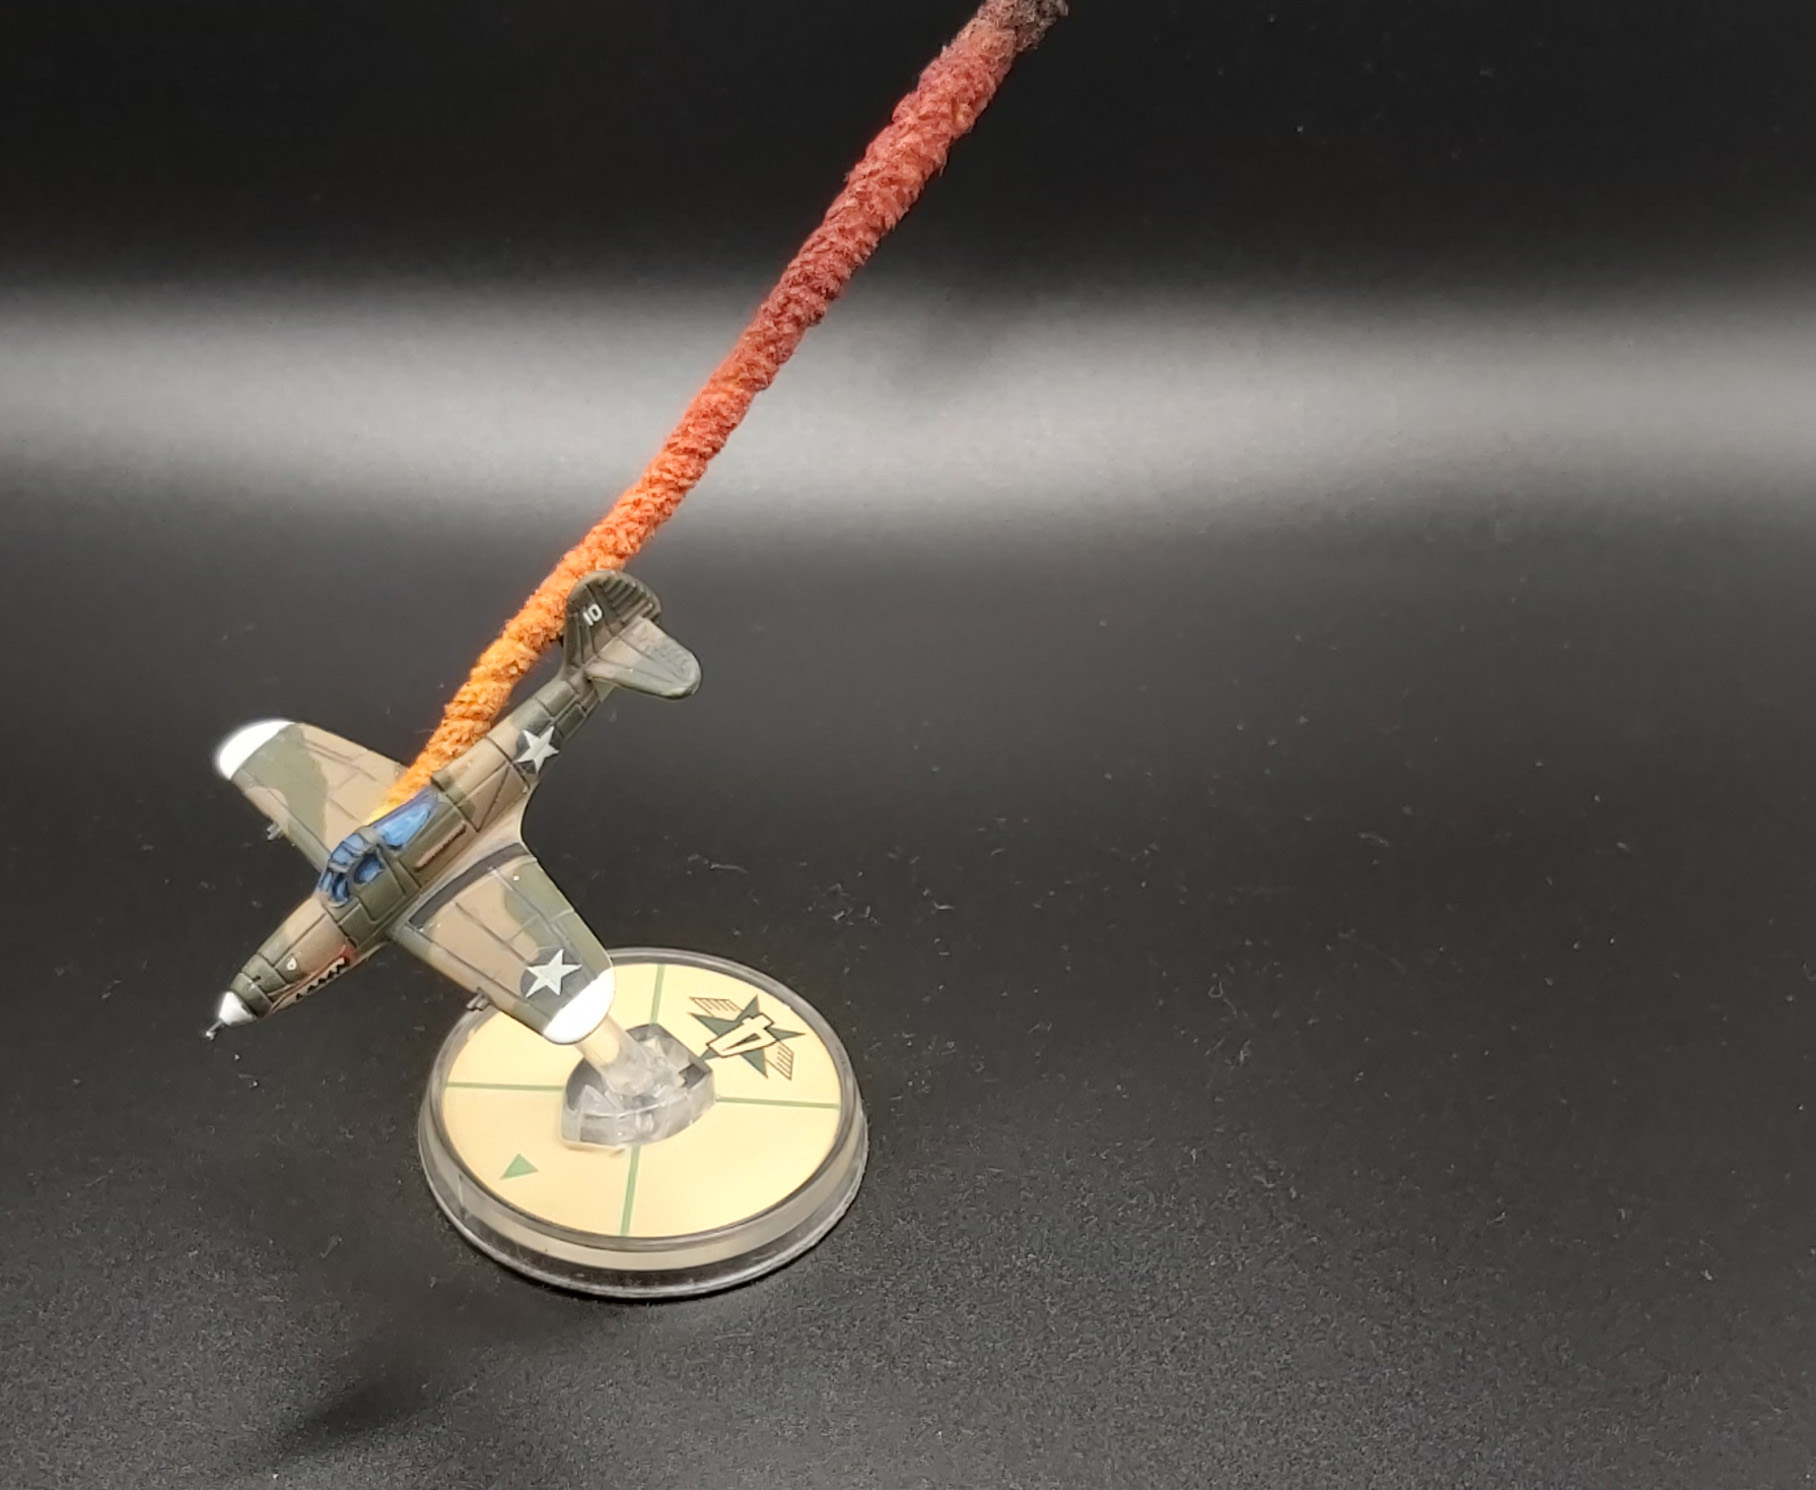
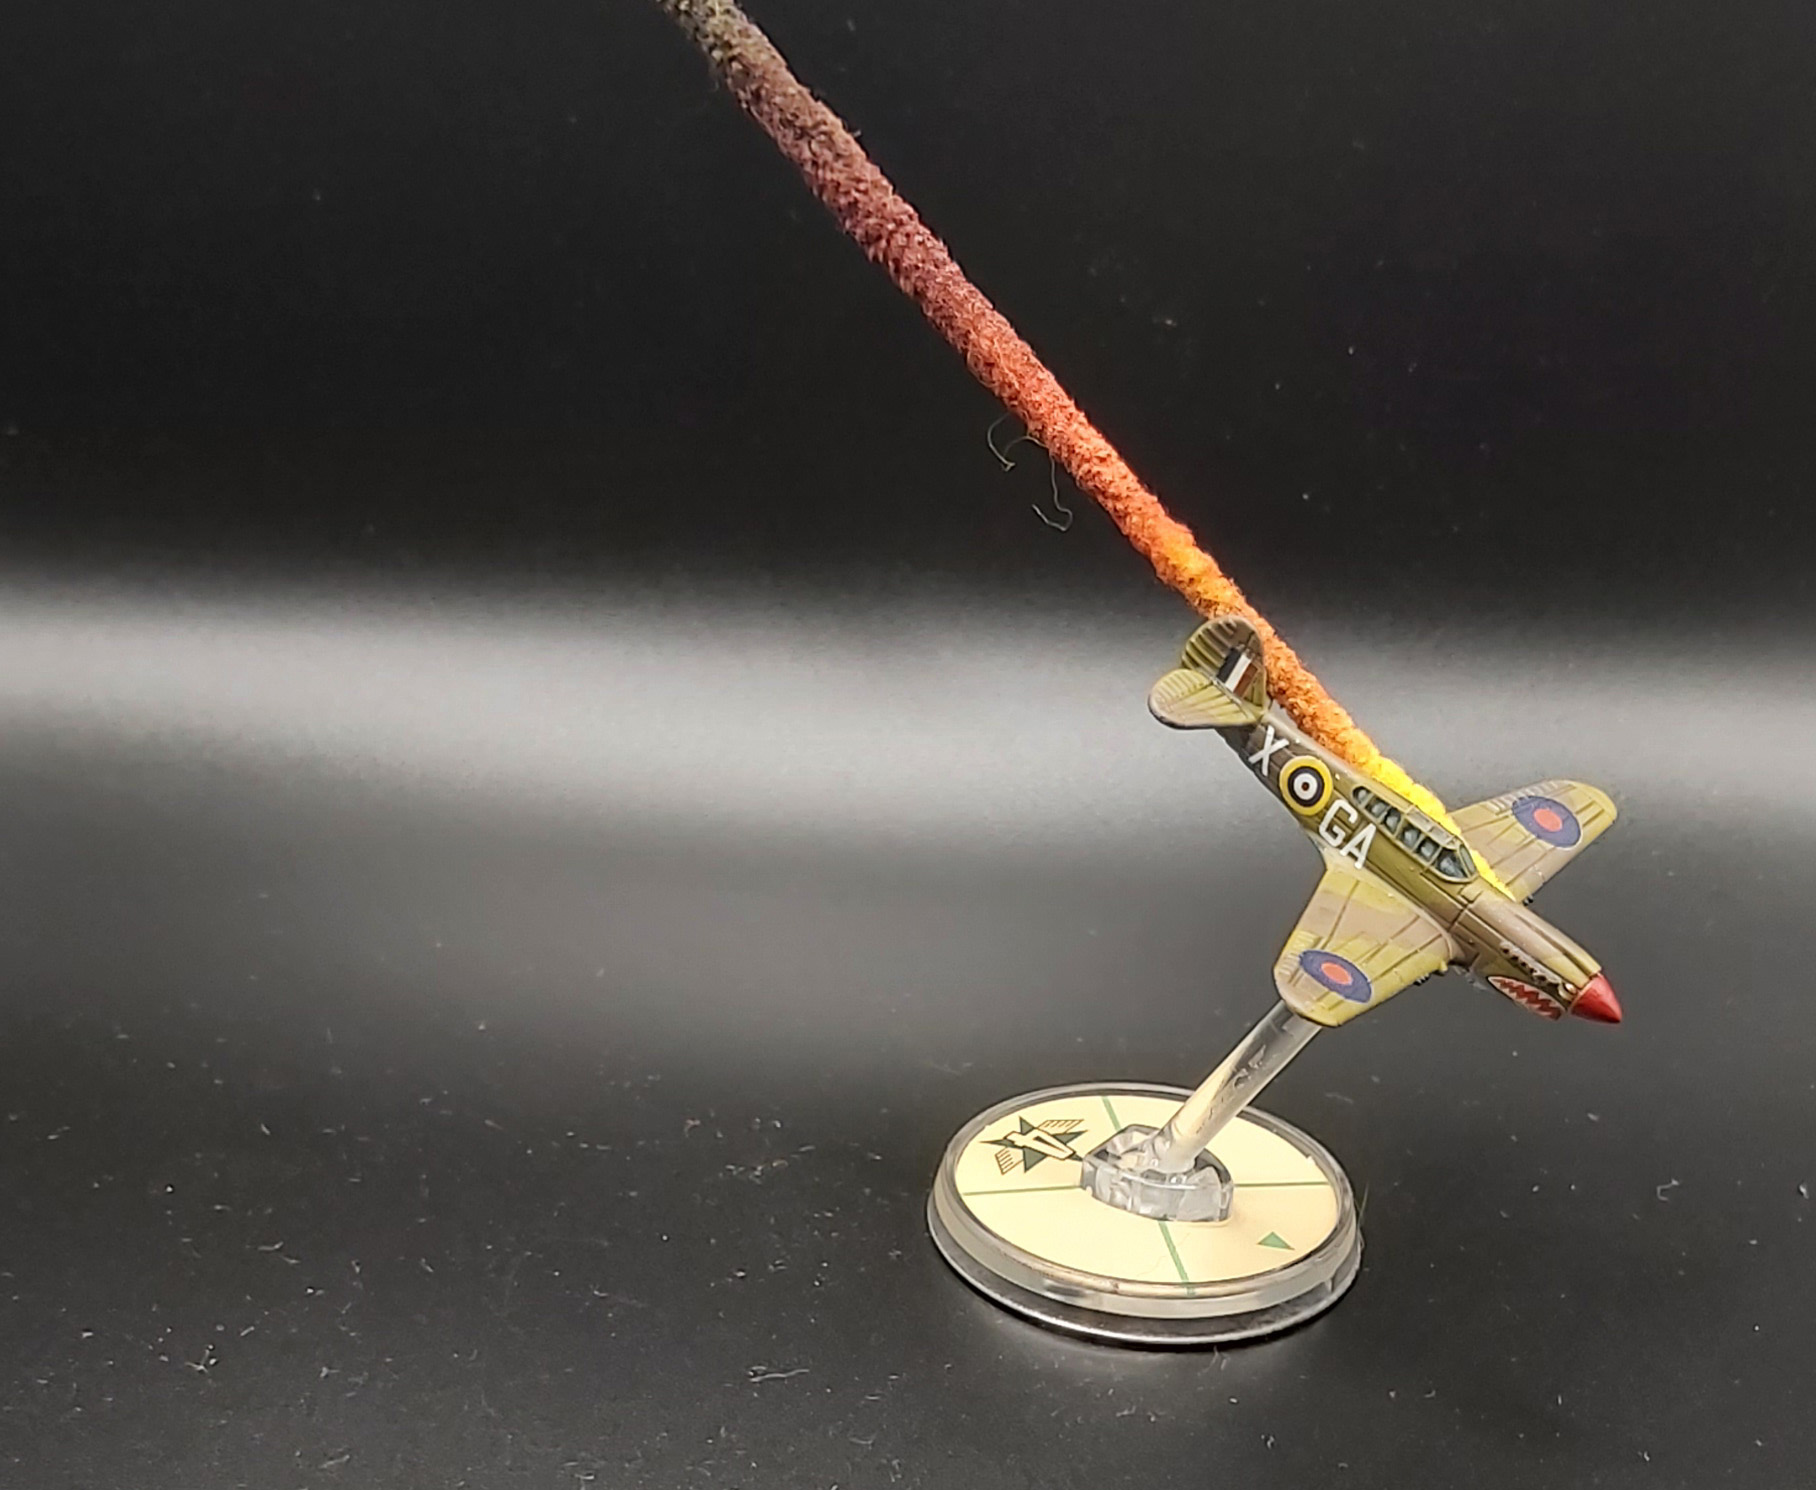
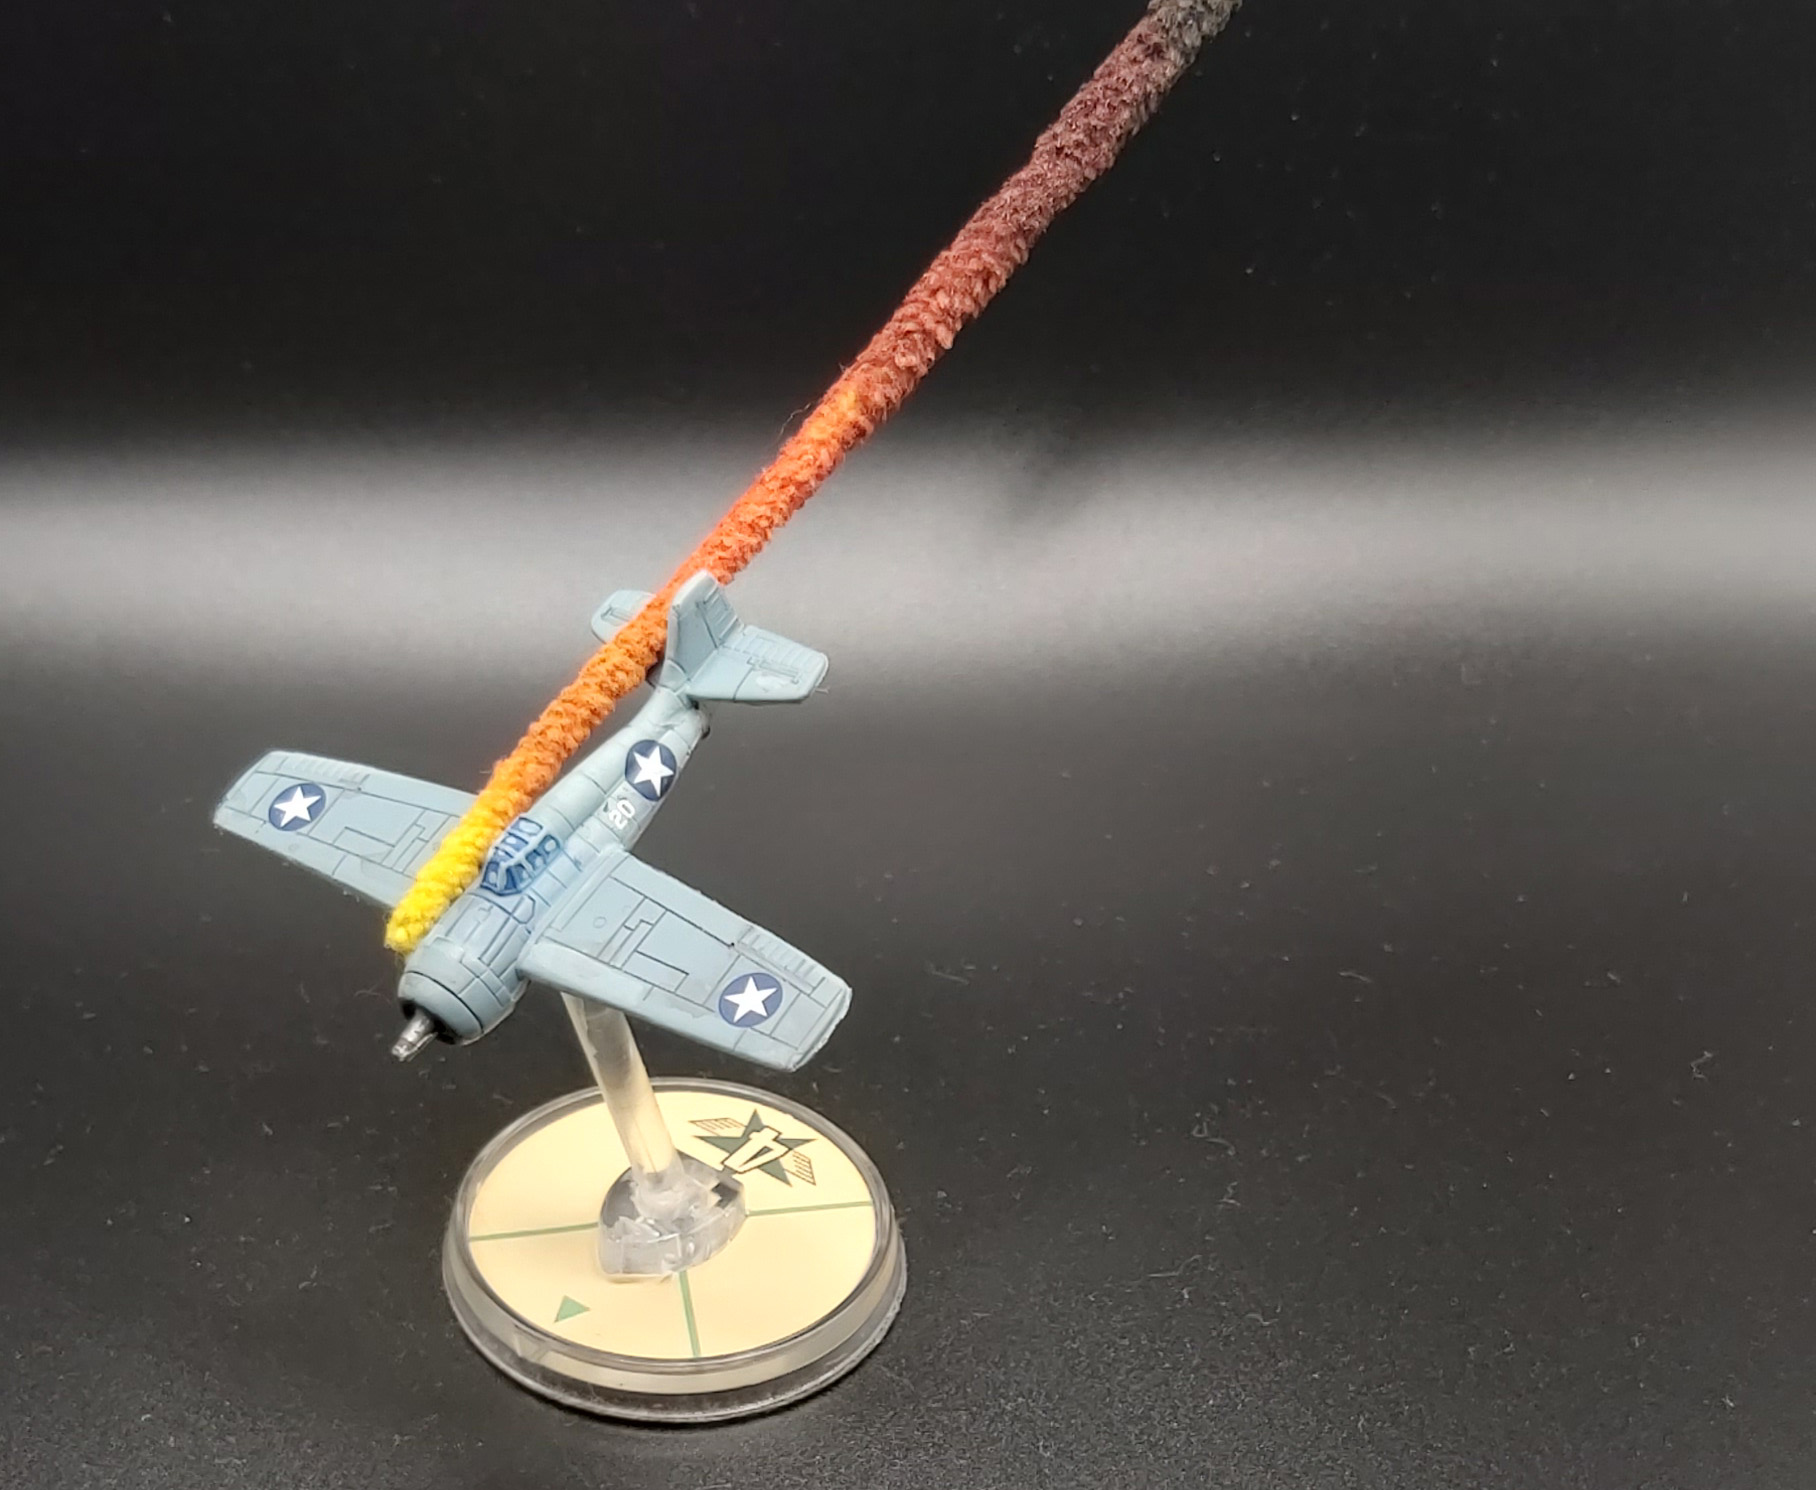
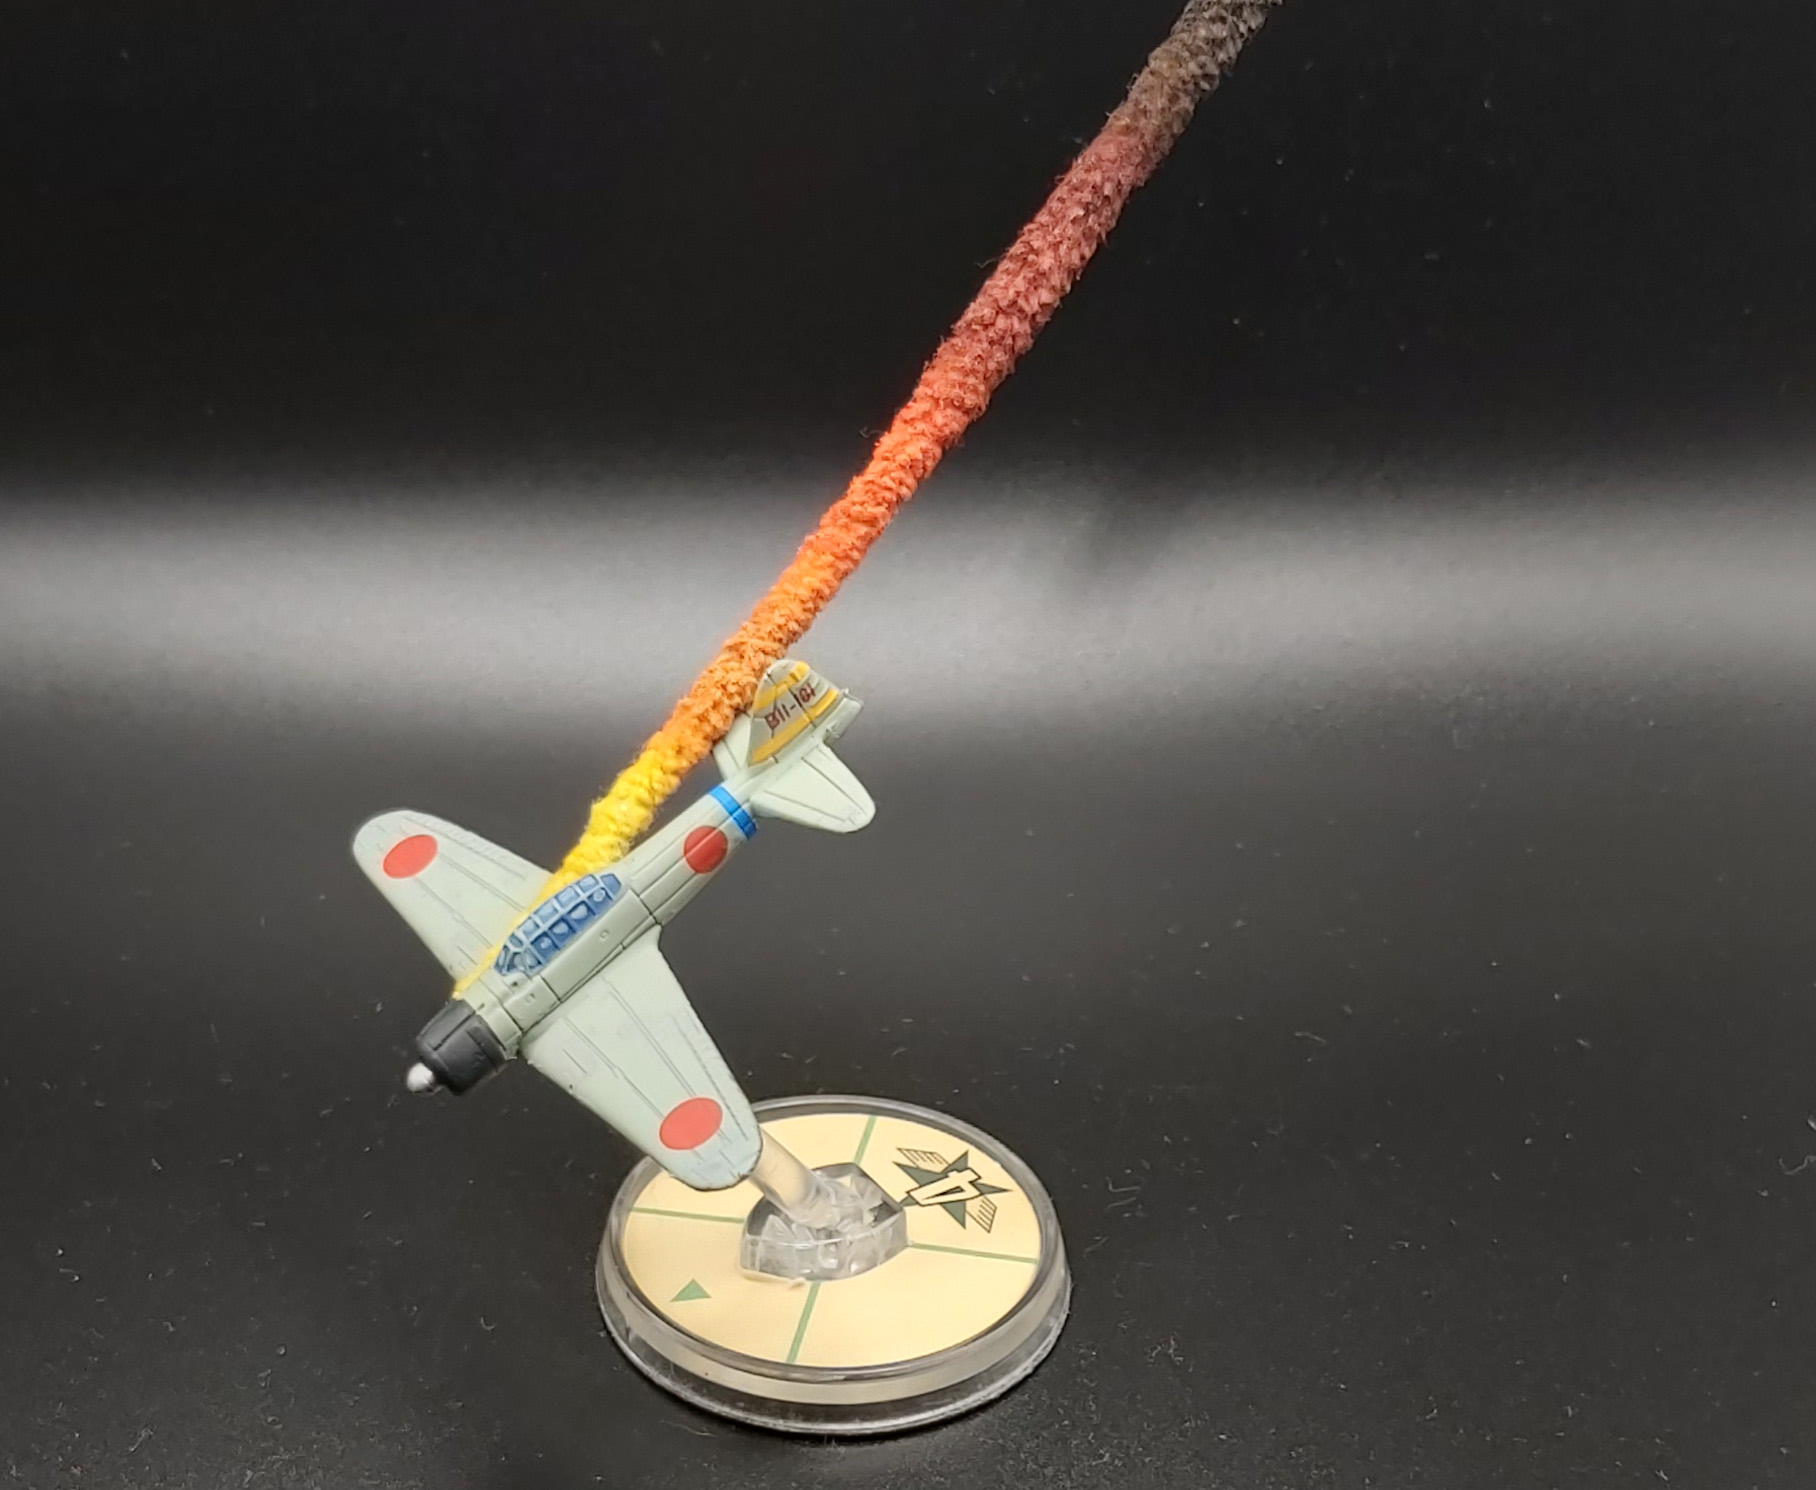
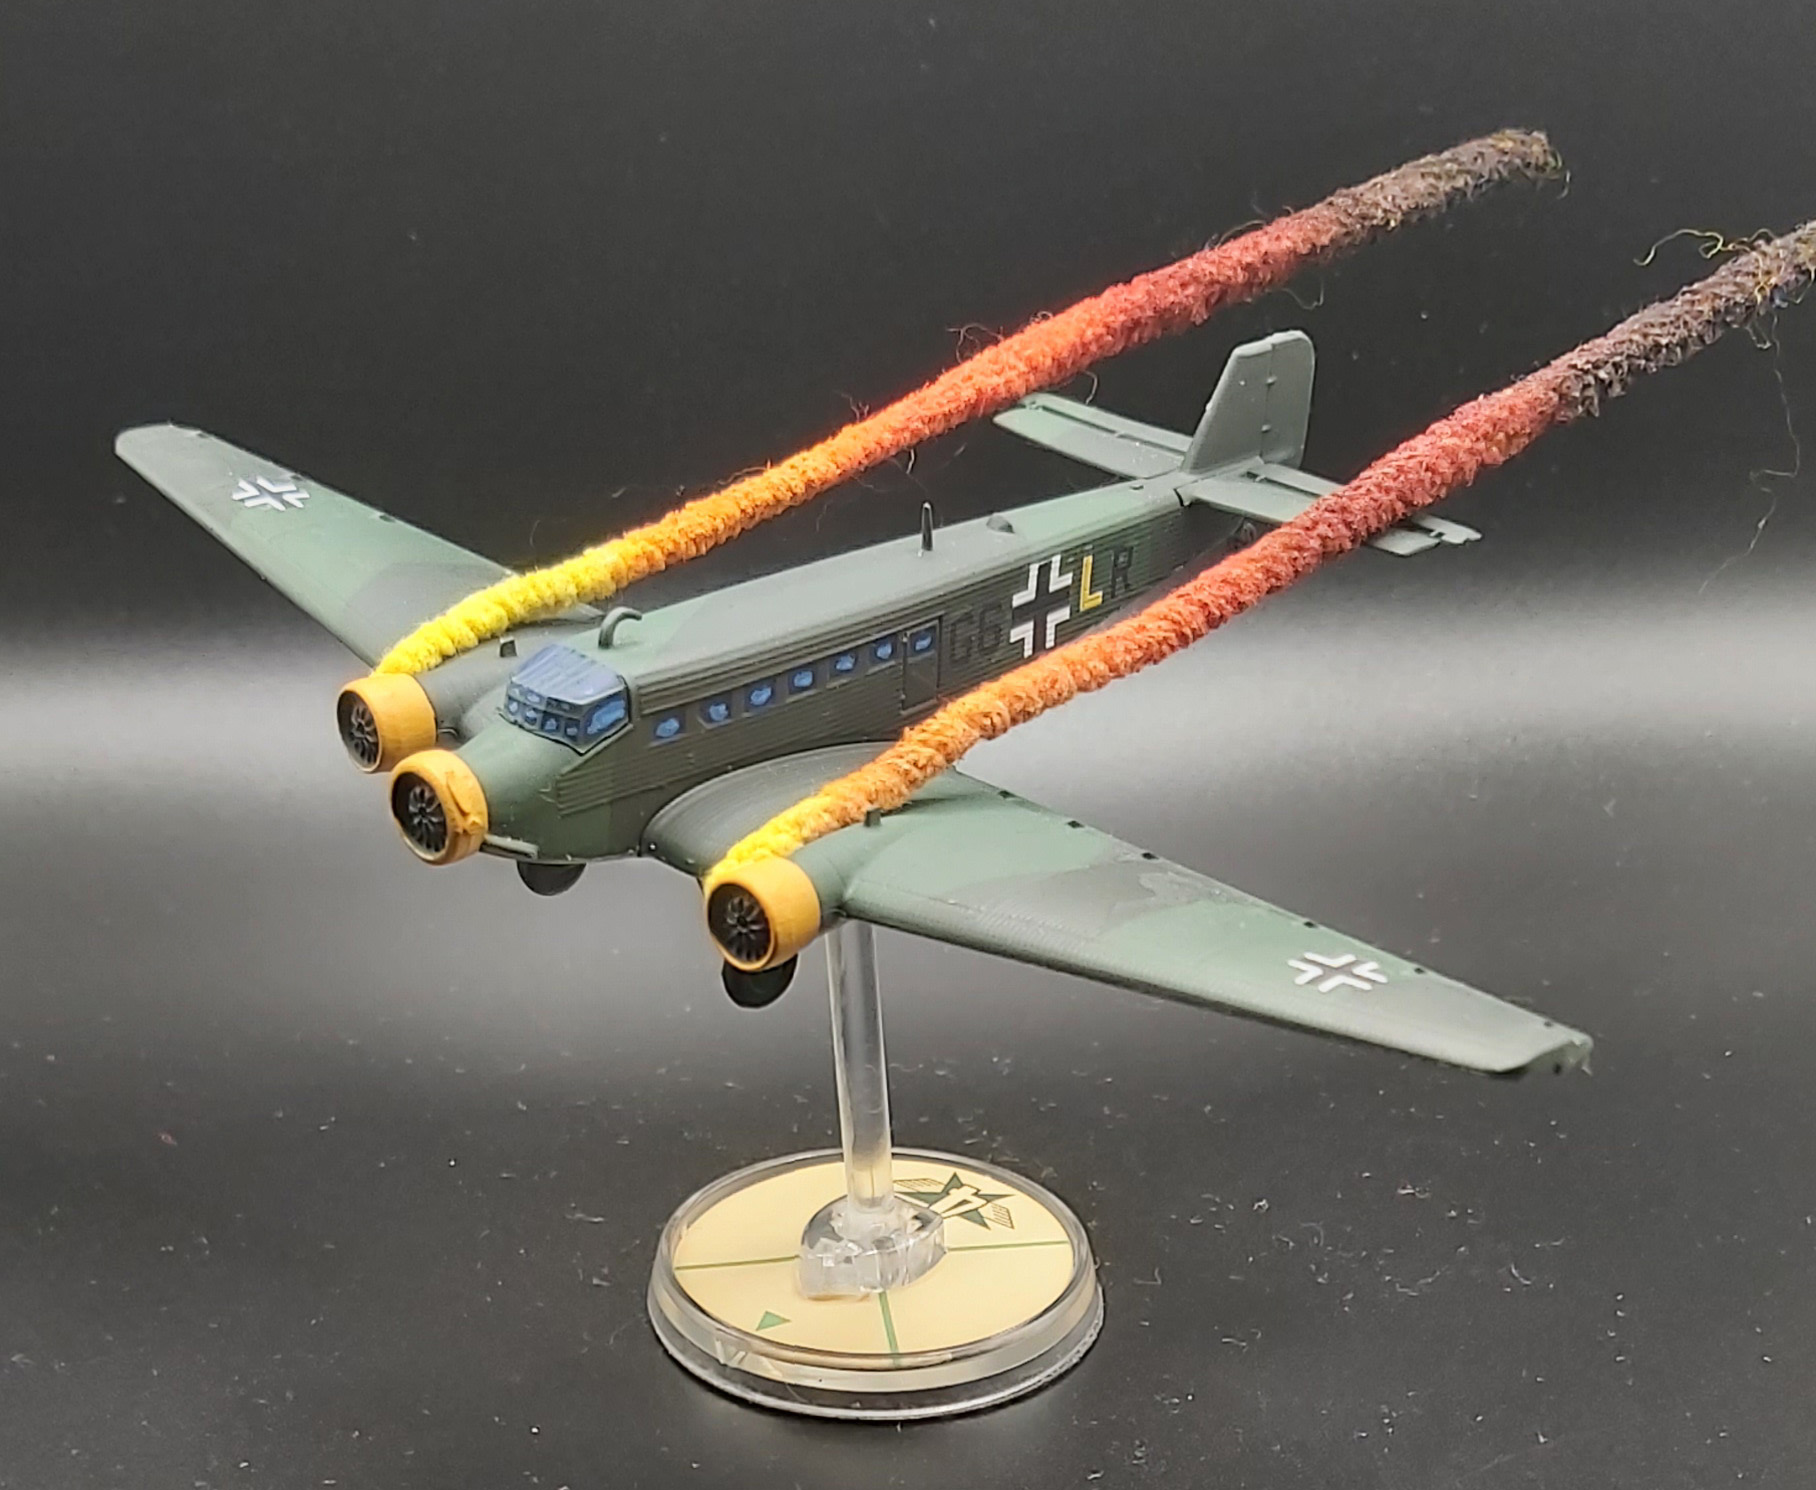
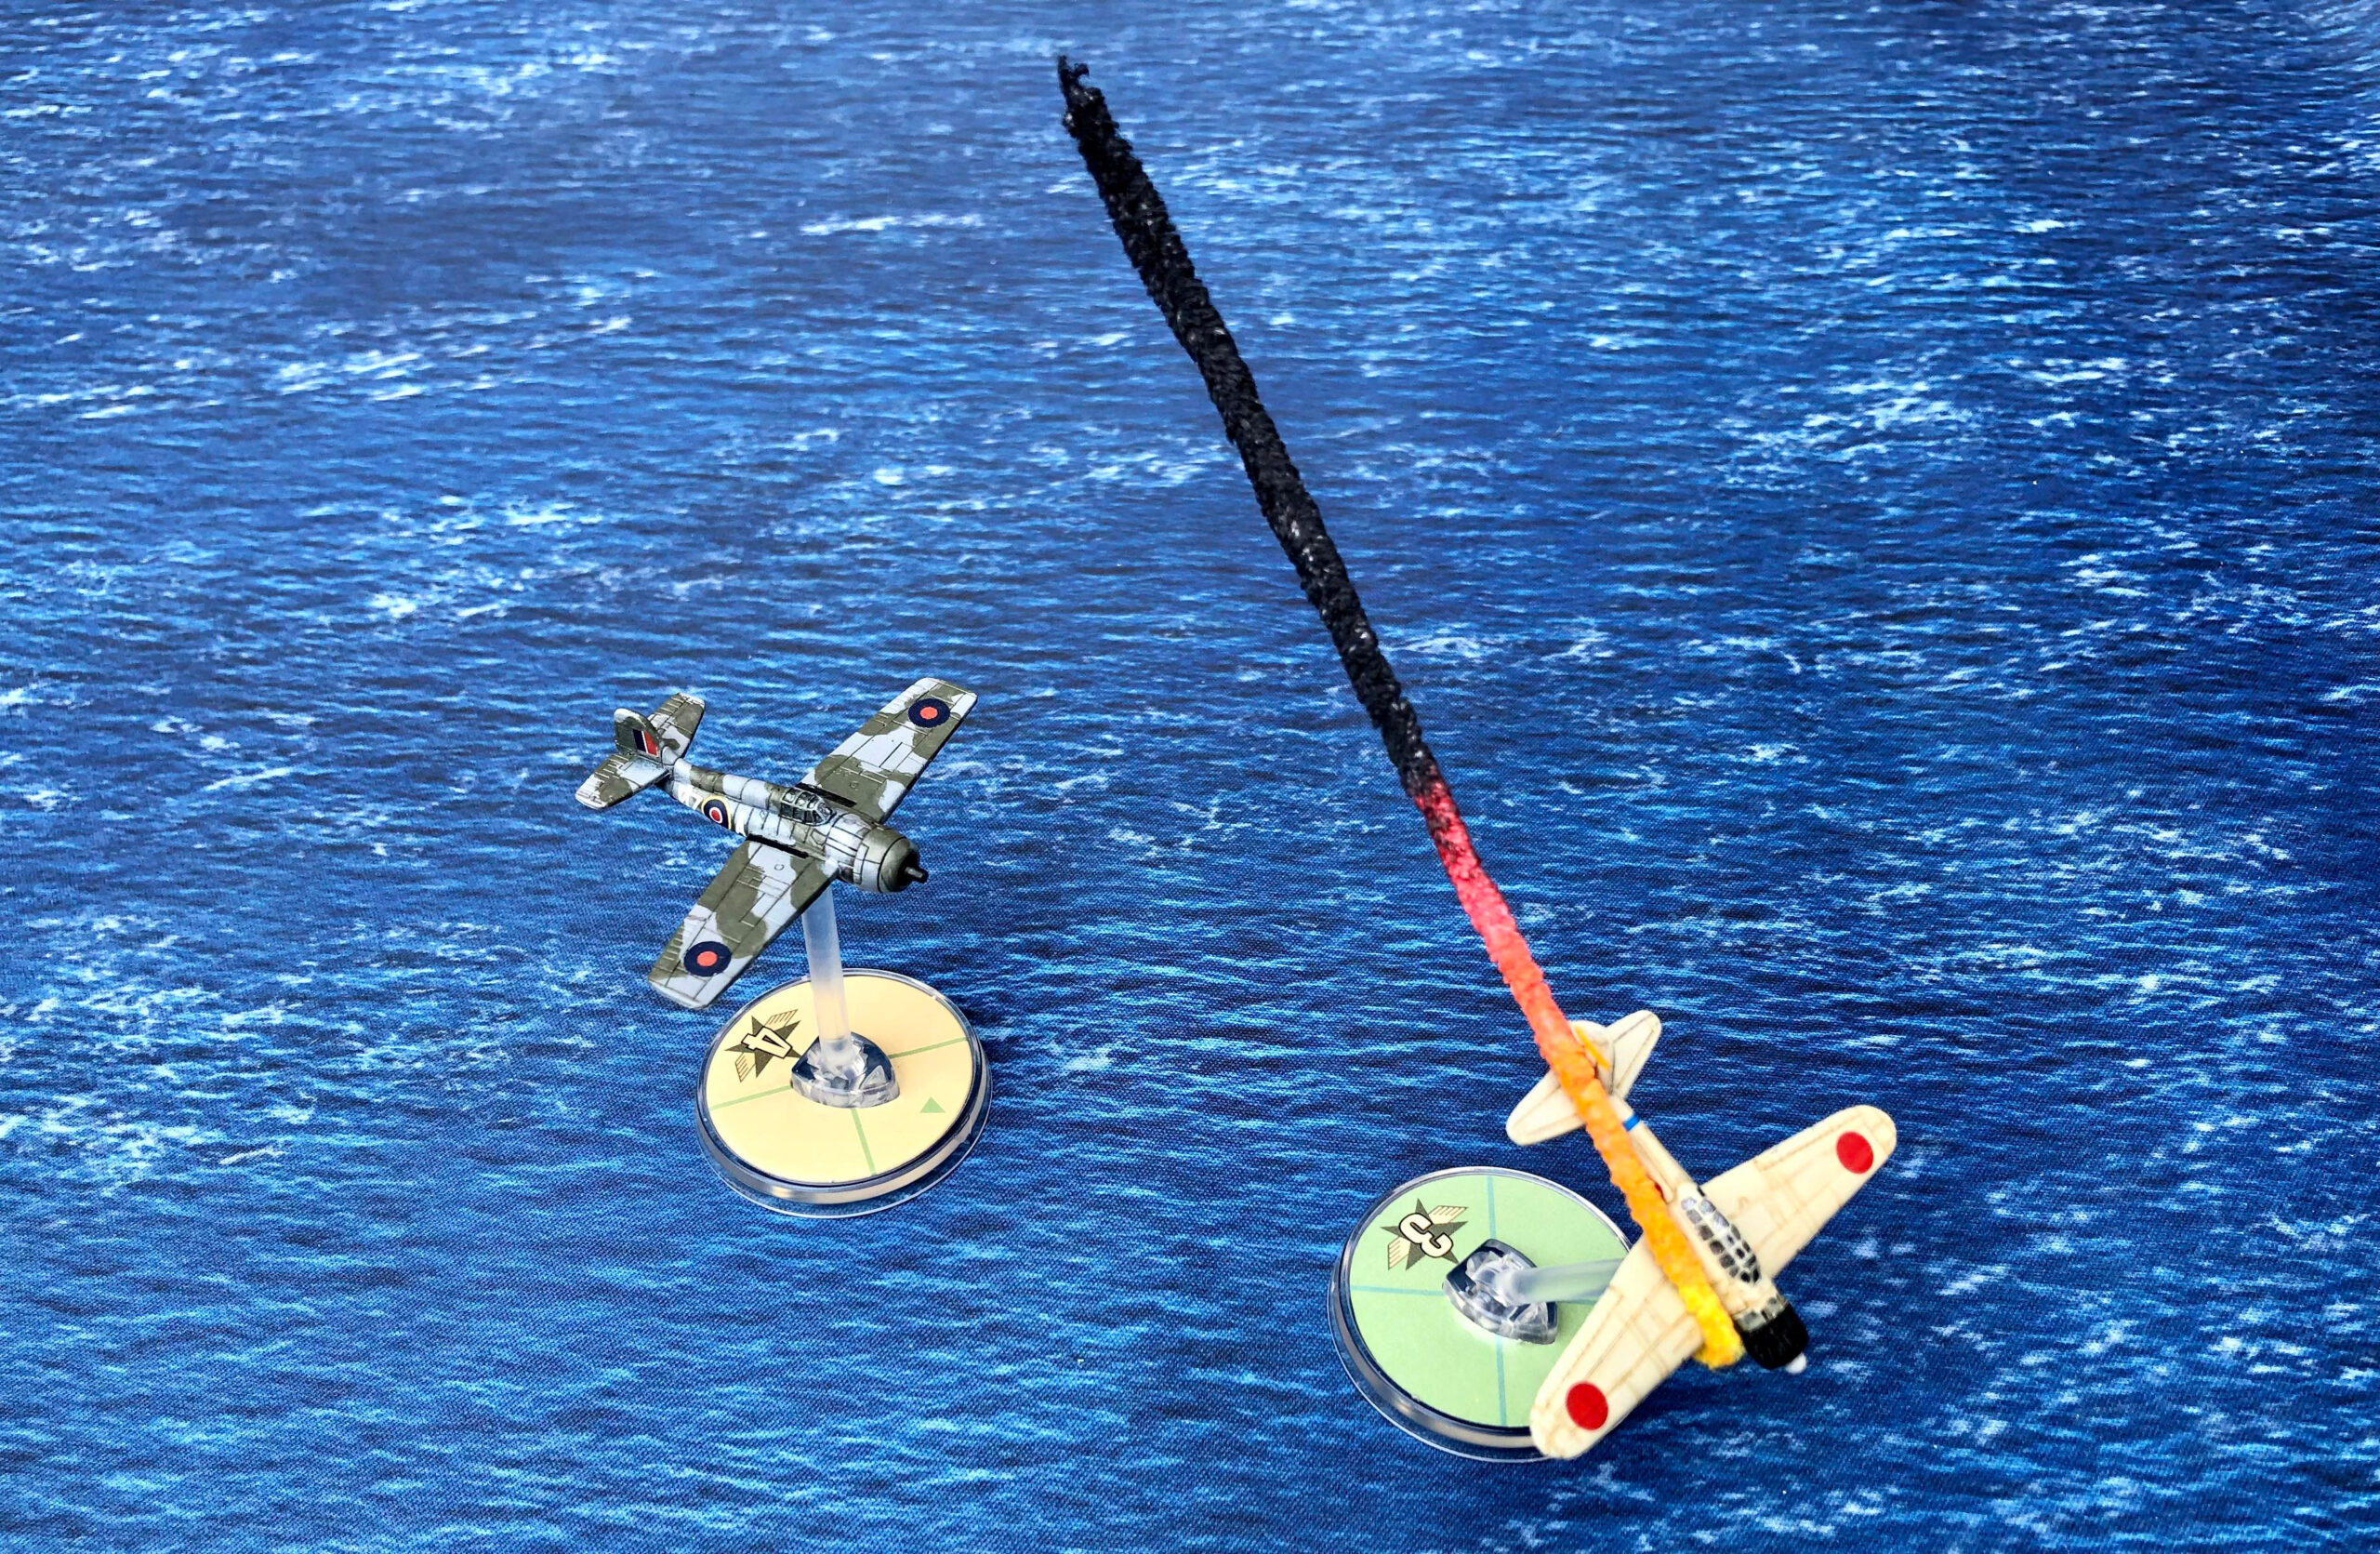
There is some debate as to which colours work best. This is partly because there are not a lot of colour pictures or film of real WW2 engine fires, and partly because they can be very different depending on the type of fire. Generally, I think the fire burns hottest at the front where it is bright orange or yellow, then gradually changes to red then oily black. But there are no rights or wrongs, just experiment until you find something you are happy with.
Yellow is amongst the most notorious of colours to paint so some players simply start with yellow pipe cleaners to avoid having to paint any. Others like a white base, though I think black or brown works equally well.
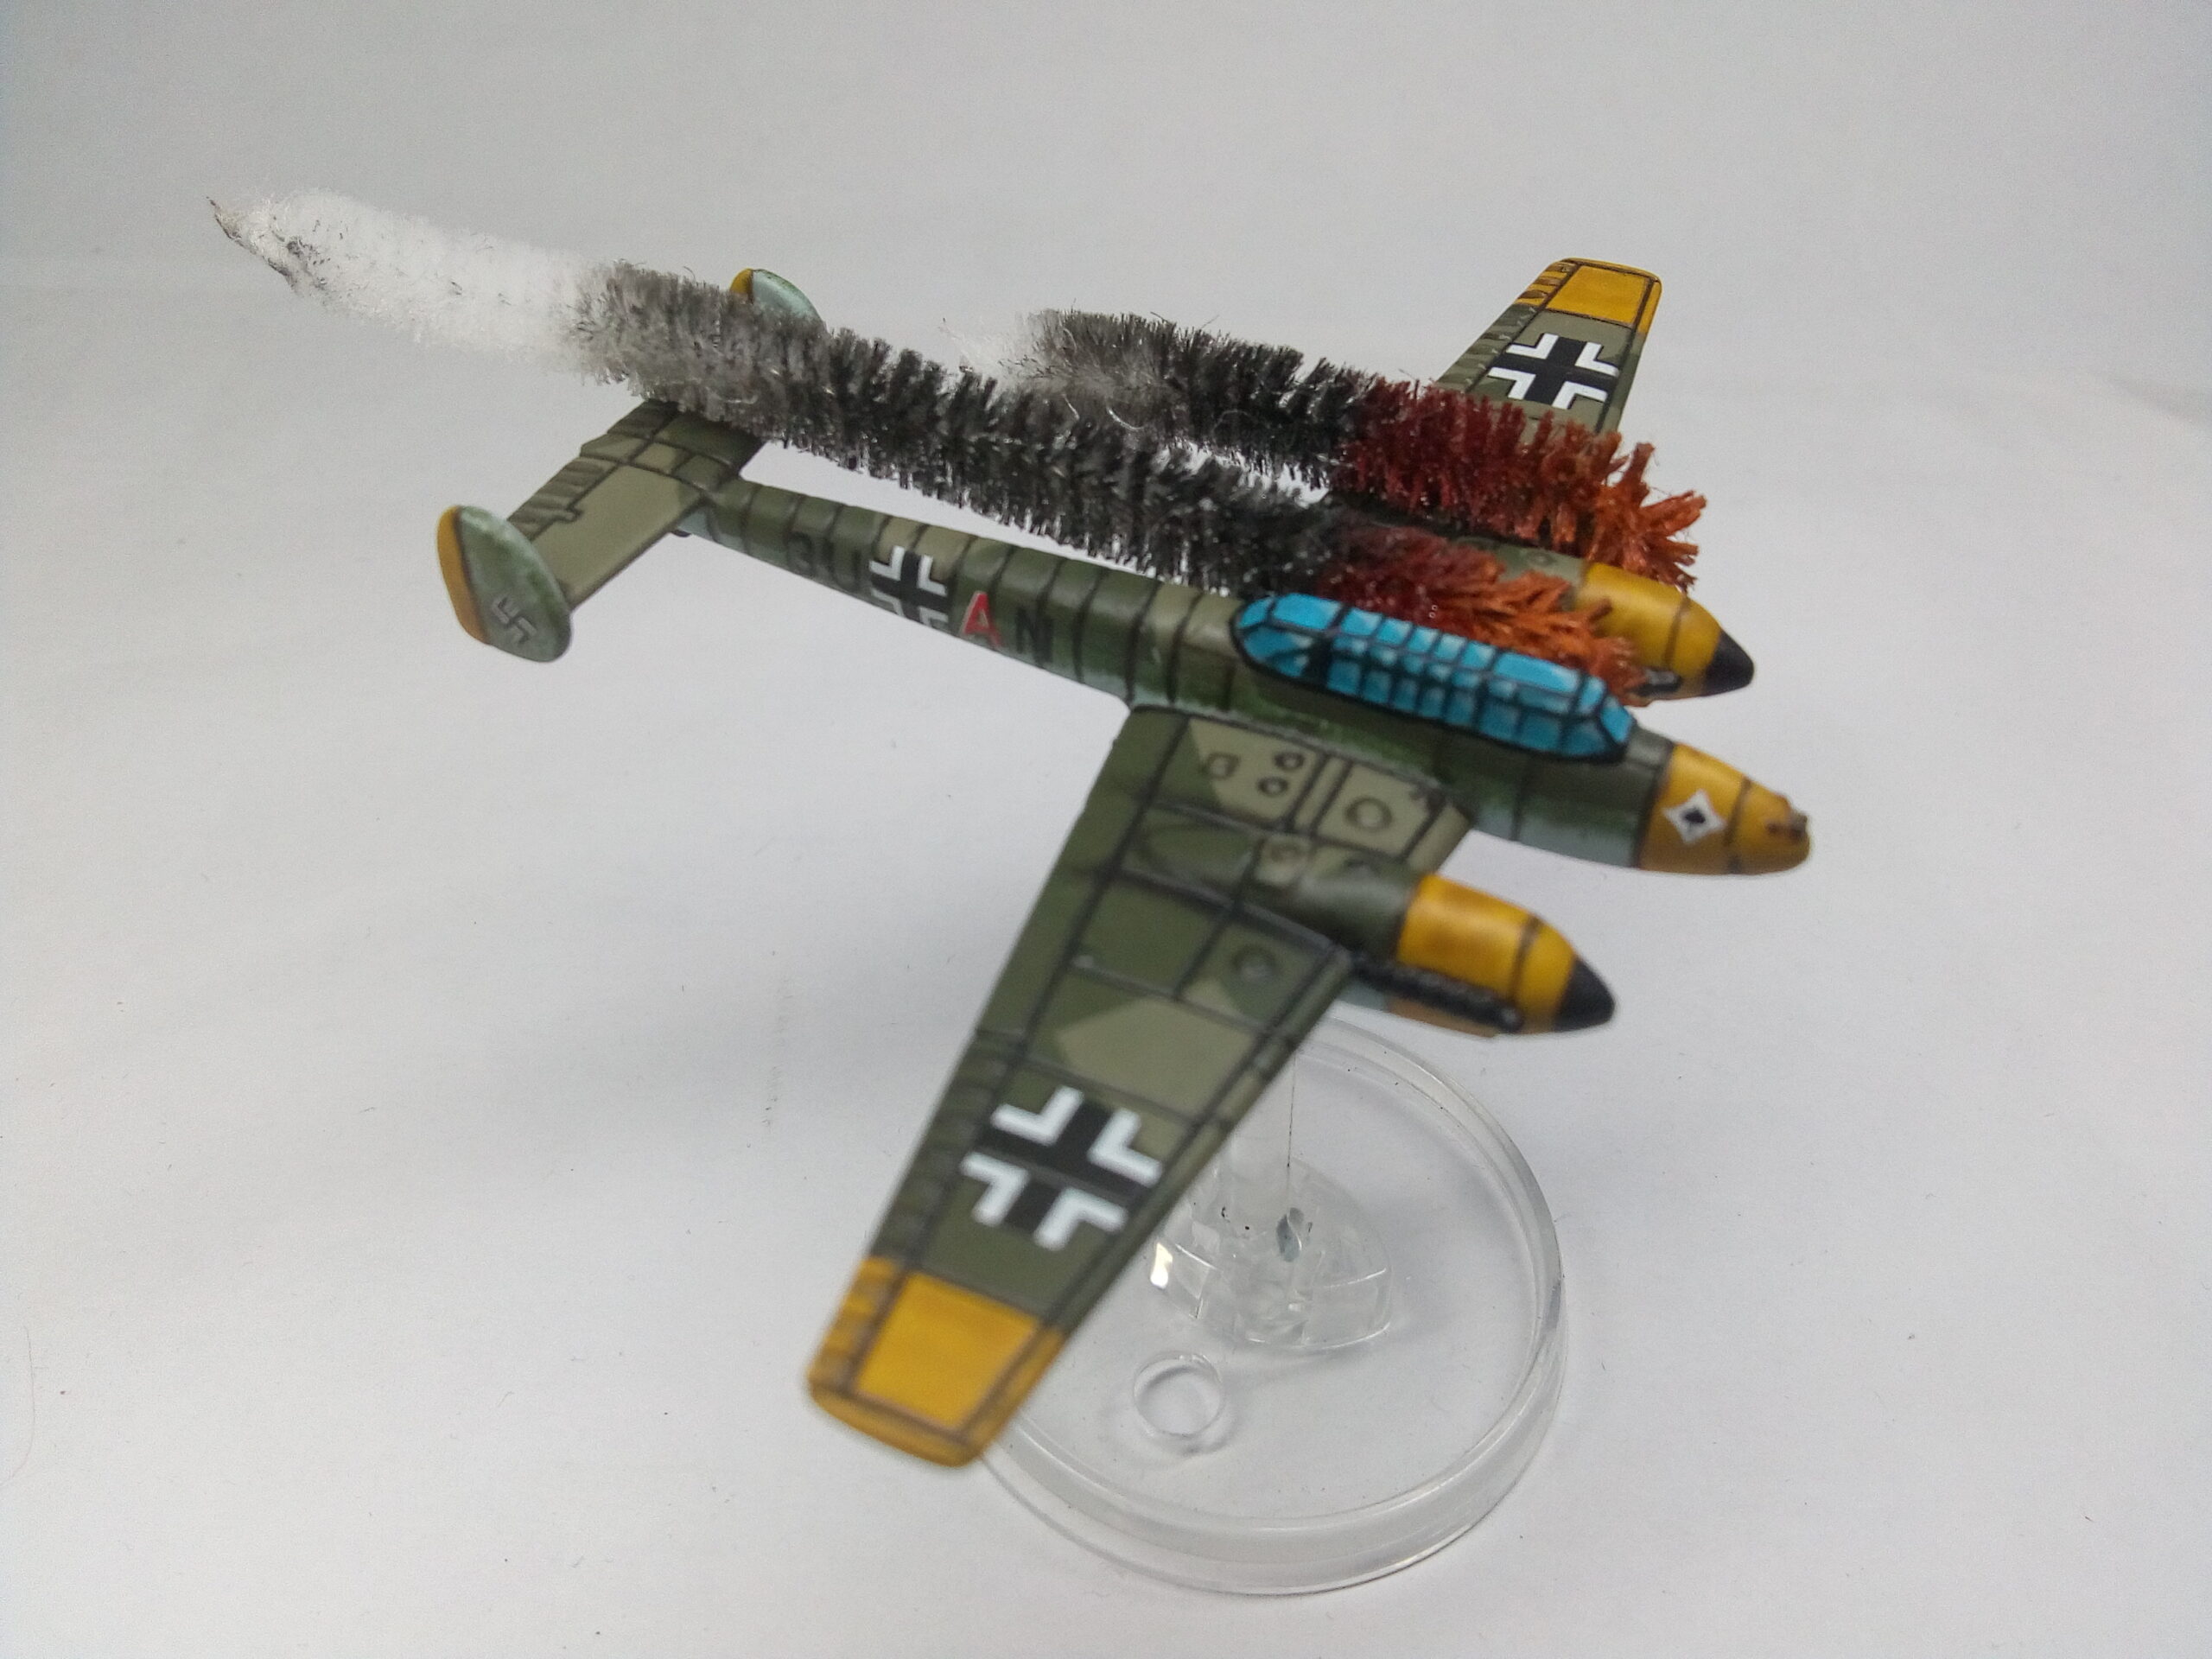
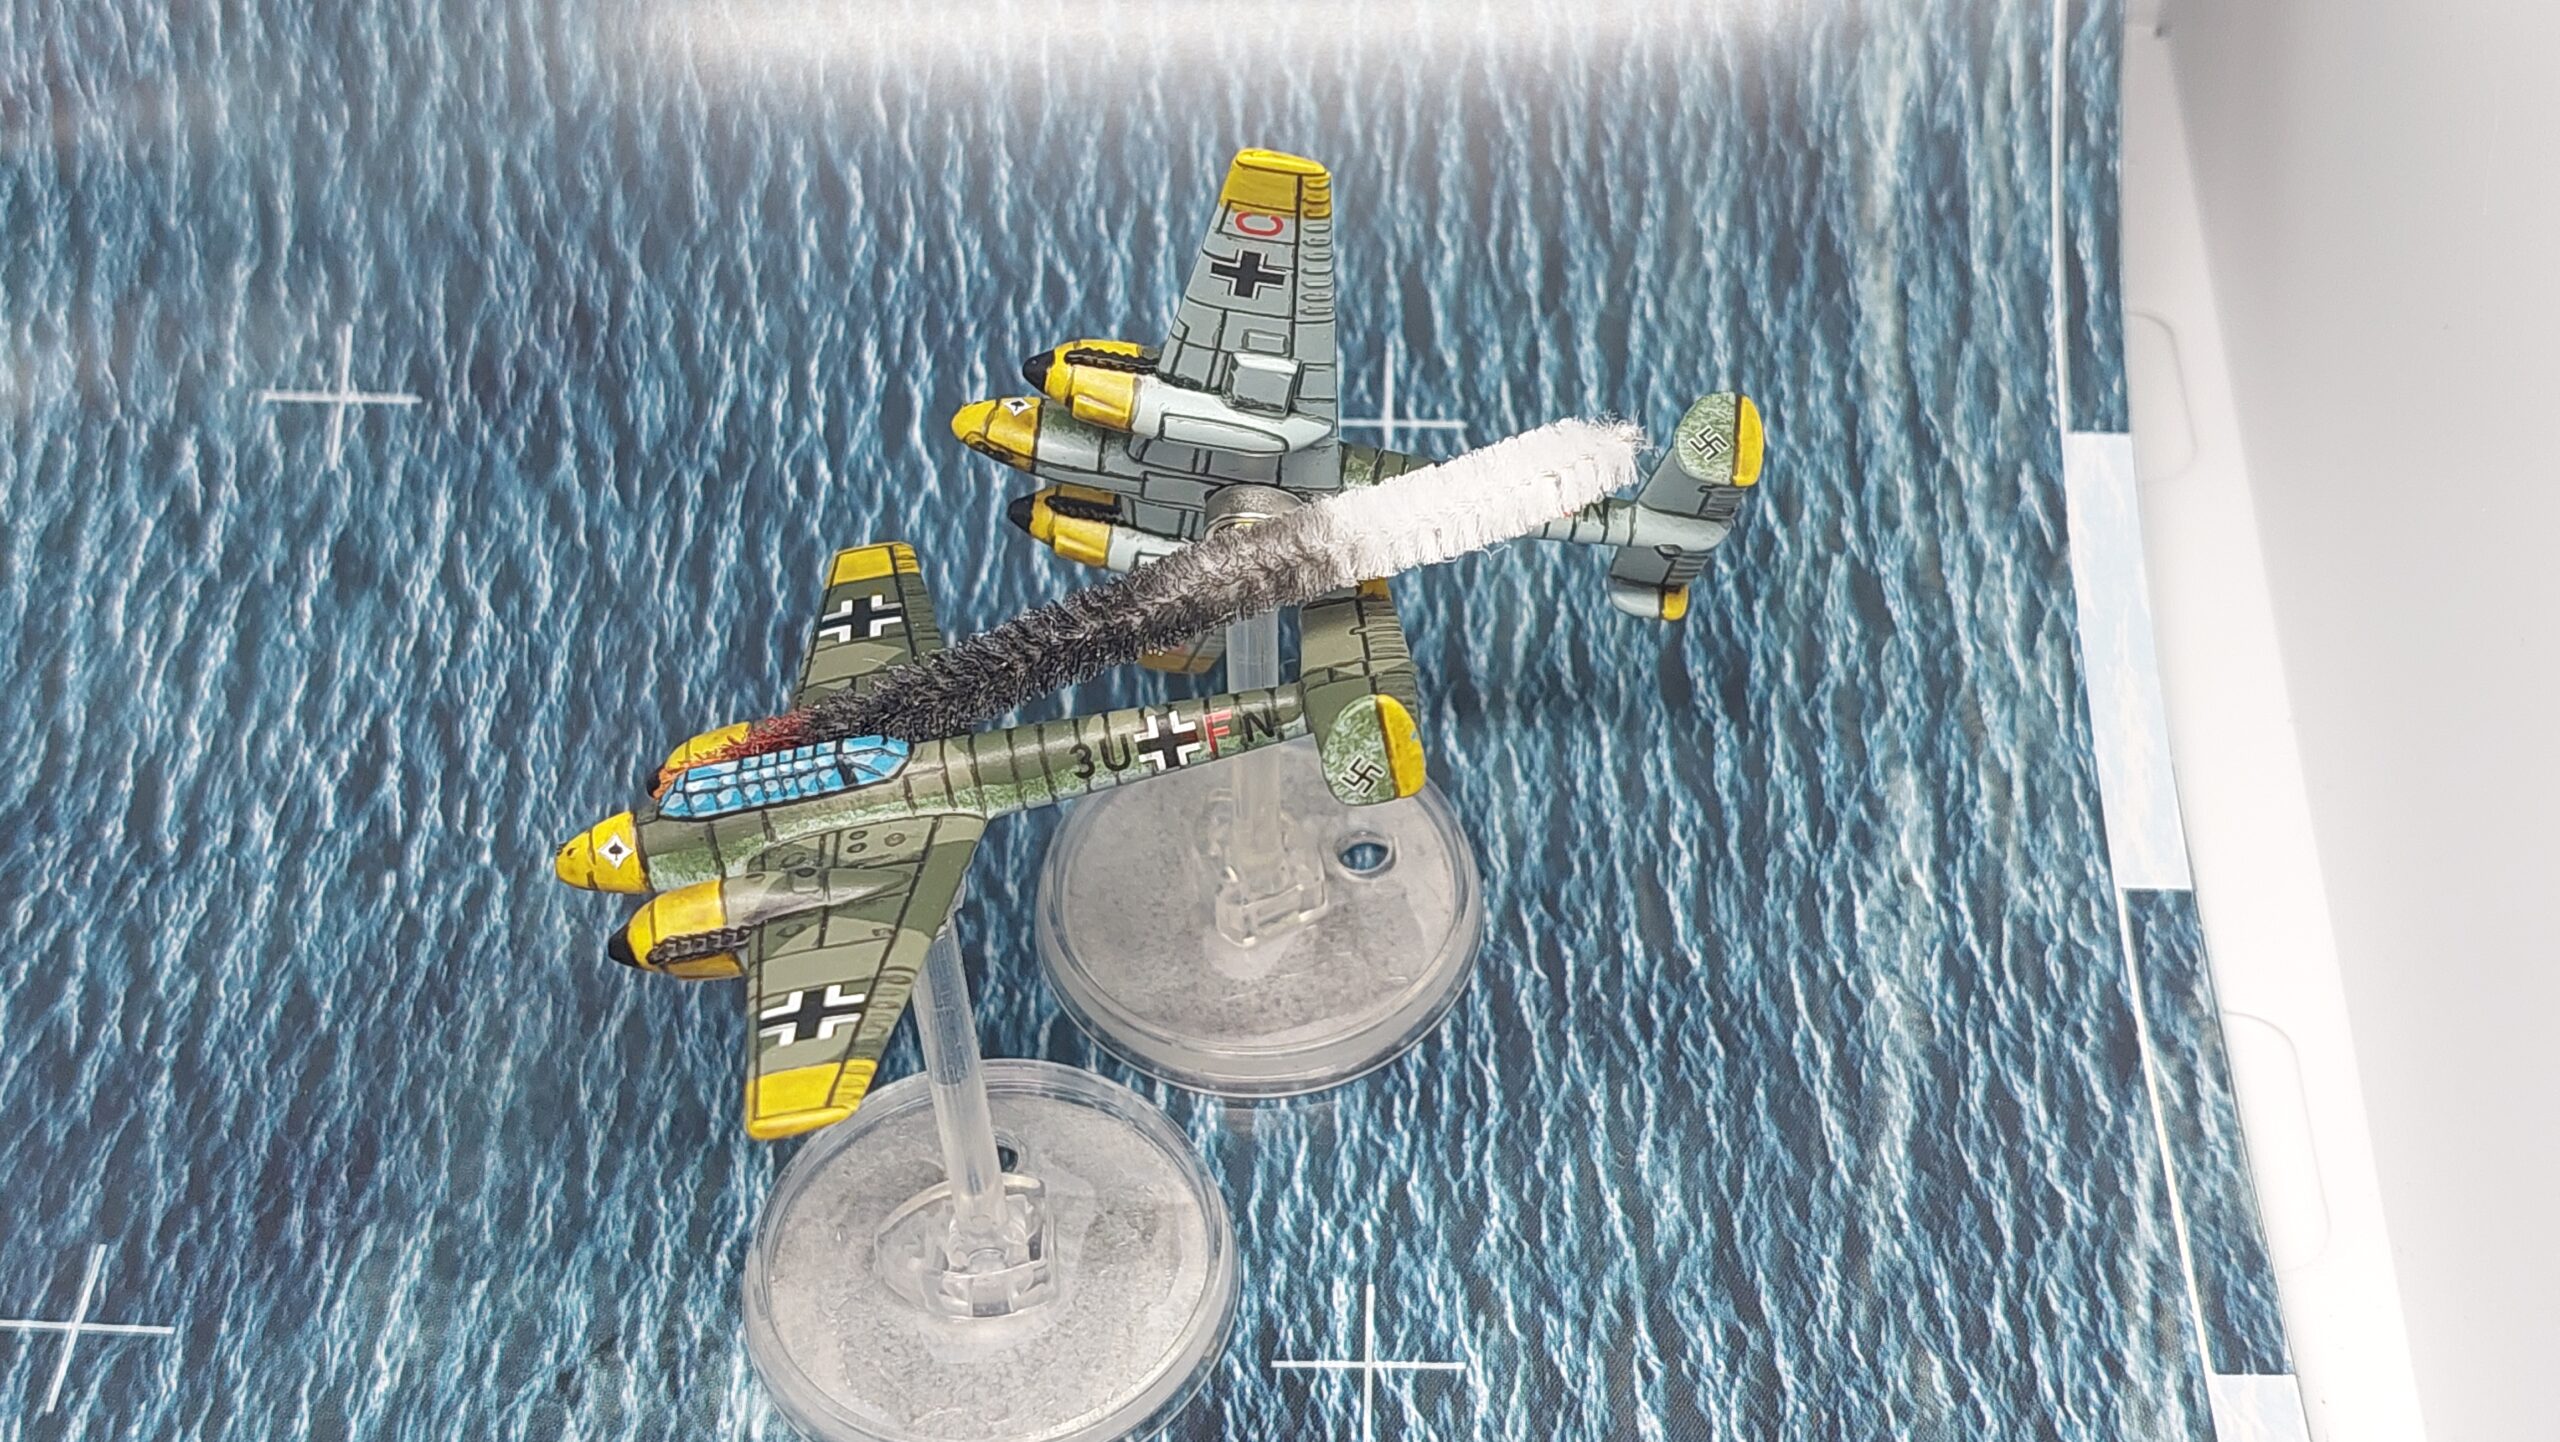
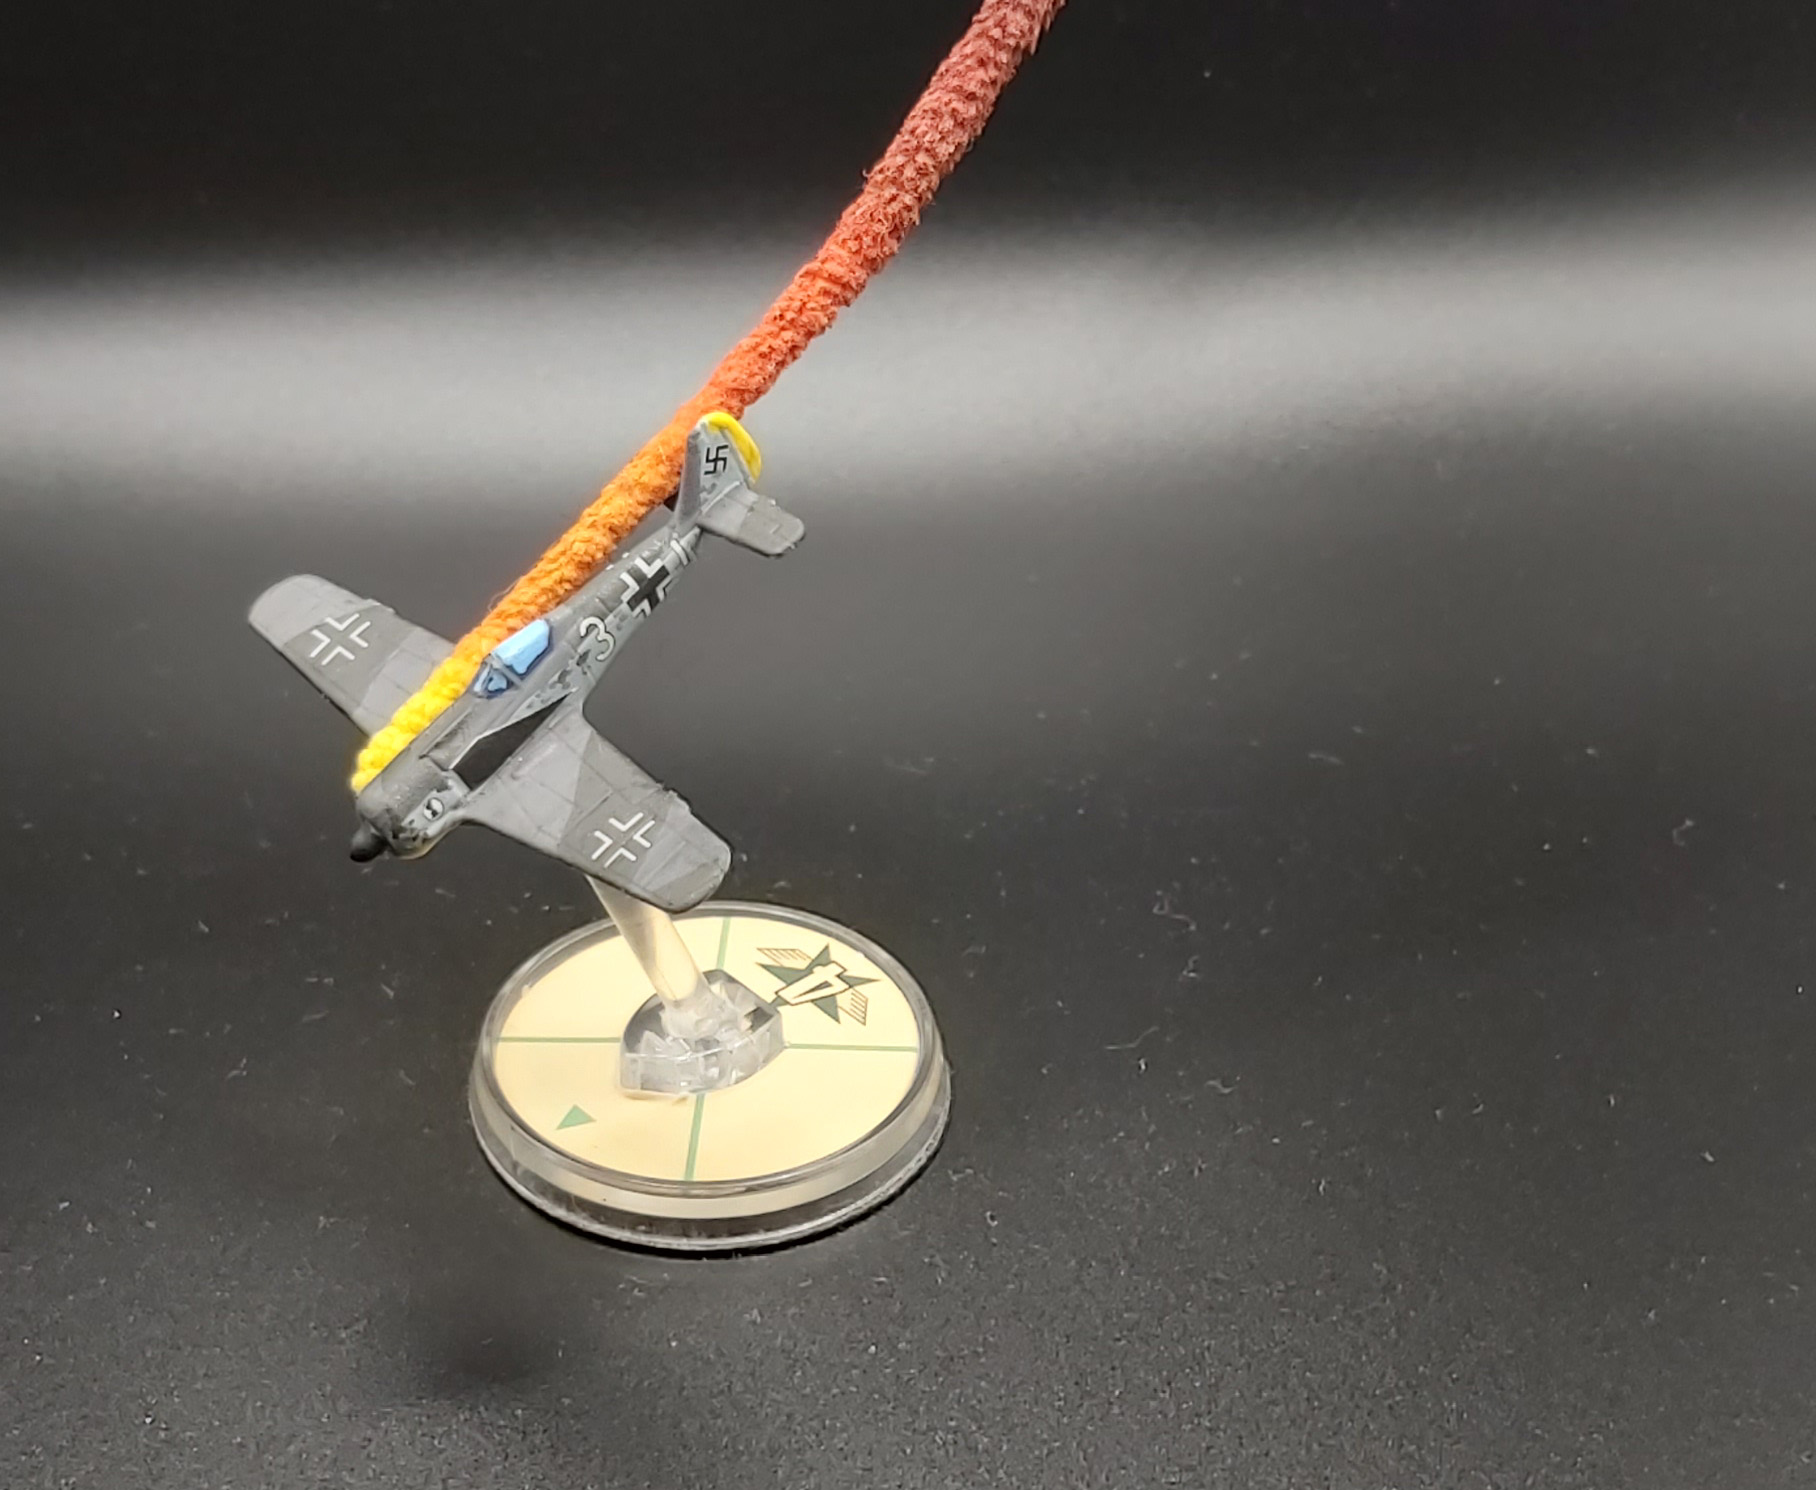
Remember your fire/engine out marker needs to be able to attach to the model. To do this you simply bend over the first inch of cleaner into a hook shape that can be wrapped around a wing or engine on your model. It is probably easiest to do that prior to painting as it will show you exactly where the ‘hottest’ point of the flames will need to be. Next, think about how long you want your marker to extend behind your model – too long and it gets in the way of moving the model around, too short looks a bit naff. I think six inches is about right, though this is entirely down to preference and different lengths will achieve different aesthetics (see the galleries below).
Now for painting. You can use any sort of paint and system. Airbrush, rattle can, even just an old paintbrush, or a mix of all three. Normal brushing has the advantage of being cheap and easy but can be a bit messy. I use poster paint and an old brush.
I’d start at the front where the fire is hottest and paint that bright yellow, even white. Remember this section will be hooked around the model, representing the source of the smoke and/or flames. Then, work back along the smoke trail switching to orange/red and finally into oily black. There’s no need to be neat or delineate where one colour ends and the next begins. Leave it to dry and you should be done.
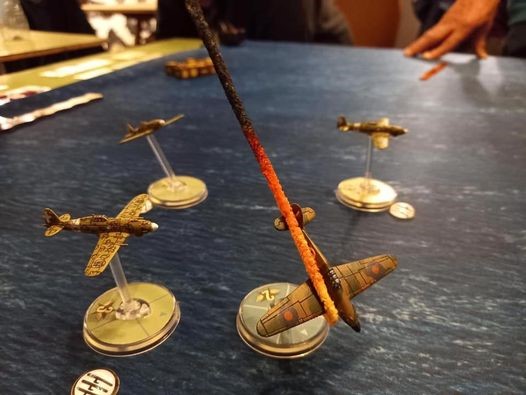
You will find you need quite a few of these, or at least I did, particularly if you run games with multi-engined bombers. Below are a few different examples of flame/smoke markers from the Blood Red Skies Ready Room community.
So there you have it – a nice “craft” addition to your BRS games that really boosts the visual appeal of your game. Give it a go.
by Ken Natt