Last time, we looked at how to play Bolt Action aggressively – getting on the attack, taking the initiative from your opponent, and generally getting stuck in. Now, let’s flip that on its head, and talk about playing defensively! While it’s often talked about much less than attacking, it’s a vital part of Bolt Action, and every competitive player should be able to employ a defensive style when needed – it’s certainly saved my bacon at a few tournaments!
One thing that’s very important to clarify right at the start of this discussion is that playing defensively does not mean playing on the back foot, or letting your opponent seize the initiative from you. Instead, think of it in terms of setting up the game in such a way that your opponent plays into your hands, and of forcing them to fight you on your terms. In many ways, the mentality is the same as playing an attacking game, just with a different methodology. As a strategy, as with attacking play, it’s important to know exactly when to employ it – you’ll want to consider how much available cover there is, what force your opponent has, and of course what mission you’re playing!

Generally speaking, any Bolt Action force can be played defensively. As I’ve mentioned (and will keep mentioning – it’s the truth!), for competitive Bolt Action, the more Order Dice you have, the better, but if your army is on the smaller side, it can actually benefit from being played in a defensive style. This is due to a few factors that we’ll outline in a moment, but for those of you who enjoy bringing plenty of Veterans or big tanks to tournaments – you’re in luck!
The primary factor you’ll need to consider when deciding to play defensively is the mission. It’s no good sitting back if you’re playing something like Double Envelopment, or need to capture an objective all the way across the table. In those circumstances, consider playing more aggressively, as you’re likely to get better results. If, however, you’ve been drawn as the defender in a mission, then it may well be worth playing as such.
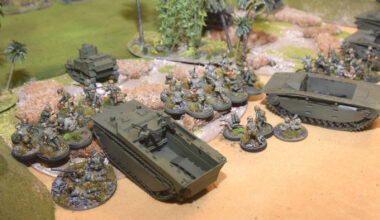
Ironically, when playing defensively, your first moves should actually be pretty aggressive! You’ll want to move out of your deployment zone rapidly, to claim the best positions possible in terms of cover and lines of fire, as well as any nearby objectives if the mission requires them. This ensures that you have a strong defensive line to operate from when your opponent arrives, and means your troops are best-placed to both weather incoming fire and dish out their own retaliation. What you want to have, by the end of Turn One, is the majority of your units ensconced in good positions, and if not actively engaging the enemy already, then ready to engage them in the next couple of turns. This will allow you to enact your dastardly plans!

With your units properly set up, the mission conditions (you did remember the bit about playing defensively only in the right missions, right?) should force your opponent to have to come to you and dig you out of your positions. This means that, with a bit of thought (and some dice luck!) you can gain the upper hand early on in the game. Remember – you have something your opponent wants, and they’re going to have to come and take it off you. What you’re looking to do is make the act of closing the gap across the table as unpleasant and deadly as possible, and there’s a few ways to do this.
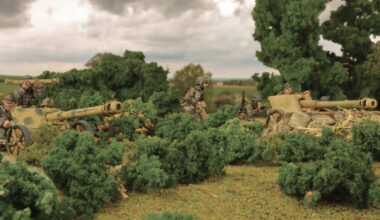
1 – Direct your opponent’s movement – Simply put, you want to herd enemy units into killing grounds of your choice – turn the no man’s land between patches of cover into deathtraps, and force your opponent to sacrifice units (and Order Dice) to gain ground. In order to do this, you’ll want to…
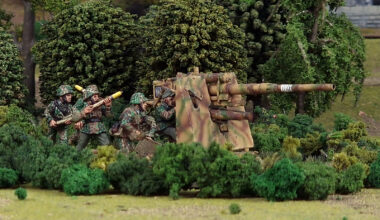
2 – Focus fire – Wait until an enemy unit enters your optimum range (usually inside 12″) until you strike. It’s important to note that this isn’t a ‘hard and fast’ rule, but an ideal that you want to be aiming for. Essentially, you want to make sure that whatever you shoot at dies that same turn (or at the very least is so heavily pinned that it needs to spend the next turn Rallying), and doesn’t survive to get amongst your lines. This will hopefully foil your opponent’s plans, and force them to commit a new unit to the same objective. When they do… rinse and repeat! By holding your fire, you can lure your opponent into bringing their units into the open where they’re most vulnerable. A great way to do this (and control where your opponent goes) is to…
3 – Make good use of the Ambush order – You don’t need to shoot at the first target you see, especially if it’s a ‘low-percentage’ shot. Instead, consider going on Ambush! Not only will this allow you to save your shots for when the enemy is in a prime position, but a unit on an Ambush order can also have a disproportionate impact on your opponent’s plans – don’t be surprised to see them avoiding a unit that is normally pretty pillow fisted as if it were a platoon of M16 MGMC ‘Meatchoppers’! This also gives you another way to control where your enemy goes – by blocking off avenues by which the enemy can advance with units on Ambush, you can ensure that the only ‘safe’ route leads directly onto the guns of the rest of your army. Finally…
4 – Don’t be afraid to counterattack – This is really a two-part point. Firstly, there may well come a time when your enemy’s plans have completely fallen apart and their advance is stalled – that’s the perfect time to flex to a more aggressive strategy and catch them on the hop! On a smaller scale, what I mean by ‘counterattack’ is much more limited. Is there an enemy unit that’s stranded, battered, and outnumbered? Don’t be afraid to go hard at it with a couple of units of your own, and destroy it before your opponent can bring up reinforcements! Assaults are ideal for this, as they guarantee that one of the two units involved will be destroyed… just make sure not to get too ambitious, or it might be yours!
Playing Bolt Action defensively can be a real game of cat-and-mouse. You wait, and wait, and wait… and then as soon as your opponent makes a mistake, you pounce! Done well, it can leave opposing players wondering just how they’ve been so comprehensively beaten. Get it wrong, however, and you’ll look like you’ve done nothing all game, and be roundly mocked. Are you brave enough for this playstyle? Then dig in, and fix bayonets – the enemy are coming!