Andrés: In this article I’ll talk about very easy and fast conversions you can perform on your plastic legionaries, to get the most out of this fantastic plastic set.
What started as an interest in simply trying a different colour scheme for the plastic Caesarian Romans (see Andrés’ article on painting Pompeian Romans) soon turned into a full army project.
In tackling a full army project, I decided to adjust some of my painting and modelling processes – from lessons learned from my experiments with those Pompeian Romans. These changes would speed up the painting process without losing too much detail. I’ve not painted the eyes on the miniatures, for example, as the goal was good-looking full units, rather than individual figures. Even without them, you can see that the end result is quite good.
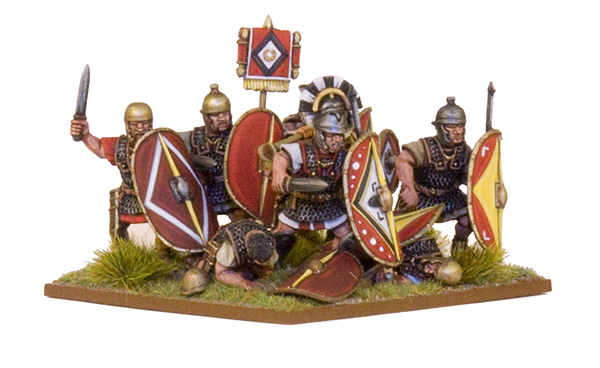
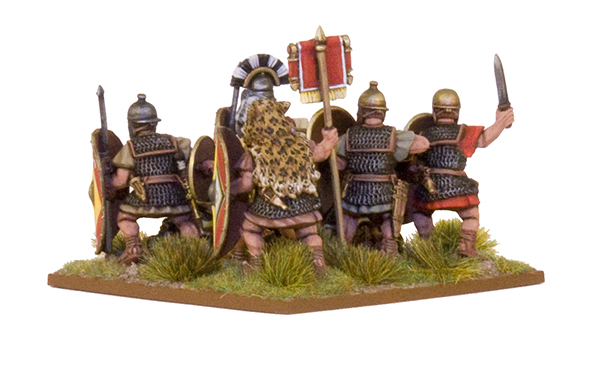
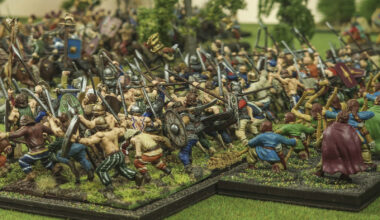
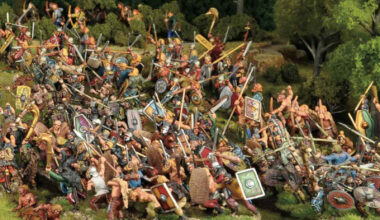
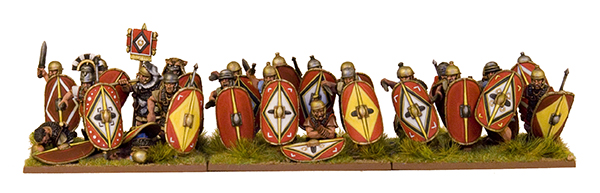
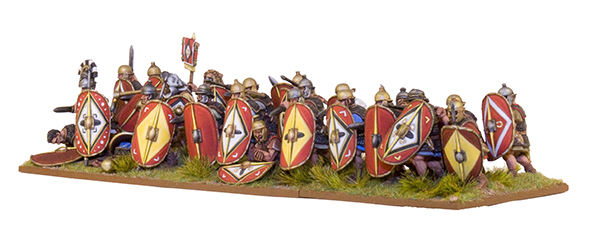
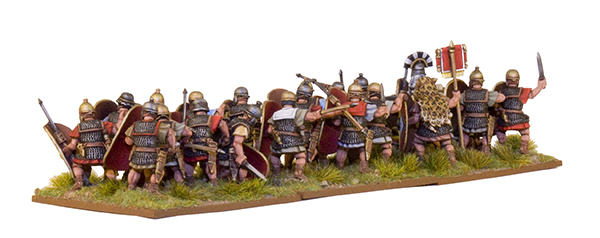
I also changed my basing convention, using 60 x 60 mm bases, with eight figures per base. This narrow frontage let me create a better impression of a shield wall – which is something particularly great to see with Roman figures. The extra depth also allowed me a bit of room to play with the position of the figures; their animated poses lent themselves to experimentation whilst also leaving room for pilum staffs to stick out of the base. This facilitates the creation of small battle scenes whilst retaining the flexibility to change formations. Each 24-man unit thus has a 180 x 60 mm footprint.
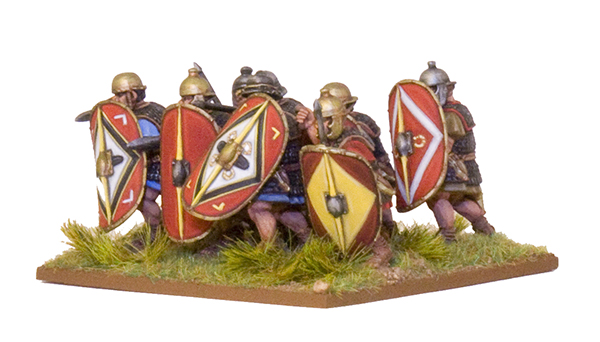
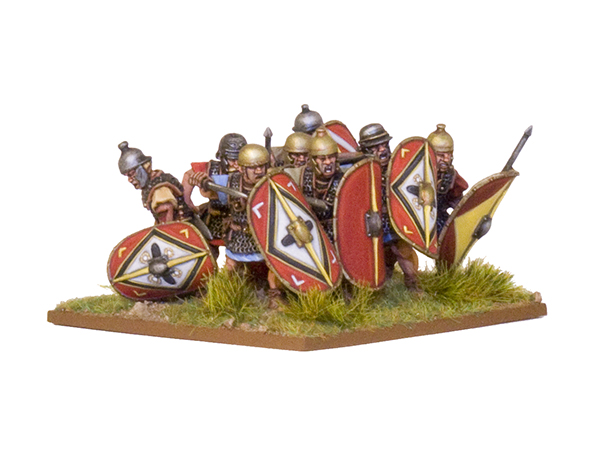
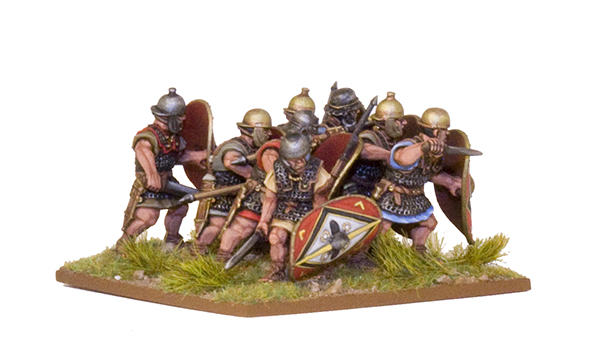
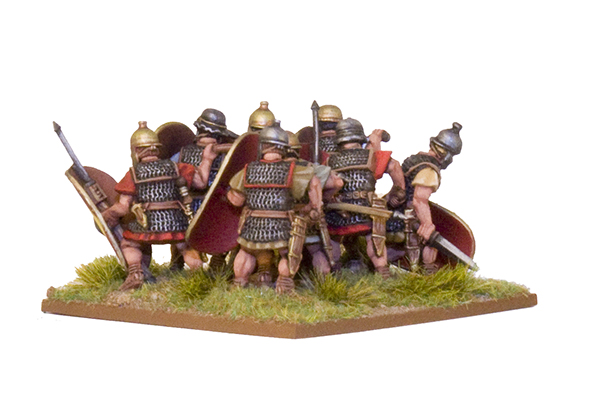
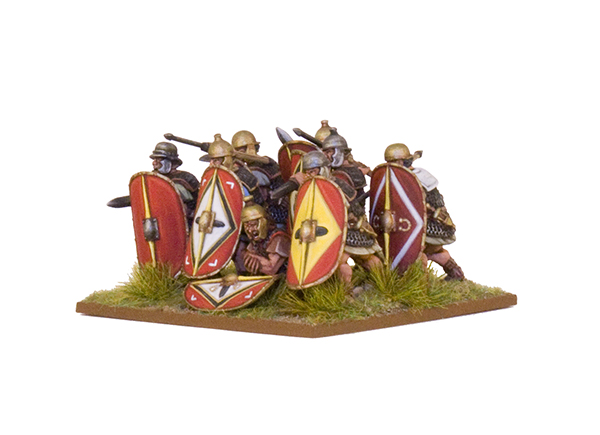
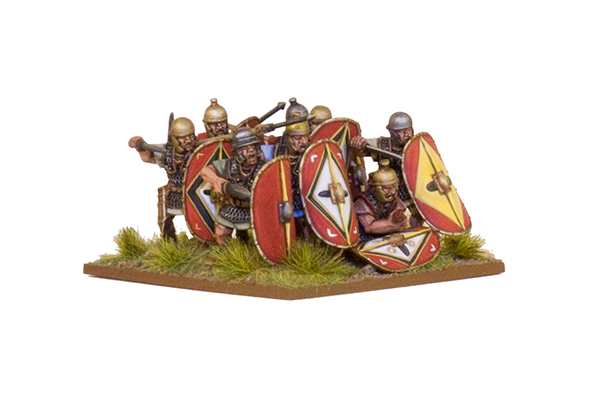
Another thing I’ve done is to paint the shields with variations of the same symbol, whilst even leaving some flat colours in some of them. The idea is to give each unit variety but keep a common theme. I’ve used several shades of the same colour as I did with those ochre/yellow shields on my first Pompeian Romans. A simple method of getting even more variation is to switch up the colour of the boss – I varied between bronze or gunmetal.
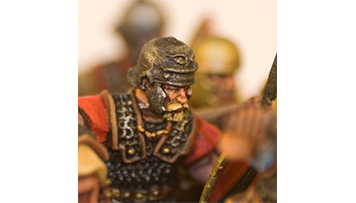
The main change I have introduced, however, is more conversions to get more variety of helmet and armour – all very easy yet effective conversions. I touched upon such methods with my Pompeian Unit – cutting the horse tail on all the helmets:
This time I went for more modifications, such as removing the whole metal knot where the horse tail is usually attached. It’s just a matter of cutting a bit more plastic than I did with the Pompeians. What I usually do is to cut the knot just a little and then carefully shave the plastic until I get a spherical surface:
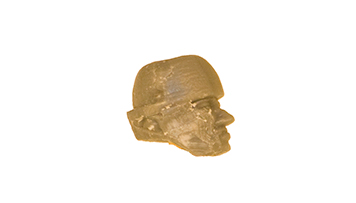
By shaving away the top of the helmet a bit more and making it look a bit flatter, we will have another variant:
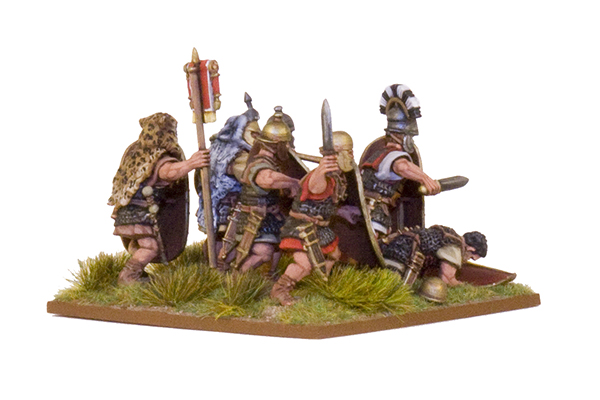
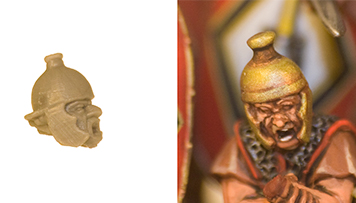
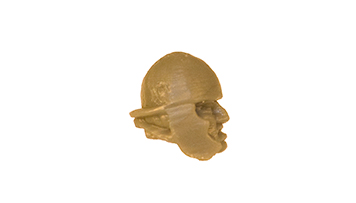
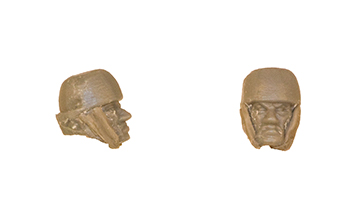
To get another helmet type (one that looks like it was very cheap to make in great numbers), we can do several things. The first stage is to get rid of the metal knot, and to shave the top a bit so we lose the completely spherical shape. Now we need to shave the neck protection, so we carefully remove the entire rear edge. After that shave away the back strap that ties the helmet to the head.
By doing all this we get the broad characteristic shape of this kind of helmet. Now we have three options here, and I have used all three.
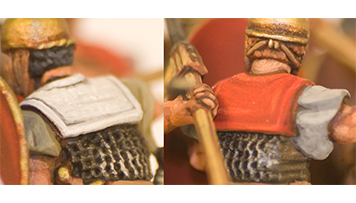
The easiest one is just a painting solution, paint the ear flaps as if they were made of leather (some archaeologists say those helmets did have them, some say they didn’t, so there is a degree of freedom to our own “artistic license” here:
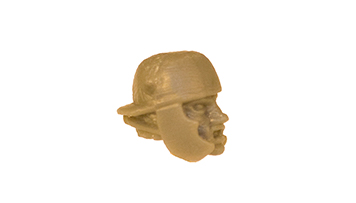
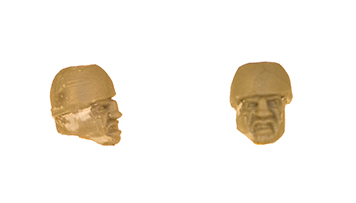
The second is to remove the ear flaps with a knife and cover it with leather straps that will cover the ears and tie under the chin. Despite looking complex, it’s just a matter of pressing a little ball of grey/green stuff the size of the ear and then making a very thin putty cord:
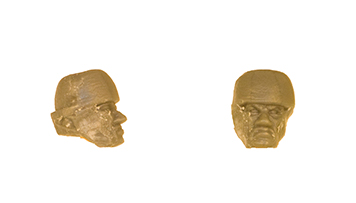
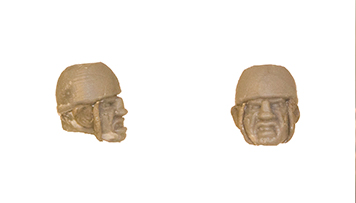
The last method may be a bit trickier for some as it involves working with metal parts; I modified several centurion metal heads from the Caesarean metal command set. I cut the horse tail by the knot, file the bits left over very well, and you get another legionary helmet:
As an aside, if you have leftovers from a collection of Celts, you can use some of their helmeted heads with Caesarean Roman bodies, with similar minor modifications. I have even left some moustaches and beards, as it is well known that Caesar let his warriors keep their traditional ways:
By using all three methods I manage to get a very good variety of models within a unit, and considering that there are six different plastic heads per sprue (and that you can also paint them bronze or iron for even more variety), you have a lot of combinations to play with.
Another effective conversion is filling in the piece of chainmail that covers a legionaries’ shoulders – to make it look like leather or linen armour. I have done this with acrylic putty, the same stuff used for filling gap in model kits. Once it dries you can file it to get a smooth surface. You could do the same with grey/green stuff, but it will take more time to dry and it will be a bit more difficult to sand thereafter.
Remember, if you are using Romans attacking with gladius, it’s always good if you get rid of the hilt of the sword on the miniatures’ bodies, leaving only the scabbard. It will take you a few seconds to do this. Otherwise, the miniature will have a sword hanging from the belt, and another one in the hand. Not that this wouldn’t happen at some point in the middle of the battlefield, but maybe not every single legionary in the whole legion. I hope you will find these tips useful when you come to build your own Caesarian Roman units, and armies.

Start Your Roman Cohort
The ideal place to begin is with the Late Republican Roman Starter Army boxed set, containing no fewer than 96 legionaries, plenty enough to experiment with your own conversions!
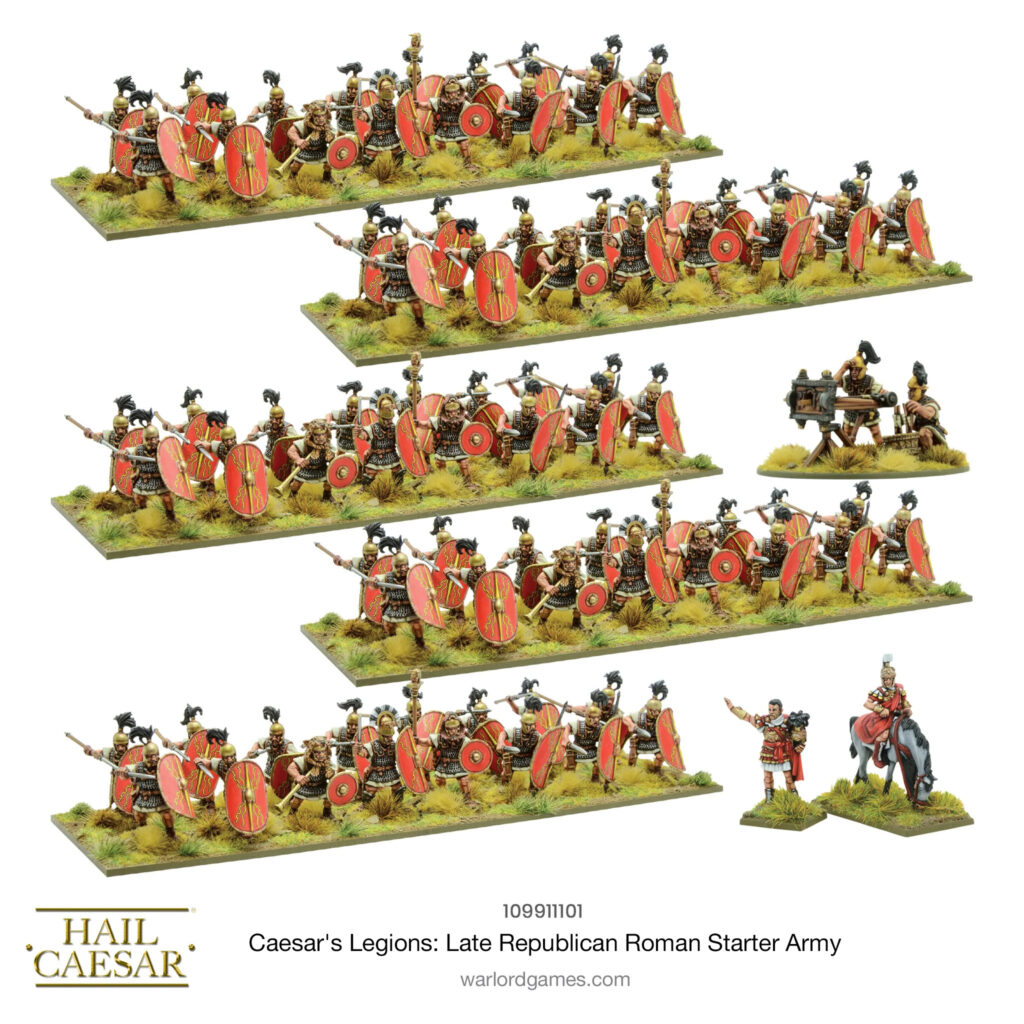
This starter set contains enough units for one complete Hail Caesar Late Republican Roman army division.
Contents:
- 2x Roman officers (metal)
- 96x Roman legionaries with command figures (plastic)
- 1x Scorpion bolt thrower (Warlord Resin™)
- Full-colour waterslide shield decals
- Plastic bases
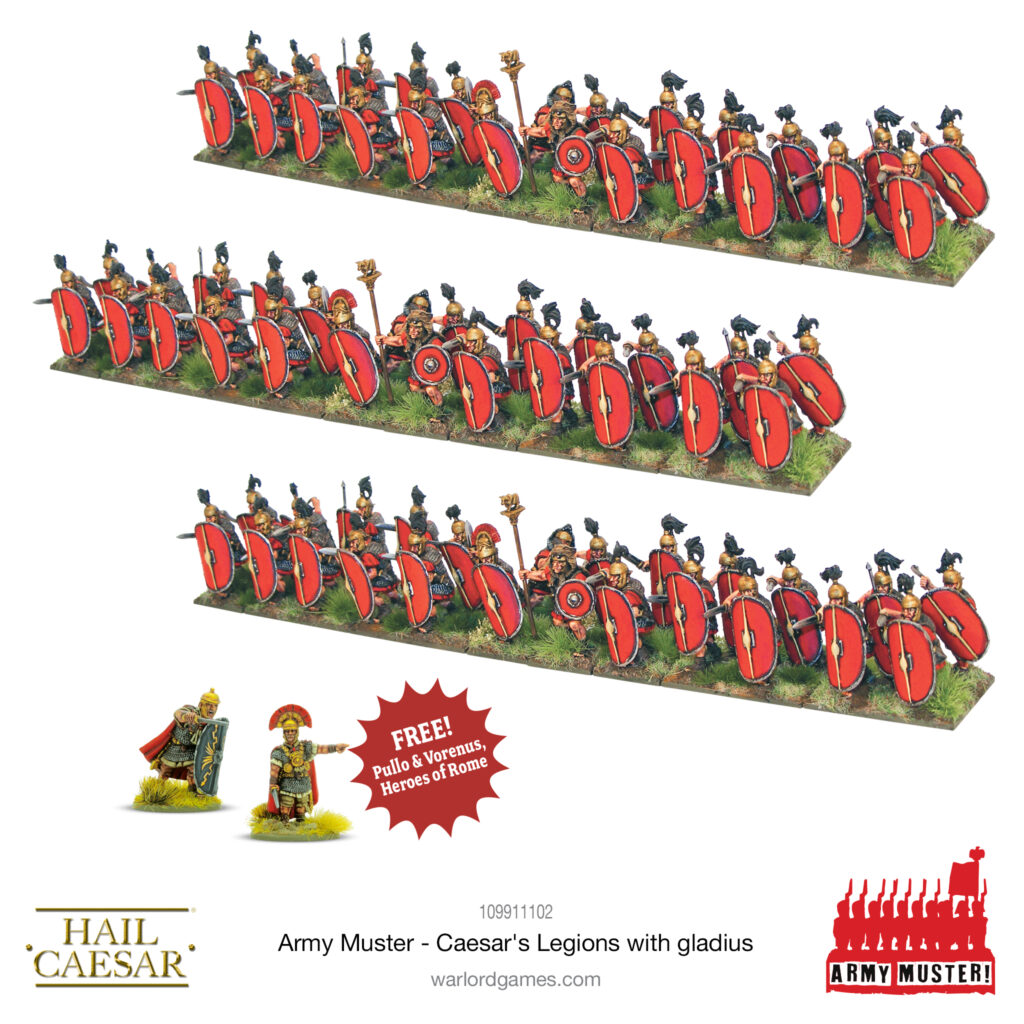
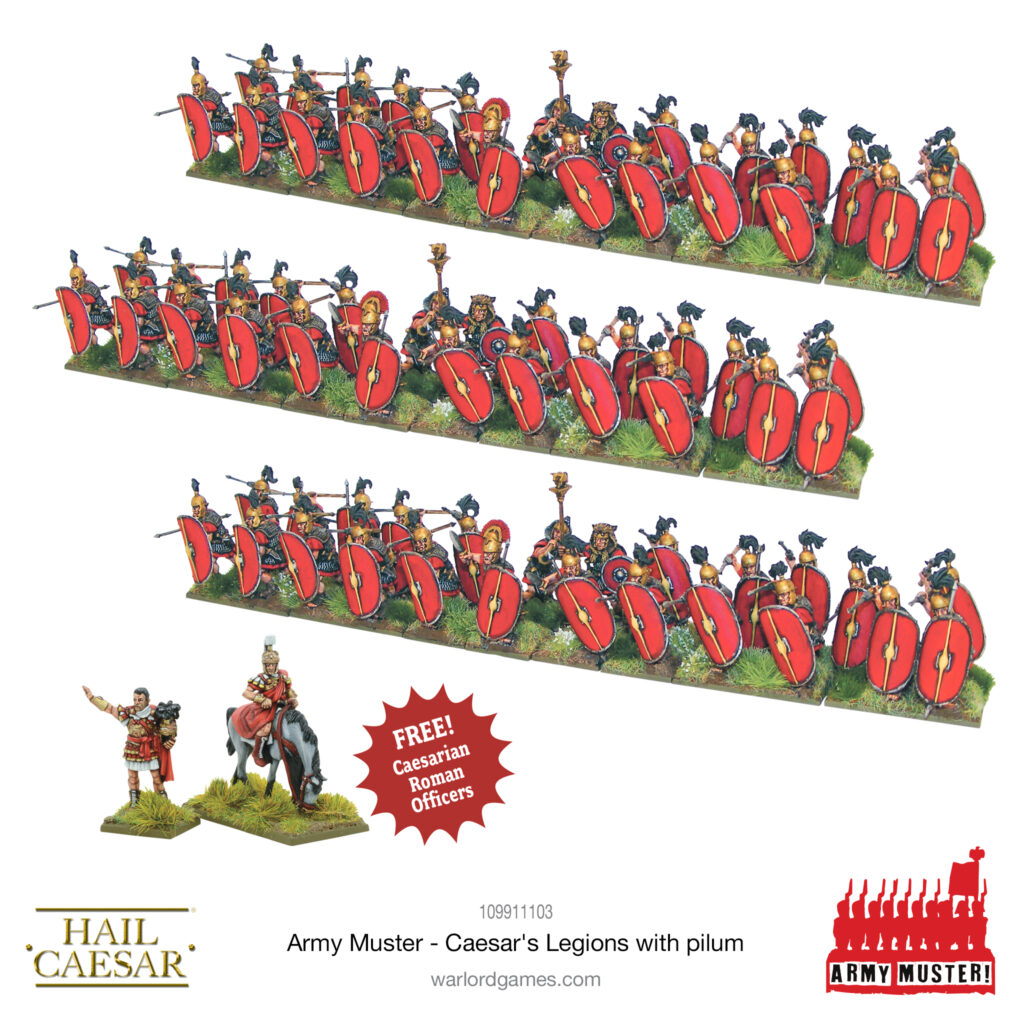
Alternatively, consider the Army Muster route. Army Muster is a set of bundles tailored to those all-important core units in our mass-battle historical wargames. An easy way to expand existing and new collections alike, each Army Muster bundle contains three copies of one of our plastic boxed sets, plus a free complementary product that will support your new soldiers nicely on the tabletop.