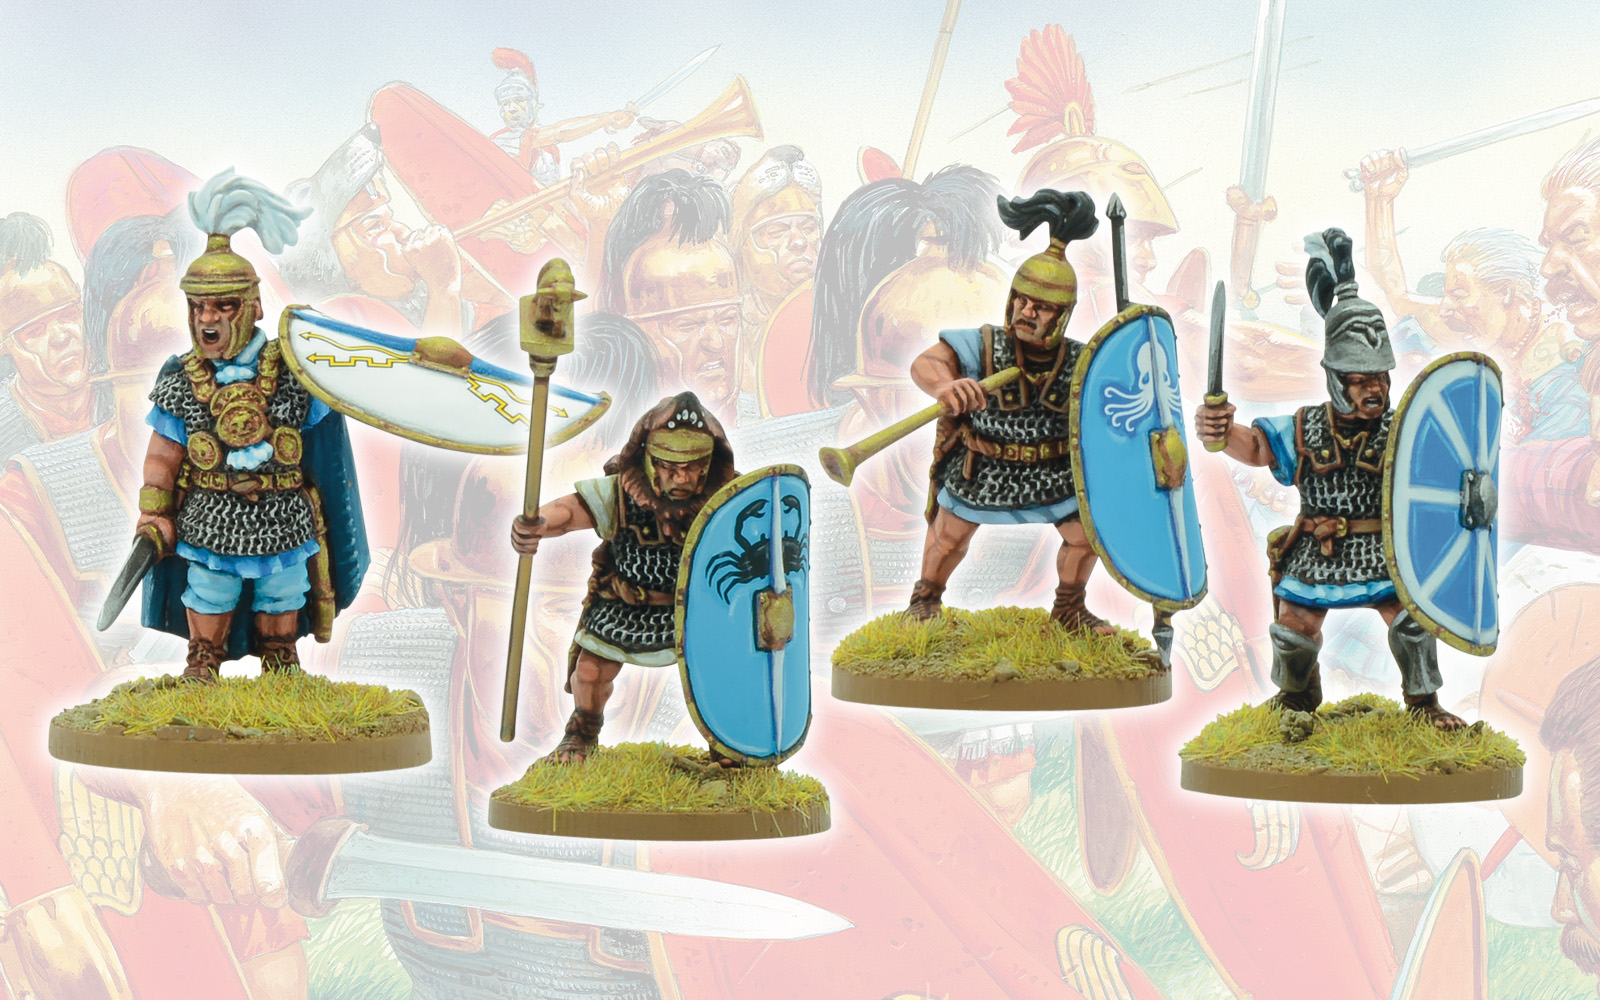
Andrés: Being slightly fed up with painting red (I painted the studio’s Caesarian Roman models – I always seem to find myself painting red shields!), as part of my ongoing Republican Roman project, I opted to model and paint my next batch of Romans as marines – with blue shields!
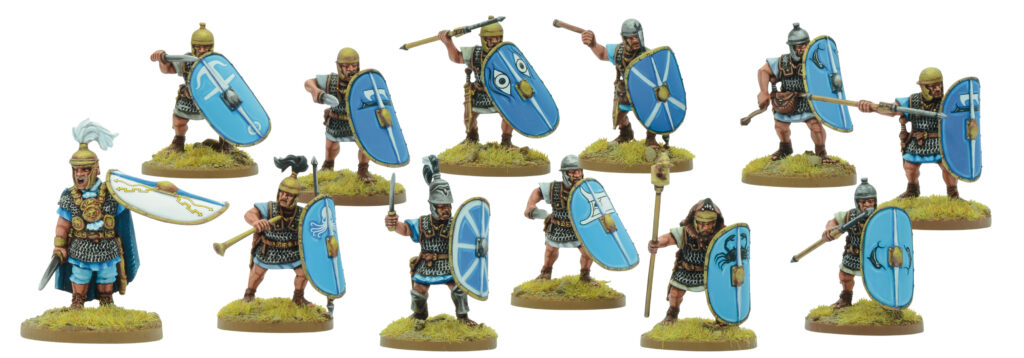
These models form the basis of an SPQR: Death of Glory warband, representing a raiding party or ‘commando’ team, but will also serve ably as an additional unit for larger games of Hail Caesar. For now, it will start life as a small number of legionaries with an accompanying hero, and perhaps a scorpion team in support.
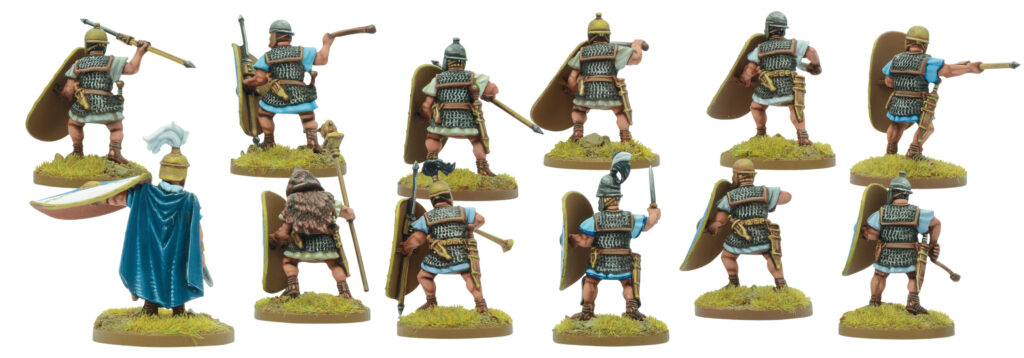
I really like the plastic Caesarean Romans, they are very easy to convert – with but a very small effort, you can get endless variety from the four bodies and six heads you get on the frame. When playing the game, you equip the whole group with the same equipment, but I really like variety in my units. So, I mixed gladius, pila, and slings within the same group to reflect their adaptability in being able to use anything they had at hand for any given mission. I’ll simply need to be upfront with my opponents when playing games about which equipment I have actually paid the points for, so there won’t be any misunderstanding.
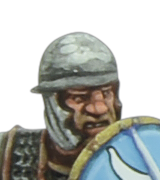
To convert the figures, I cut the horse tails off most of the legionaries’ helmets. On some of them, I removed the horsetail entirely (fig2), on others I left a semi-spherical shape (fig2). To do this I cut off the horse tail or the metal knot leaving a bit of plastic, and then I shaved that spare bit with the side of the blade carefully, so I could be as exact as possible. For a better reference, you can look at my previous (and more in-depth) article on converting plastic Caesarian Romans.
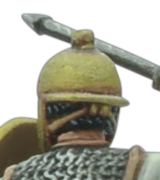
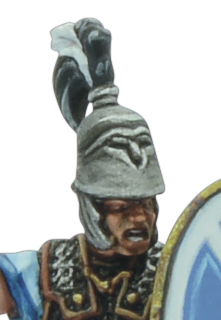
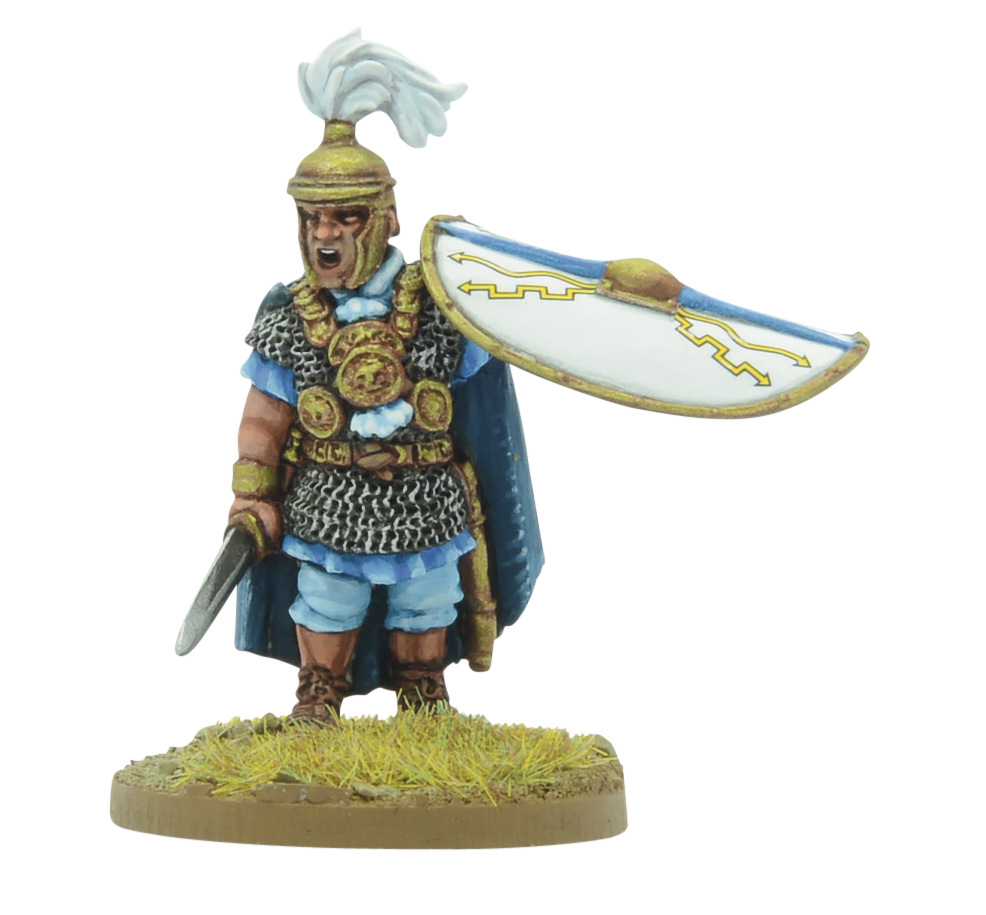
For the unit leader, I just cut off the transversal crest, and added a plastic horse tail (fig.3). For the Hero I used the Caesarians Pullo and Vorenus, Heroes of Rome metal figures as the basis. I used the body of one of the figures (Vorenus), and the shouting head of the other (Pullo), and then I added a horse tail again (fig.4).
As you can see, all the modifications were very easy to make, and the result shows a very varied group.
I then turned my attention to painting the figures, with the chief point of distinction marking them as marines, and to make it more evident they are marines, I used sea motifs on all of them. I chose different shades of blue to get even more differentiation within the unit, which creates a nice effect when the models are placed side by side. Most of the paints used were Warpaints by Army Painter, they make a good range of blues that are very useful for such a task. These are two of the combinations I used:
- Warpaints Viking Blue for the base colour, then, a highlight with Warpaints Troglodyte Blue parallel to the shield rim all around, and a last highlight with Warpaints Voidshield Blue only on the top parts of the previous highlight.
- Vallejo Modelcolor 963 Medium Blue for the base colour, then, a highlight with Warpaints Crystal Blue parallel to the shield rim all around, and a last highlight with Warpaints Troglodyte Blue only on the top parts of the previous highlight.
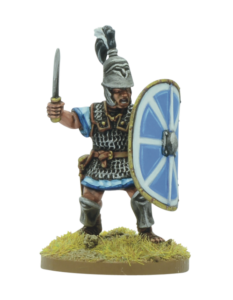
For the sea motifs, I used the Greek Hoplite Shield Designs decals. On these sheets, you will find octopuses, dolphins, anchors, crabs and ships. The Late Republican oval shield has a central spine, dividing the shield’s front in two. To adapt the decals, the only thing I had to do was cut the decals in half (I did this before submerging them in water), and I fixed each half on either side of the spine, as you can see in the pictures. Once the decal was settled and dried in place, I highlighted them a bit with grey to make them more noticeable and less artificial-looking (fig5). For the leader, I painted the shield with white lines dividing the blue background into eight slices (fig6) (fig7).
For the Hero, I went for a white background, a blue spine and the Caesarean Roman shield bolt decals you can find in the box (see Fig 4. – above).

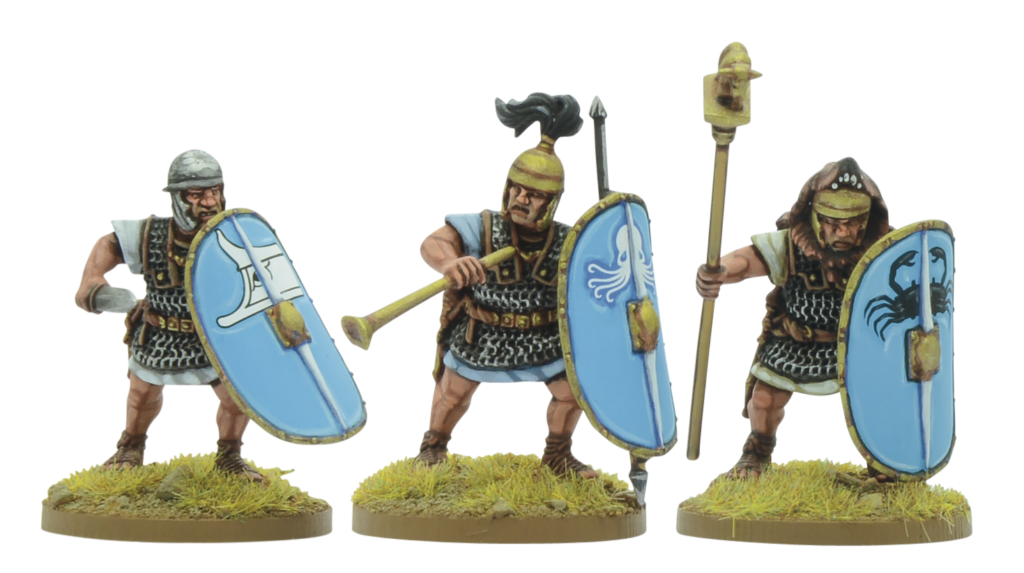
As you can see, the element that ties the whole group is the blue – on their clothes, shields and cloaks.
I tend to swap the included plastic bases for MDF bases. I do this so I can have a better grip on the base and have less chance of touching the figure itself. Once you’ve spent very precious time painting your figures, the less you touch them, the better, so a thicker base will help with careful handling, as does a good coat of varnish. Once the varnish is dry, I add grass and that´s it, the unit is ready to disembark and raid the enemy.
Collect Your Own Legions
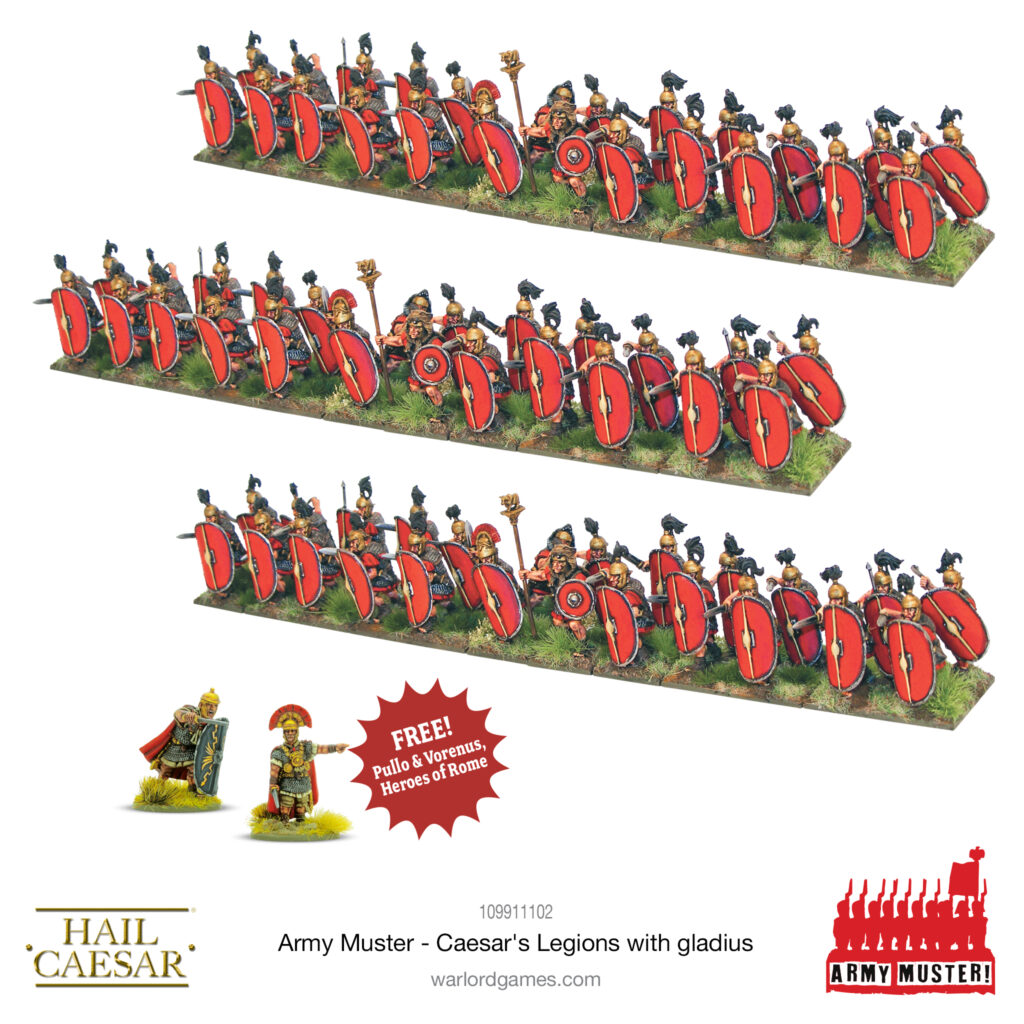
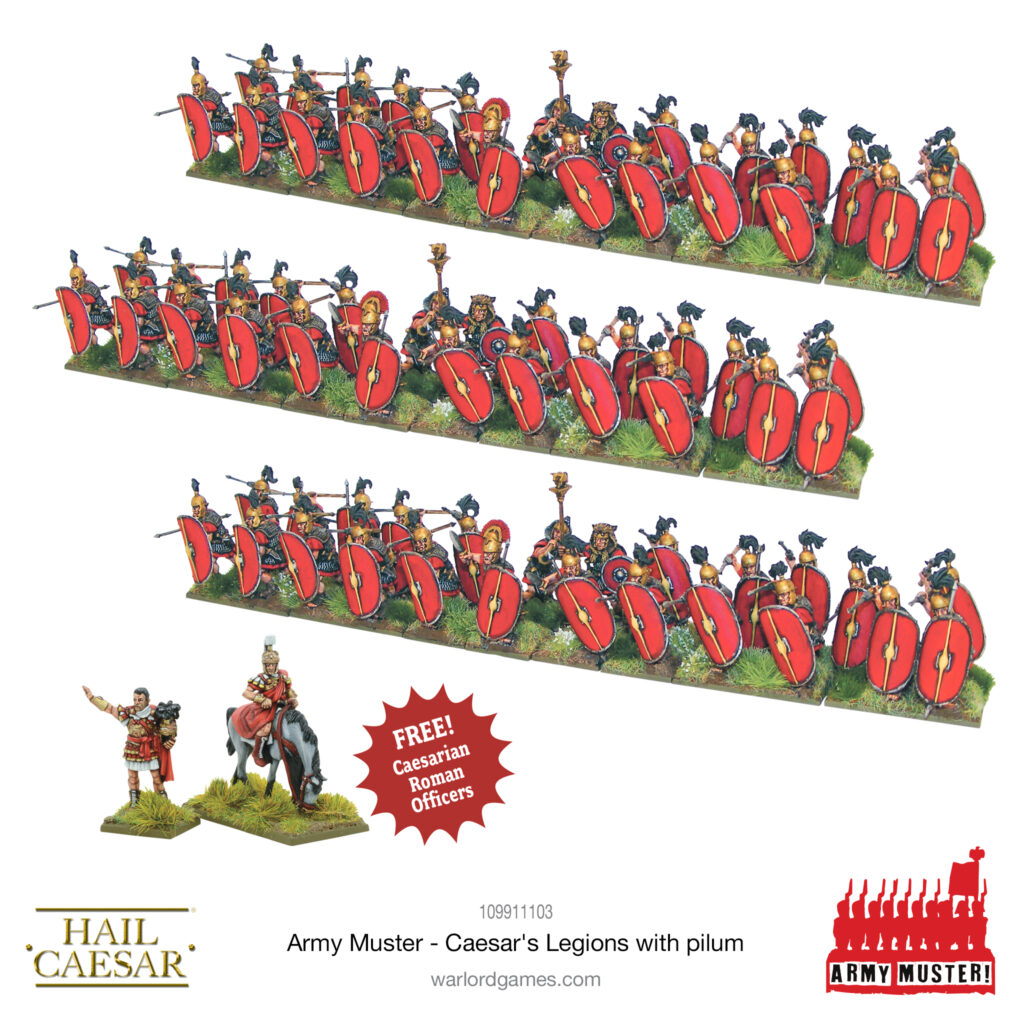
The ideal place to begin is with the Late Republican Roman Starter Army boxed set, containing no fewer than 96 legionaries, plenty enough to experiment with your own conversions!
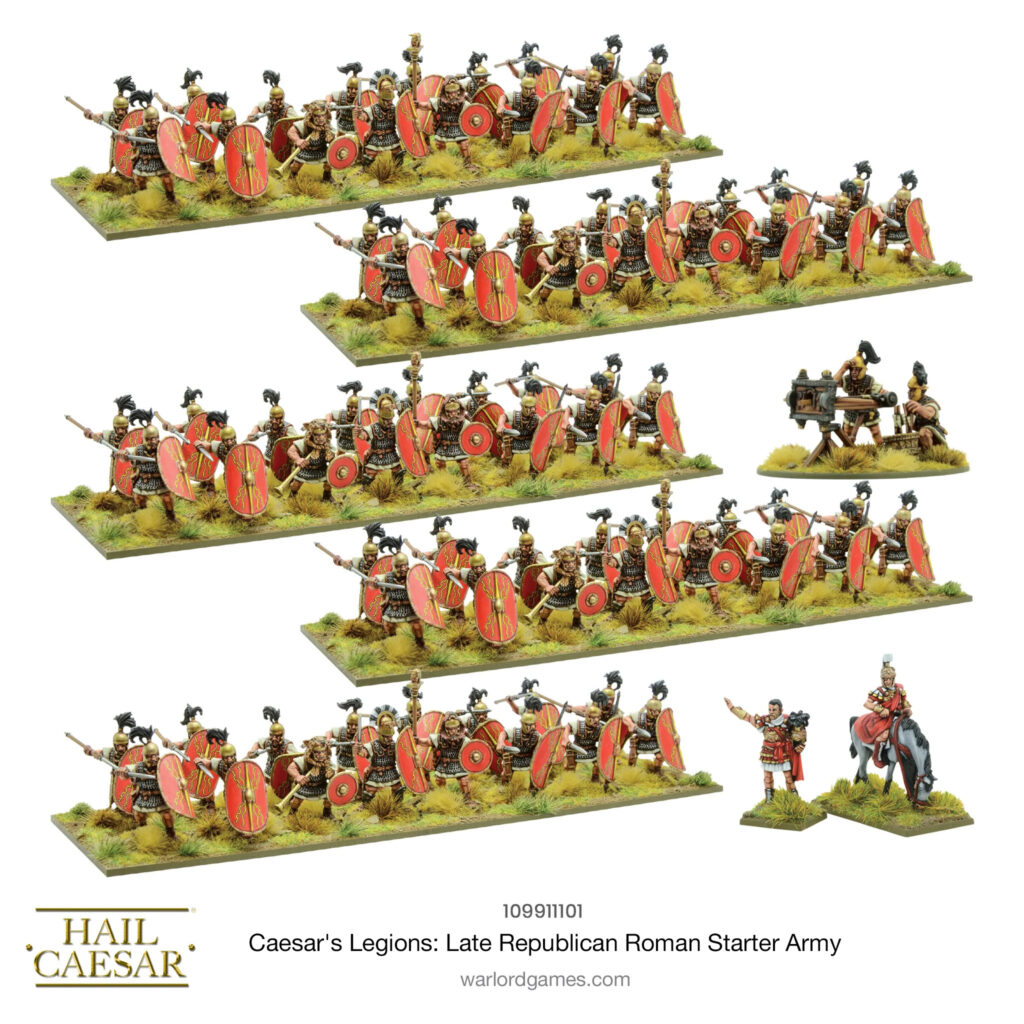
This starter set contains enough units for one complete Hail Caesar Late Republican Roman army division.
Contents:
- 2x Roman officers (metal)
- 96x Roman legionaries with command figures (plastic)
- 1x Scorpion bolt thrower (Warlord Resin™)
- Full-colour waterslide shield decals
- Plastic bases
Alternatively, consider the Army Muster route. Army Muster is a set of bundles tailored to those all-important core units in our mass-battle historical wargames. An easy way to expand existing and new collections alike, each Army Muster bundle contains three copies of one of our plastic boxed sets, plus a free complementary product that will support your new soldiers nicely on the tabletop.