
Daniel Newton is the bookkeeper of Rockingham Historical Gamers, a regular co-host on the Historical Miniature Gamers (HMG) podcast, and one of the main Bolt Action event organisers in Perth, Western Australia. He isn’t restricted to an interest in Bolt Action, however, as this Black Powder Epic Battles: American Civil War battle report shows….
Setting
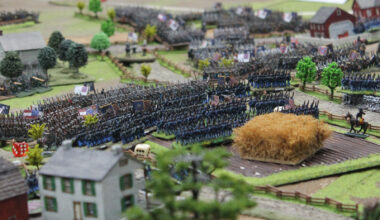
American Civil War, Western Theatre, June 1863, skirmishing action in support of a larger battle to secure strategically vital crossroads which both Grant and Lee intended to utilise.
This battle is pitched as an introduction scenario and fun game that plays fast and loose with the rules for Black Powder, very much in the anticipated spirit of the game. A good yarn, plenty of laughter and enjoyment of the spectacle, were the objectives of the day. Force composition was mirrored, whilst the statistics of each unit were randomised from a set table and hidden to increase the fog of war abstraction. This led to some amazing moments and unforgettable failures!
The winner would be the last one standing upon the crossroads after ten rounds. All measurements use the same values as per the rulebooks but were simply treated as centimetres which worked perfectly well.
The Battlefield Cast
Union Army (Russ)
Army Commander: General “At the Back” Timberwolf (rating 9)
1st Brigade Commander: “The Unknown Survivor” (rating 8)
- 5 infantry regiments
- 1 Elite, 1 Veteran, 2 Regular, 1 Inexperienced
- 1 battery of smoothbore cannon (Regular)
2nd Brigade Commander: “Valiant” Pemberton (rating 10)
- 5 infantry regiments
- 1 Elite, 1 Veteran, 2 Regular, 1 Inexperienced
- 1 battery of smoothbore cannon (Regular)
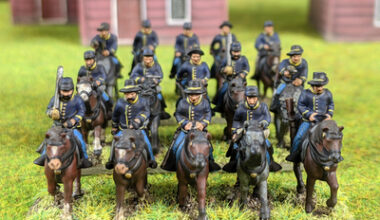
Cavalry Regiment: “Can’t Touch Me” Thomas (rating 10)
- 1 squadron of cavalry with carbine rifles (Veteran)
Confederate Army (Dan)
Army Commander: “Mr. Not Good for Much” Thomas (rating 6)
1st Brigade Commander: “The Defiant” Lachlan (rating 9)
- 5 infantry regiments
- 3 Veteran, 1 Regular, 1 Inexperienced
- 1 battery of smoothbore cannon (Regular)
2nd Brigade Commander: “Nephew” Nathaniel (rating 6)
- 5 infantry regiments
- 2 Elite, 1 Veteran, 1 Regular, 1 Inexperienced
- 1 battery of smoothbore cannon (Regular)
Cavalry Regiment: “General” Percival (rating 9)
- 1 squadron of cavalry with carbine rifles (Veteran)
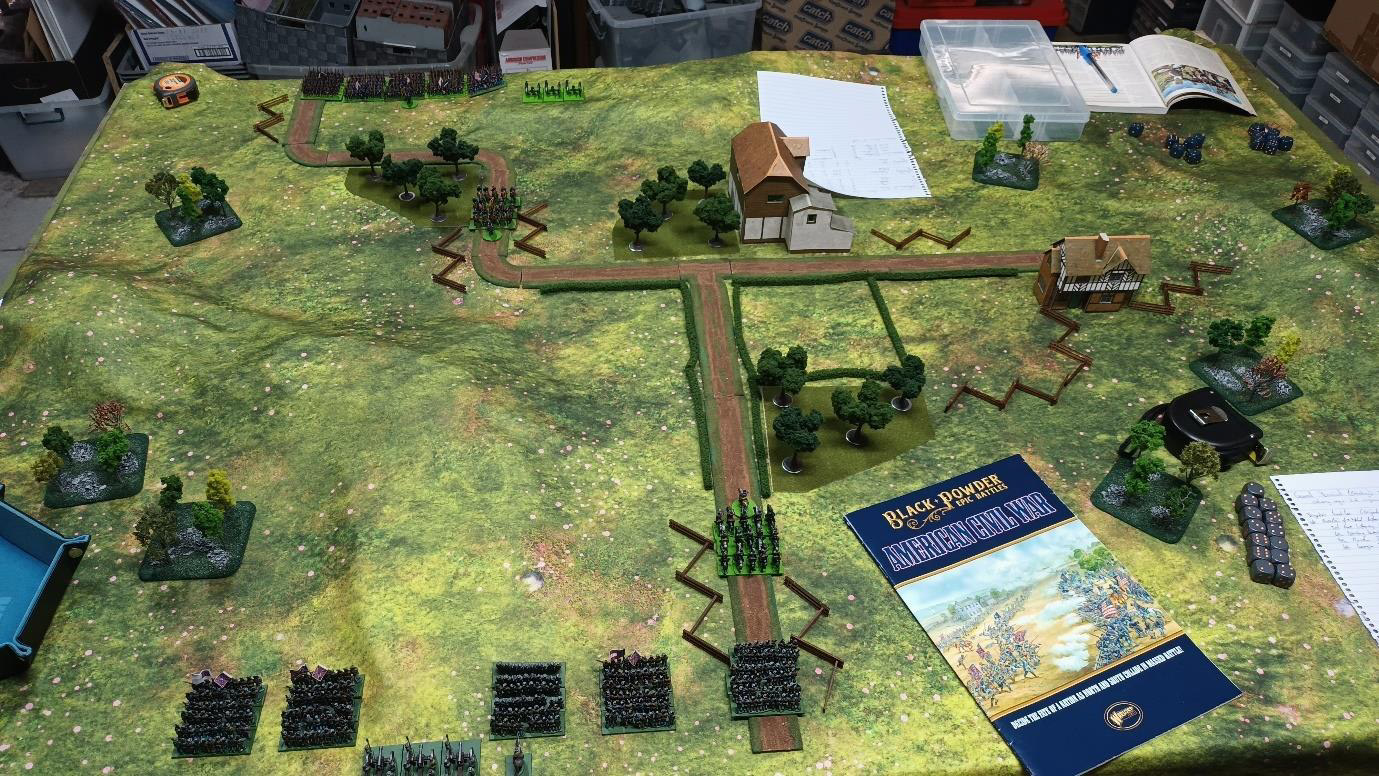
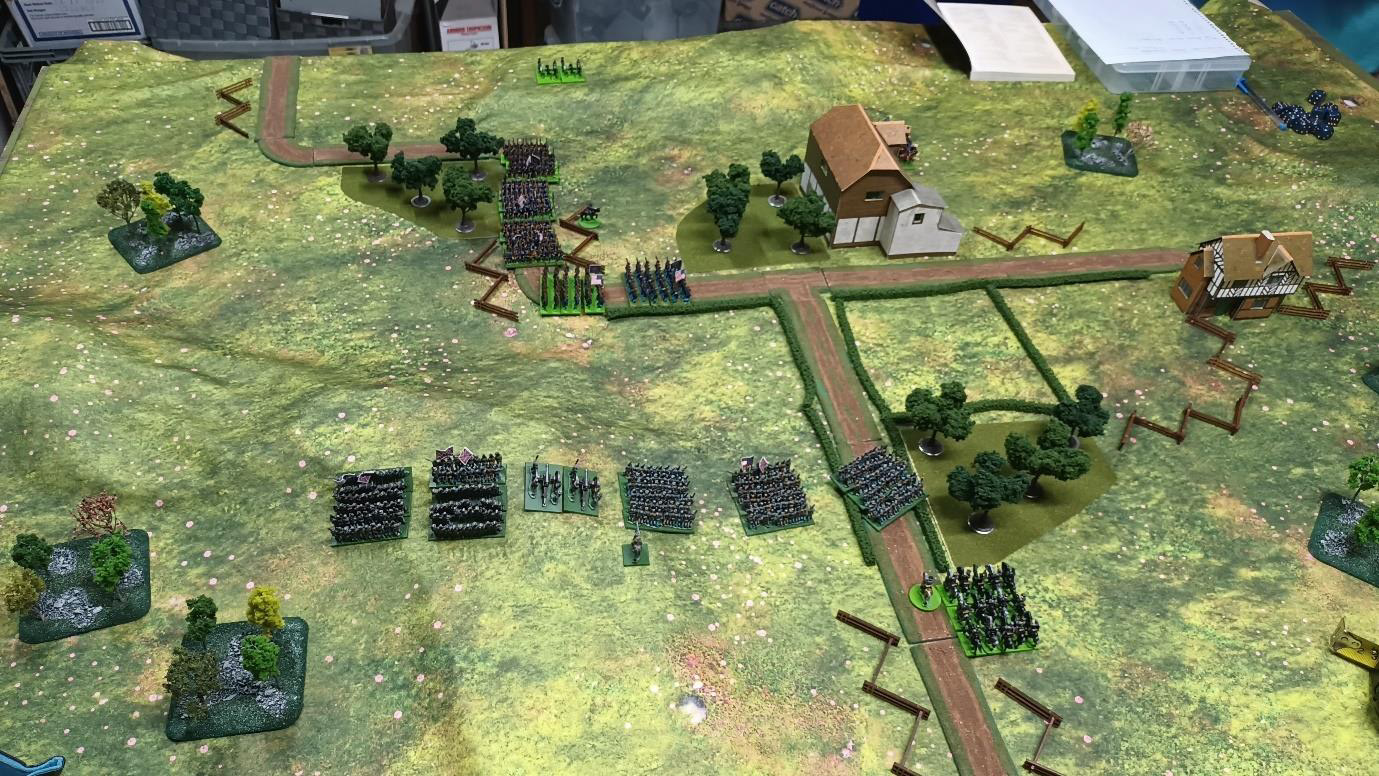
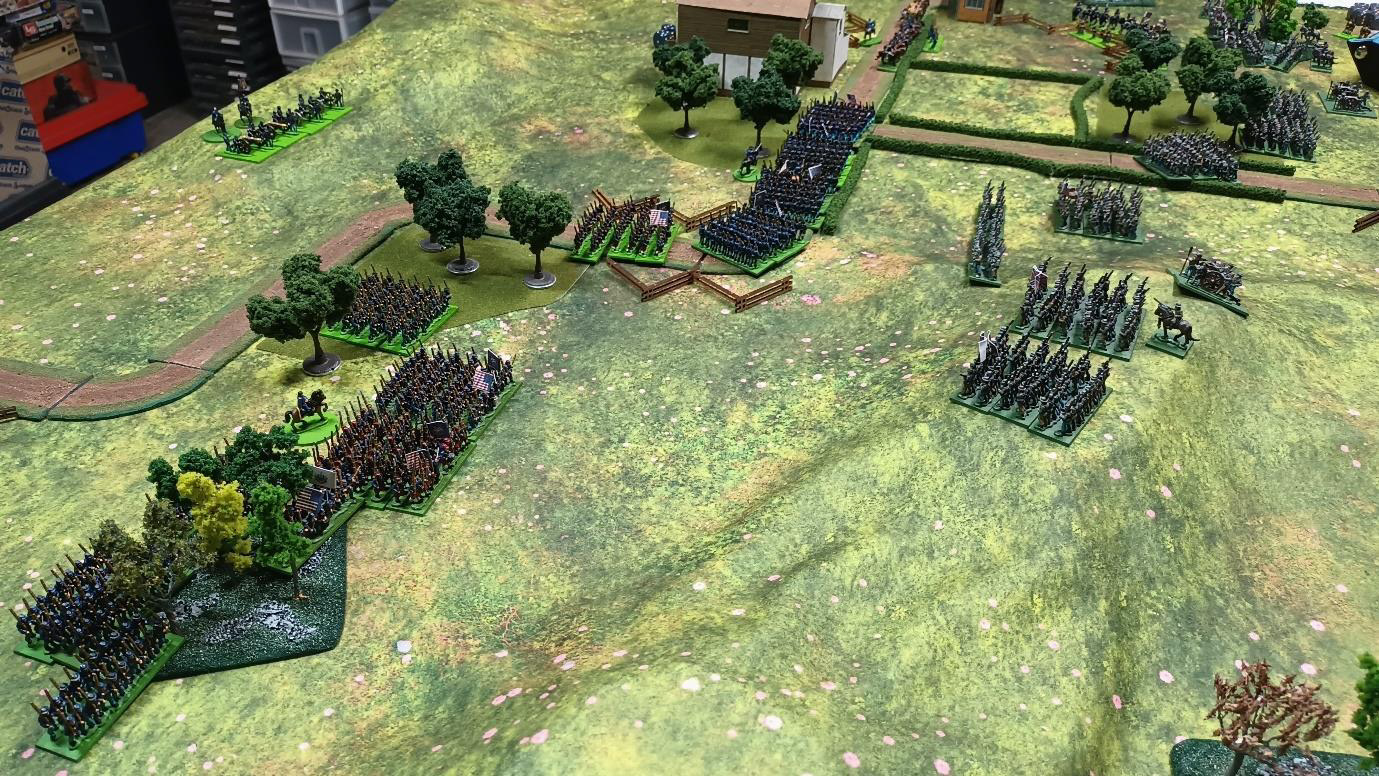
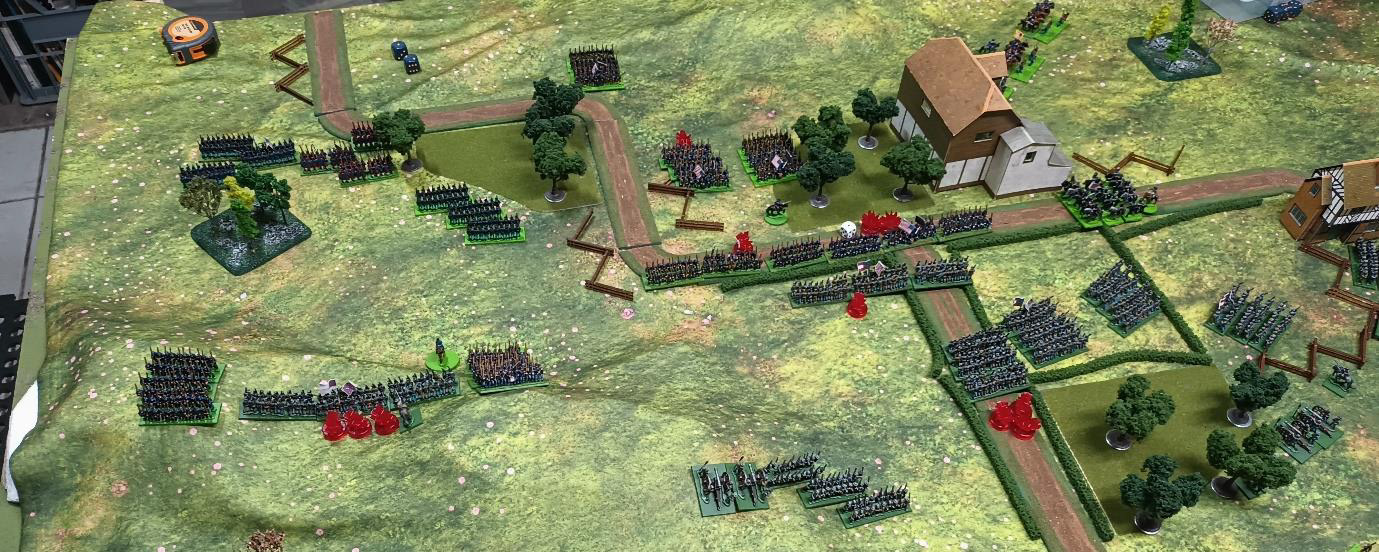
Deployment
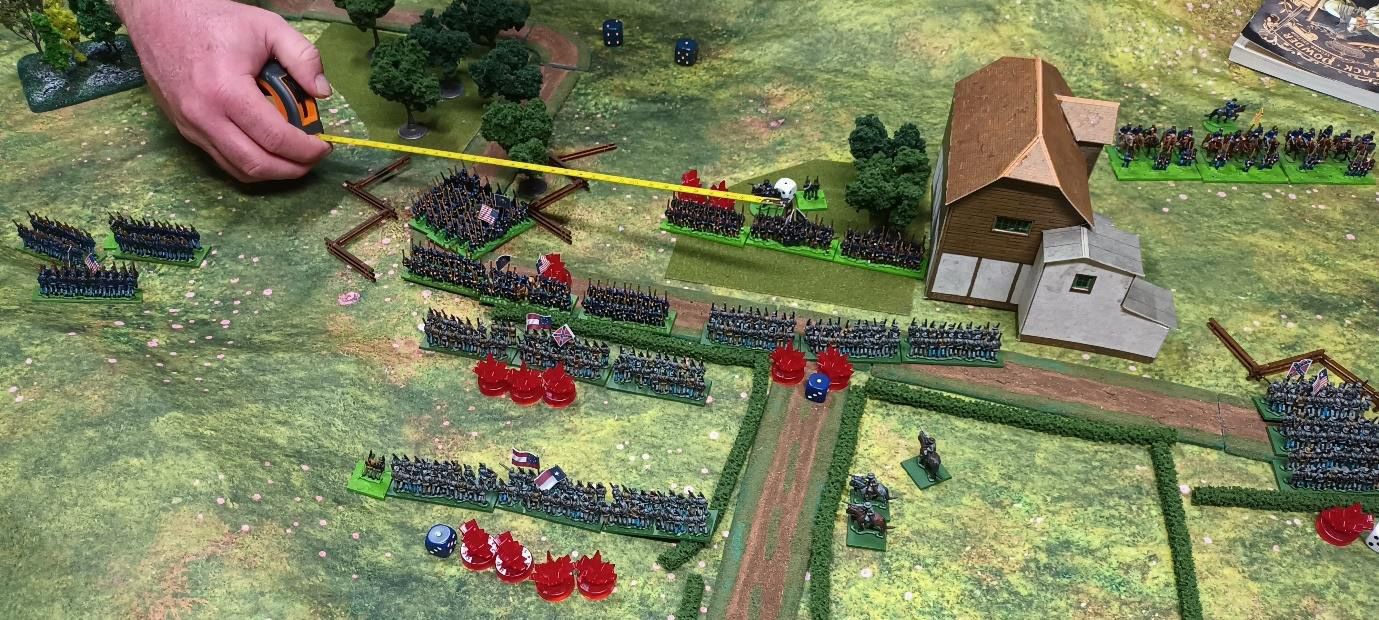
After rolling for table sides, we set about with some cavalry scouting deployments, representing the initial contact of each force and giving us an excuse to use the models. As if we needed one!
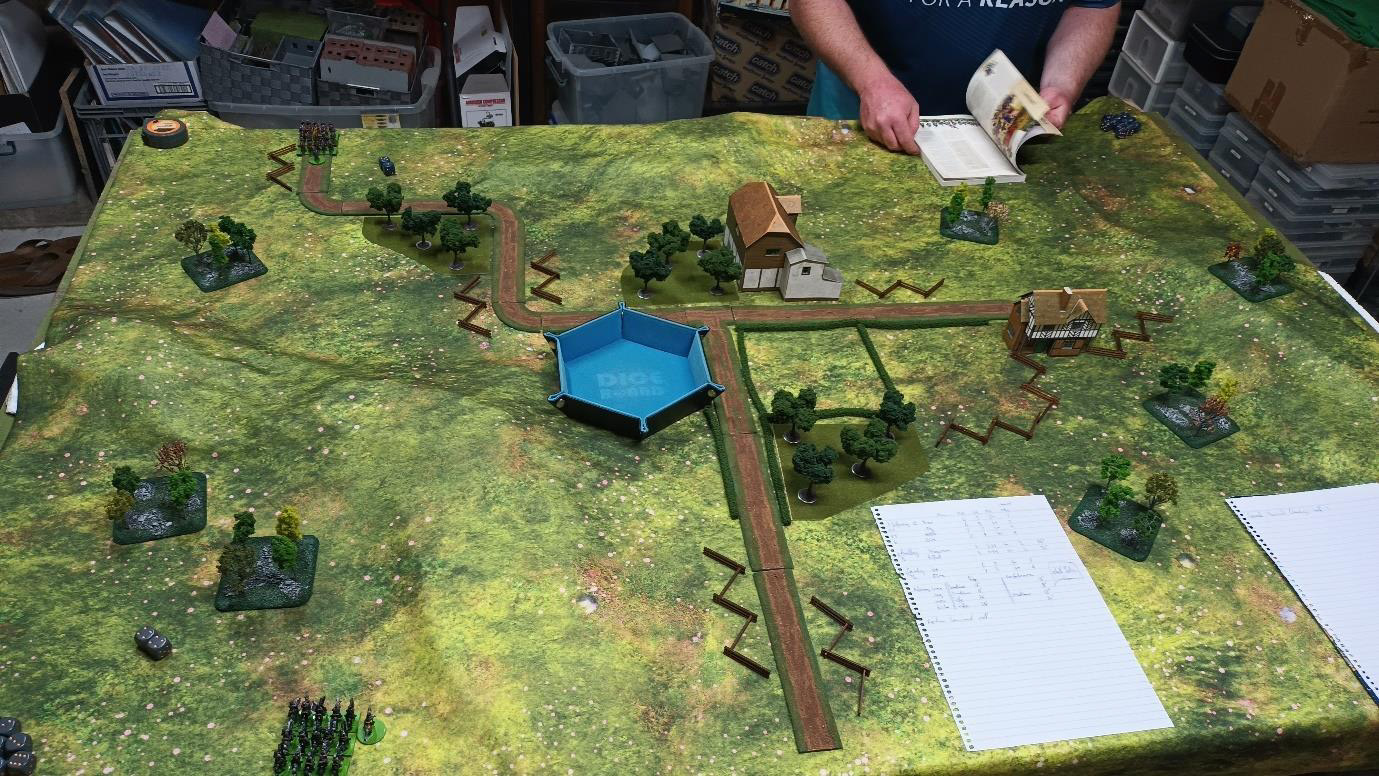
After a quick “vanguard” move we deployed the first brigades on the table 12cm from our table’s edges. It was after having deployed that we randomly generated the experience and weaponry that each regiment would be equipped with. This was kept secret to hold the tension of the battle, and commanders likewise were randomly generated as they appeared.
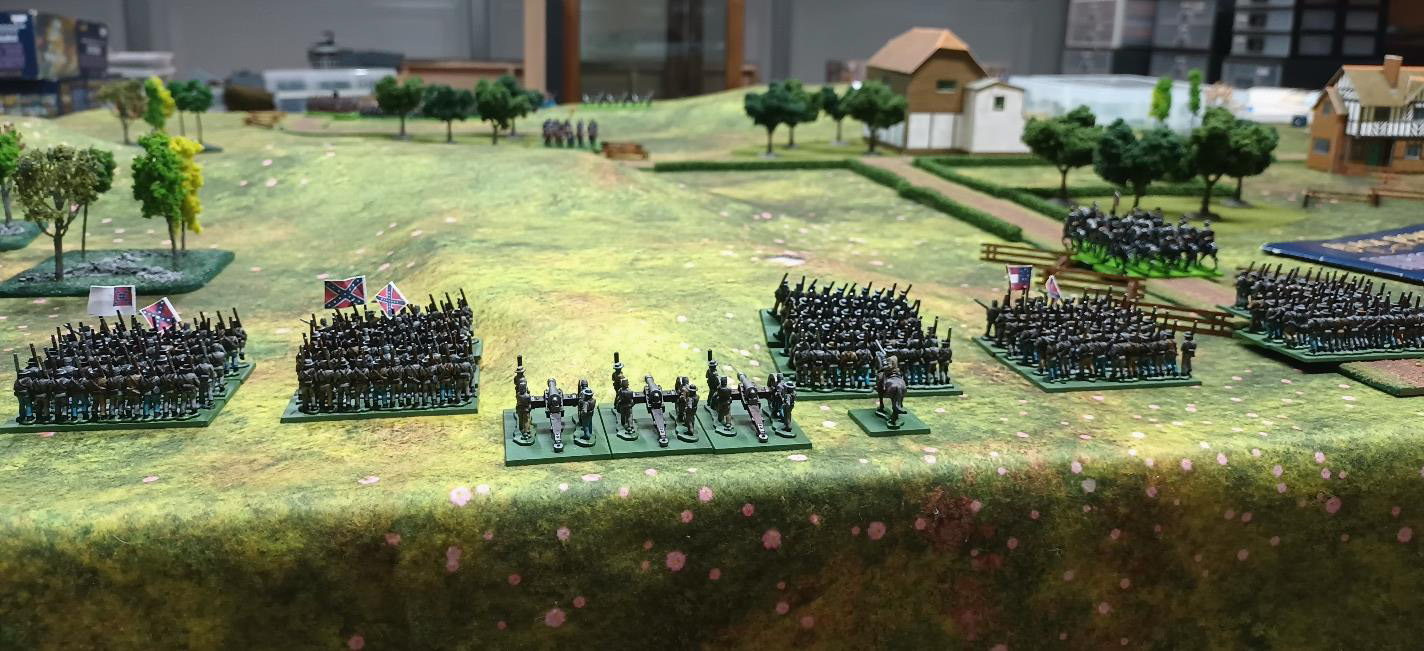
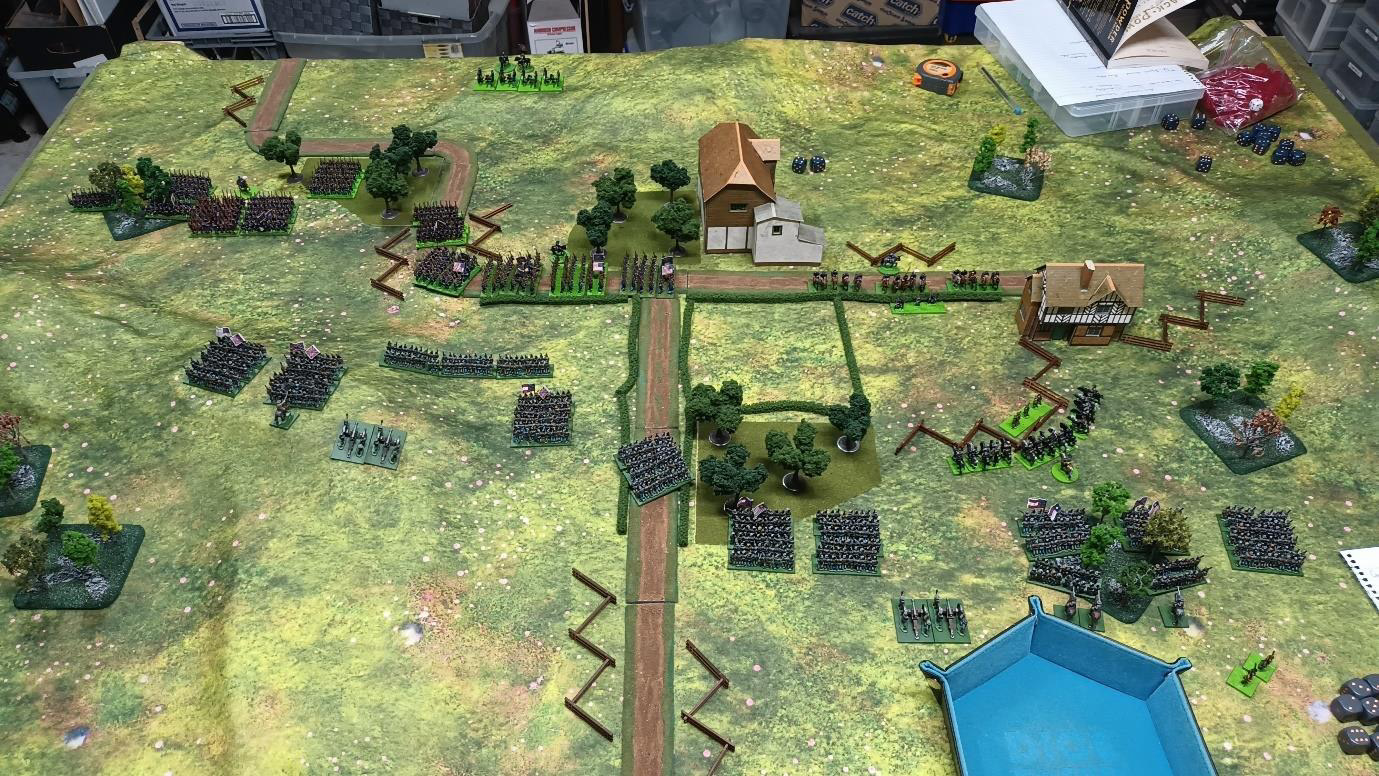
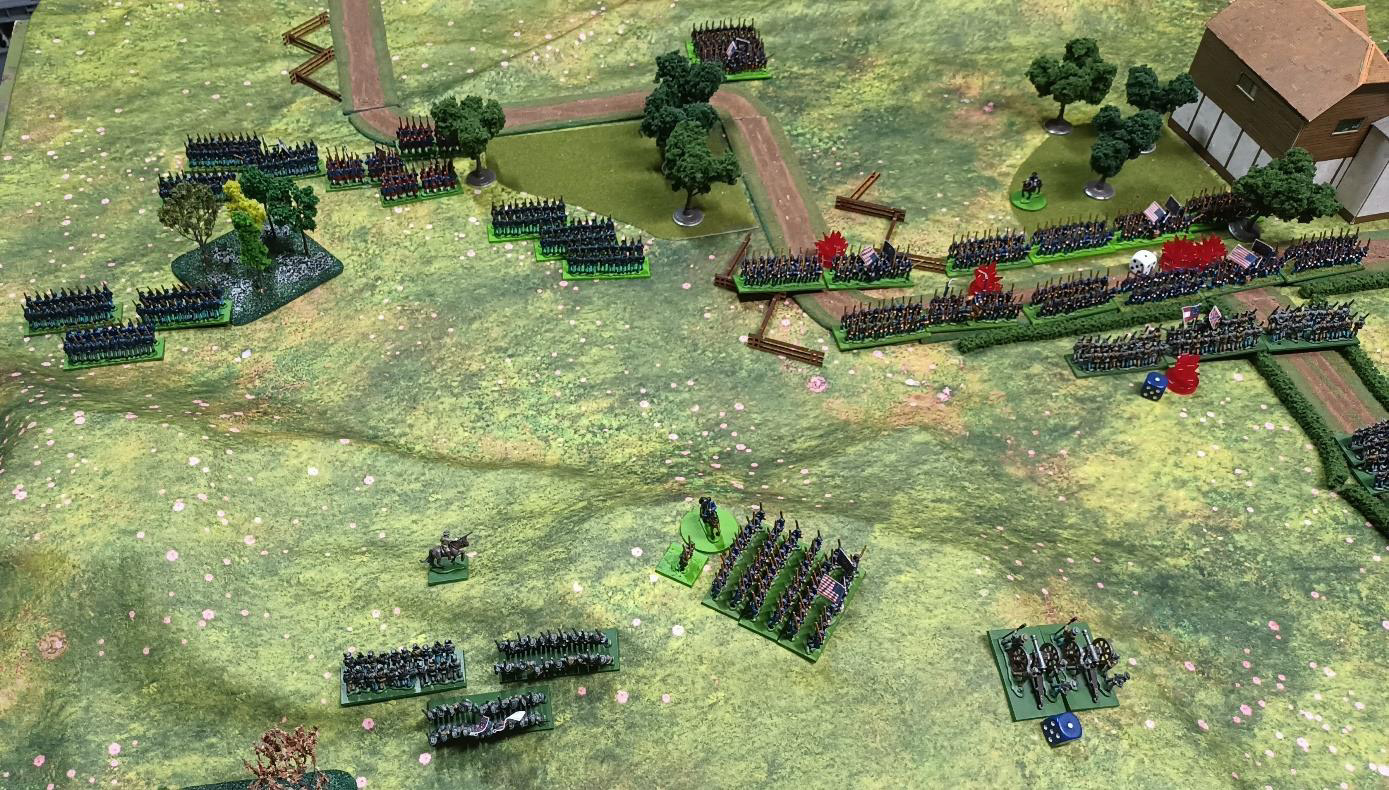
Early Game – Preparations
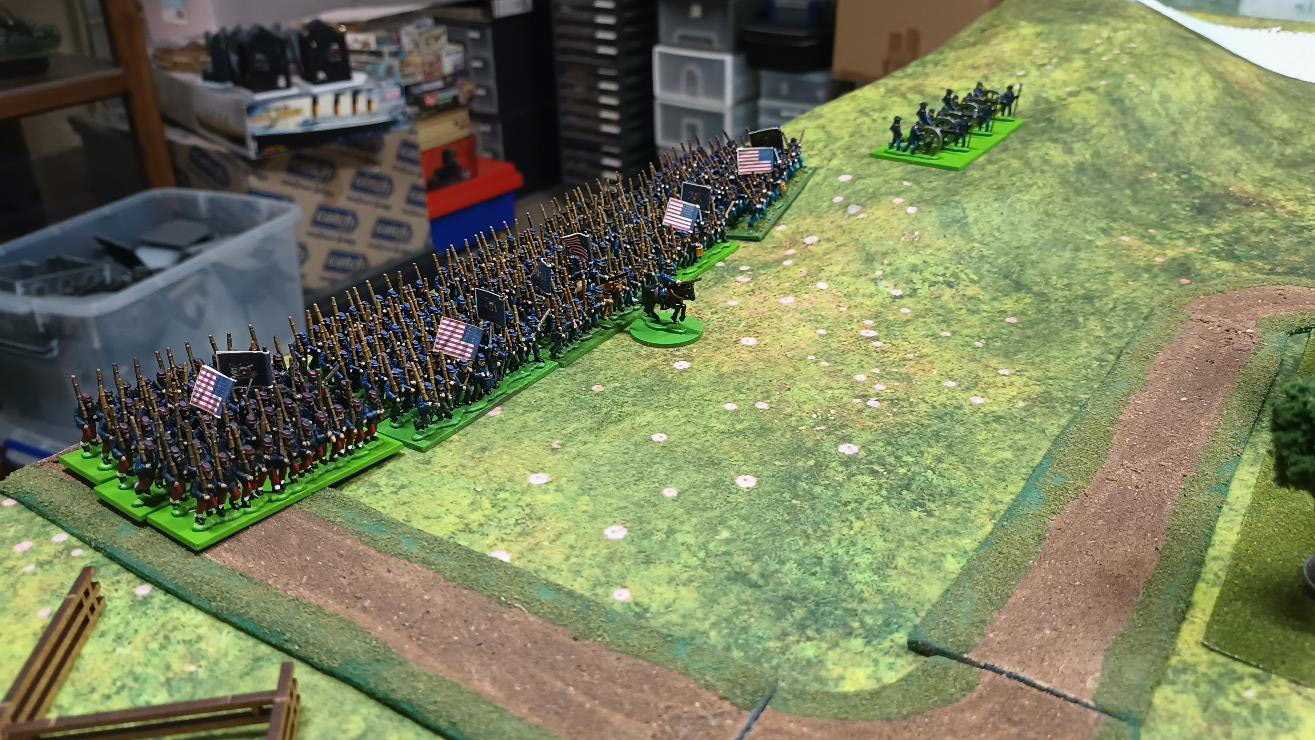
The first few turns of play consisted of manoeuvring the brigades into position supporting our tactical approaches to the crossroads and keeping in mind the end game. The Union forces ended up taking advantage of the roads and marched in column, keeping their minds focussed on the objective. As it so happened, the Confederates had stumbled slightly, not realising that their infantry could move 200% faster than what they had moved (turns out 12cm > 6cm, who knew?).
Dan’s Confederate force then marched with speed into the 2nd quarter of the table, seeking to claim the high ground before the Union forces could deploy into line across the crossroads. Notably, both cavalry squadrons chose to pull back and avoid getting blasted to bits by the oncoming regiments, although the speed and efficiency with which this was achieved was soon to become the norm…
We had discussed beforehand about how we wanted the 2nd brigades to feel like reinforcements, rushing to the aid of the 1st, and for one of us (hopefully) breaking the core of infantry down so that it became ineffective. It was agreed that from turn 2 onwards a single roll would be made for the brigade, and on a score of 6 or more they would deploy within 12cm, randomise their constituent parts and then make a move onto the board. Each successive turn they failed the roll would confer a +1 modifier for the following turn i.e. on turn 2 they need a 6+, turn 3 a 5+, turn 4 a 4+ etc.
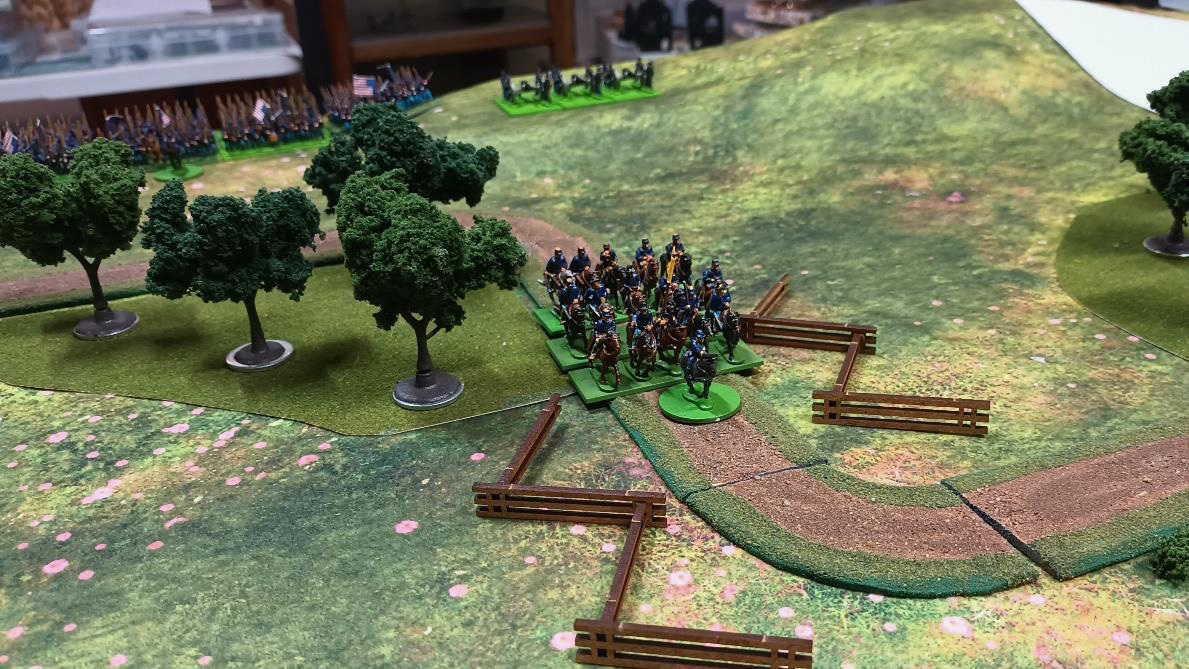
We both promptly rolled dismal failures for our first attempts and continued to reposition our troops. Minimal skirmishing had occurred thus far, however, it was in these early turns that the cavalry in both forces again made stunning successes, deploying and counter-deploying each other. This echoed how American cavalry really fought, with each of them managing to mount/dismount and move to new holding positions as the regiments of infantry progressed into more favourable positions. The Union cavalry got an early holding position’; dismounting into skirmish formation behind hedgerows on their left with a 3rd triple move! Not to be outdone, the Confederate cavalry followed suit opposite across some snake fencing also with a triple move. These horses were FAST!
Turn three began with the Confederate 2nd brigade arriving on the field. Both players laughed and lamented equally at their arrival, as the army commander generated a rating of 6, and his nephew who was dragged into battle was rated similarly. This meant the Confederacy’s right flank which had deployed on the “slower” side of the table due to terrain, also had to contend with the fact that their leadership structure was shot from the start. Little did we know that a hero had been drafted into the war effort… “Nephew” Nathaniel started his combat career by successfully executing 2 orders on his first roll, with no re-roll from the general required. There was hope after all.
The Union also rolled on their 2nd brigade and there was no letting up the pressure, as they doubled down on the road play with orders to take the Confederate hill. This was enacted with haste as yet another triple advance was successfully executed. The Union’s 1st brigade made an early play for the crossroads but were unable to form into line against the hedges.
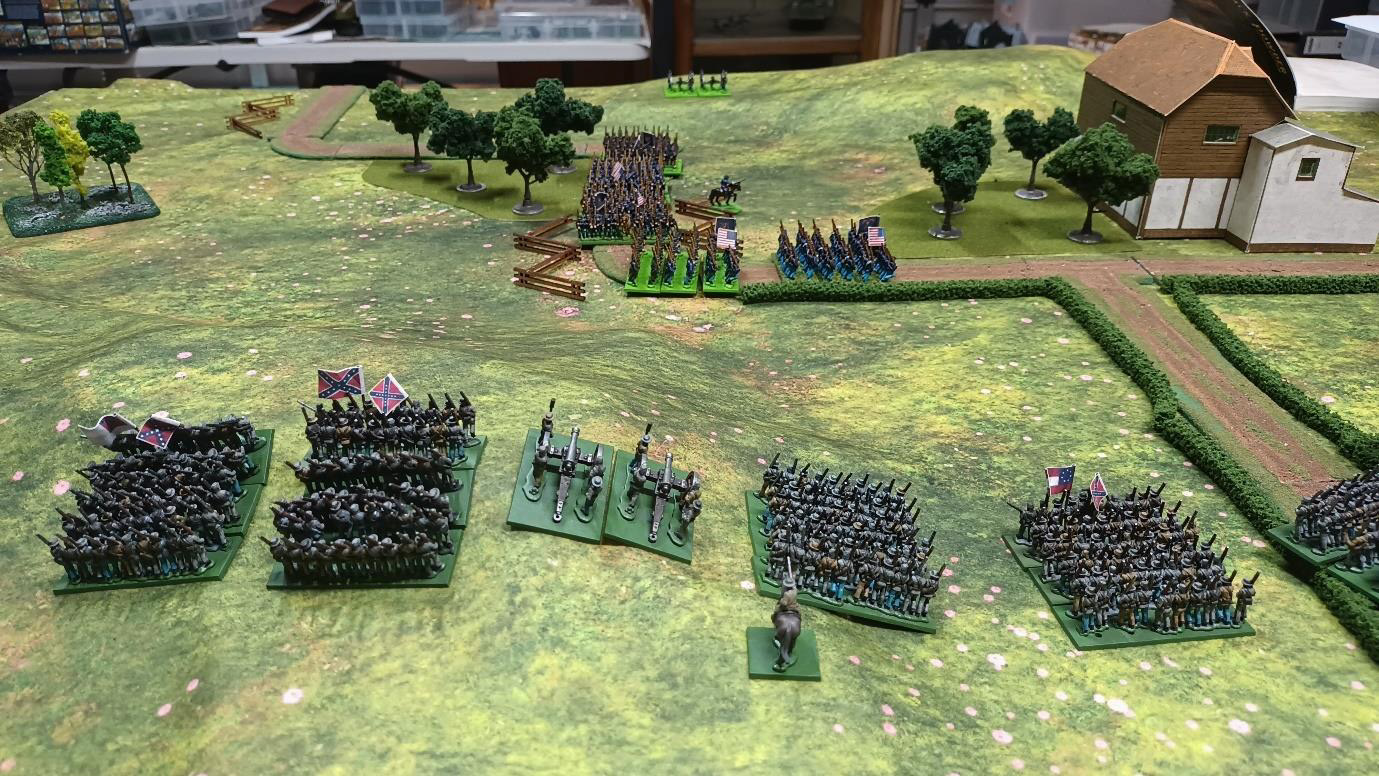
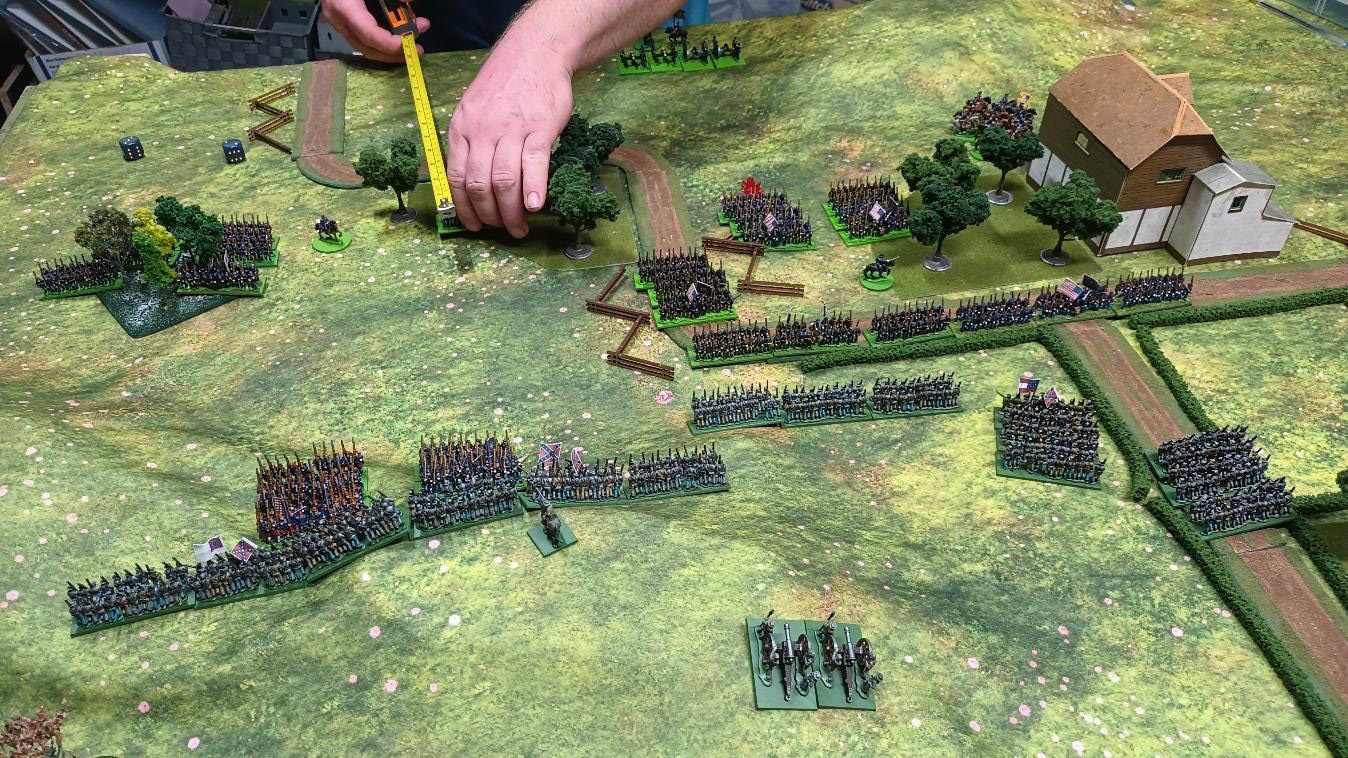
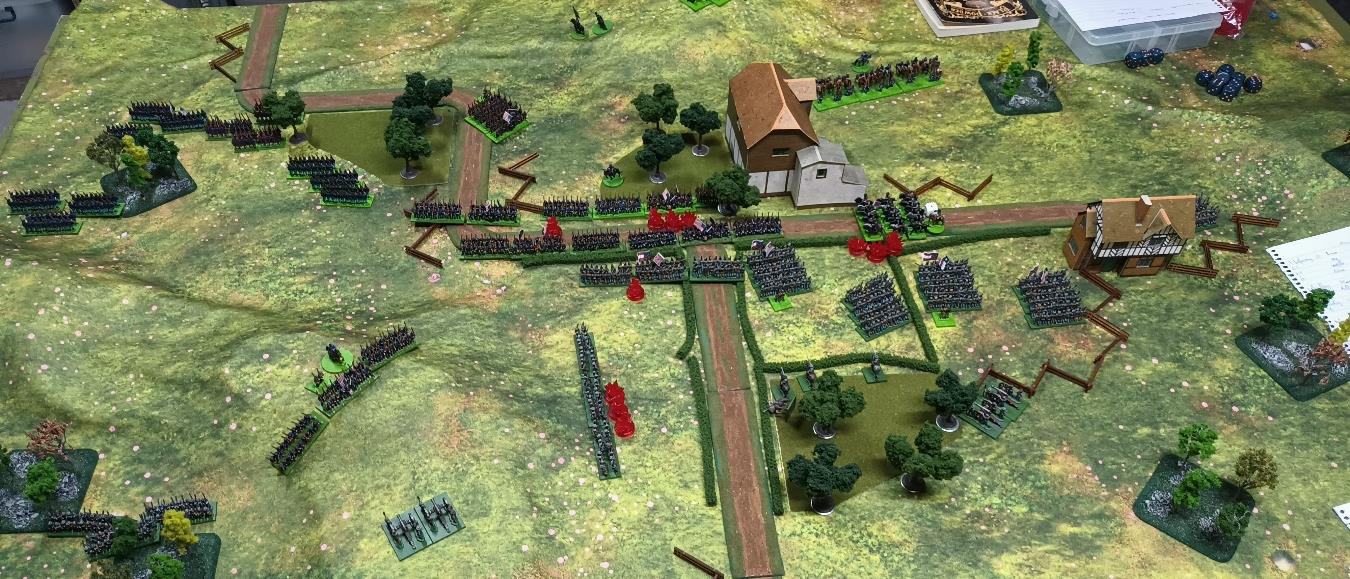
Mid Game – The stage is set, and the dice are rolled
We began the mid-stage of the game with the Confederate forces moving into line on the left flank, with pressure starting to be applied in the centre. There was a failure of orders which had left a gap in the centre lines, but the 9th Florida regulars stepped up to fill it. “Nephew” Nathaniel denied statistical probability again and the 2nd brigade once more advanced with a double move. It was hard to understand it at the time, but being able to get clear of most of the rough ground in this turn around the centre was unbelievably crucial. A few small volleys rang out without much of an impact. The Confederates had made their play; though their 2nd brigade was still a turn or two away it seemed they still had the time to bring them around to lend their support.
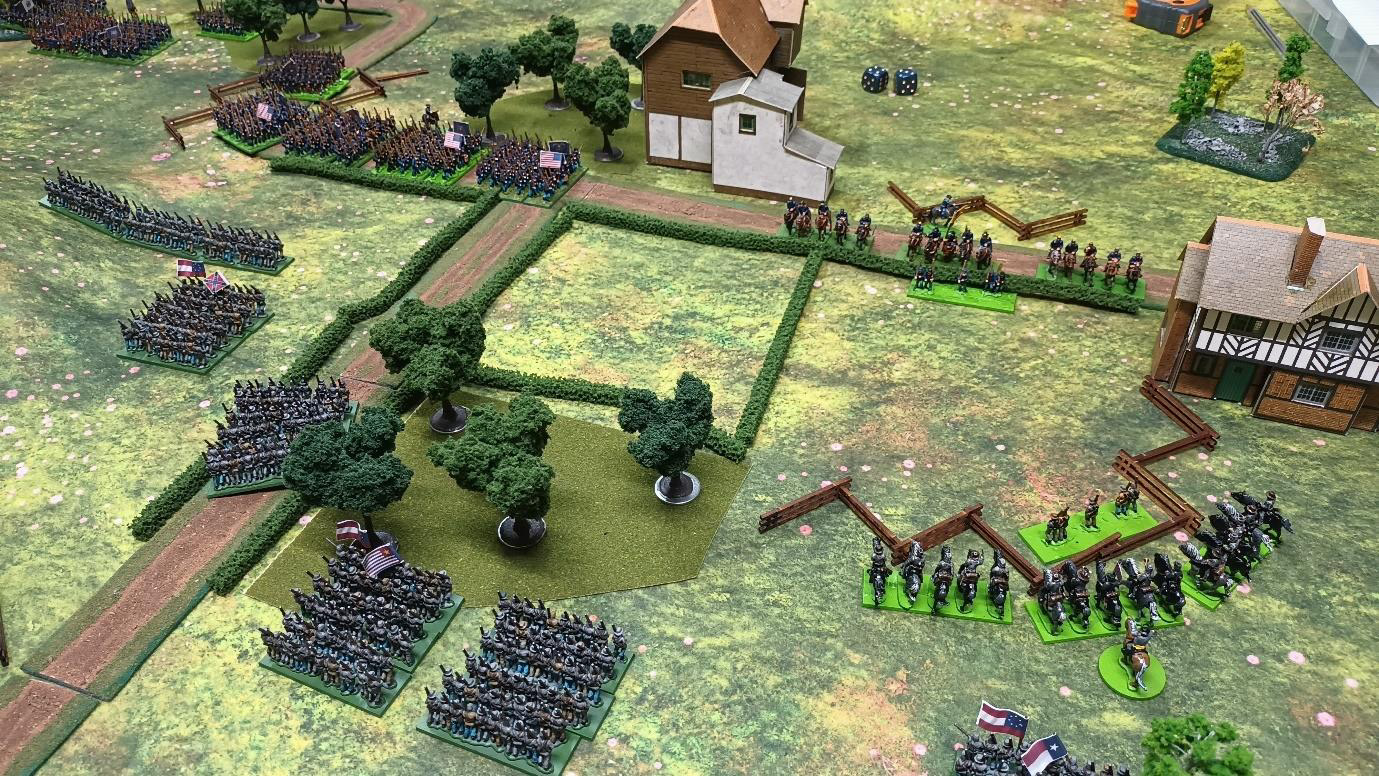
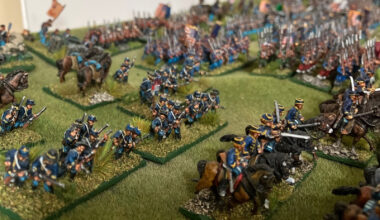
Except that they didn’t have time. After seeing the Confederates form up in line, the Union troops realised the open ground in front of them would quickly become a killing ground clogged with corpses and impediments. The charge was thus sounded and despite the distance, they successfully executed a triple move and charged up the hill. Muskets rang out as they closed, and the resultant close-quarters combat was beyond imagination. However, the left flank of the Union had a breakdown of communications and stalled. The Confederates got a snippet of a lifeline after all…

The skirmish firefights started to pick up now in the centre. Inexperienced Confederates charged in but quickly retired, although they made a good account of themselves before being forced to do so. Confederate cavalry again mounted up and once again moved with triple orders to a risky position poised to follow through on a charge in the centre, however, this time “Nephew” Nathaniel stalled, clearly confused by the rapid action on the left flank. Only the two centre regiments could move under initiative. The Confederate artillery drove off the worn Inexperienced unit from the side of the Elite Union regiment. Meanwhile, “The Defiant” Lachlan mopped up the other Inexperienced regiment that had charged him at the end of the last turn and advanced to force a decision from the Union generals.
In a disastrous turn of events for the Union, “The Unknown Survivor” in the centre blundered his orders, sending an Elite unit back into a deep reserve position. The remainder of the Union troops plugged what gaps they could. Faring better elsewhere, the Union confidently attempted to clear off the remnants from ”The Defiant” Lachlan’s brigade who were almost at breaking point resulting in the loss of cohesion of both regiments. The Elites formed up intending to do incredibly violent things to the Confederate artillery battery but missed. The Confederate cavalry became pin cushions, and whilst they aren’t severely damaged, they are not comfortable!
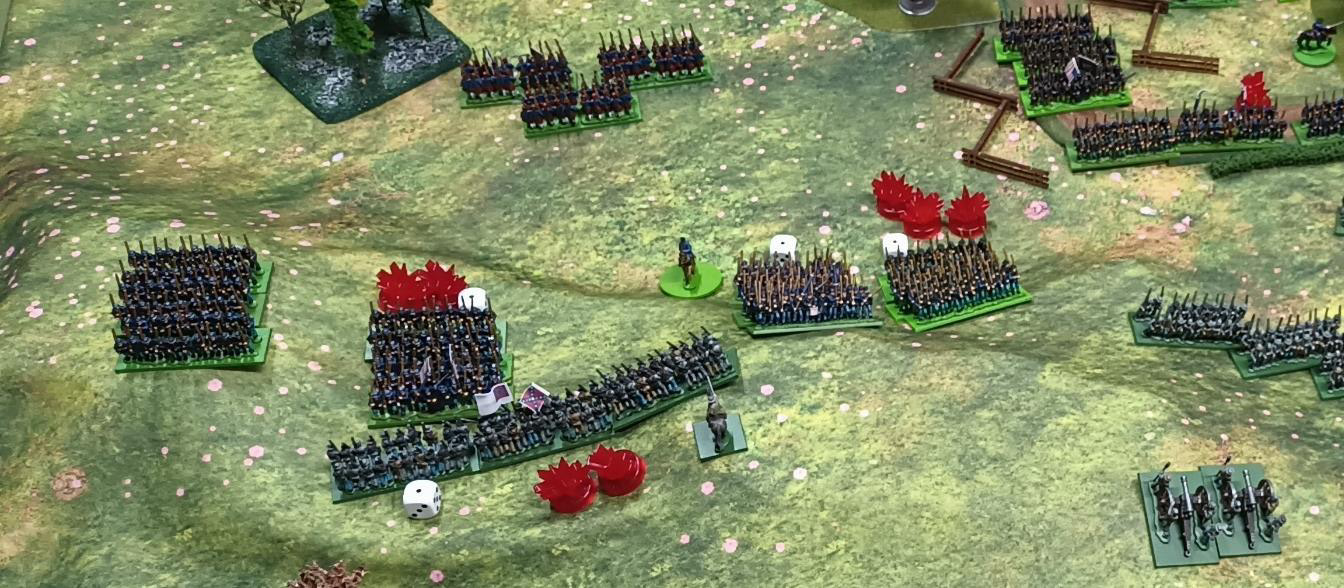
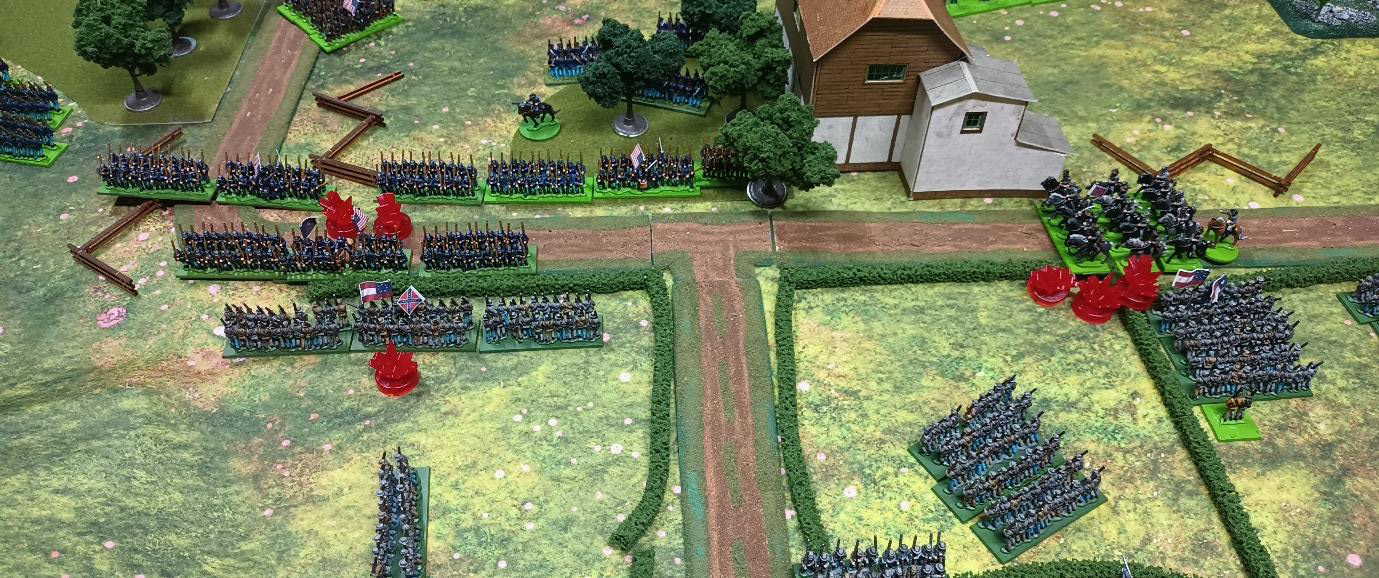
Late Game – Closing turns and gambles!
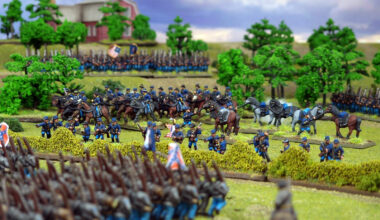
Coming into the last stages of the game there was still all to play for. The Confederate forces may have lost the hilltop on the left, but they had sent four Union regiments packing in the process, and they had full effective use of the artillery at the start of this turn. The Union held the crossroads, it was time to push in and claim them. Technically we had hit a point where brigades would normally be retiring from battle but because we were having fun, neither of us bothered to check, we just wanted that crossroads!!
A series of desperate manoeuvres and holding actions now took place, so many that it is hard to recall each detail. Suffice it to say we gave it everything we could to try and secure the crossroads and force attrition. The Confederates managed to check, hold and break the remaining Elite unit of Union that assaulted the hilltop, and over the final turns we also saw several commanders fired upon by sharpshooters while at risk in proximity (these were our own house rules) and that meant we saw both “Valiant” Pemberton and “The Defiant” Lachlan meet their ends, although their heroic skirmish on the hilltop will forever be remembered. The Confederates raised Mathias (rating 6), who was forced into command and not well-suited to it. After his untimely death half a turn later, Darrius (rating 5) stepped into the role. Neither’s effort could compare to the feat achieved by “The Defiant”. As the 2nd brigade was wiped out to a man no replacement leader was generated for the Union.
By the end of turn 9, the Confederates had cleared the crossroads and in the last turn they had secured them with a beaten, but not defeated, Inexperienced regiment. The Union forces surrounding the crossroads were all disordered except for a single regular regiment, which was out of formation and two moves away. “The Unknown Survivor” needed to issue 3 movement orders at an additional -1 penalty for the range, on a rating of 8 (4 or less!) for that regiment to even be eligible to charge.
The dice were cast, the result a 3 and the charge roared home (much laughter from both players ensued). Closing fire had some impact, and the reduced Inexperienced unit went down fighting, but they were ultimately beaten. After ten hard-fought turns, fast positioning, upsets and some outlier results in critical positions on both sides, the Union had enough of a grip on the crossroads that the Confederates pulled back. A pyrrhic victory; they’d secured the crossroads, but the 2nd brigade had been annihilated and they’d lost “Valiant” Pemberton. As for “Nephew” Nathaniel? He has a very bright future ahead!
by Daniel Newton
Get Started with Epic Battles: American Civil War
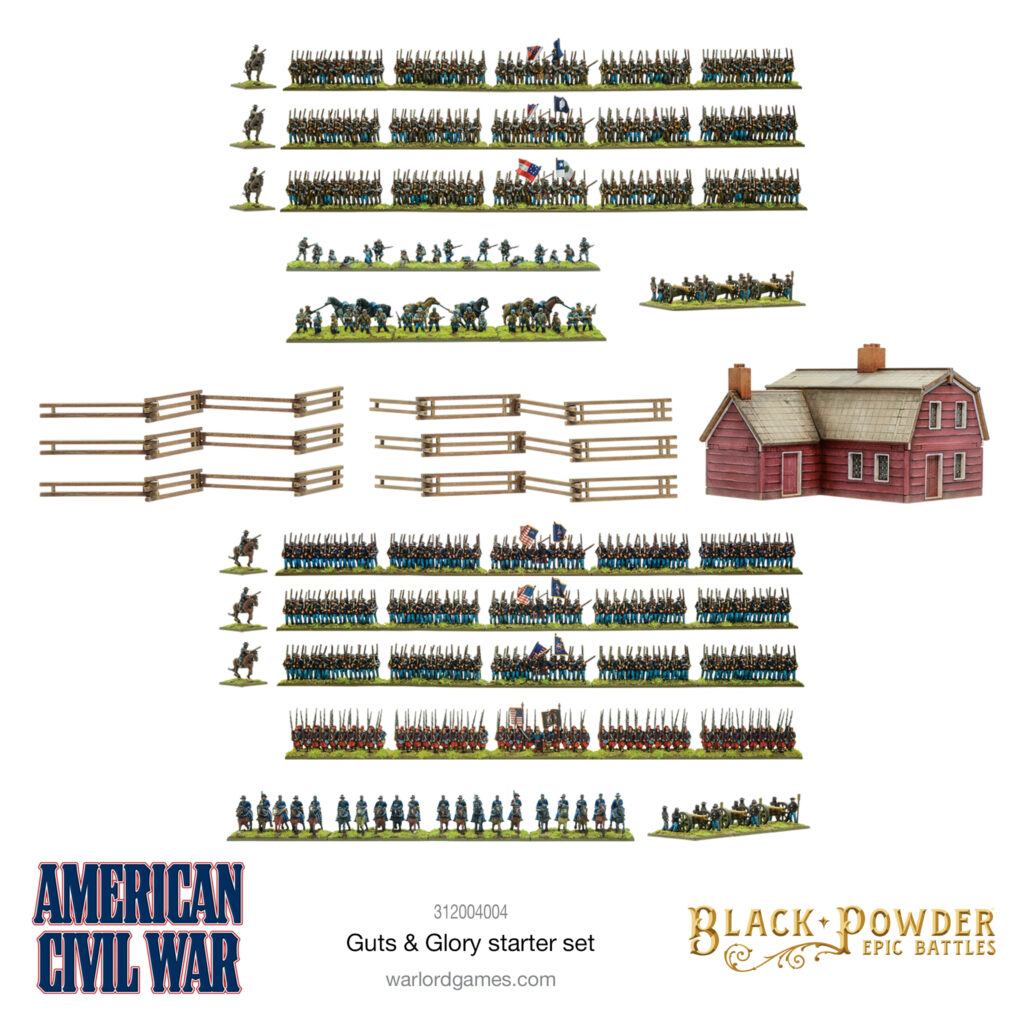
Guts & Glory
This starter set is ideal for new players easing their way into Black Powder Epic Battles for the first time, or even those who want a healthy number of reinforcements for an existing army. In here you’ll find enough for a regiment each of zouaves, cavalry, dismounted cavalry and skirmishers, as well as six regiments of infantry, cannon & mounted commanders. In addition, we have a Dutch-style barn and snake fences in laser-cut MDF and everything you need to get playing, and with flag sheets included for both Union and Confederates, you’re not tied down to a particular side.
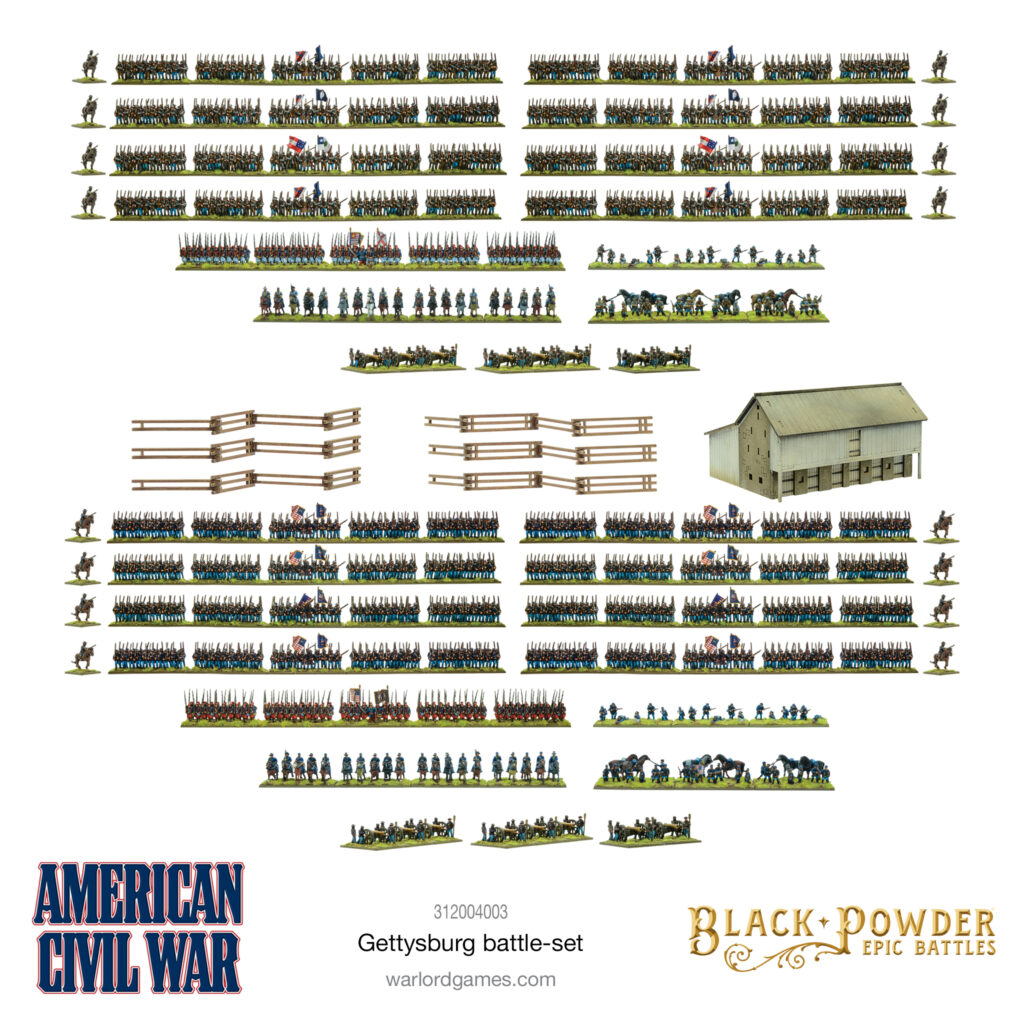
Gettysburg Battle-Set
For those who want to follow Ralph’s example and go big (and who doesn’t?) we have the superb value battle-set, Gettysburg. This is the ultimate way to get started with Epic Battles, with two massive armies in colour-coded plastic, MDF scenery pieces and just about everything you need to get playing the American Civil War on the epic scale it deserves. The Gettysburg Battle-Set contains:
- Union army (blue plastic) – 8 infantry regiments, 1 Zouave regiment, 1 cavalry regiment, 1 dismounted cavalry regiment, 1 skirmishers regiment, 8 cannon & 8 mounted commanders
- Confederate army (grey plastic) – 8 infantry regiments, 1 Zouave regiment, 1 cavalry regiment, 1 dismounted cavalry regiment, 1 skirmishers regiment, 8 cannon & 8 mounted commanders
- Green plastic bases for all figures
- A5 Black Powder rulebook
- 36-page American Civil War background, scenario and supplemental rule booklet
- Flag sheets for both Union and Confederate forces
- Laser-cut MDF farm building
- Laser-cut MDF Snake fences
- Six D6 dice

1 comment
Brilliant stuff Daniel you blokes in WA are something to behold! Not Queenslanders, but still…
Comments are closed.