It’s been tanks-a-go-go here at Warlord Games HQ ever since we got our hands on the first test copies of Achtung Panzer!, and many Warlord staffers have been beavering away on new tanks of our own in preparation for a really big game in our HQ store! Naturally, seeing so many writeups come across my desk for preparation got me wanting to join in the fun – so I did! Initially, I was planning to do something Soviet that could be used either for Achtung Panzer! or my Russian Bolt Action collection but then I looked at the signup sheet for the mega-game – the Axis were clearly in need of a few extra players! By this point, however, I’d already got my heart set on a Soviet KV-series tank, so it was looking like the Allied numerical superiority was about to increase even further…
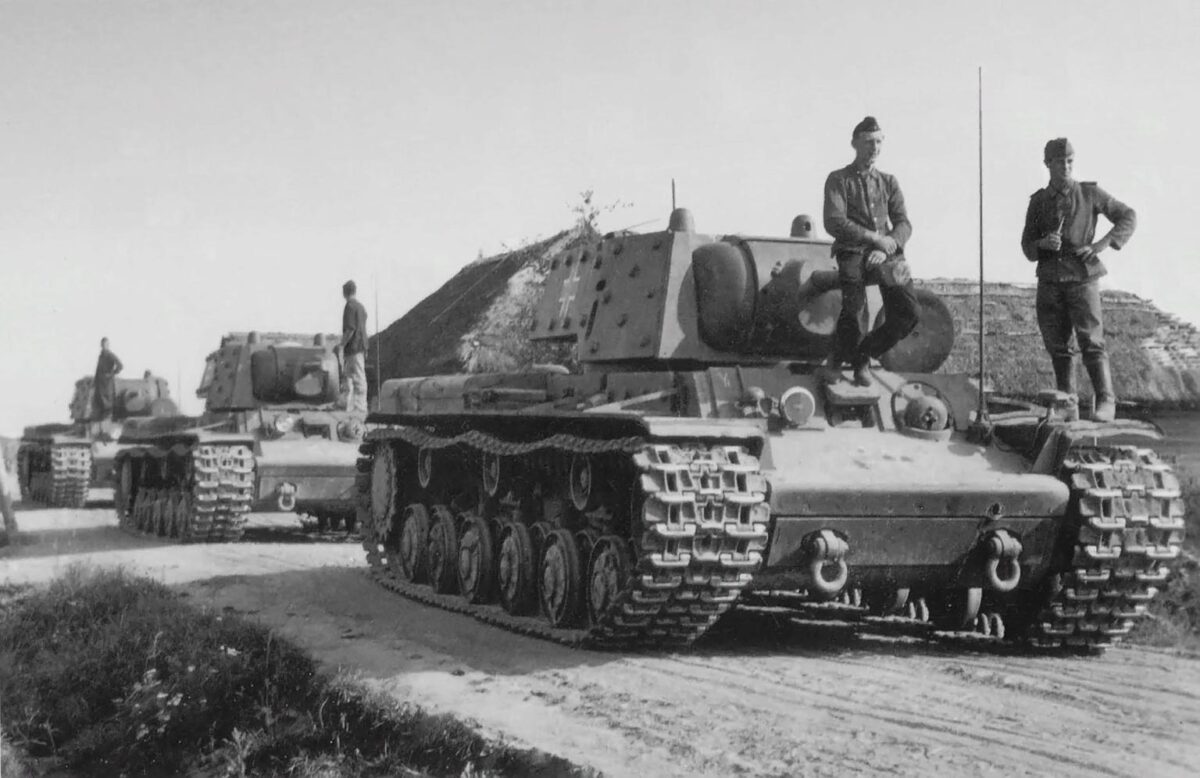
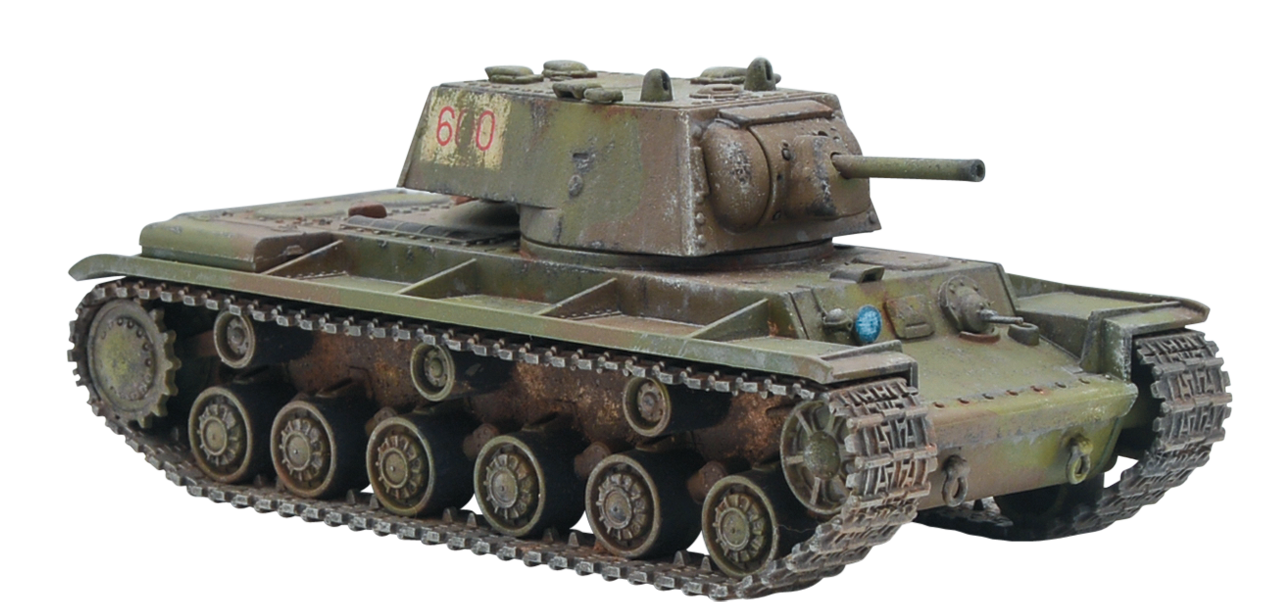
Then I remembered! The German military captured enormous numbers of tanks and other vehicles from many of the nations they fought against – including of course the Soviet Union – and would frequently press them into service, with varying levels of modification! What’s more, the Achtung Panzer rulebook comes ready with rules for fielding captured enemy armour. A quick internet search turned up plenty of images of KV-1s and 2s in Wehrmacht service, including a particularly interesting KV-1 retrofitted with the long 75mm gun from a Panzer IV! While this would be a very cool conversion opportunity, I decided to keep things a little simpler – by using a ‘standard’ KV-1, I wouldn’t need to change any stats, and could just use the KV-1 card from the Soviet deck – I always like to err on the side of simplicity when it comes to big games like this! That’s not to say there weren’t conversion opportunities, however. One thing I knew going in, which was borne out by many of the original images, was that the German military absolutely loved replacing the commander’s cupola on captured tanks with one based on the Panzer III. You can see why – compared to many of the hatches in use, it’s a flat upgrade, providing better protection and visibility for the tank commander, and a bit more space!
Assembly
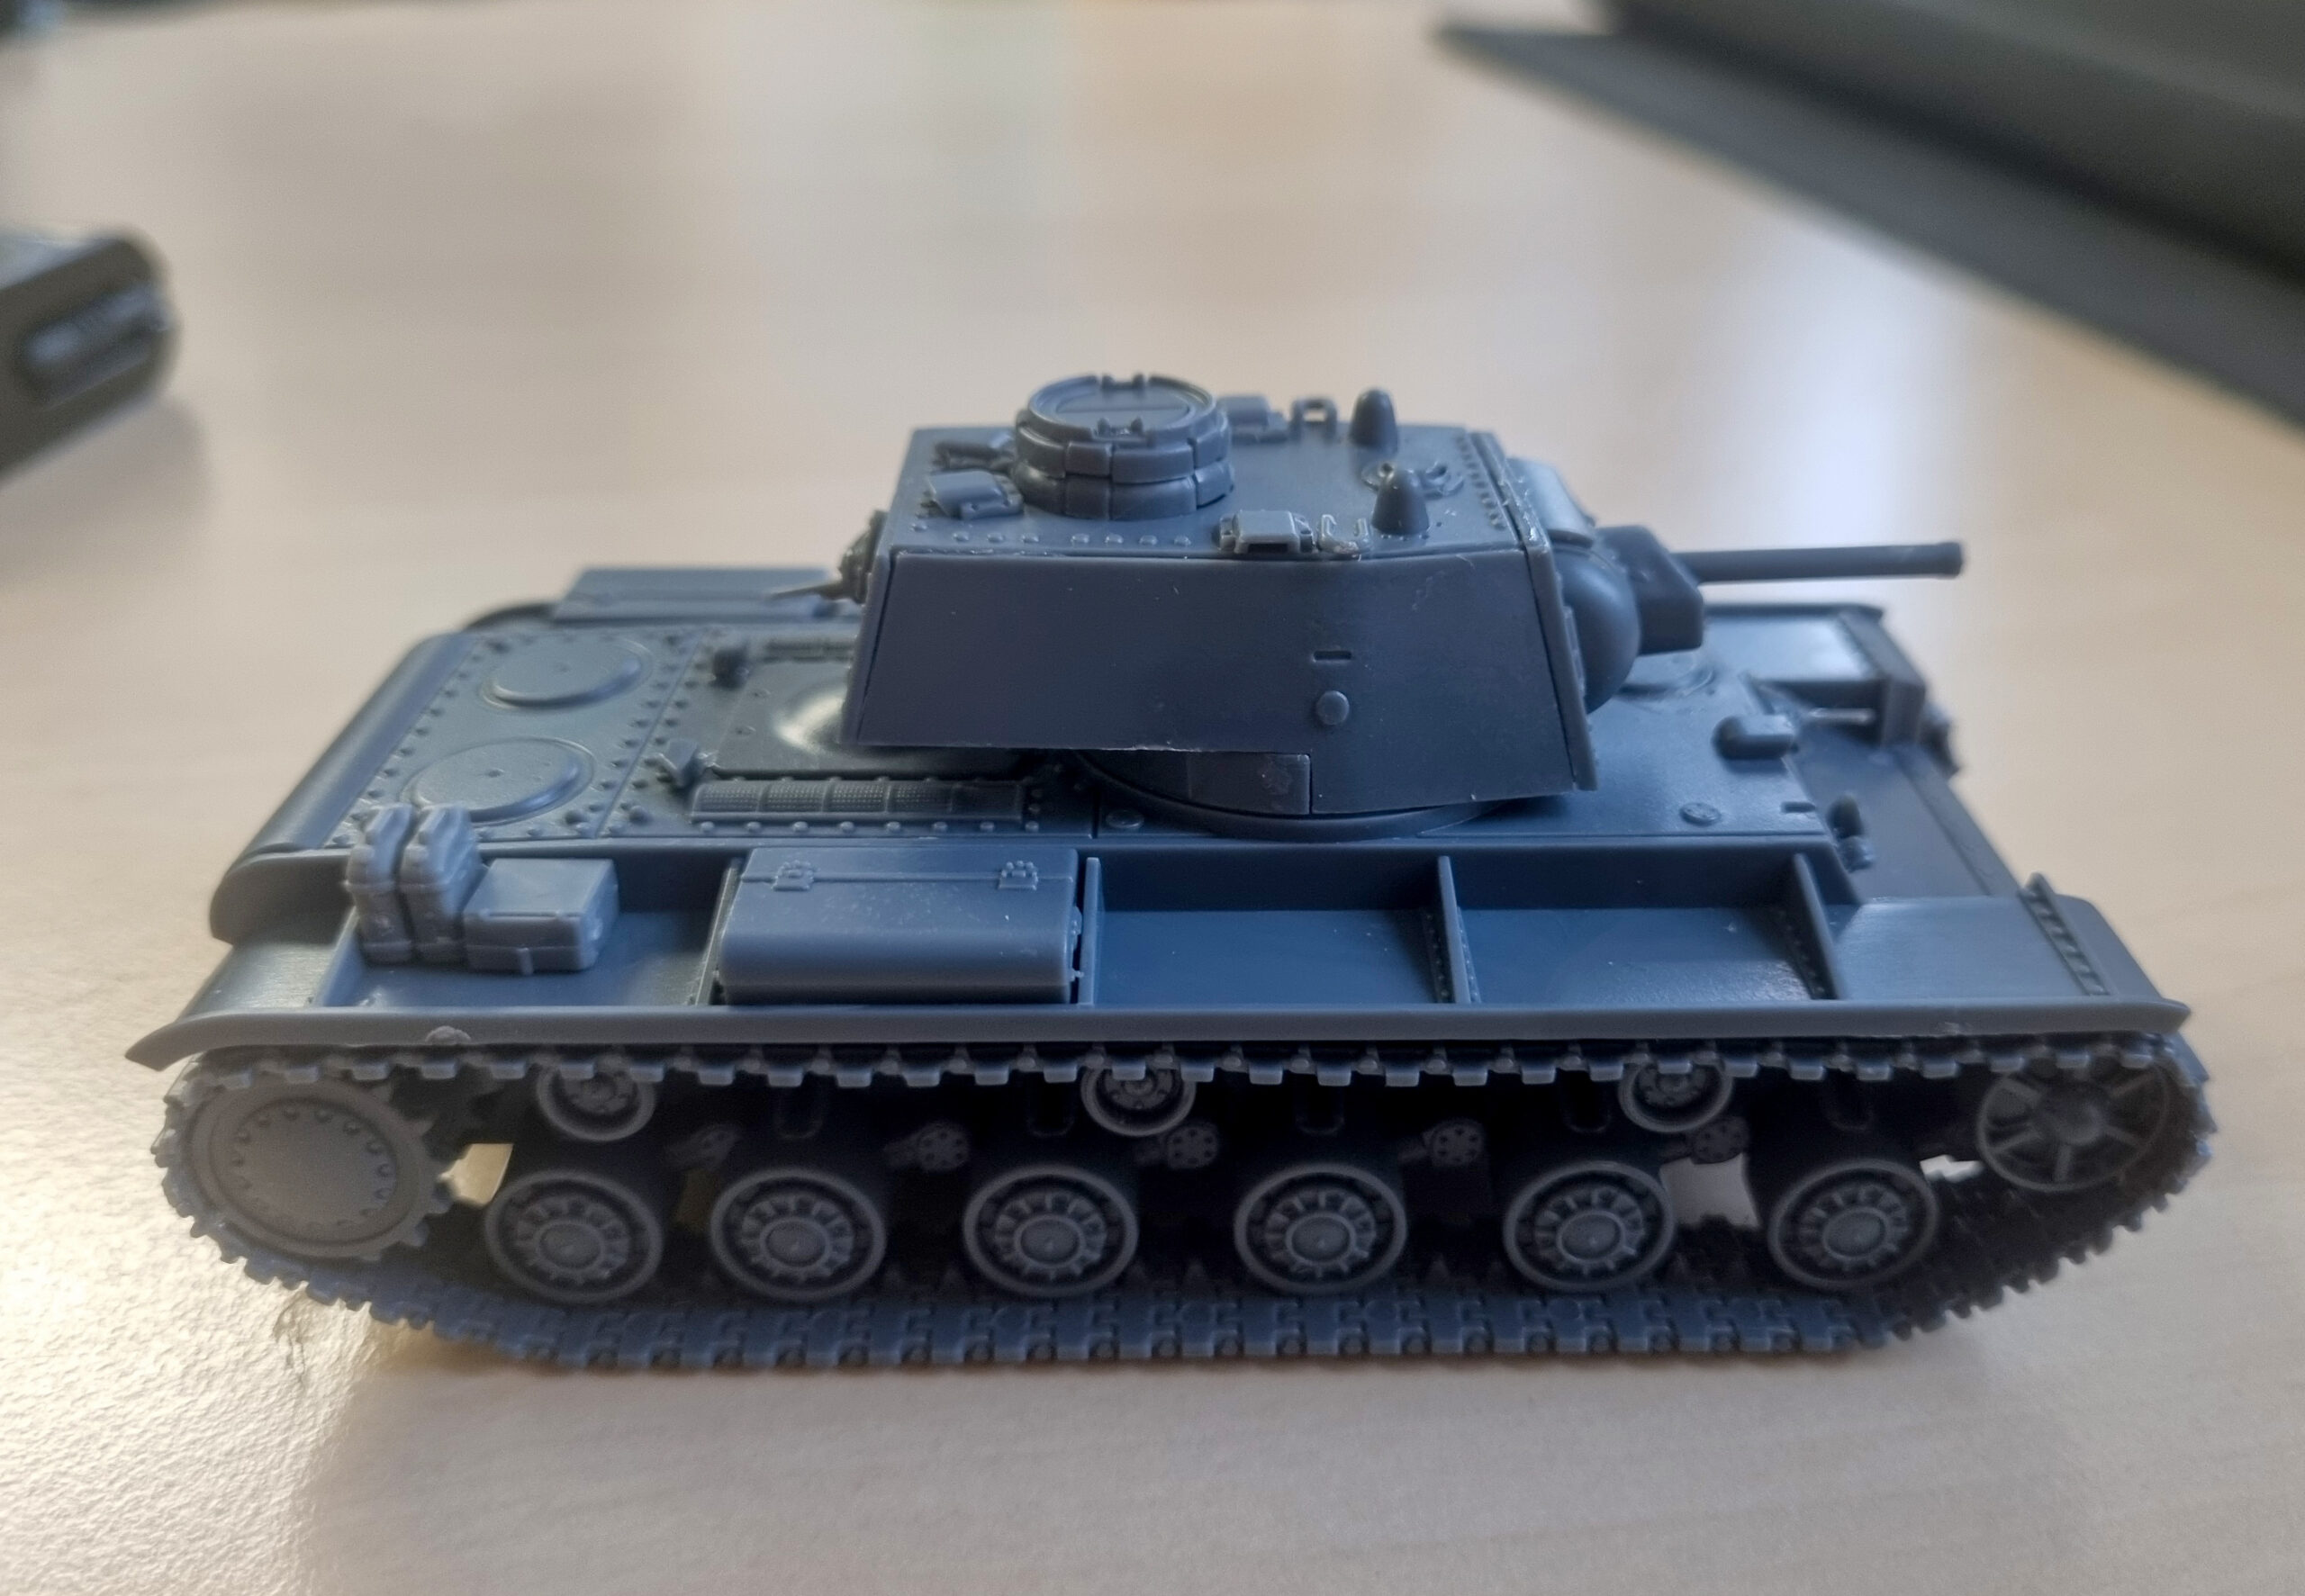
Armed with a nice new KV-1/2 kit and a ‘scrap’ Panzer III kit (several crucial components had been requisitioned by our Customer Service team to fulfil a special request!), I set out to build! I’ve put together a lot of plastic tanks in my time, particularly of the German variety, but this was actually my first ever Soviet AFV, so I decided to take things nice and slowly – I always prefer to take a little bit of extra time on a build, rather than have to go back and try to fix things! As this kit can be built as either the KV-1 or KV-2, there are a whole bunch of ‘extra’ turret components on the sprues (not to mention a sprue of Soviet infantrymen and their weapons!). This can look a little bit overwhelming at first glance, but this can be avoided by simply following the instructions and essentially ignoring all the other components until you need them!
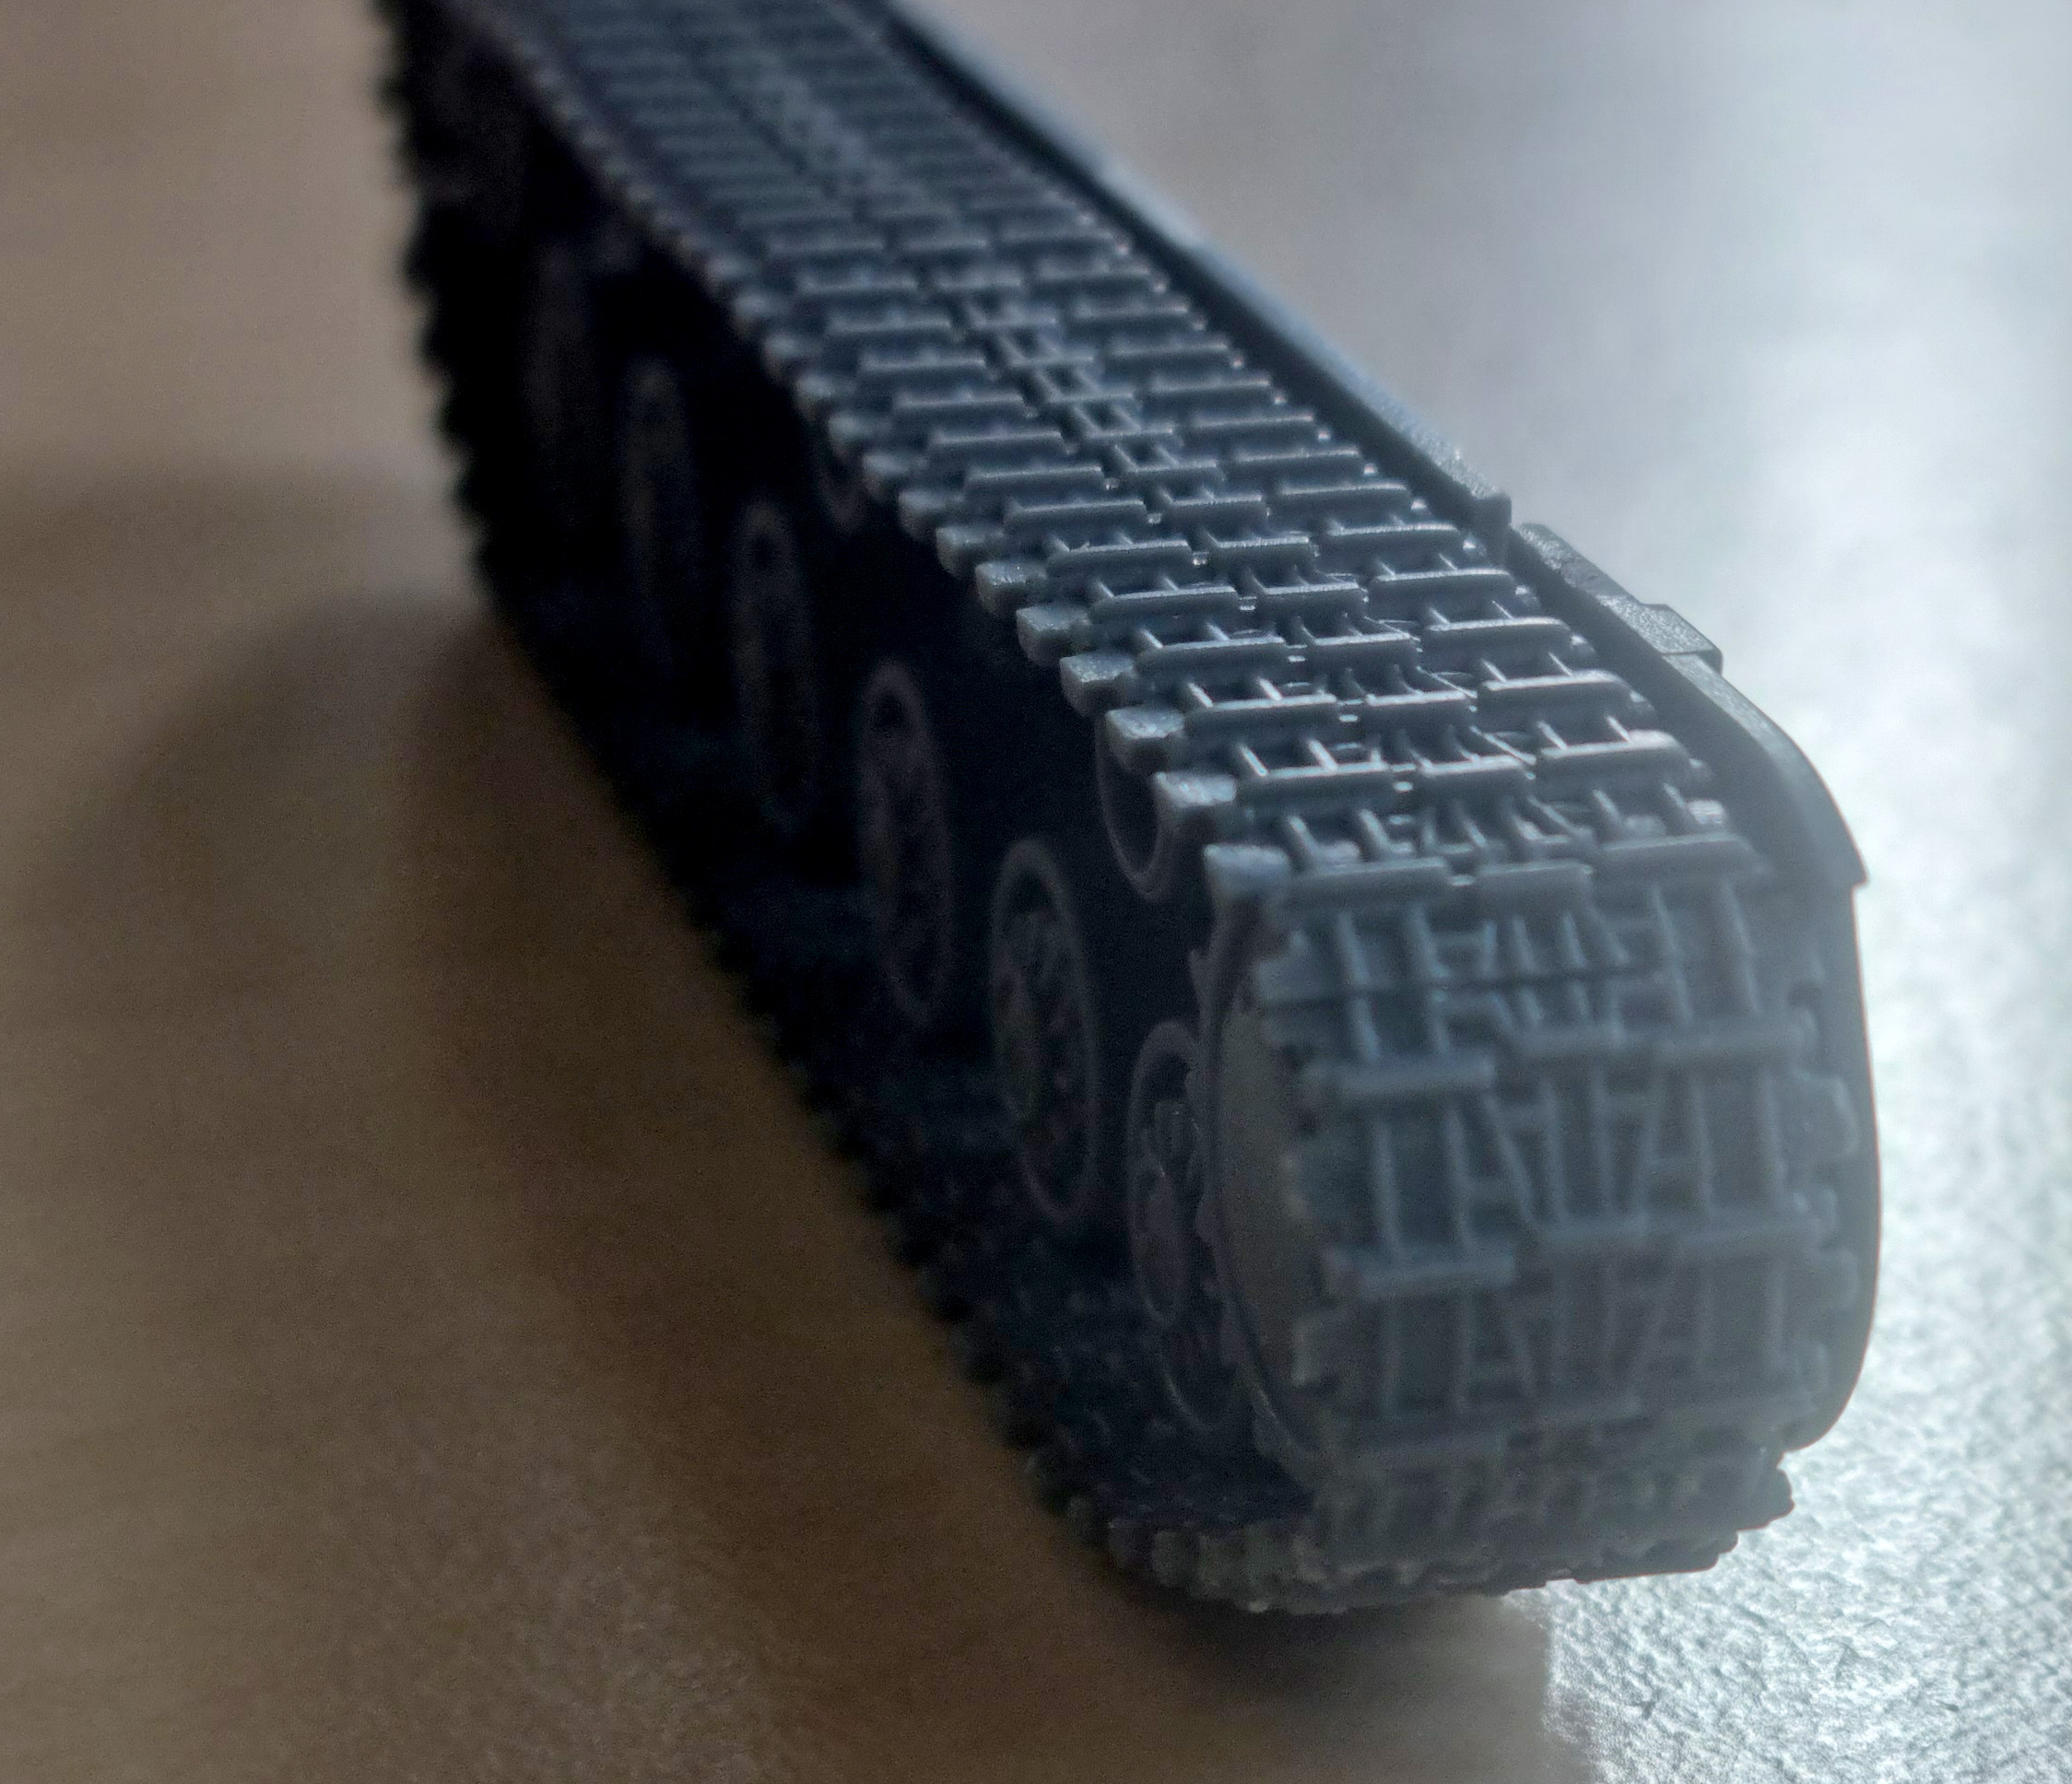
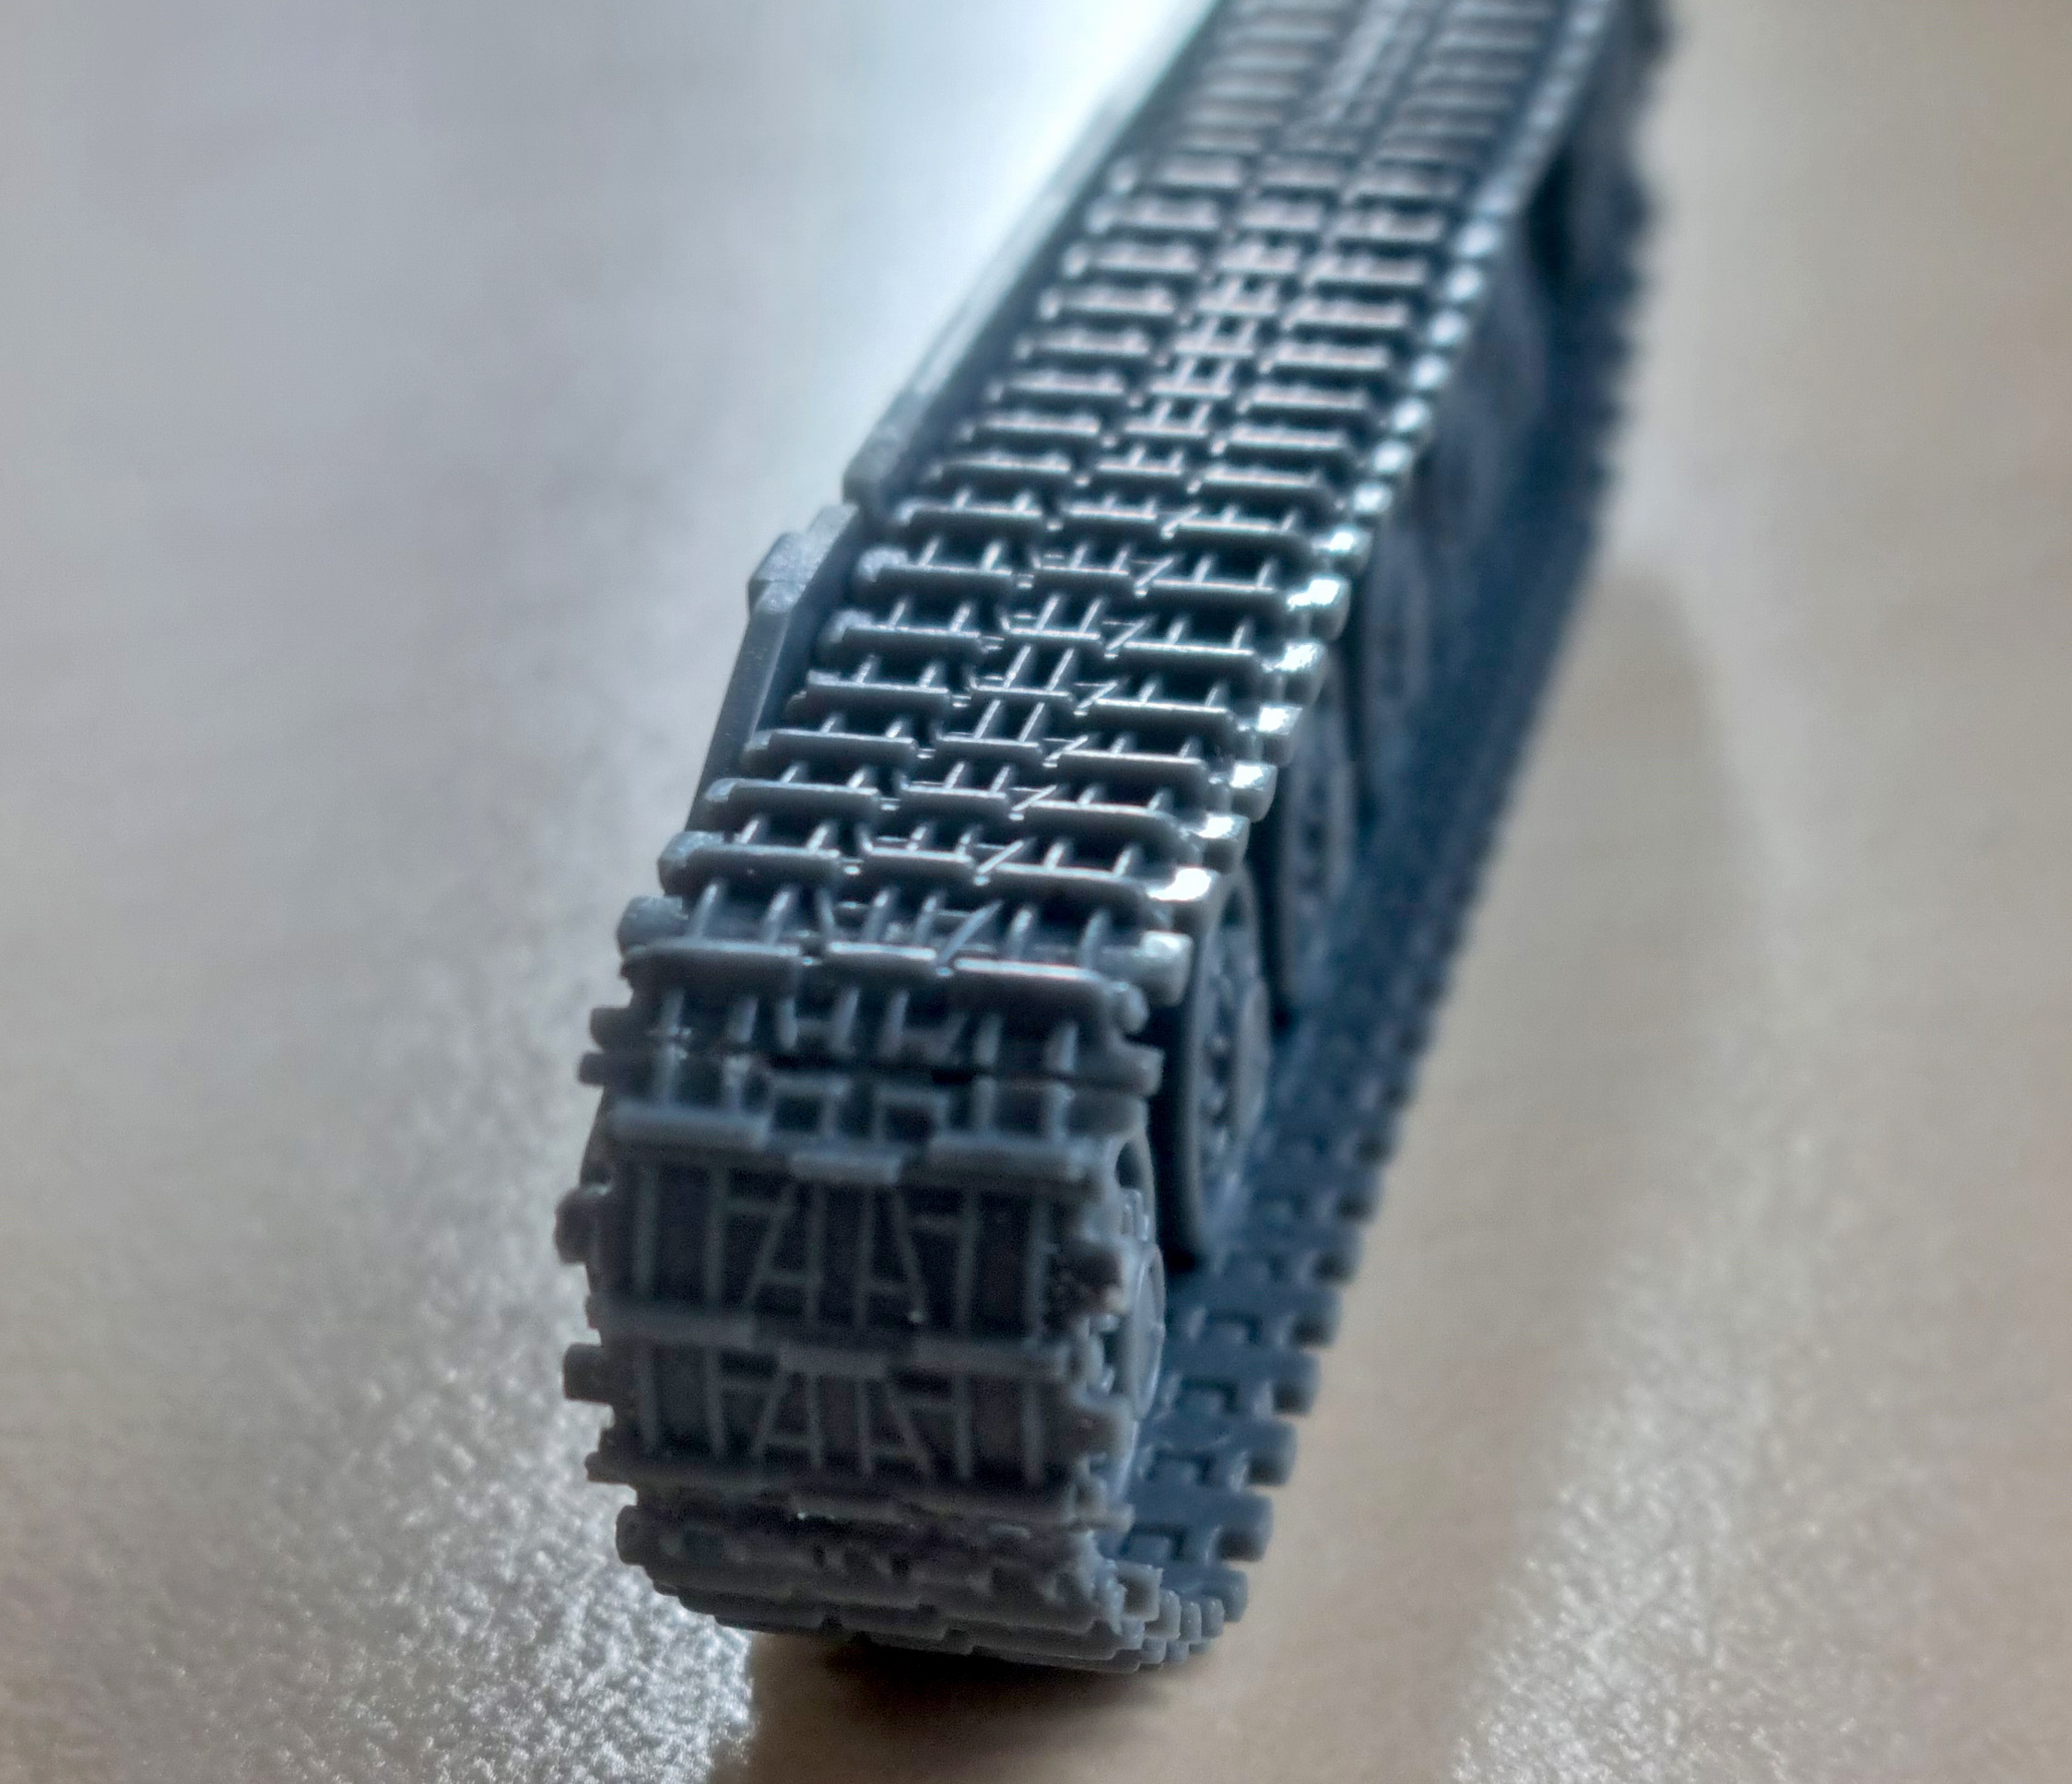
Overall, this kit is one of the simpler ones I’ve worked on, which is always a bonus in my books! The tracks, running gear, and lower hull assembly are all easy to assemble, with locating tabs meaning it’s very hard to get anything wrong – the only thing to make sure of is that you’ve got the track segments on the right way ‘round! This is one of those cases where taking an extra ten seconds to really look at a component is infinitely preferable to rushing ahead and potentially making a mistake!
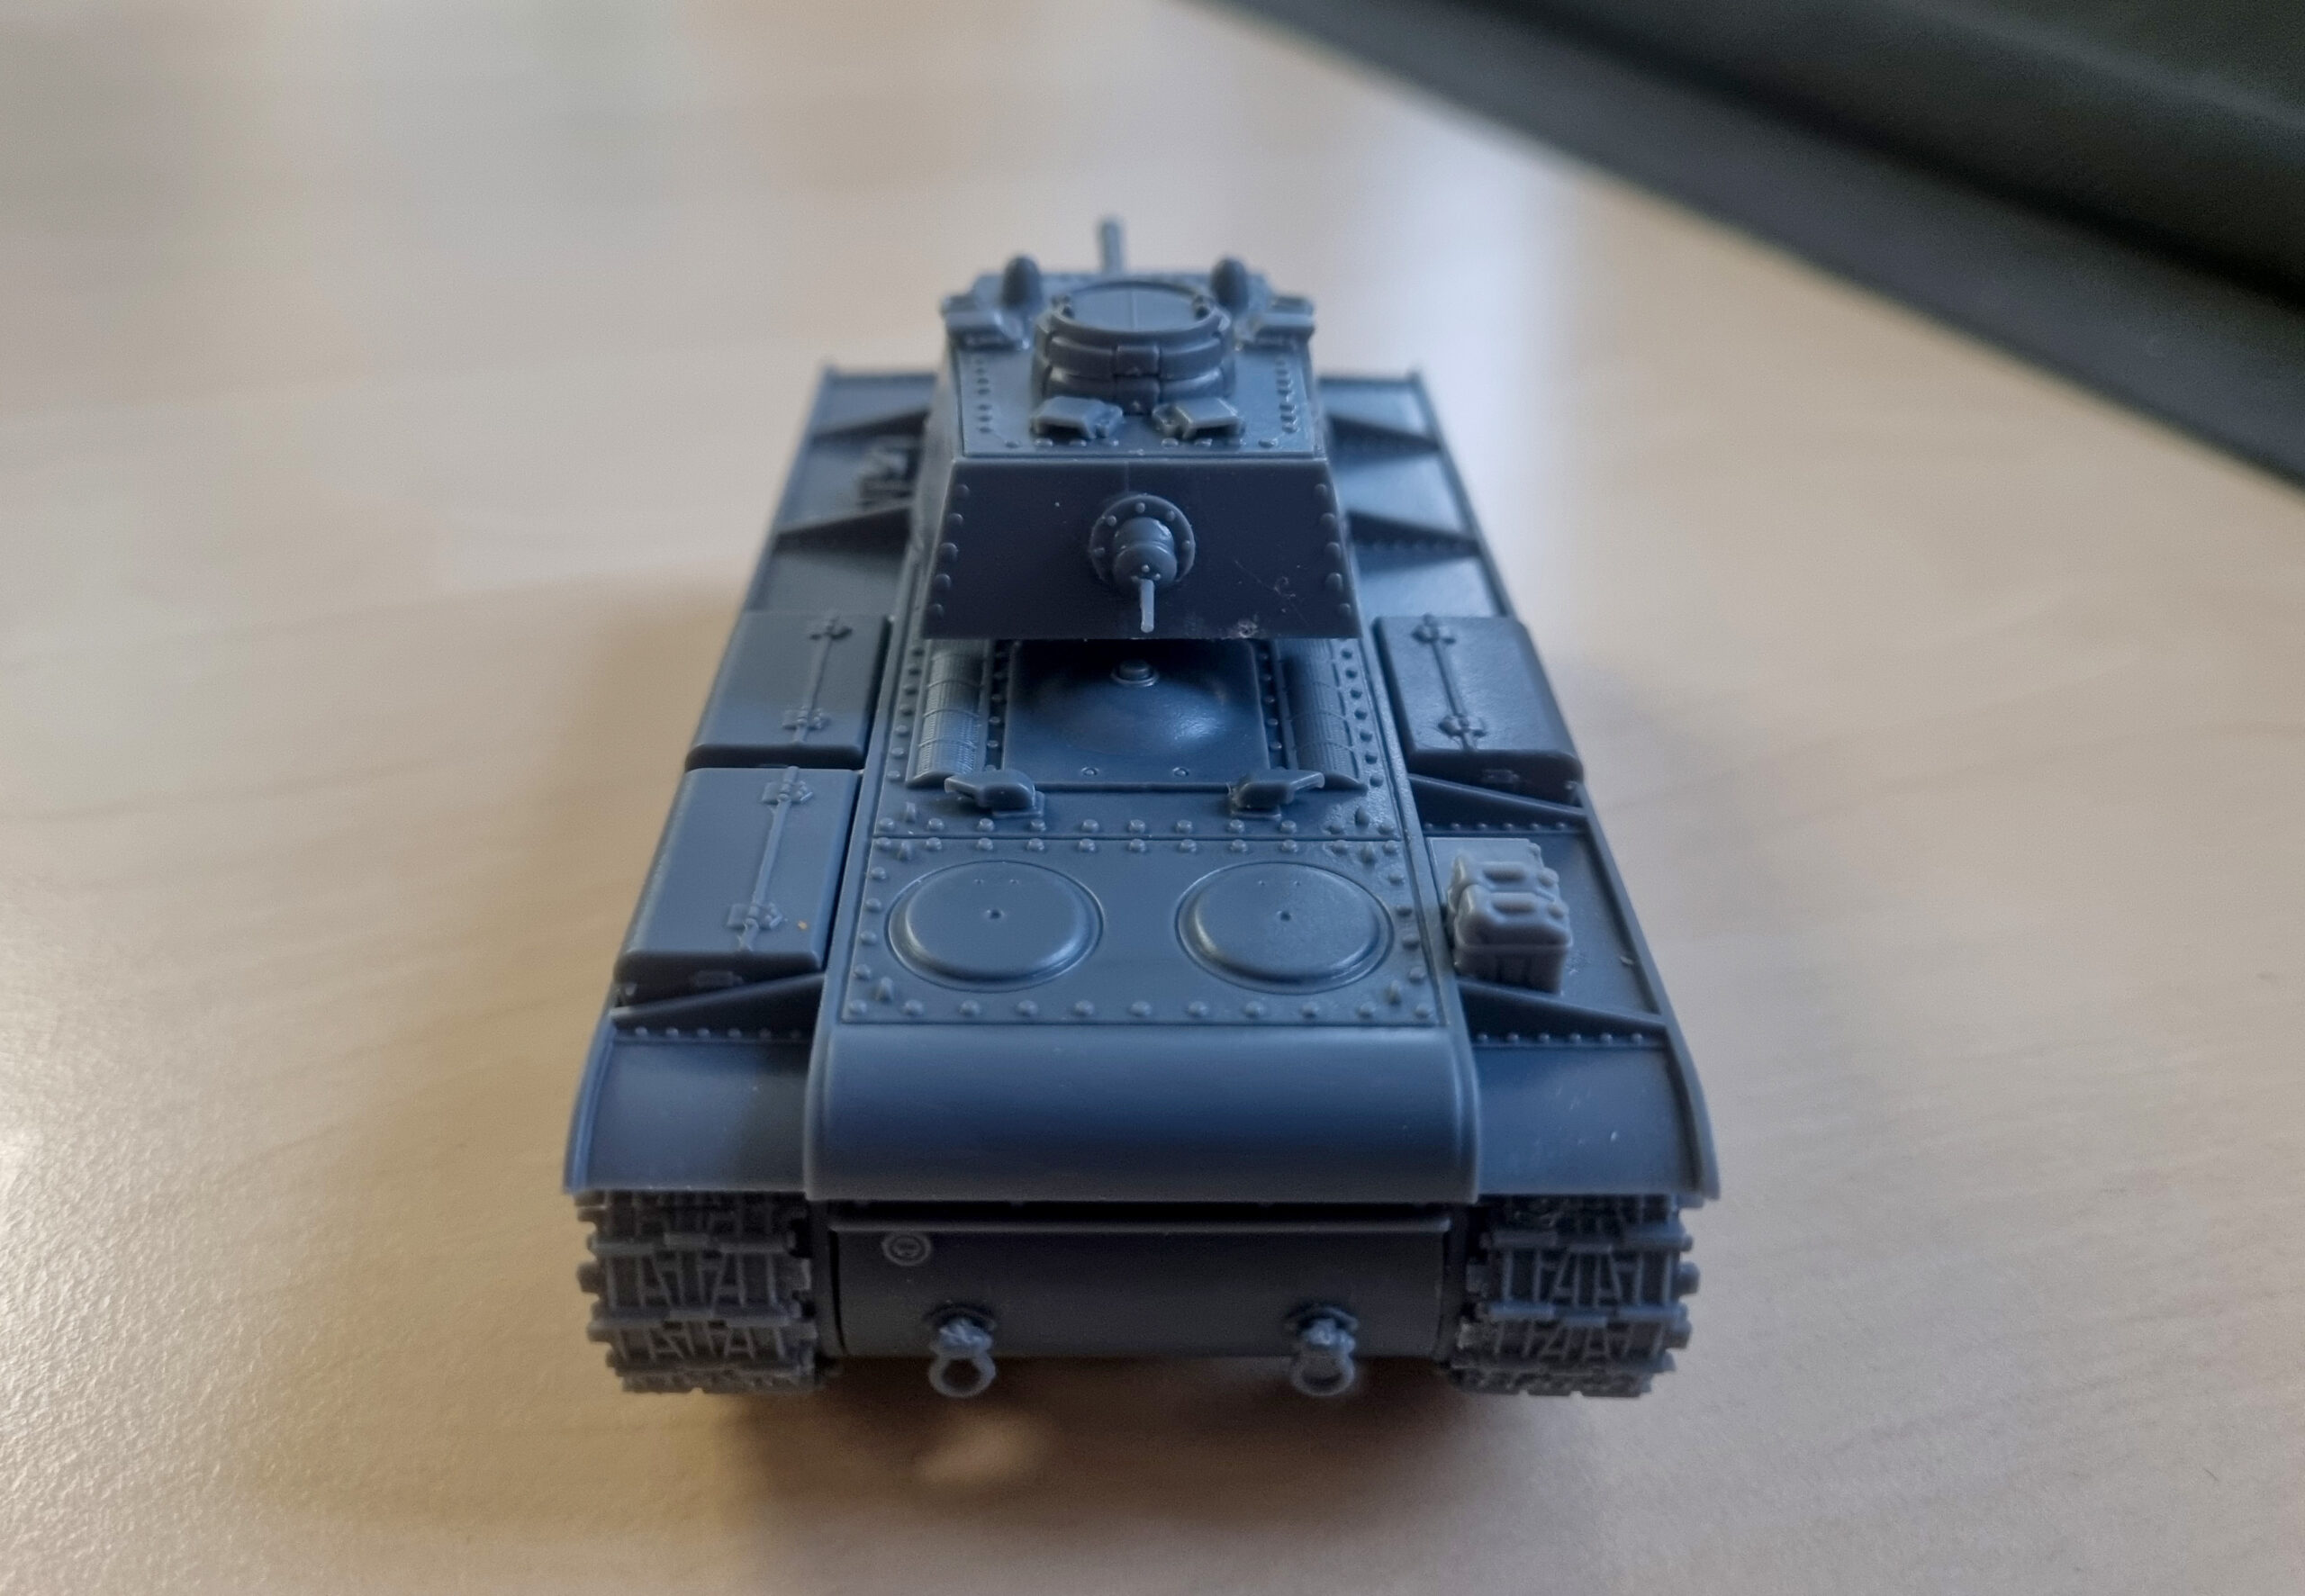
As the upper hull is a flat plate that sits on top of the lower assembly, there’s really not too much to worry about when completing the hull – the headlights, bow machine gun, tow hooks, and other ‘greebles’ can be pretty fiddly, but this can easily be overcome with a pair of tweezers and thin poly cement – with pieces this small, you want to use as little plastic glue as possible, and avoid anything too thick, as this will quickly melt and destroy the detail!
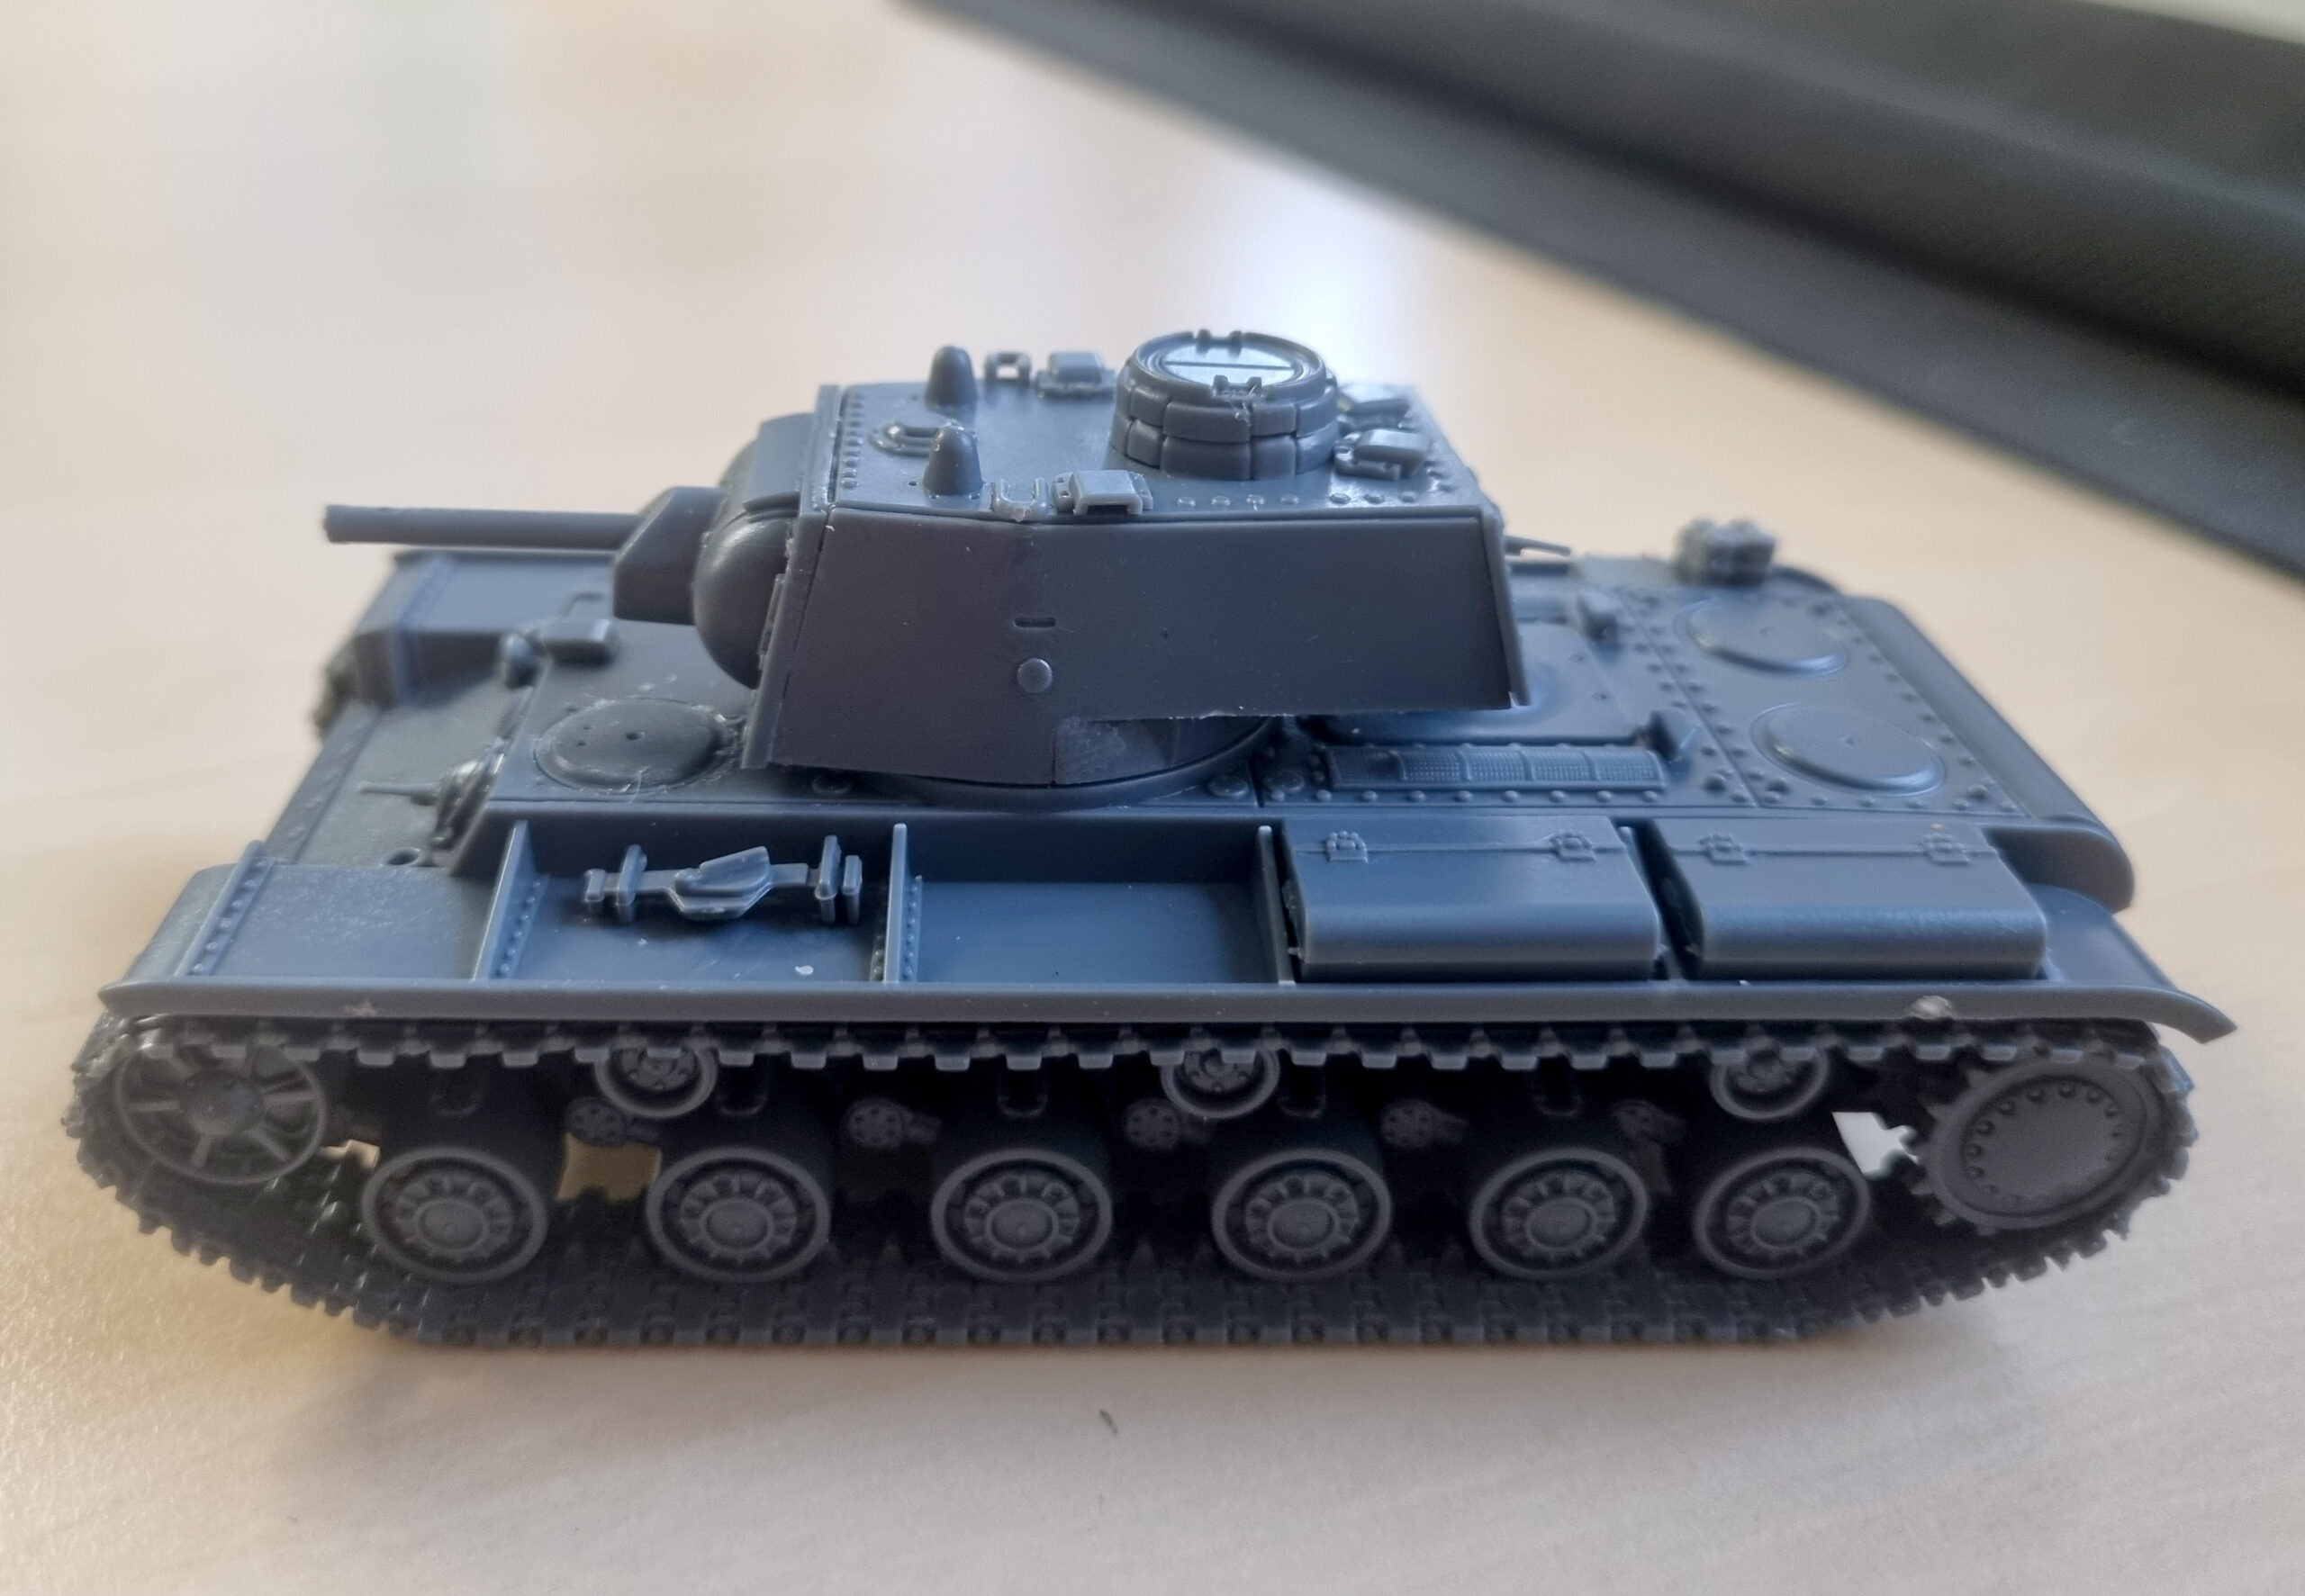
At this stage, you’ve got your KV hull – for either the -1 or the -2 – and all that remains is to assemble the turret! As I’d already decided on the KV-1, I knew I could simply ignore all the KV-2 bits. Knowing that I was going to be converting the top armour plate to include the German-style commander’s cupola, I actually broke my own rule, and did everything I needed to on that component first (including adding all the little extra details), out of sequence with the instructions, so that it would be completely dry and set when the time came to start manipulating it into position! The ‘conversion’ was, to be honest, simplicity itself – the German cupola just sits over where the original Russian hatch assembly would attach! I’d been a little bit worried that it would prove to be an absolute pig, so it was a real relief when it just… worked!
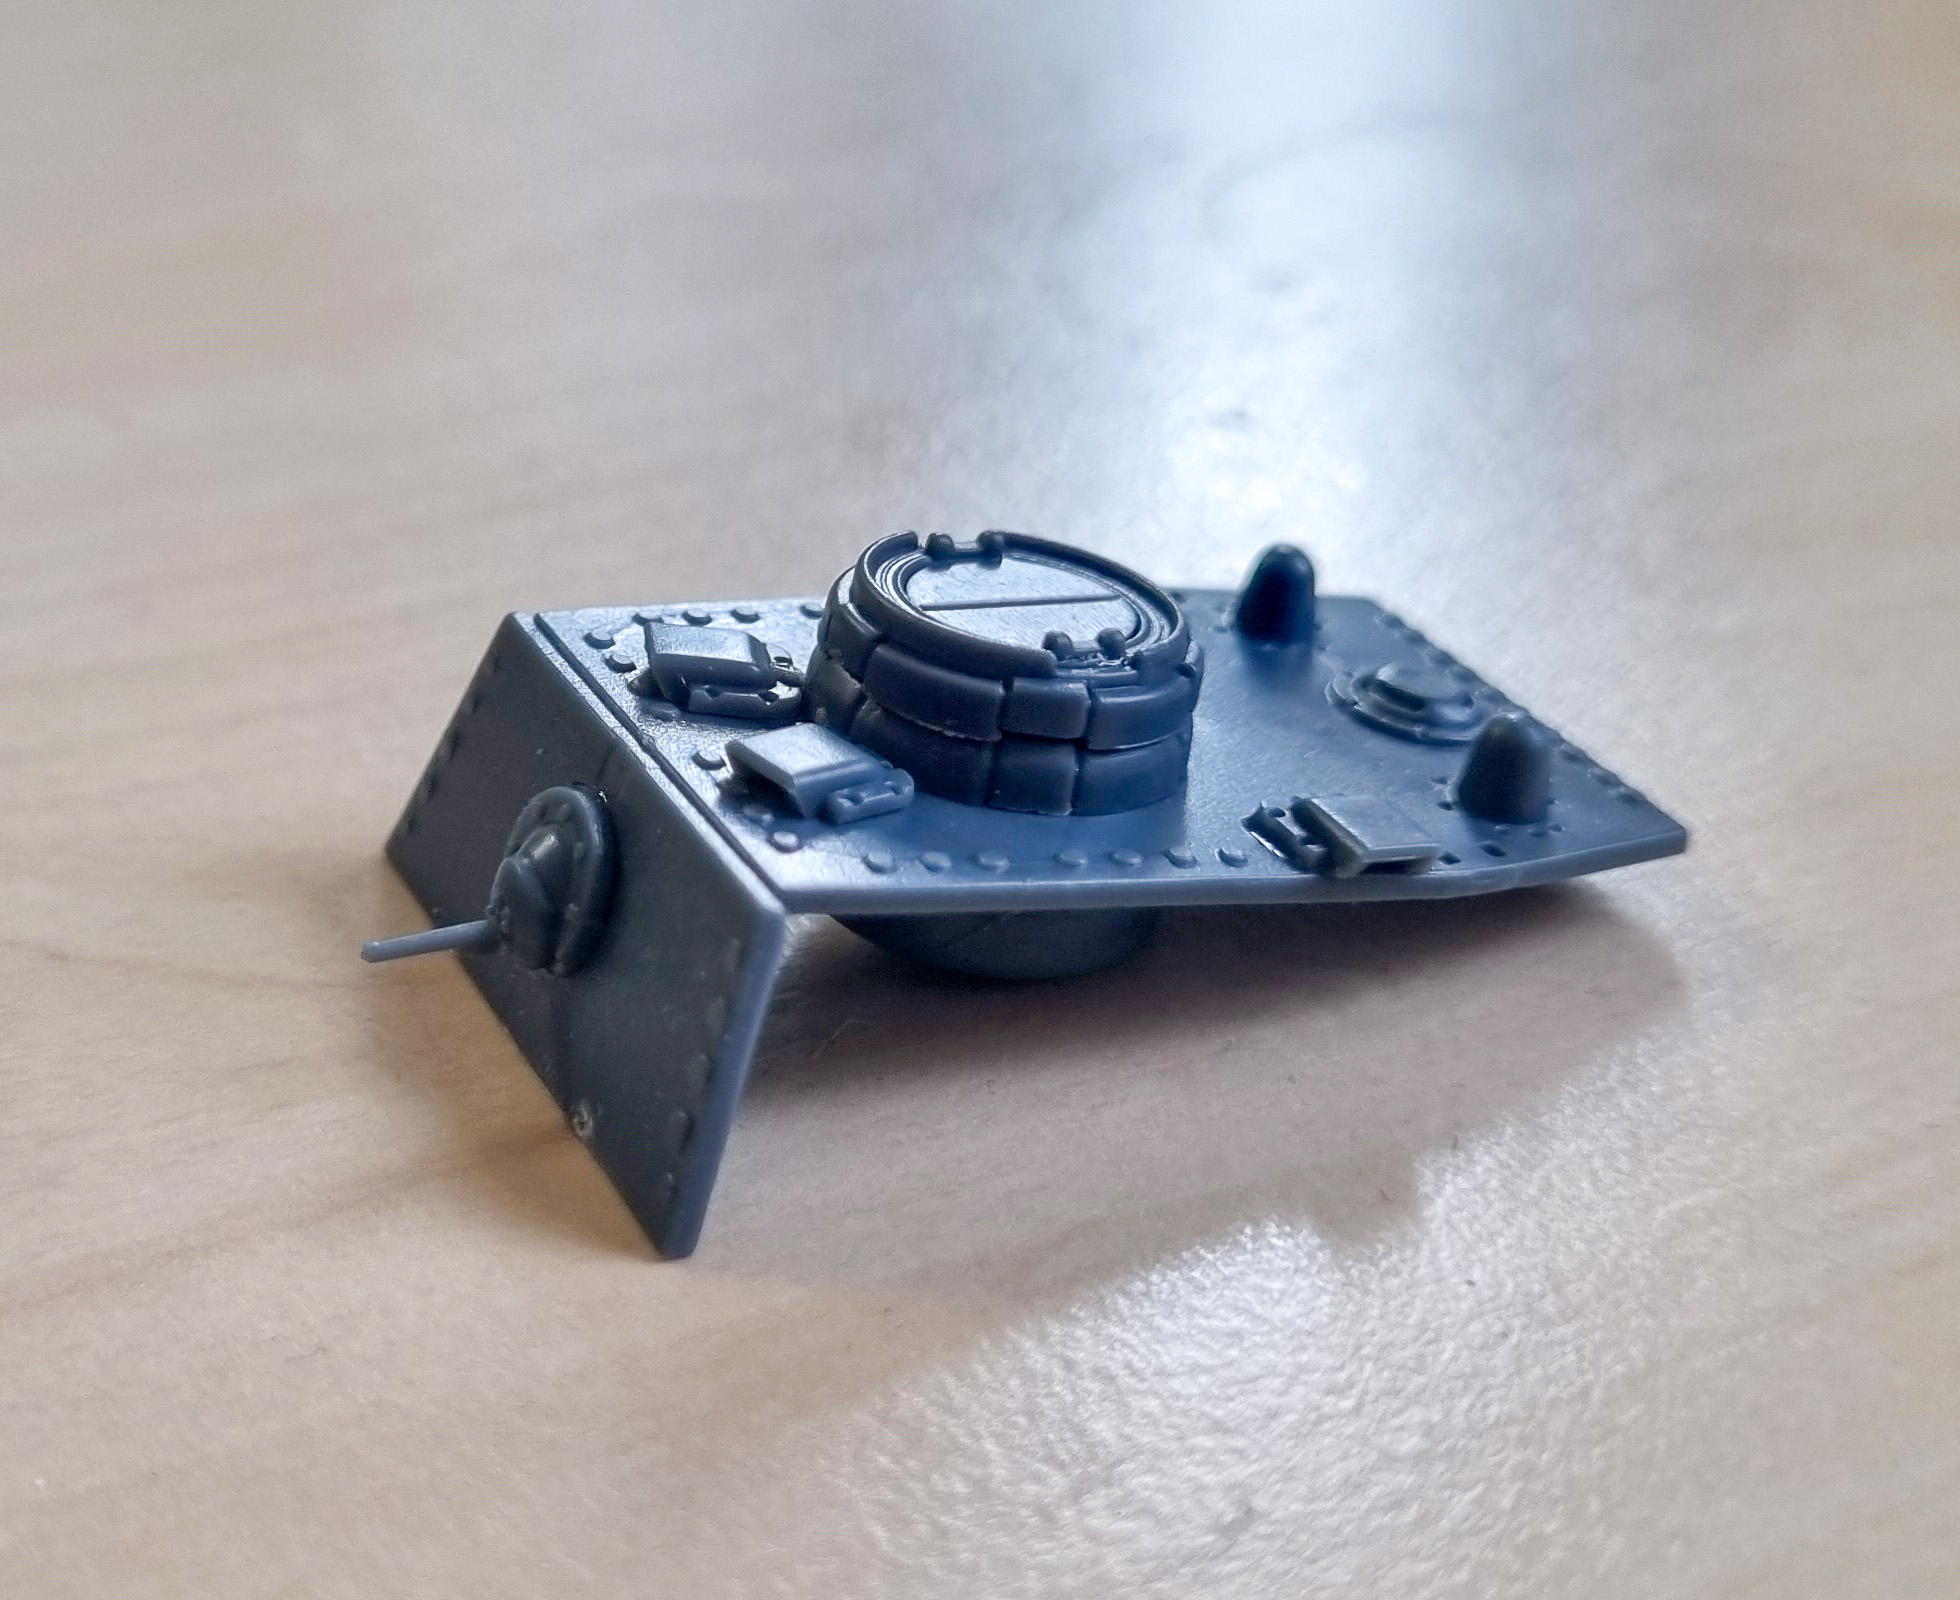
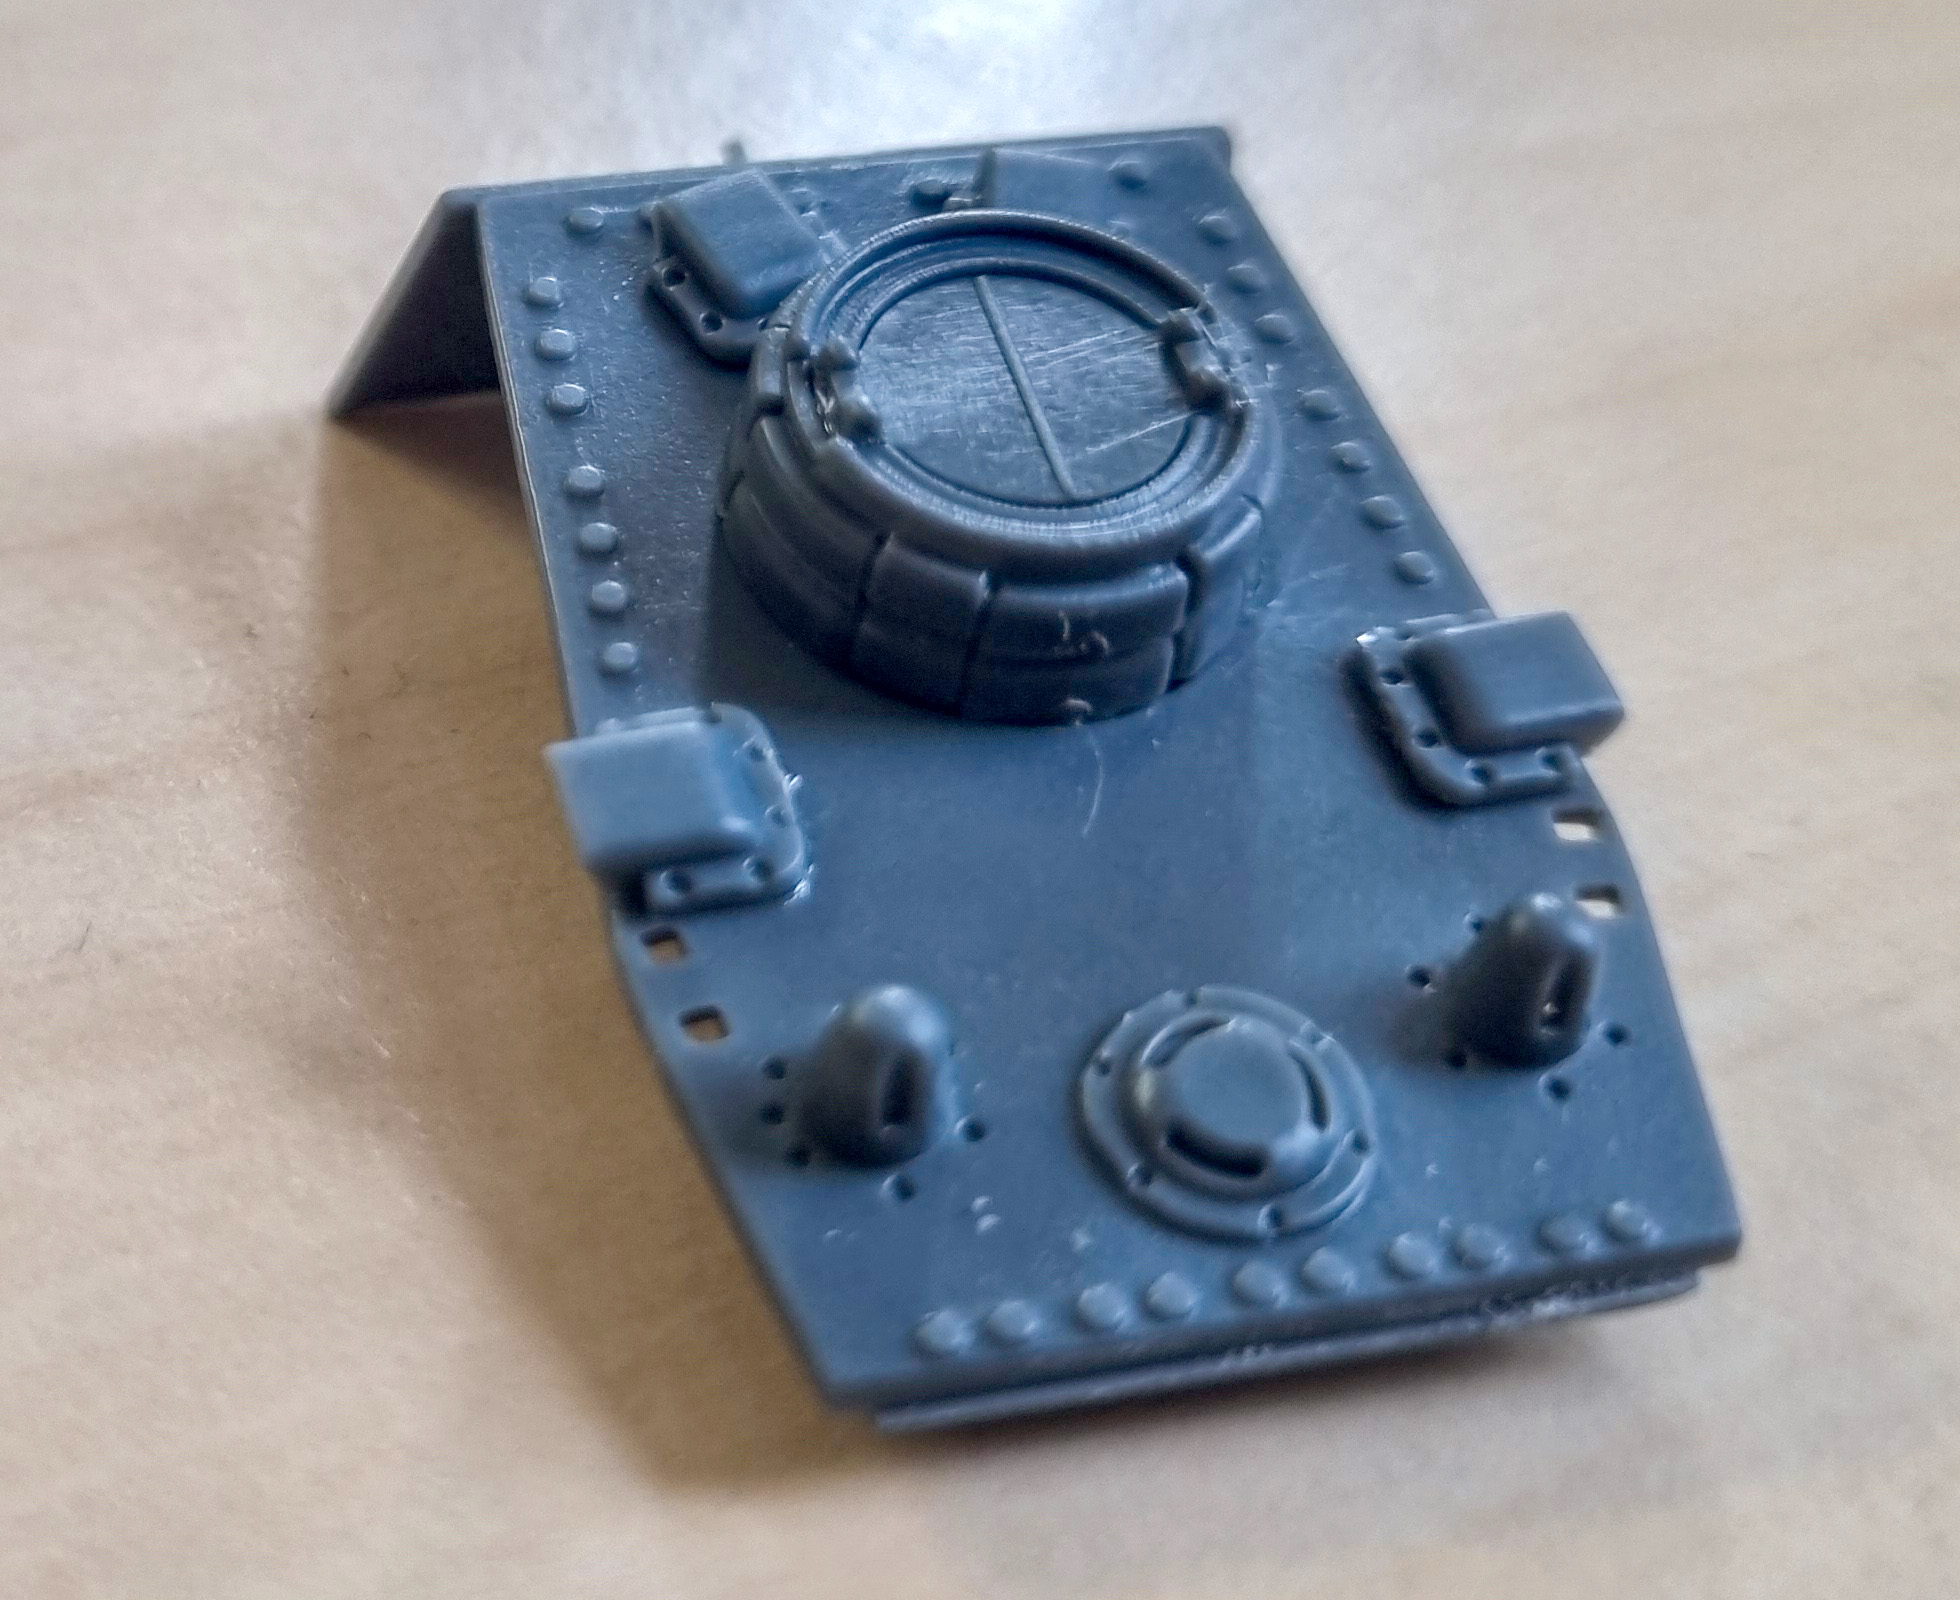
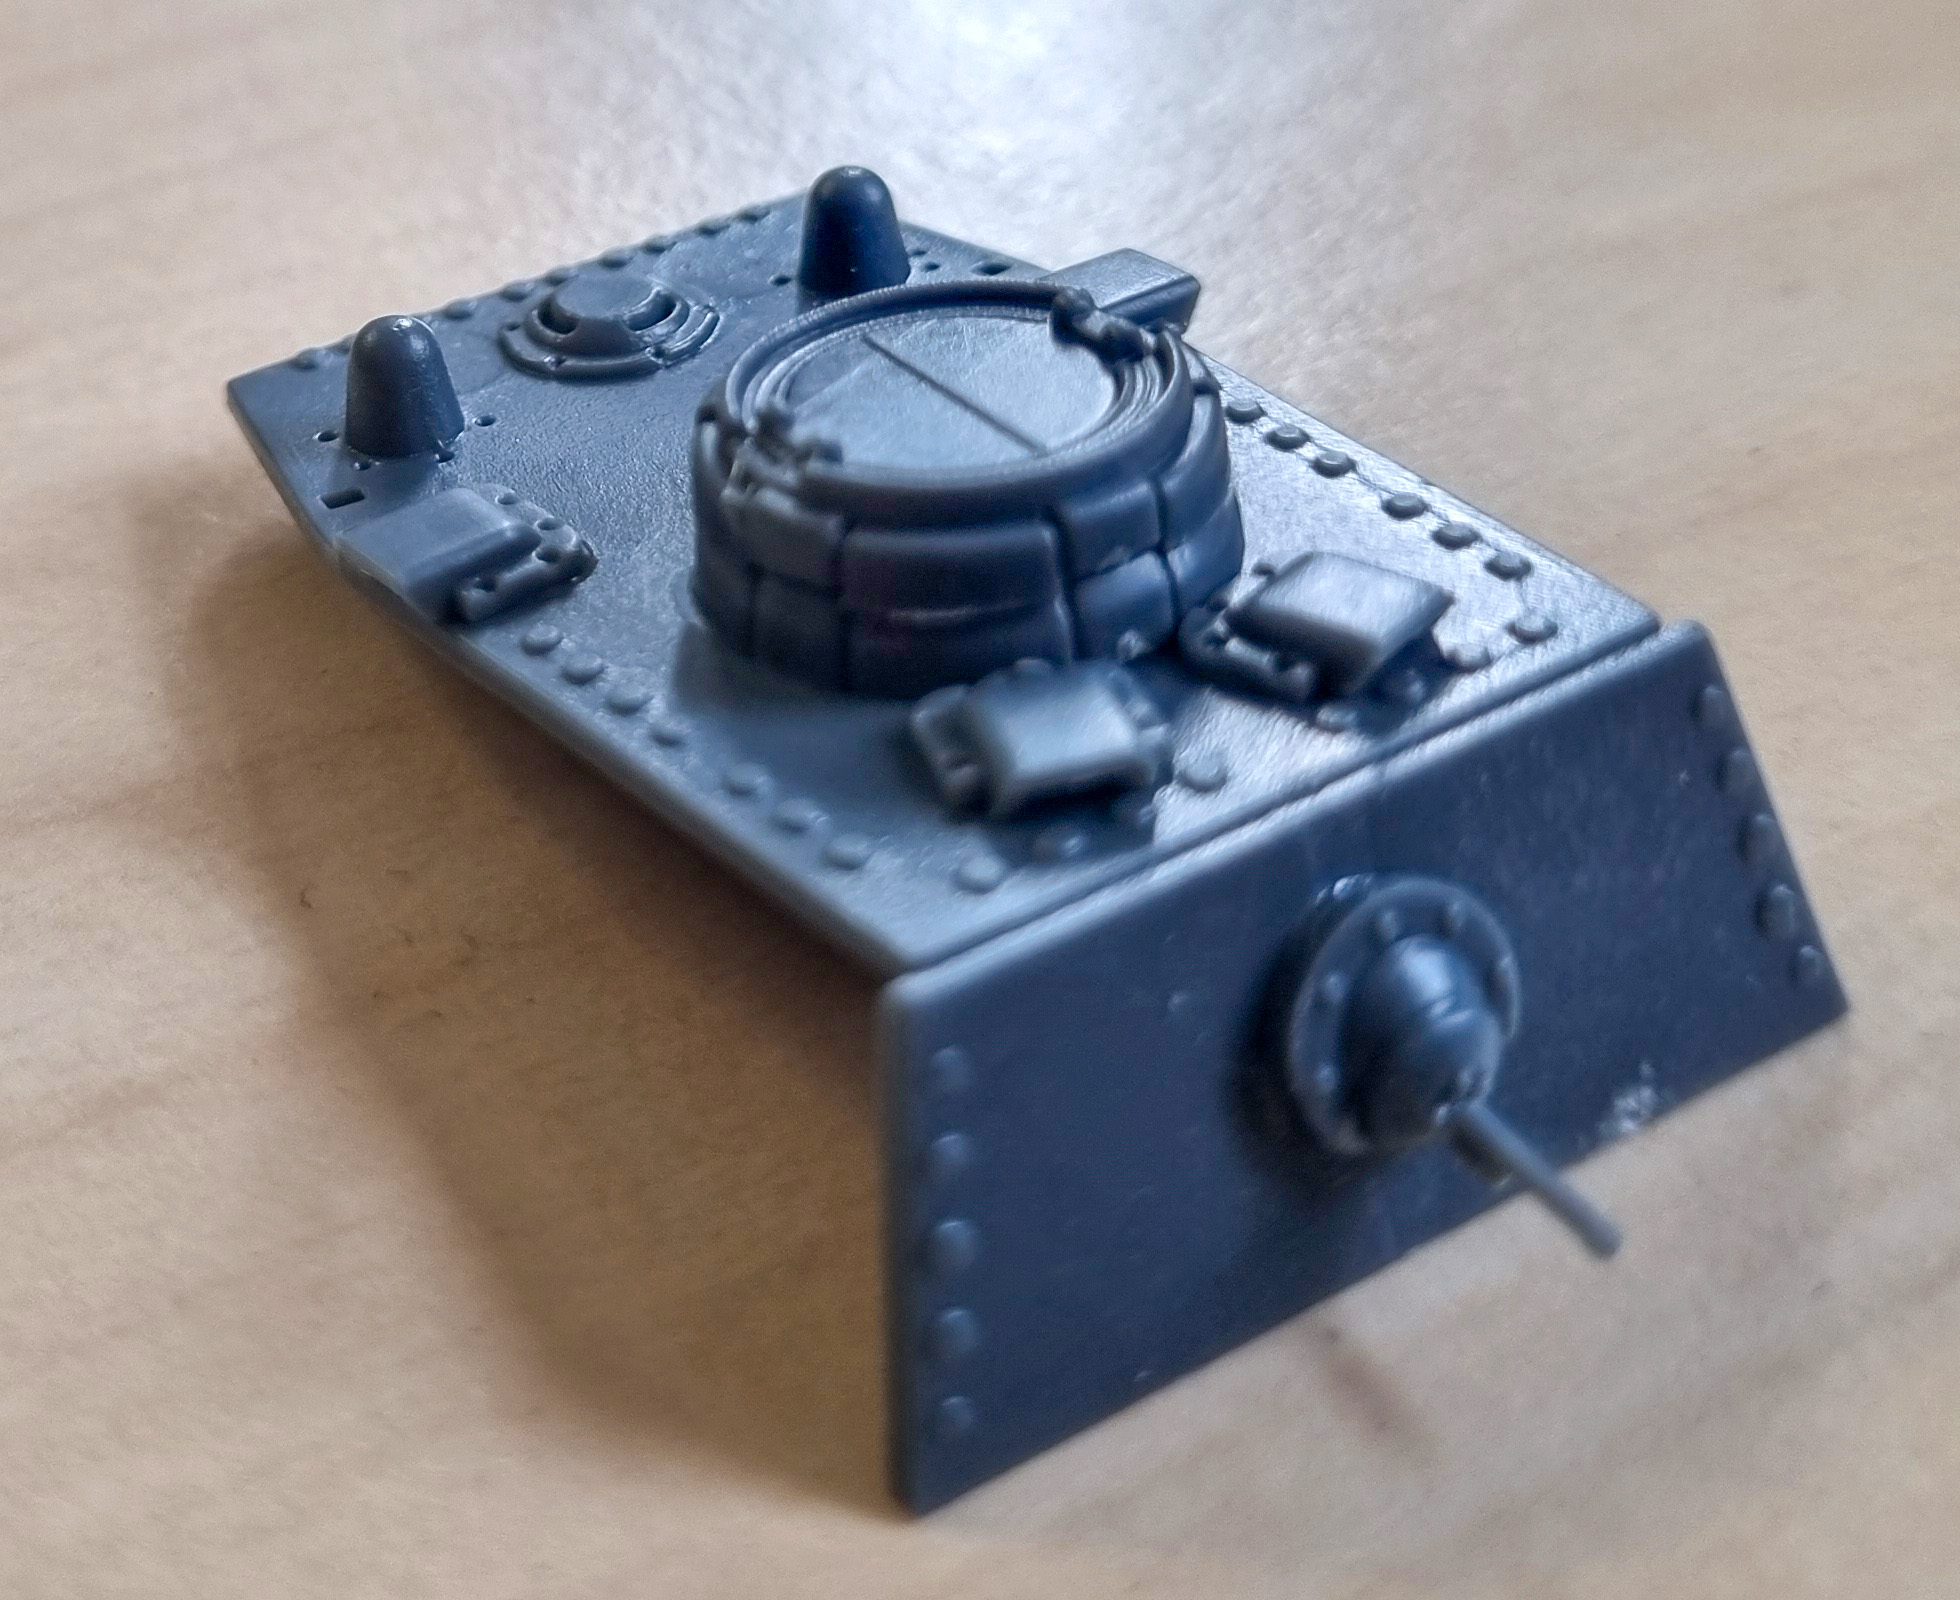
Compared to the hull assembly, the turret can look pretty daunting with its free-standing armour panels all needing to line up properly on the base and with the top plate, but this is actually a case of the instructions making something look scarier than it is! The plates all have a good system of grooves that interlock with the top and bottom panels, and they support themselves far better than I expected!
With the main assembly completed, I wanted to add a little bit more German ‘flavour’, without going overboard – as this tank is going to be a gaming piece rather than a display item, I didn’t want it cluttered with too many fragile components that might snap off in use, but still wanted it to feel well-used. A couple of jerry cans from my bits box, and the track-jack from the Panzer III kit was all it took to get the effect I wanted.
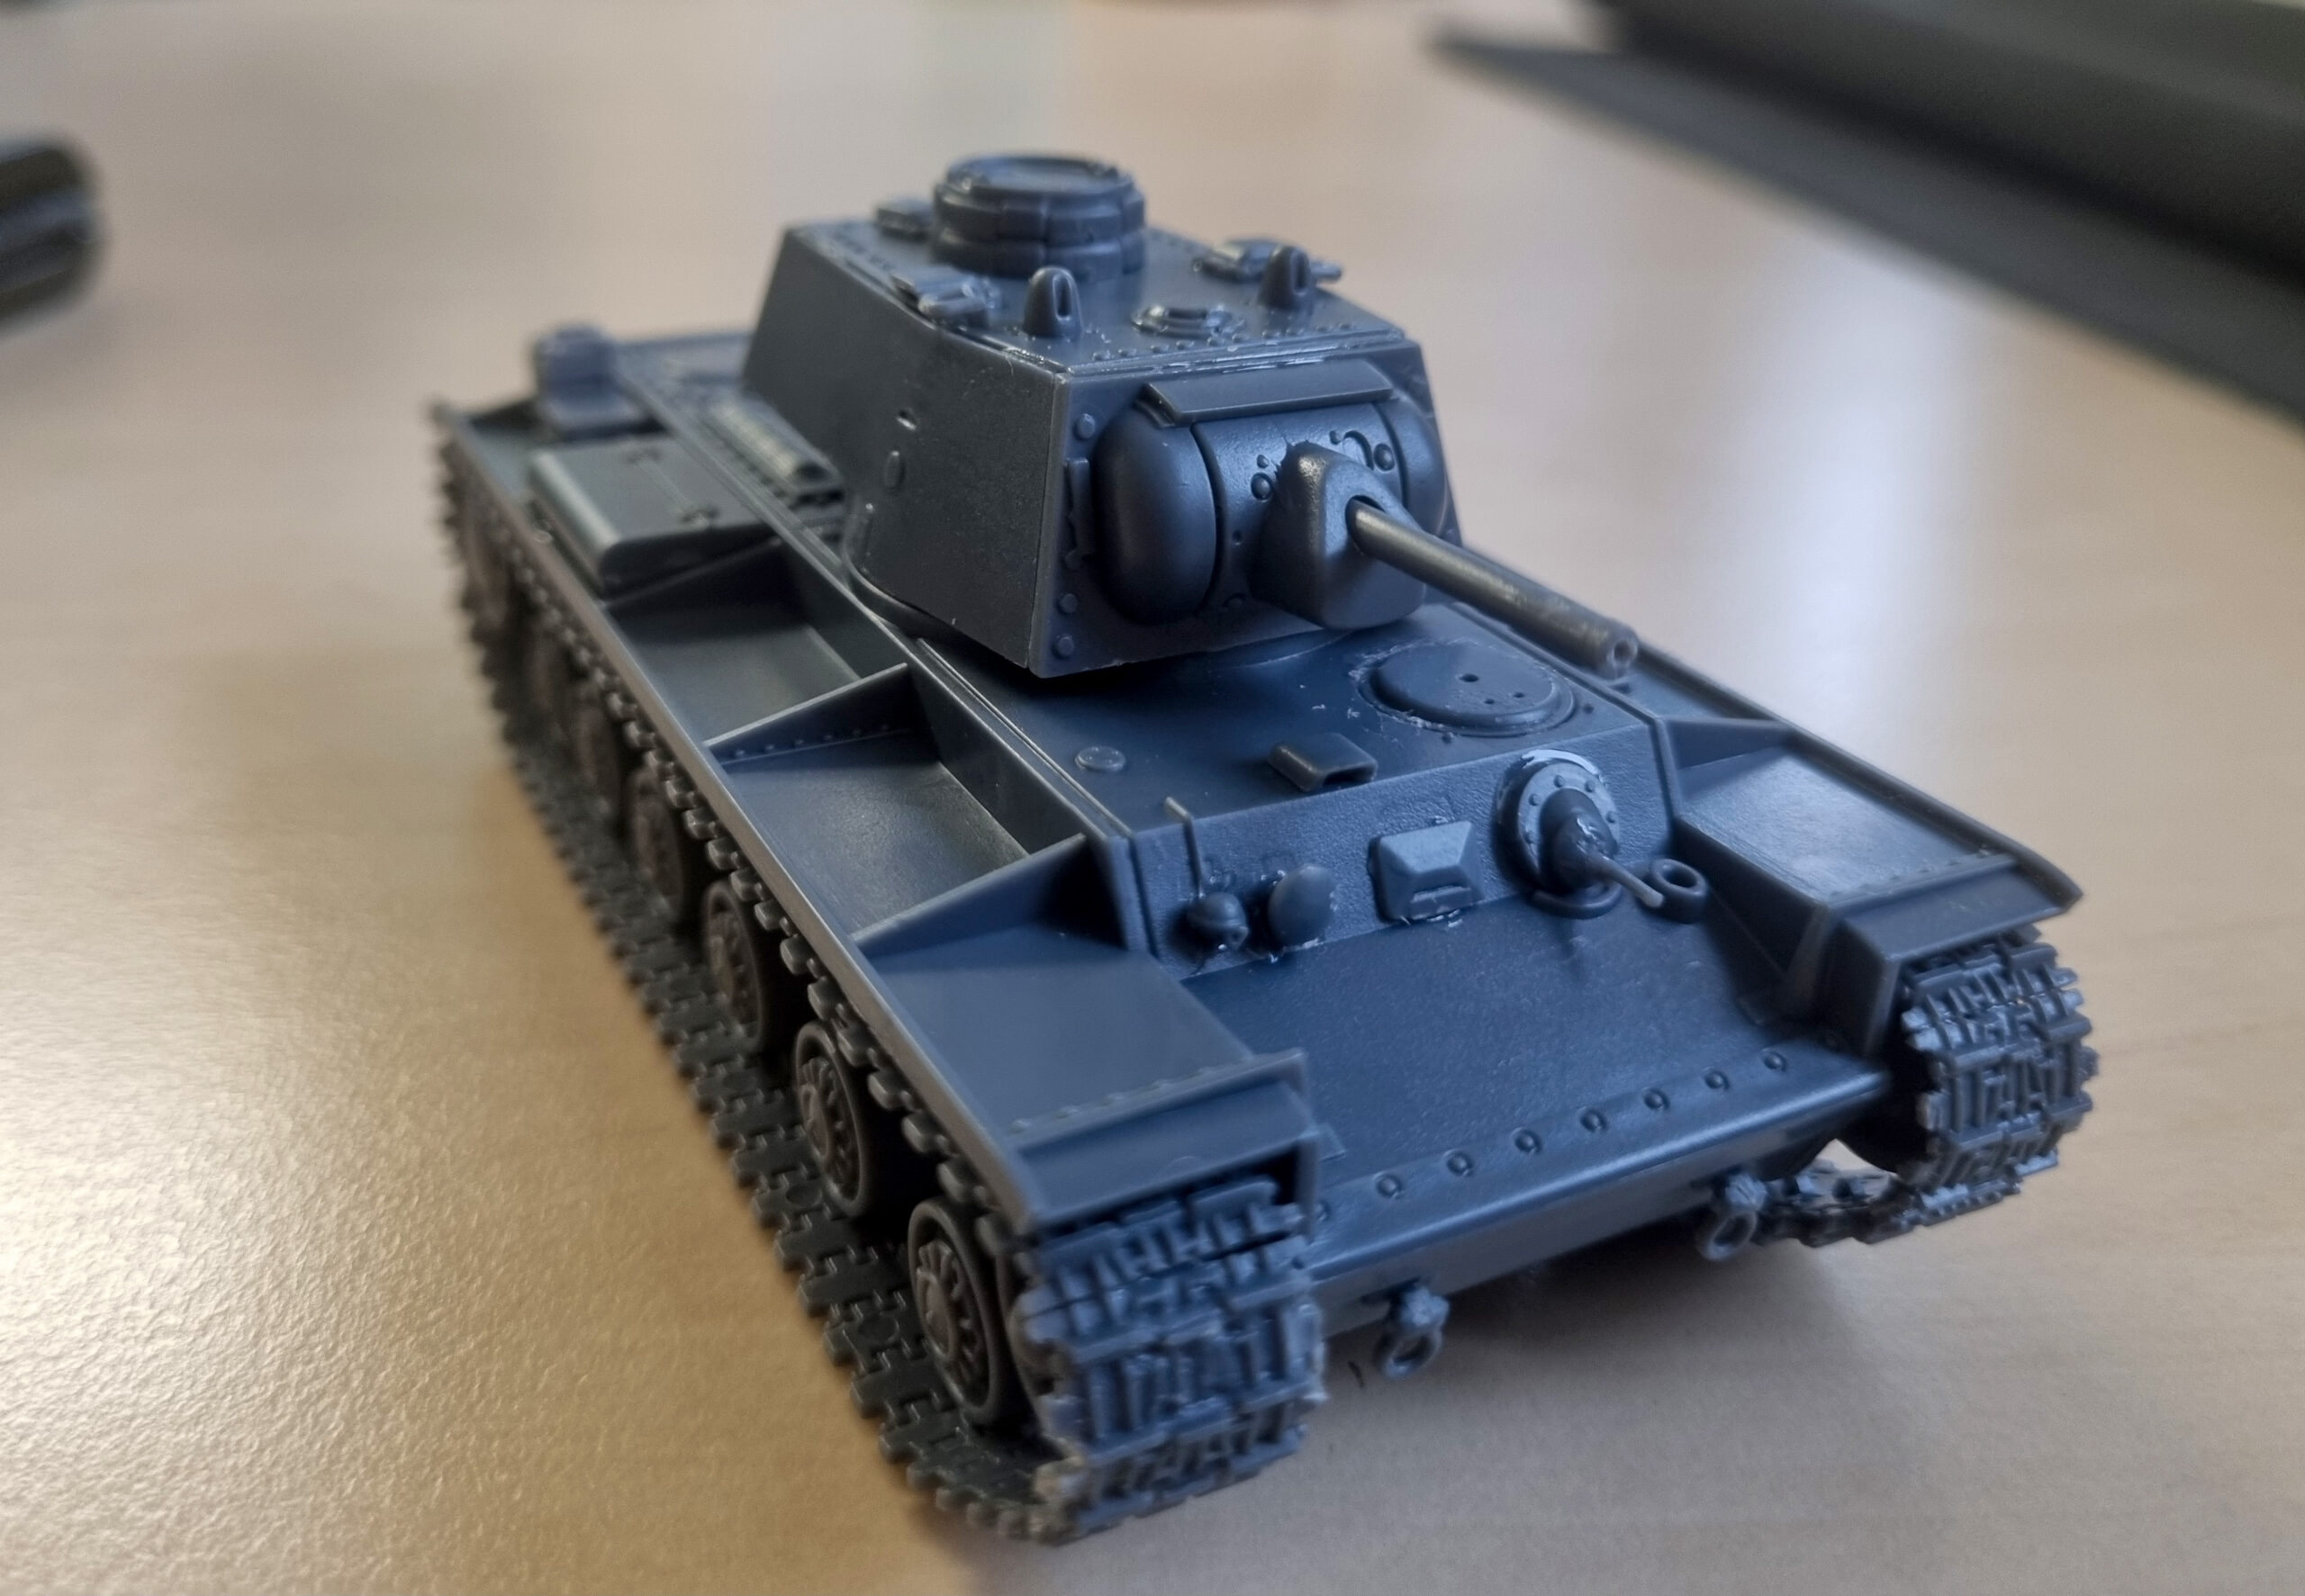
Overall, I’d rate the build as a relatively quick and easy one – some of the little ancillary components on the hull were a bit fiddly, but it certainly wasn’t the hardest kit I’ve ever assembled!
Painting
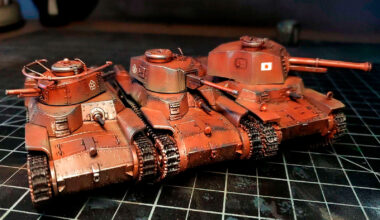
As mentioned, I wanted this to be a ‘working’ tank for playing Achtung Panzer! and Bolt Action, so I didn’t want to go massively overboard with the paintjob. I did, however, know what sort of ‘vibe’ I wanted to have – I wanted my captured KV-1 to look like it’d been pulled off a battlefield, given the bare minimum of refit and maintenance, and then thrust back into hard service, probably on second-line duties or as an emergency replacement for lost German vehicles. Most of the reference images I could find had captured KV-series tanks painted in an all-over Dunkelgelb (dark yellow) colour, one of the foundational German paints, with over-sized and very visible Balkenkreuz markings to avoid friendly fire. This is a really simple paint scheme to implement, and one I’ve done plenty of times before, so I felt pretty confident going in… in hindsight, that should have been a warning sign!
Apologies, I forgot to take any photos throughout painting my tank!
I started with a spray prime of Army Painter Desert Yellow – this is an awesome basecoat for Dunkelgelb, and forms the ‘foundational’ colour for the vehicle. After that, the tracks got a quick coat of watered-down Army Painter Oak Brown to establish their base colour, while the machine-gun barrels were given a coat of Army Painter Gun Metal – one of my favourite metallic paints and an absolute staple of my Bolt Action painting. Next, I got out my biggest brush, and absolutely went to town over the entire vehicle with Army Painter Strong Tone Wash. This can be really daunting, as once it’s done it looks like you’ve absolutely ruined the model, but fear not – it’s just a transitional stage!
Once the wash was fully dry (I left it overnight to ensure it was completely done), I went back in with a large drybrush and Vallejo Khaki – this is a really heavy drybrush stage that mostly obscures the Strong Tone, leaving it most visible in the recesses of the armour, while also adding a highlight to raised edges, rivets, and the like. The entire tank except the tracks and machine guns got this treatment, and it soon had me feeling much better about having covered my lovely tank in all that Strong Tone!
This is where it all went a bit… pear-shaped! I used a sponge (blister pack backing is perfect for this, so I never throw mine away!) to dab Army Painter Gun Metal over the tracks to bring out the worn metal look – so far, so good! Then I wanted to just add a little bit of dirt to the running gear and hull of the tank using the same method and a light brown to give a used, muddy effect. You can probably see where this is going…
Instead of dipping my sponge into the brown paint on my palette, I dipped it into the gun metal. Somehow managing not to notice this, I merrily dabbed a great big splodge of silver onto my lovely tank – a disaster of nightmarish proportions that no amount of wiping off could fully remove! I was so annoyed with myself that I decided to set the tank aside for the evening and do something else, vowing to fix it in the morning! This, while a funny silly moment, is actually a good bit of hobby advice – if something just won’t go right, you can always just walk away for a bit and come back to it later!
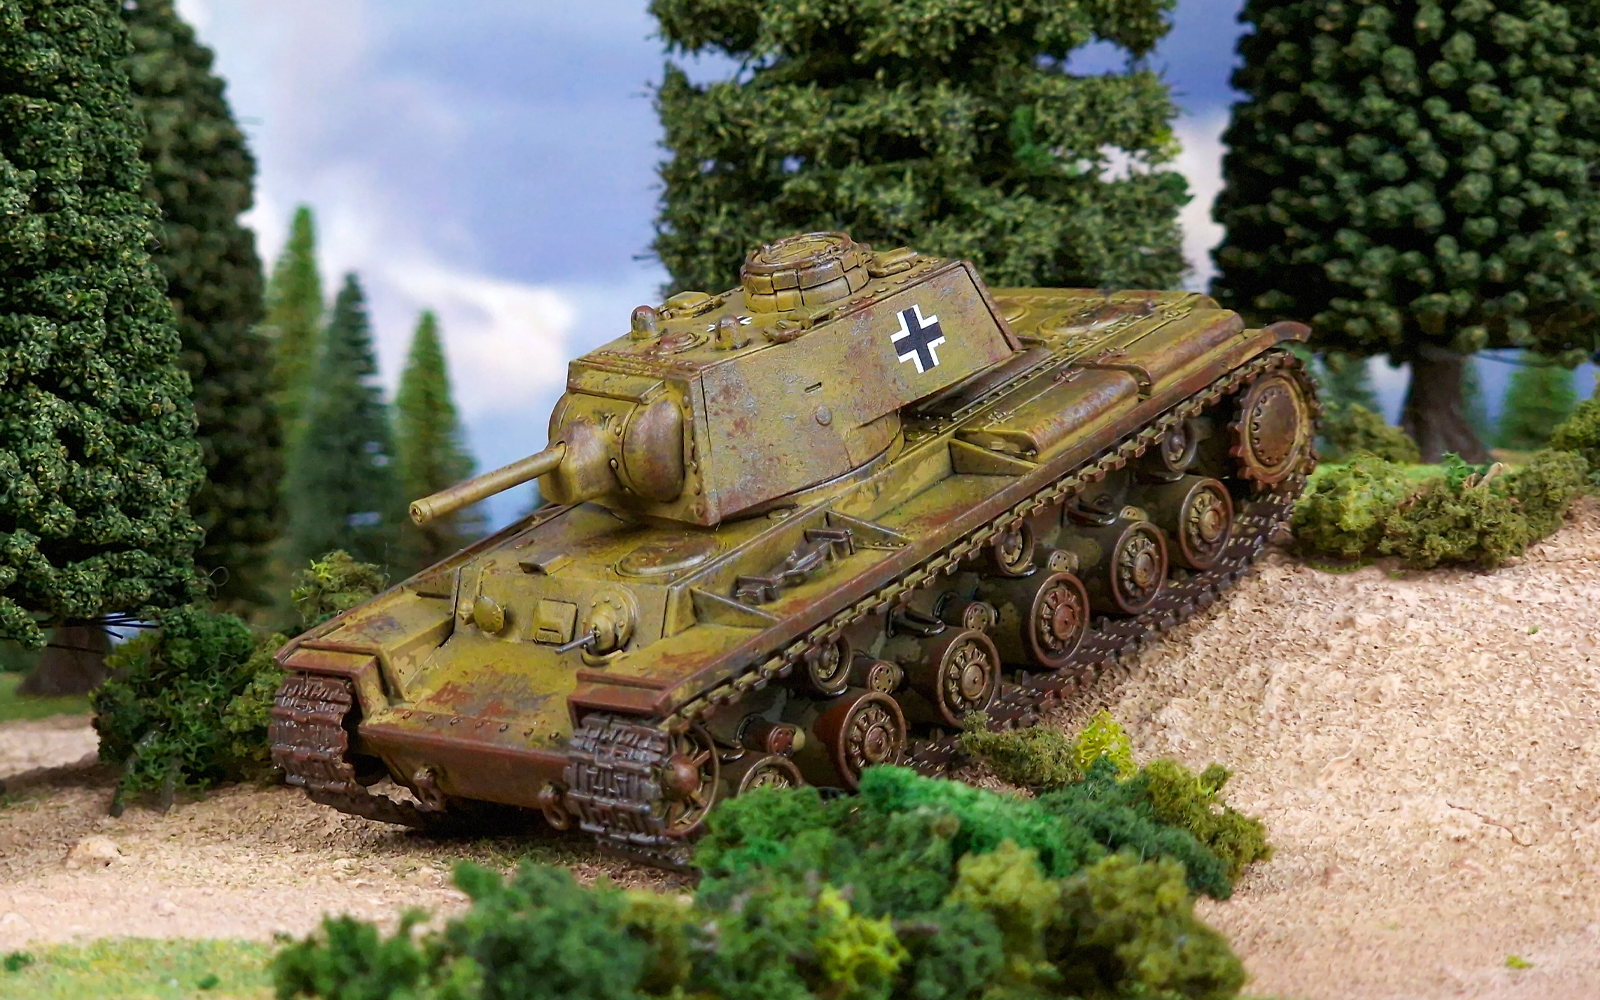
When I came back to my now slightly silver KV-1 the next day, I resolved to fix the issue by deploying one of my all-time favourite weathering methods. Doubling down on the silver, I sponged it all across the tank, aiming for the places where the paint would naturally wear off the quickest. Once that was dry, I went back over the same areas with a slightly lighter sponge of Army Painter Leather Brown. This is quite an orangey brown, and so produced a rusty effect with a minimum of effort. Some Balkenkreuz decals on the turret and a quick spray coat of Army Painter Anti-Shine Matt Varnish later, and voila! One captured KV-1, now in German service, and rather more weathered than I’d originally intended.
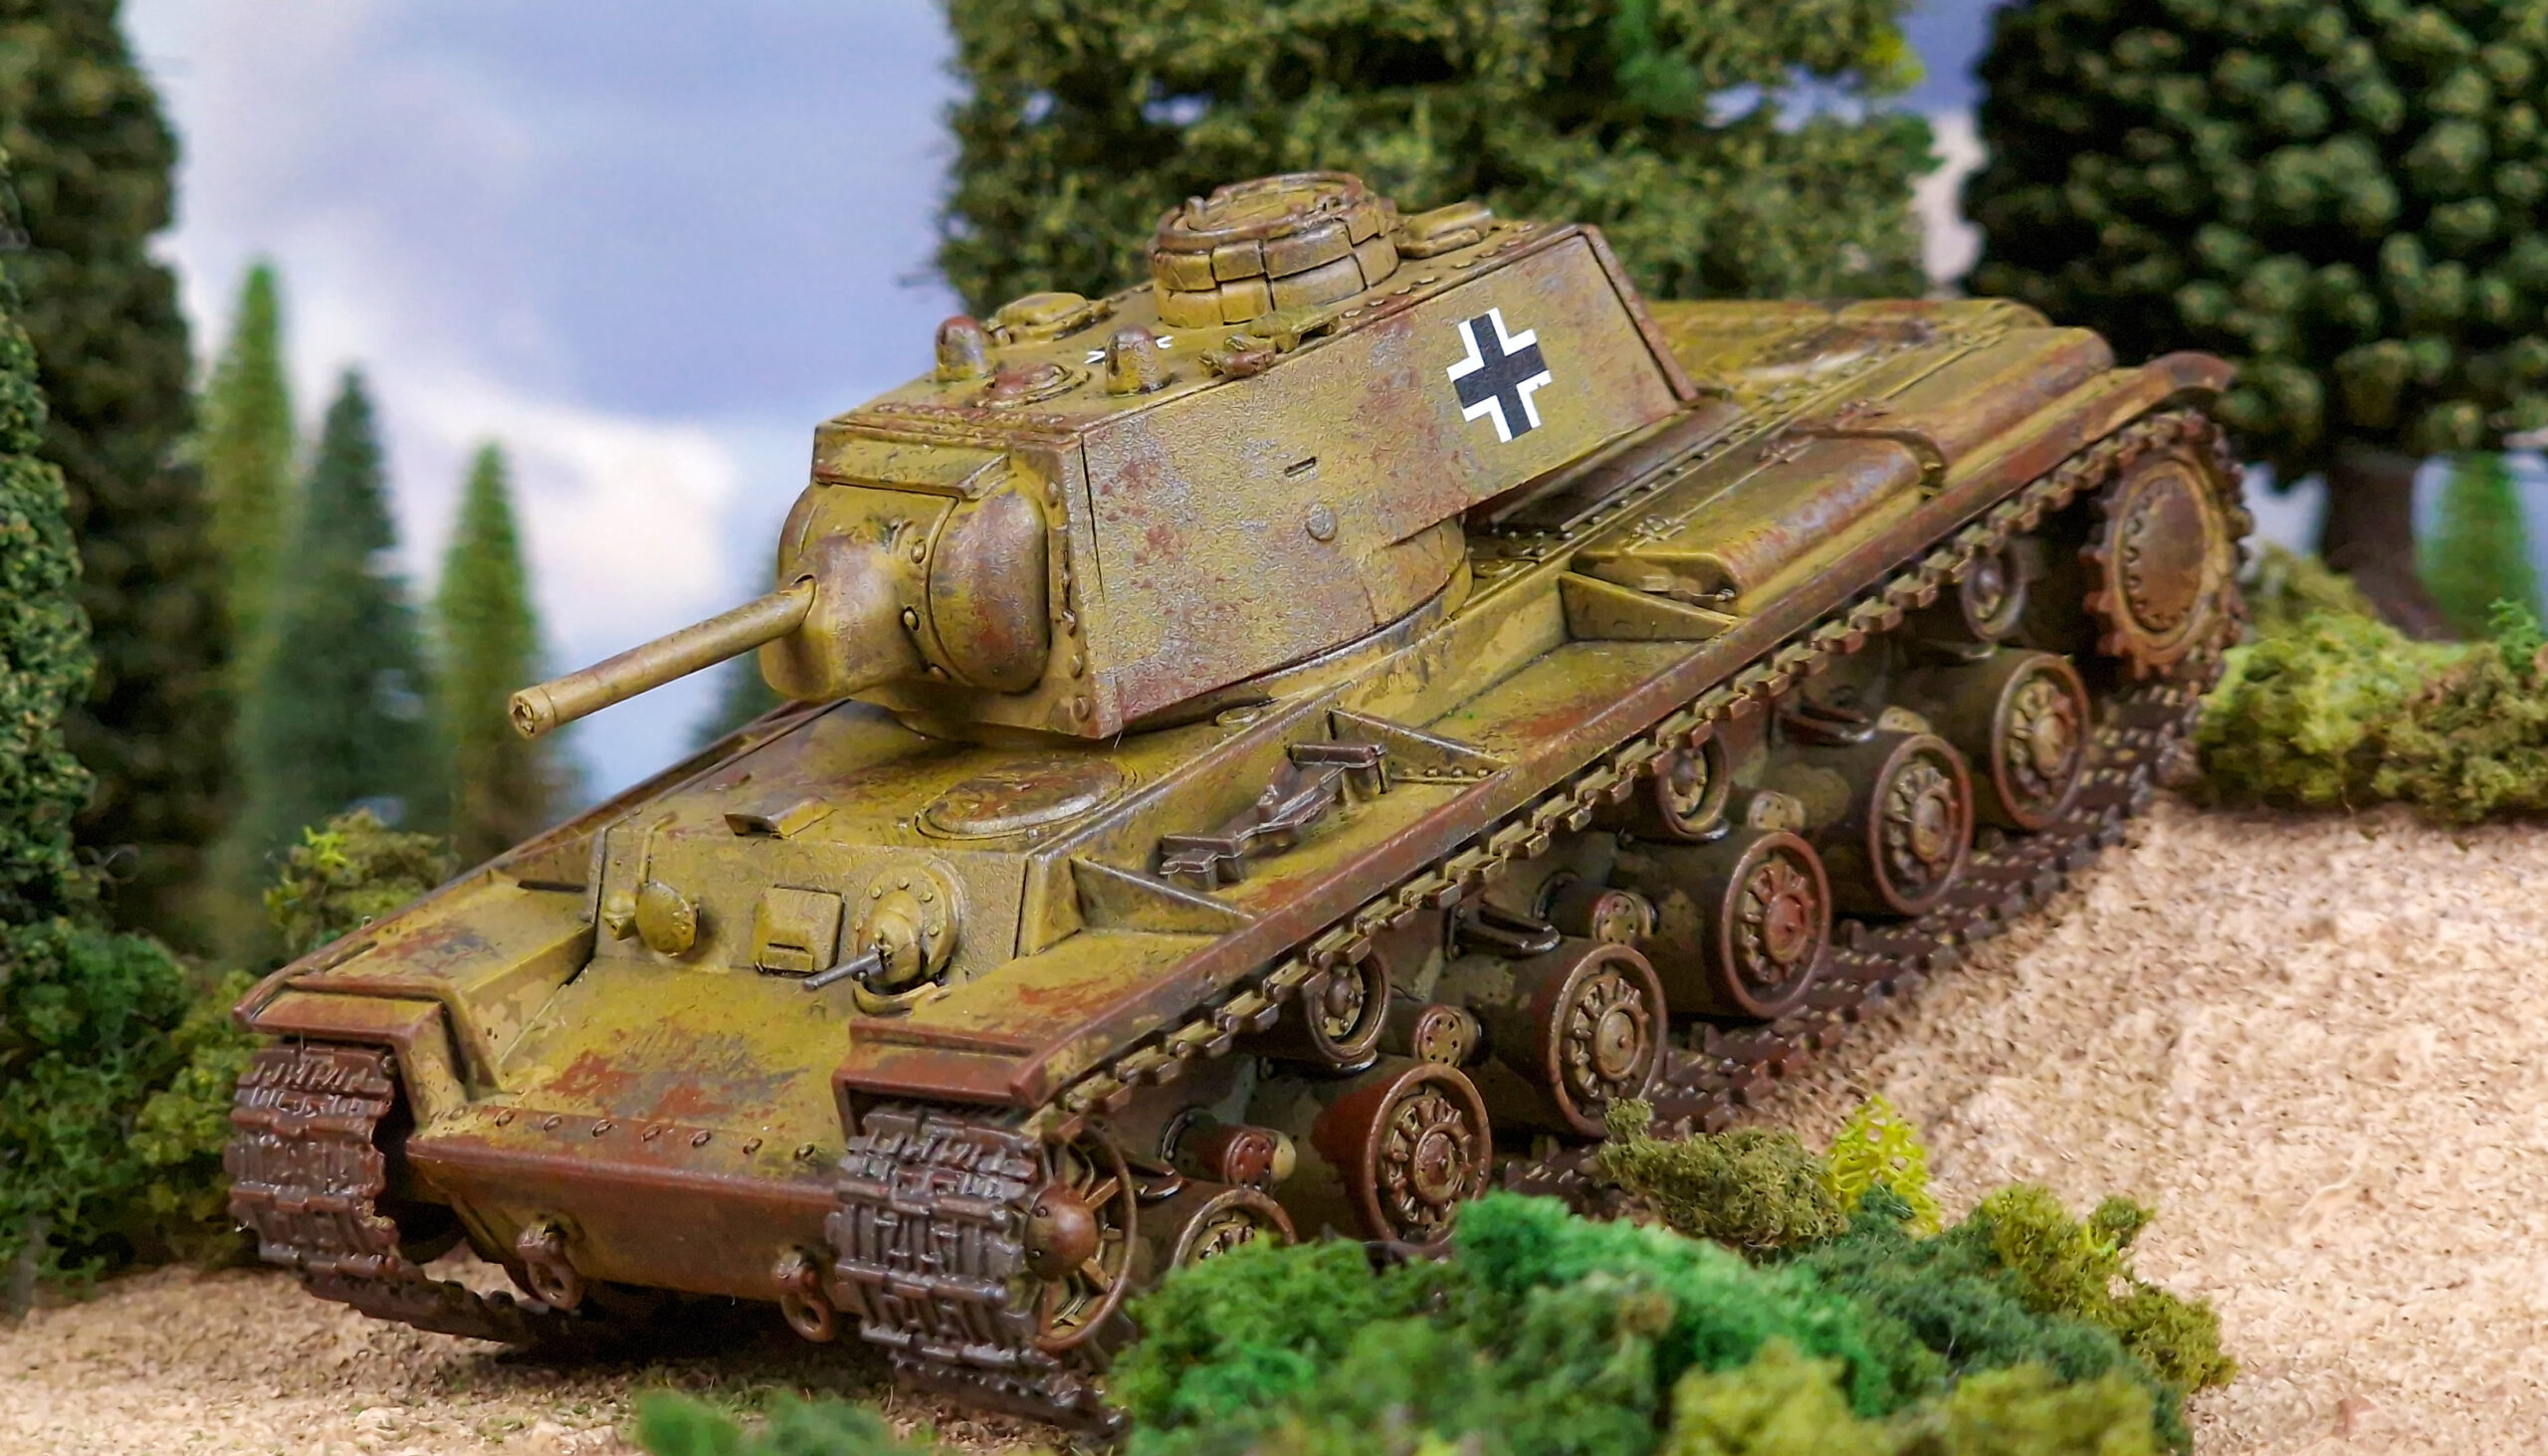
Despite it being the result of a careless accident, I actually really like the final result of the weathering – it really gives the appearance of a tank that’s been through hell, but come out the other side… just not necessarily on the same side! I’m hoping this will give it some kind of special resilience in the Achtung Panzer! mega-game – with my dice luck, I might need it!
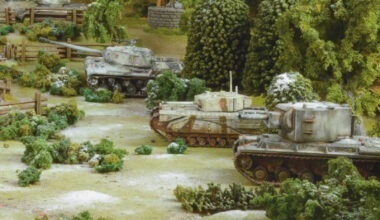
Soviet KV-1 / KV-2 Plastic Boxed Set
The KV – named after the Defence Commissar Kliment Voroshilov – was a pre-war tank that was thickly armoured all round but also very heavy at 45 tons, making it both unmanoeuvrable and slow. Initially, the 500 KV-1s in service caused the Germans immense problems as the heavy tanks were virtually immune to German anti-tank guns at anything other than point-blank range. This allowed KV-1s to literally overrun German formations in 1941, crushing useless 37mm PaK 36s beneath their broad treads. Although production of the KV-1 continued until 1943, its technical limitations and unreliability were a constant problem, particularly due to a weak transmission system. It was also felt to be undergunned as it carried the same 76.2mm cannon as the smaller and lighter T-34.
Our plastic boxed set boasts enough components to create one complete KV tank hull as both turret variants (KV-1 and KV-2), as well as a squad of eight Soviet infantry performing double service as tank riders.
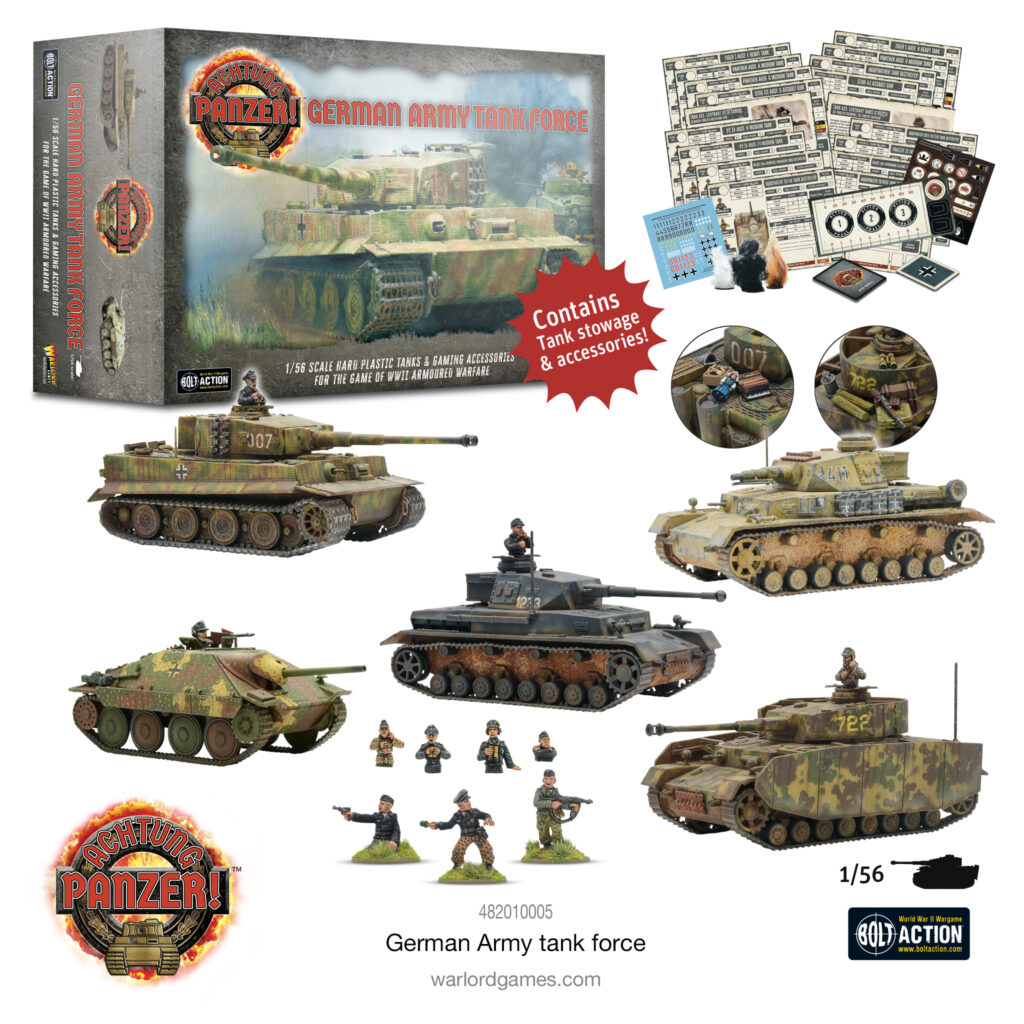
Achtung Panzer! German Tank Force
The Achtung Panzer! German Army Tank Force provides five legendary German tanks with which to take on Allied armour. With a rock-solid core of hard-hitting late-model Panzer IVs mounting long 75mm guns and capable of dealing with whatever the Allies throw at them, backed up by the anti-tank punch of a Hetzer tank destroyer and the infamous armoured might of a Tiger I to anchor your platoon, this force is more than capable of taking on the best the Allies can bring to bear. With plenty of long-ranged punch at your disposal, your enemies will learn to fear open ground!
Alongside the five great plastic vehicle kits (and a fantastic set of characterful stowage items), the included Germany-specific Asset cards, plus Datacards for 16 different tanks (letting you field the full armoured fury of the Wehrmacht), Tank Ace and Ace Skill cards, game tokens and markers along with mounted and dismounted tank crew figures give you the resources you need to tackle the foes of the Fatherland. Panzer Marsch!
Also Available
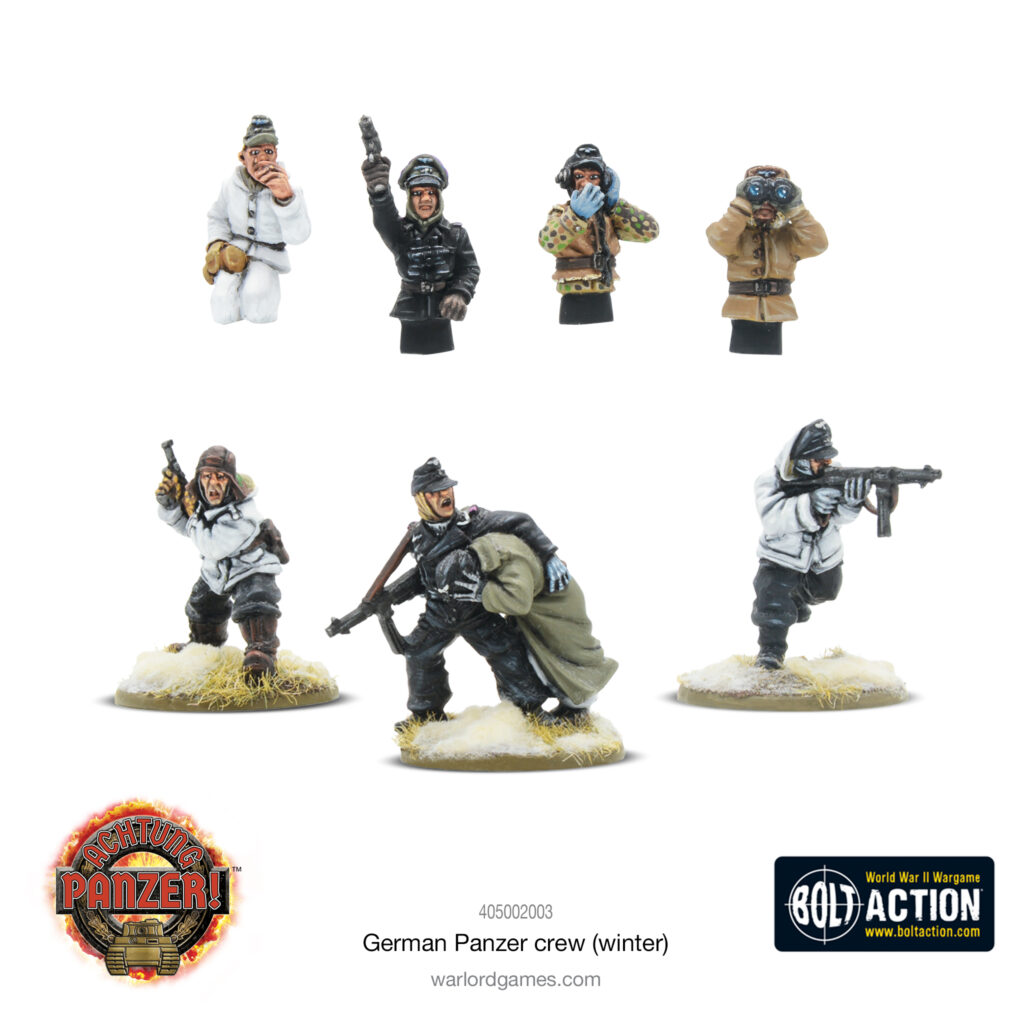
The perfect way to jump into Achtung Panzer! on the side of the Axis, the Achtung Panzer! German Collection nets you both the Blood & Steel starter set and the German tank force detailed above, along with an extra set of German Panzer crewmen (both mounted and dismounted) included for free! The crew are also available separately, for added customisation options or to use in Bolt Action as footsloggers who’ve been forced to abandon their armour in the field. There’s also a Winter version of the crew, for those battles in less… tropical climes.


2 comments
Marcus, I too love a beutepanzer! Many in the collection.
One thing I noticed, you put the cupola on back to front! The single view port should be at the front. Do you have an historical precedent or was it an error? Genuinely fascinated.
Honestly, it was a mistake! This is the kind of thing that can happen when you go ‘off-piste’ and don’t have a full set of instructions to hand, of course!
I won’t risk messing up the model by correcting it, but I know it’s a mistake I won’t make again on my next beutepanzer!
Comments are closed.