With the advent of Achtung Panzer!, a game dedicated to exciting close-quarters tank-on-tank battles, I just knew I had to get involved, though not without trepidation. Though a wargamer of many years, armoured vehicles were still of a blind spot to me hobby-wise. With the suggestion that Warlord Games staffers each build and paint a fresh new tank in anticipation of having a multiplayer game right around the new game’s launch, it was just the nudge I needed to pick up my first WWII plastic vehicle kit.
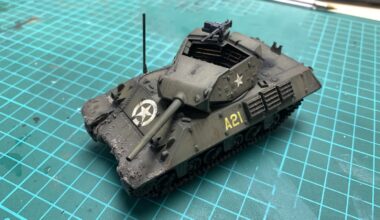
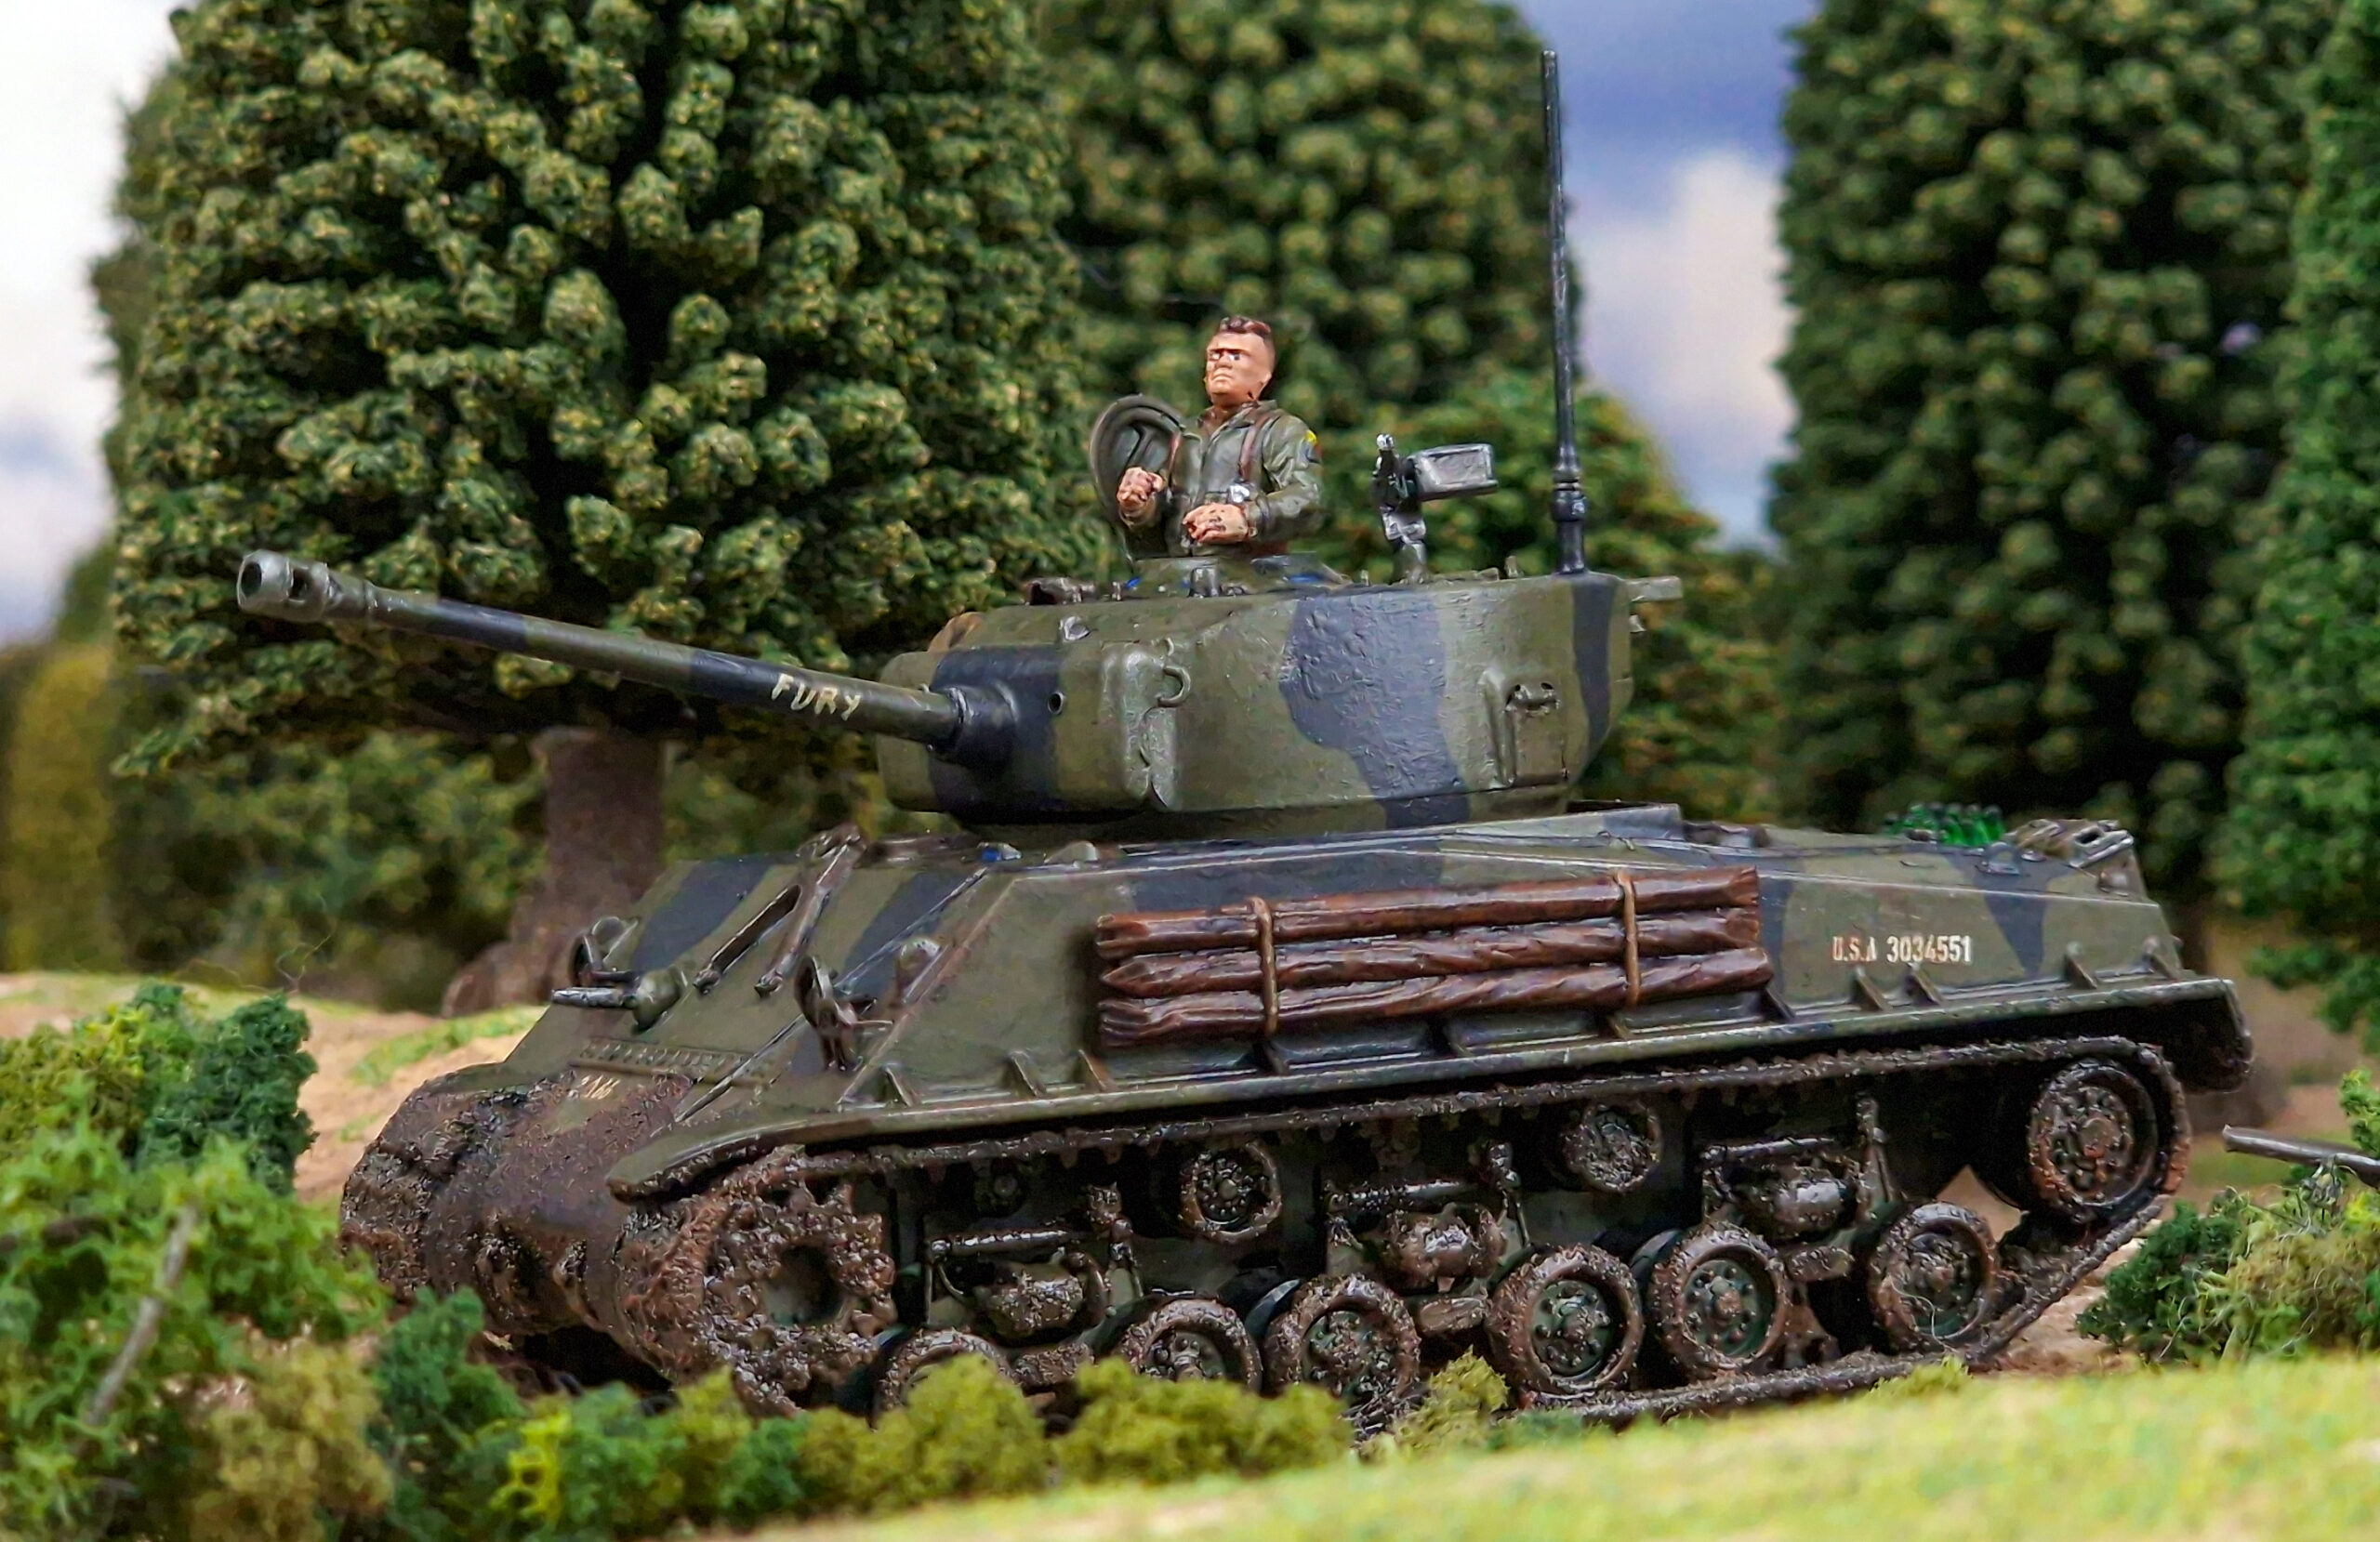
But which plastic tank to pick? There was a plethora to choose from! With the focus of Achtung Panzer! very much on the late-war, meaning there was no opportunity to add to my current long-term Bolt Action French Army project (I’ll have it ready for Third Edition!), I turned to other avenues. I didn’t really want to duplicate what any other players were building, so I settled on one of the more recent plastic kits – the Sherman ‘Easy Eight’, thinking that it’d be reasonably simple to paint for a relative newcomer in the discipline. Perhaps it was also on the mind as I’d only recently watched Fury for the first time!
Building
Seeking the advice of my fellow Warlord staffers, many of whom are veterans in the art of miniature tank building, their wisdom was not too dissimilar from that of any other types of models – only clip off the relevant parts of the sprue for the stage you’re working on at any one time, always dry fit, and be mindful of parts that may be inaccessible when assembled – in case you want/need to paint them.
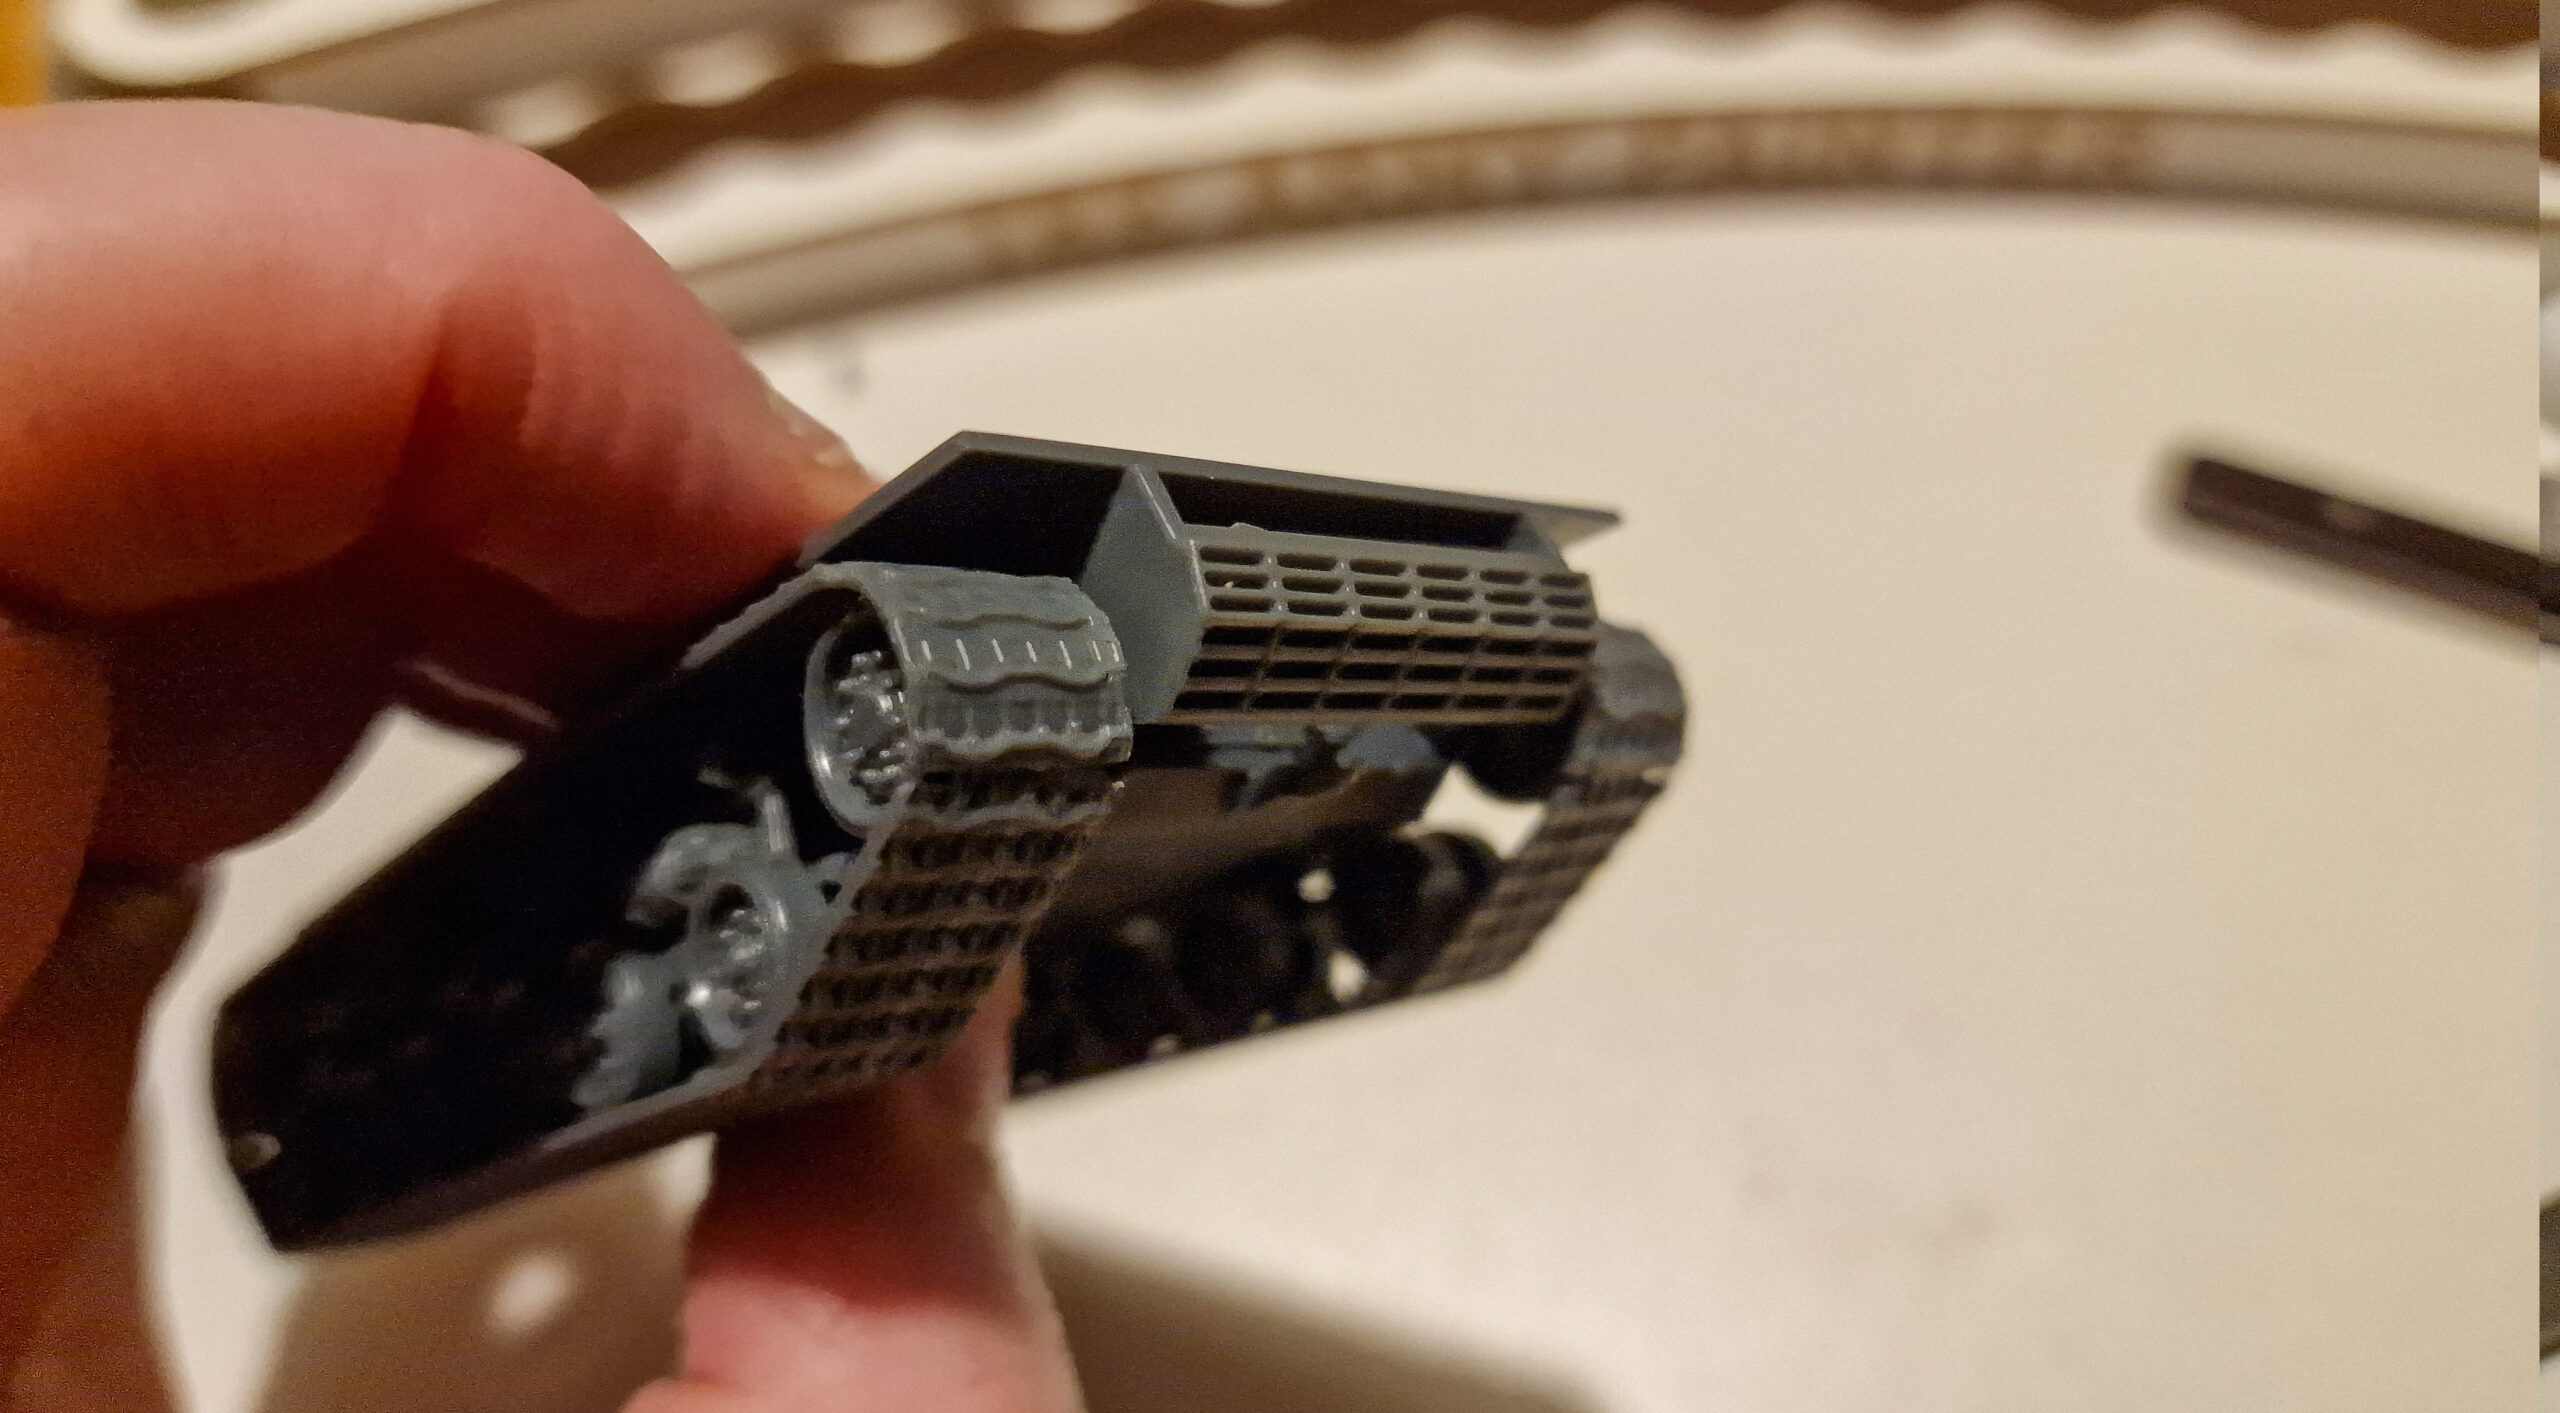
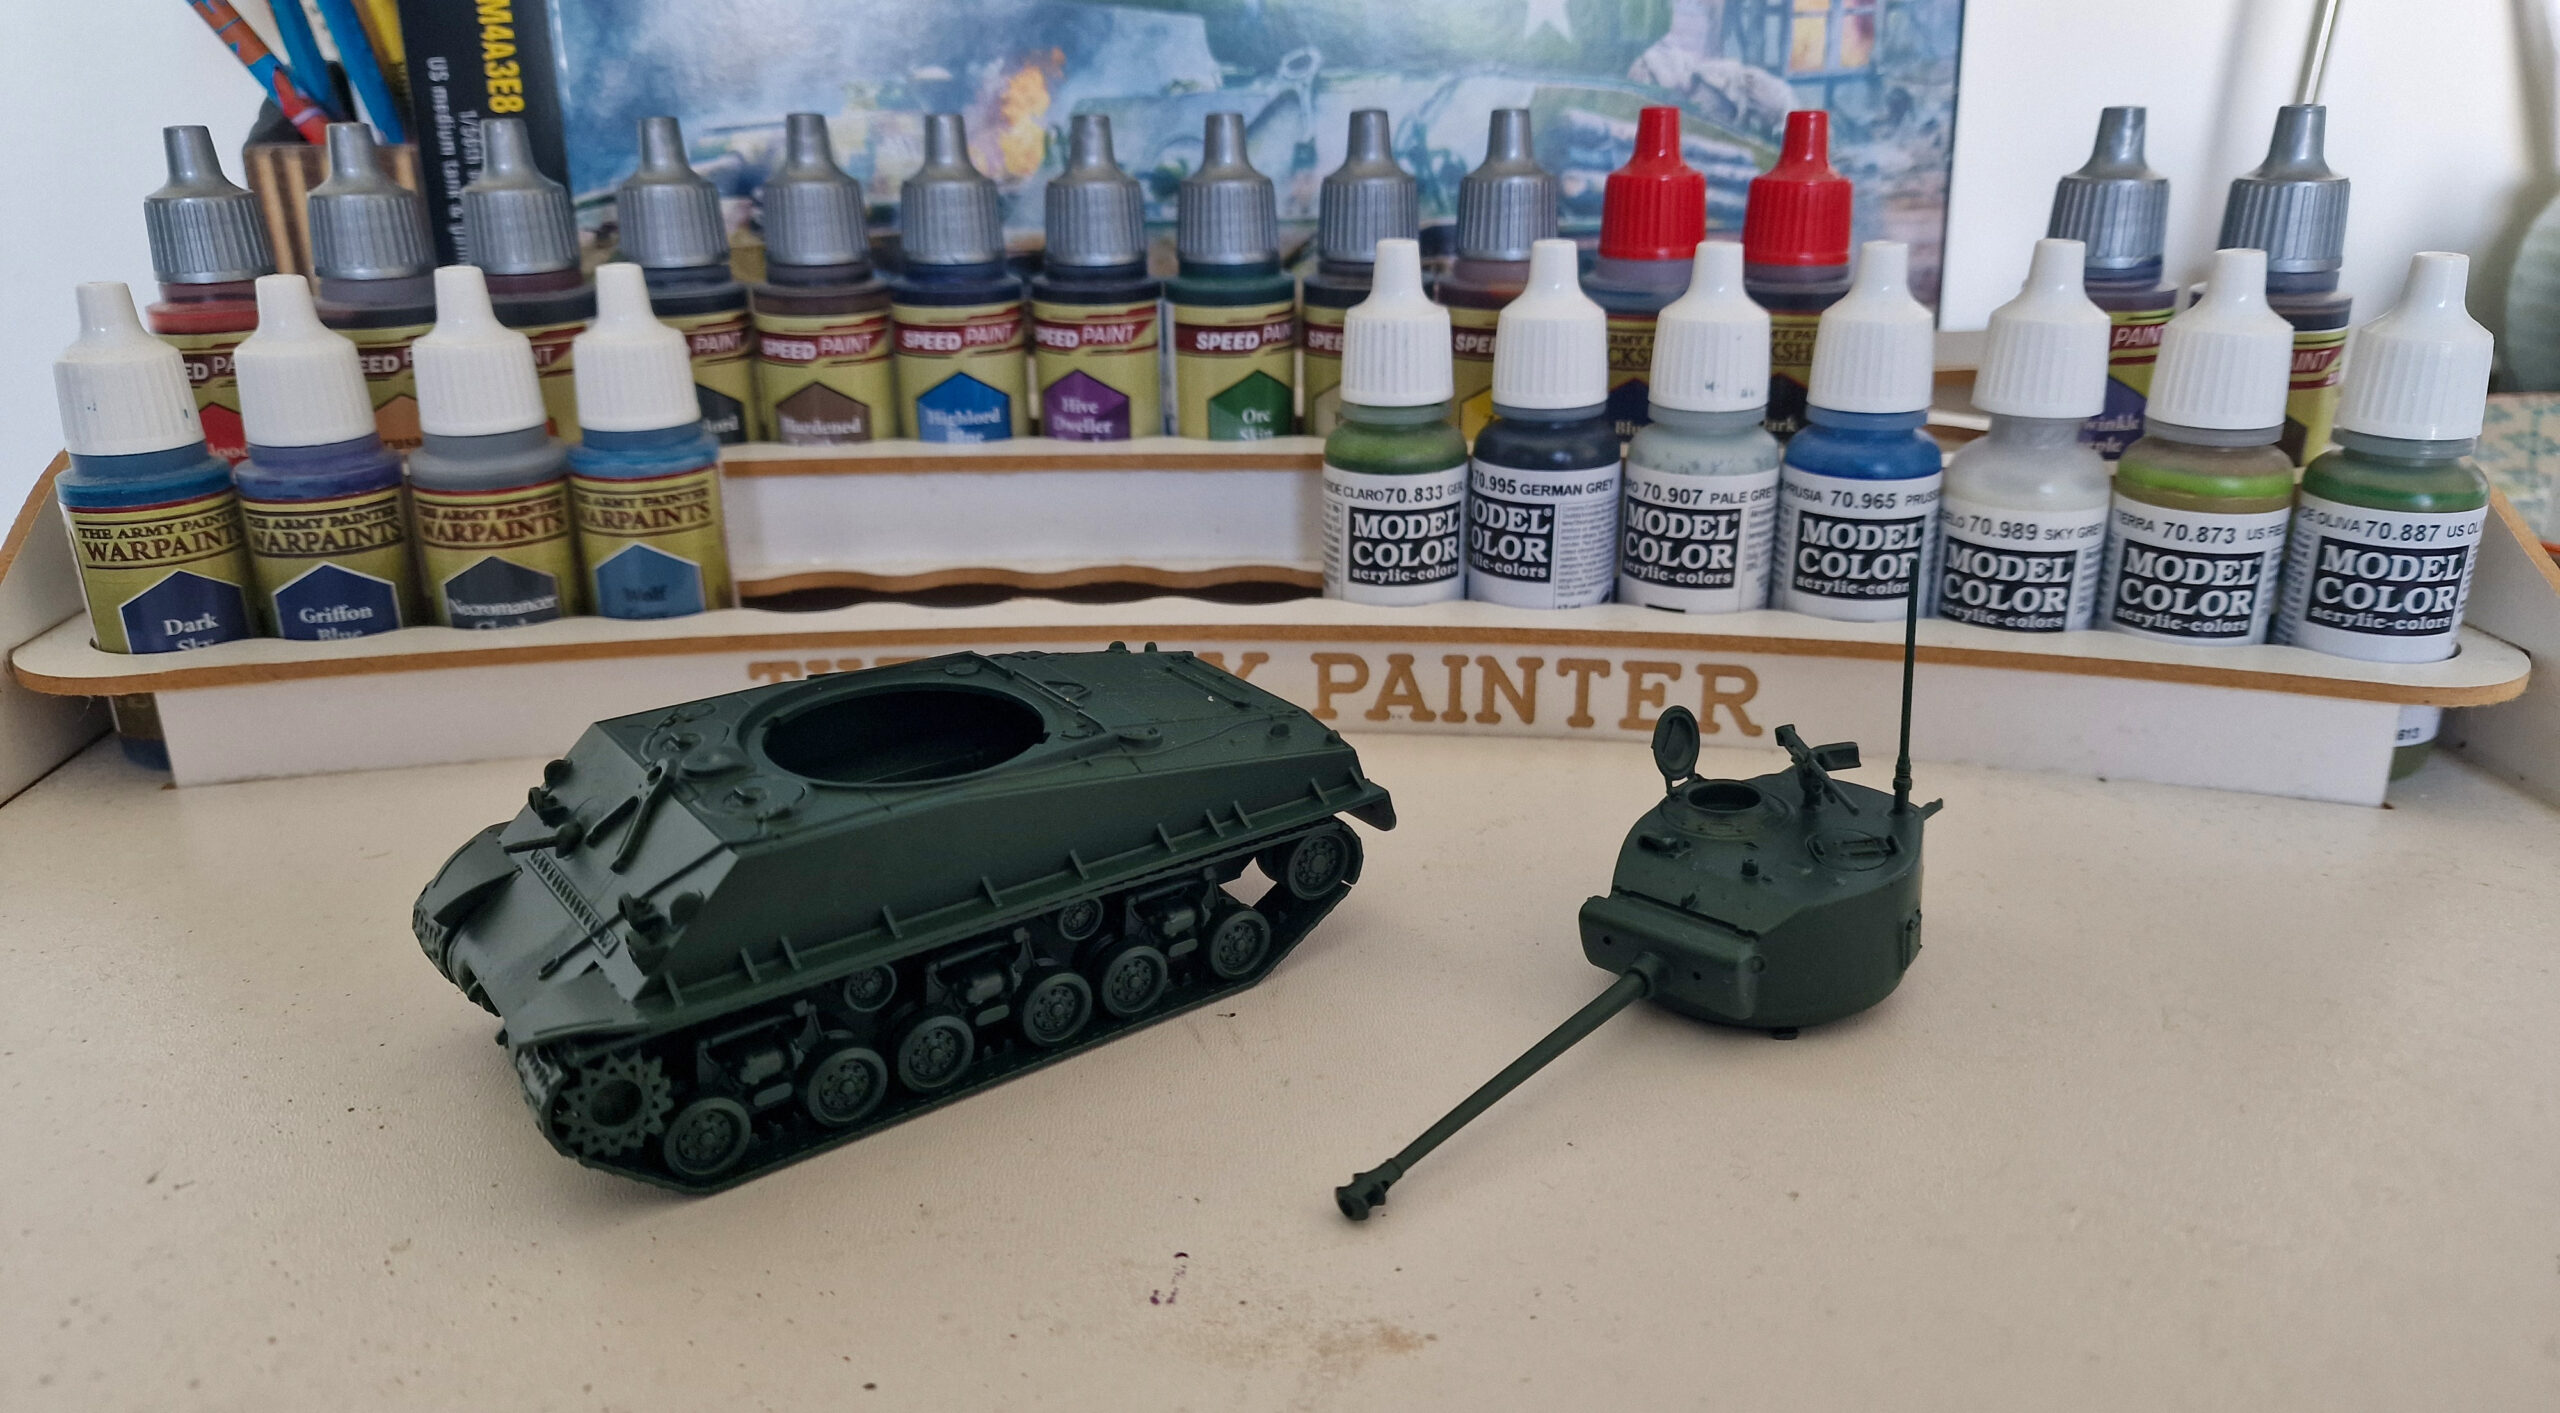
By far the most difficult parts of the build are the tracks, and these, inevitably, were first up on the assembly line. For ease of access, I glued all the wheels in first, reasoning that these would be difficult to access once the tracks were on. For the tracks themselves, I clipped out one set at a time and laid them out, making sure each part was orientated the same way, before, beginning with the bottom tread, gluing them to the wheels one piece at a time – ensuring they were aligned centrally. I made sure there was plenty of drying time, and pressed the pieces together more firmly than I ordinarily would, to ensure a secure finish.
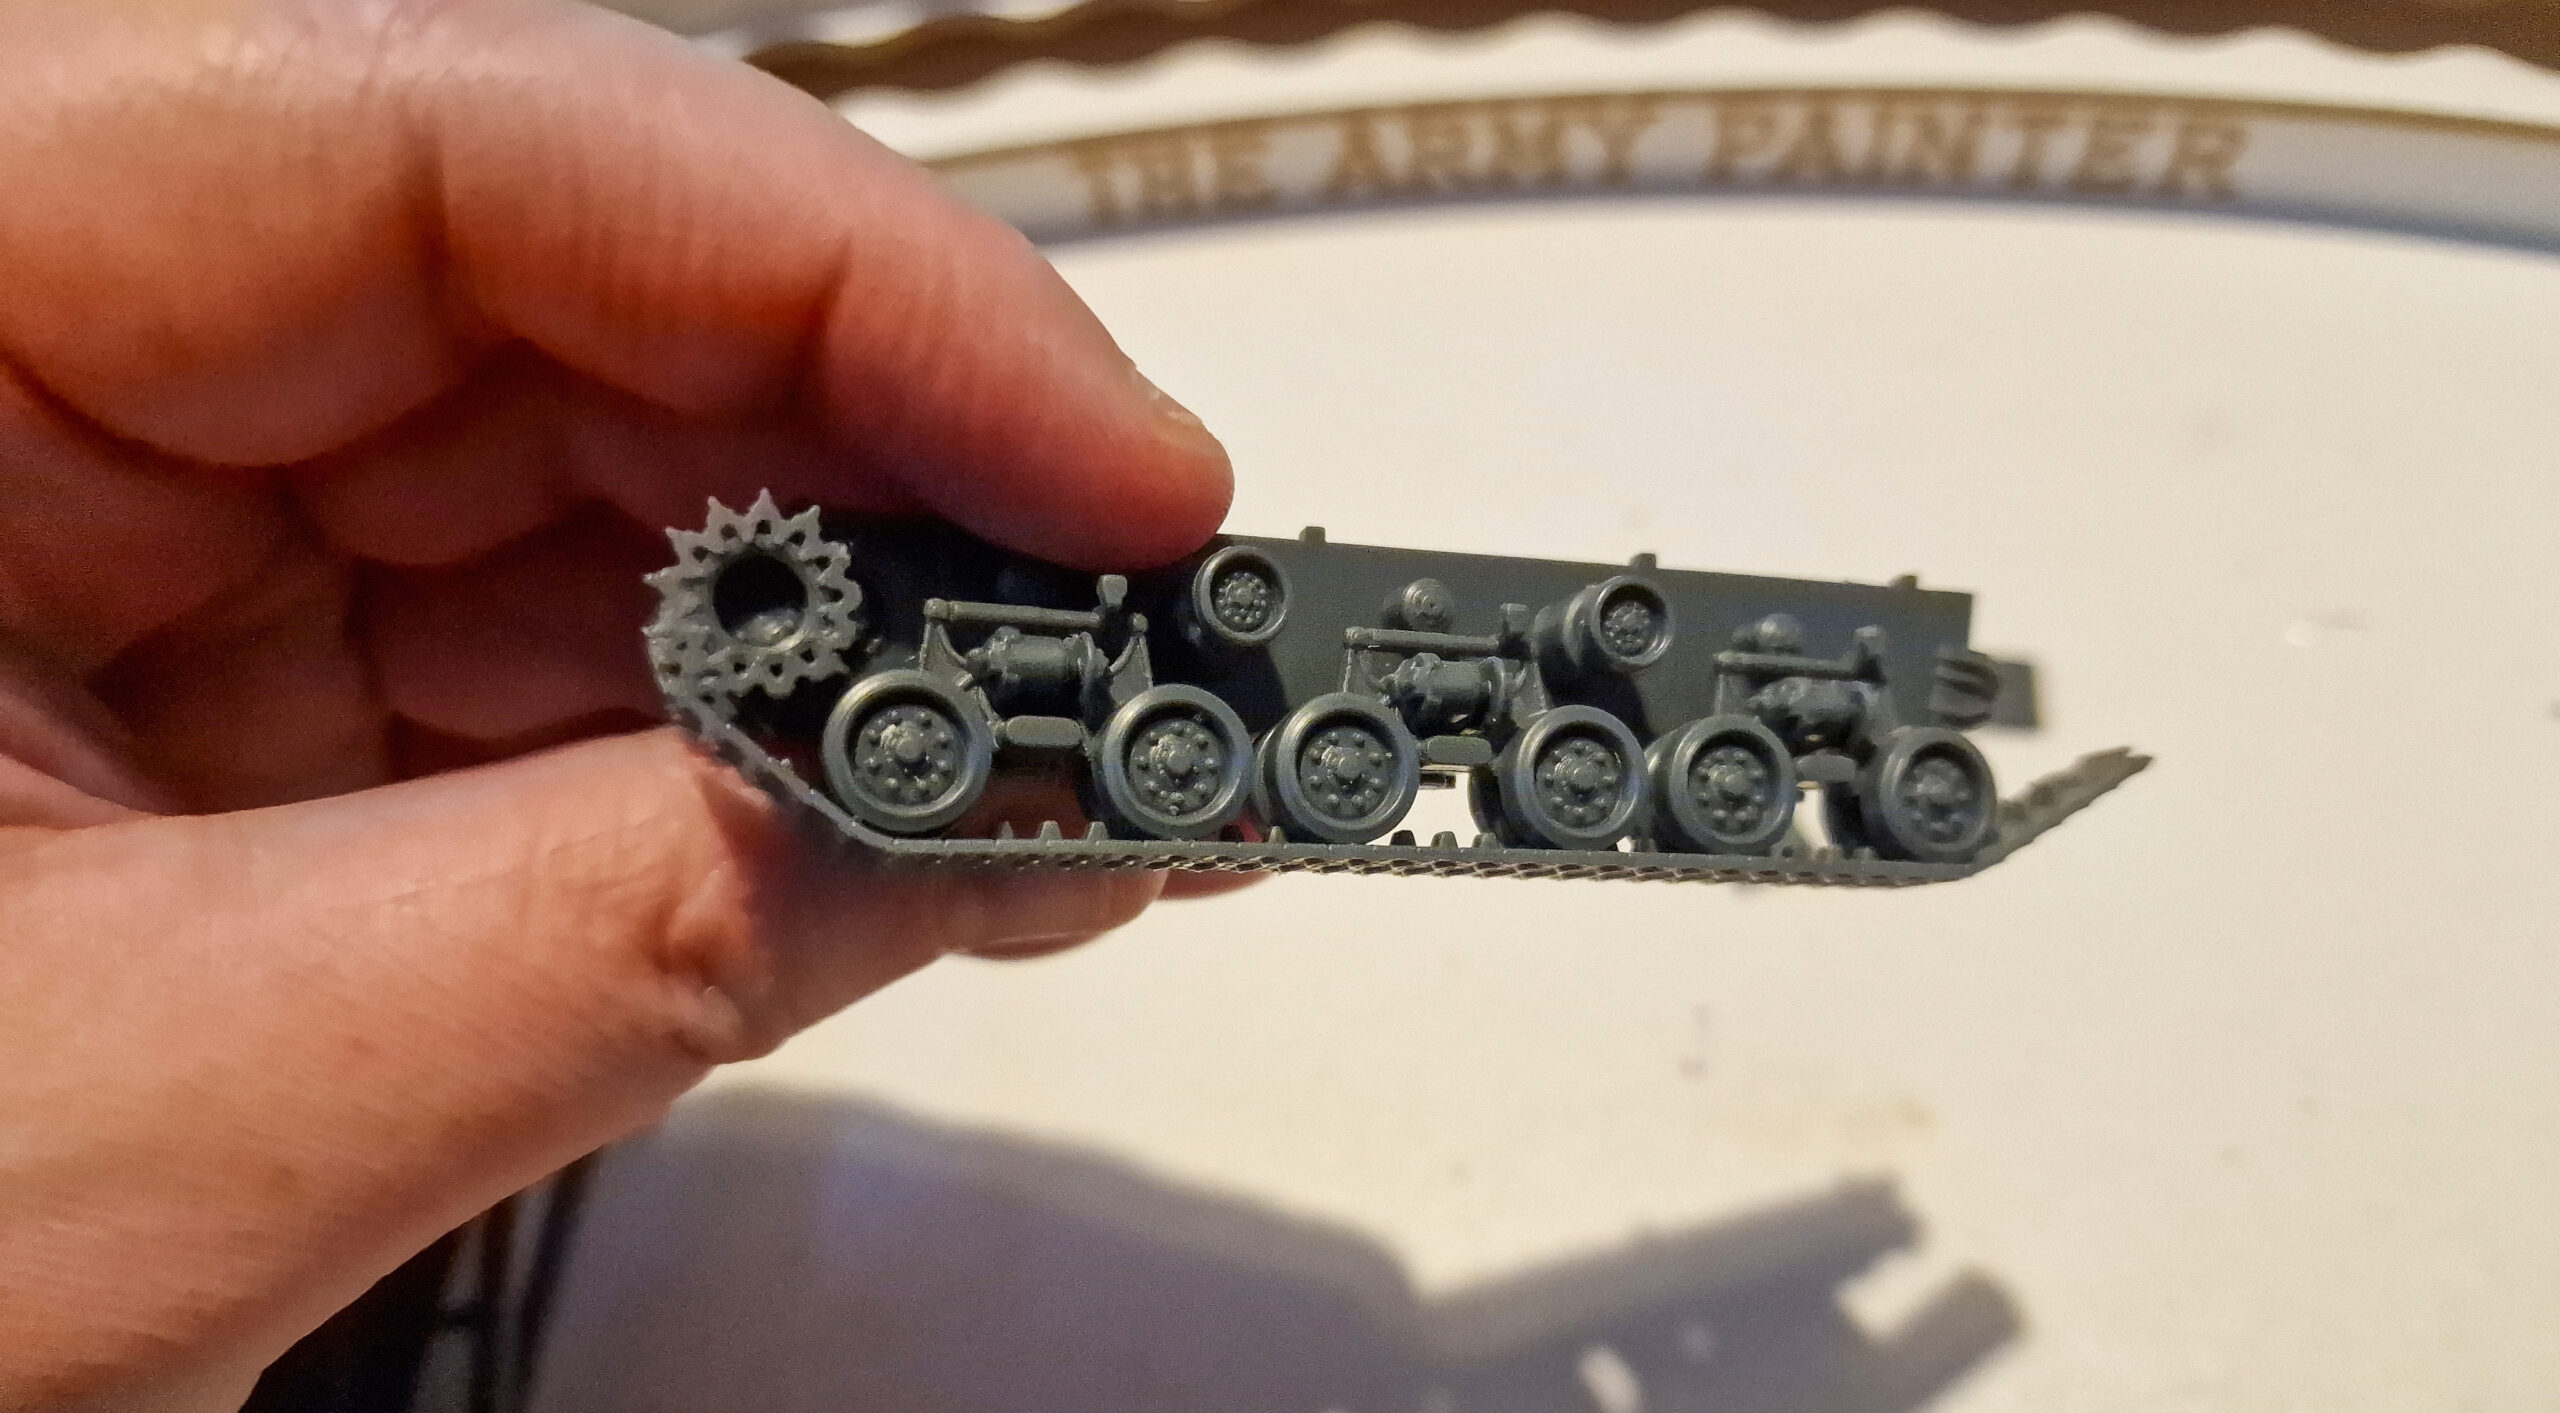
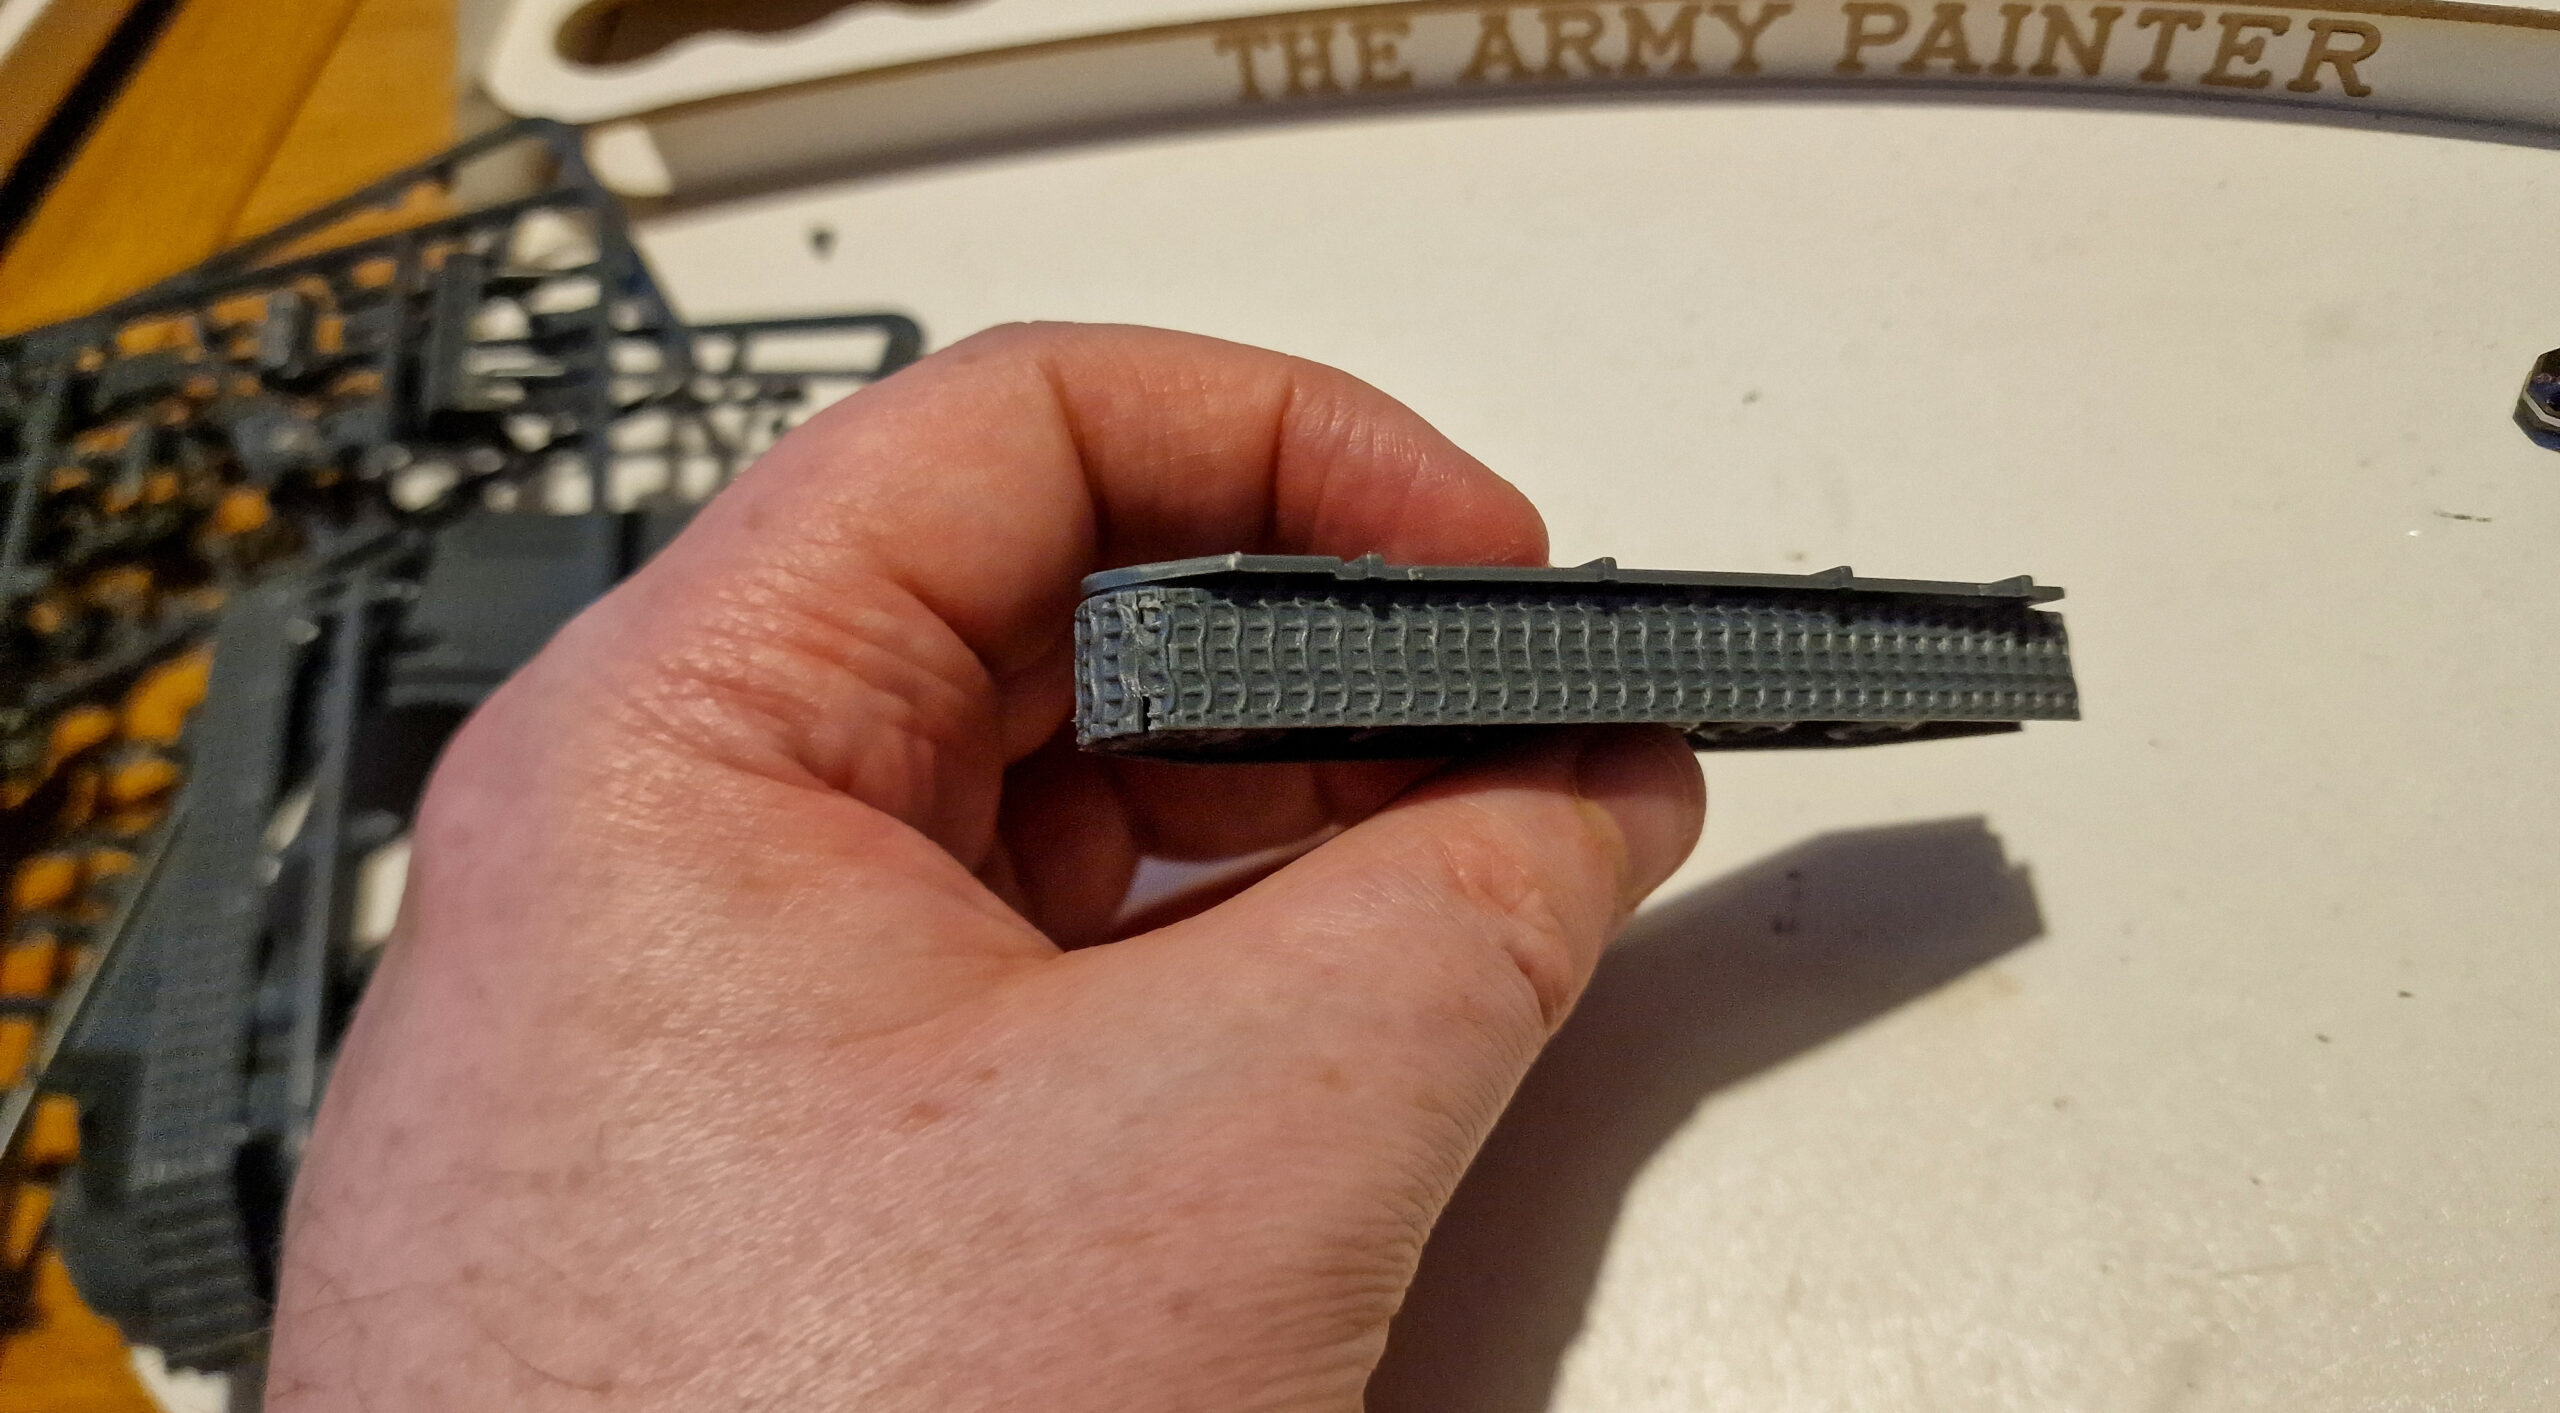
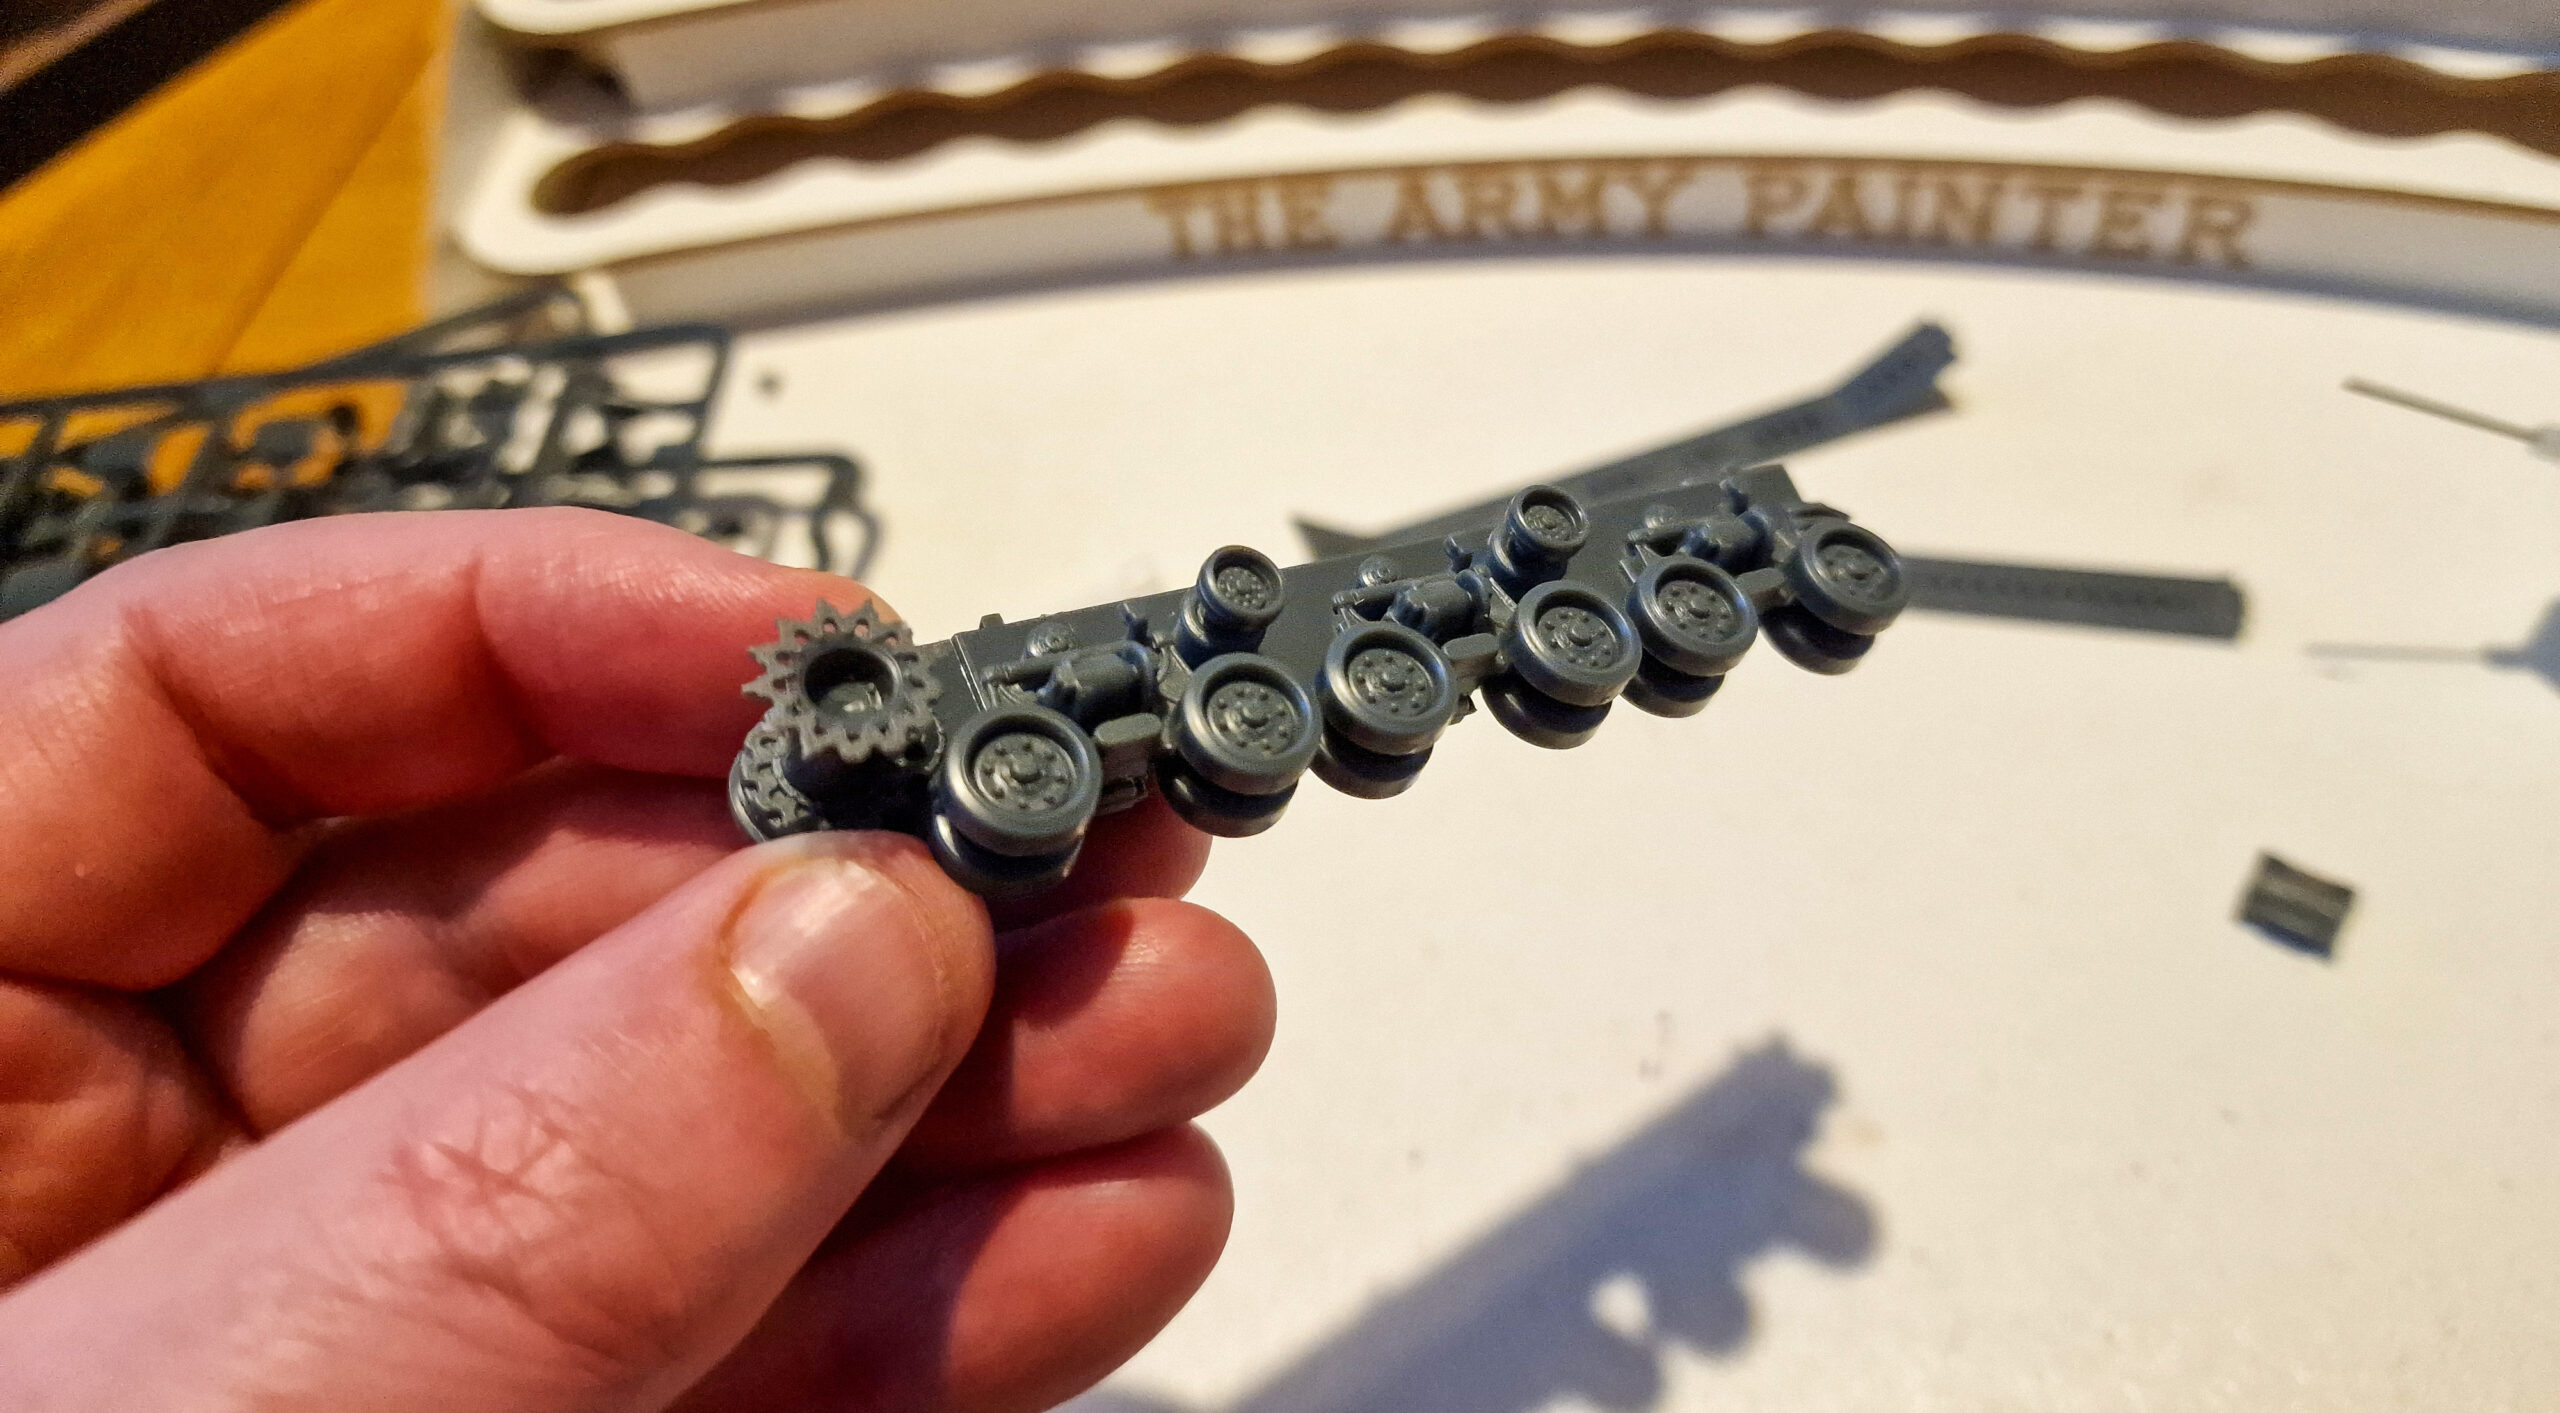
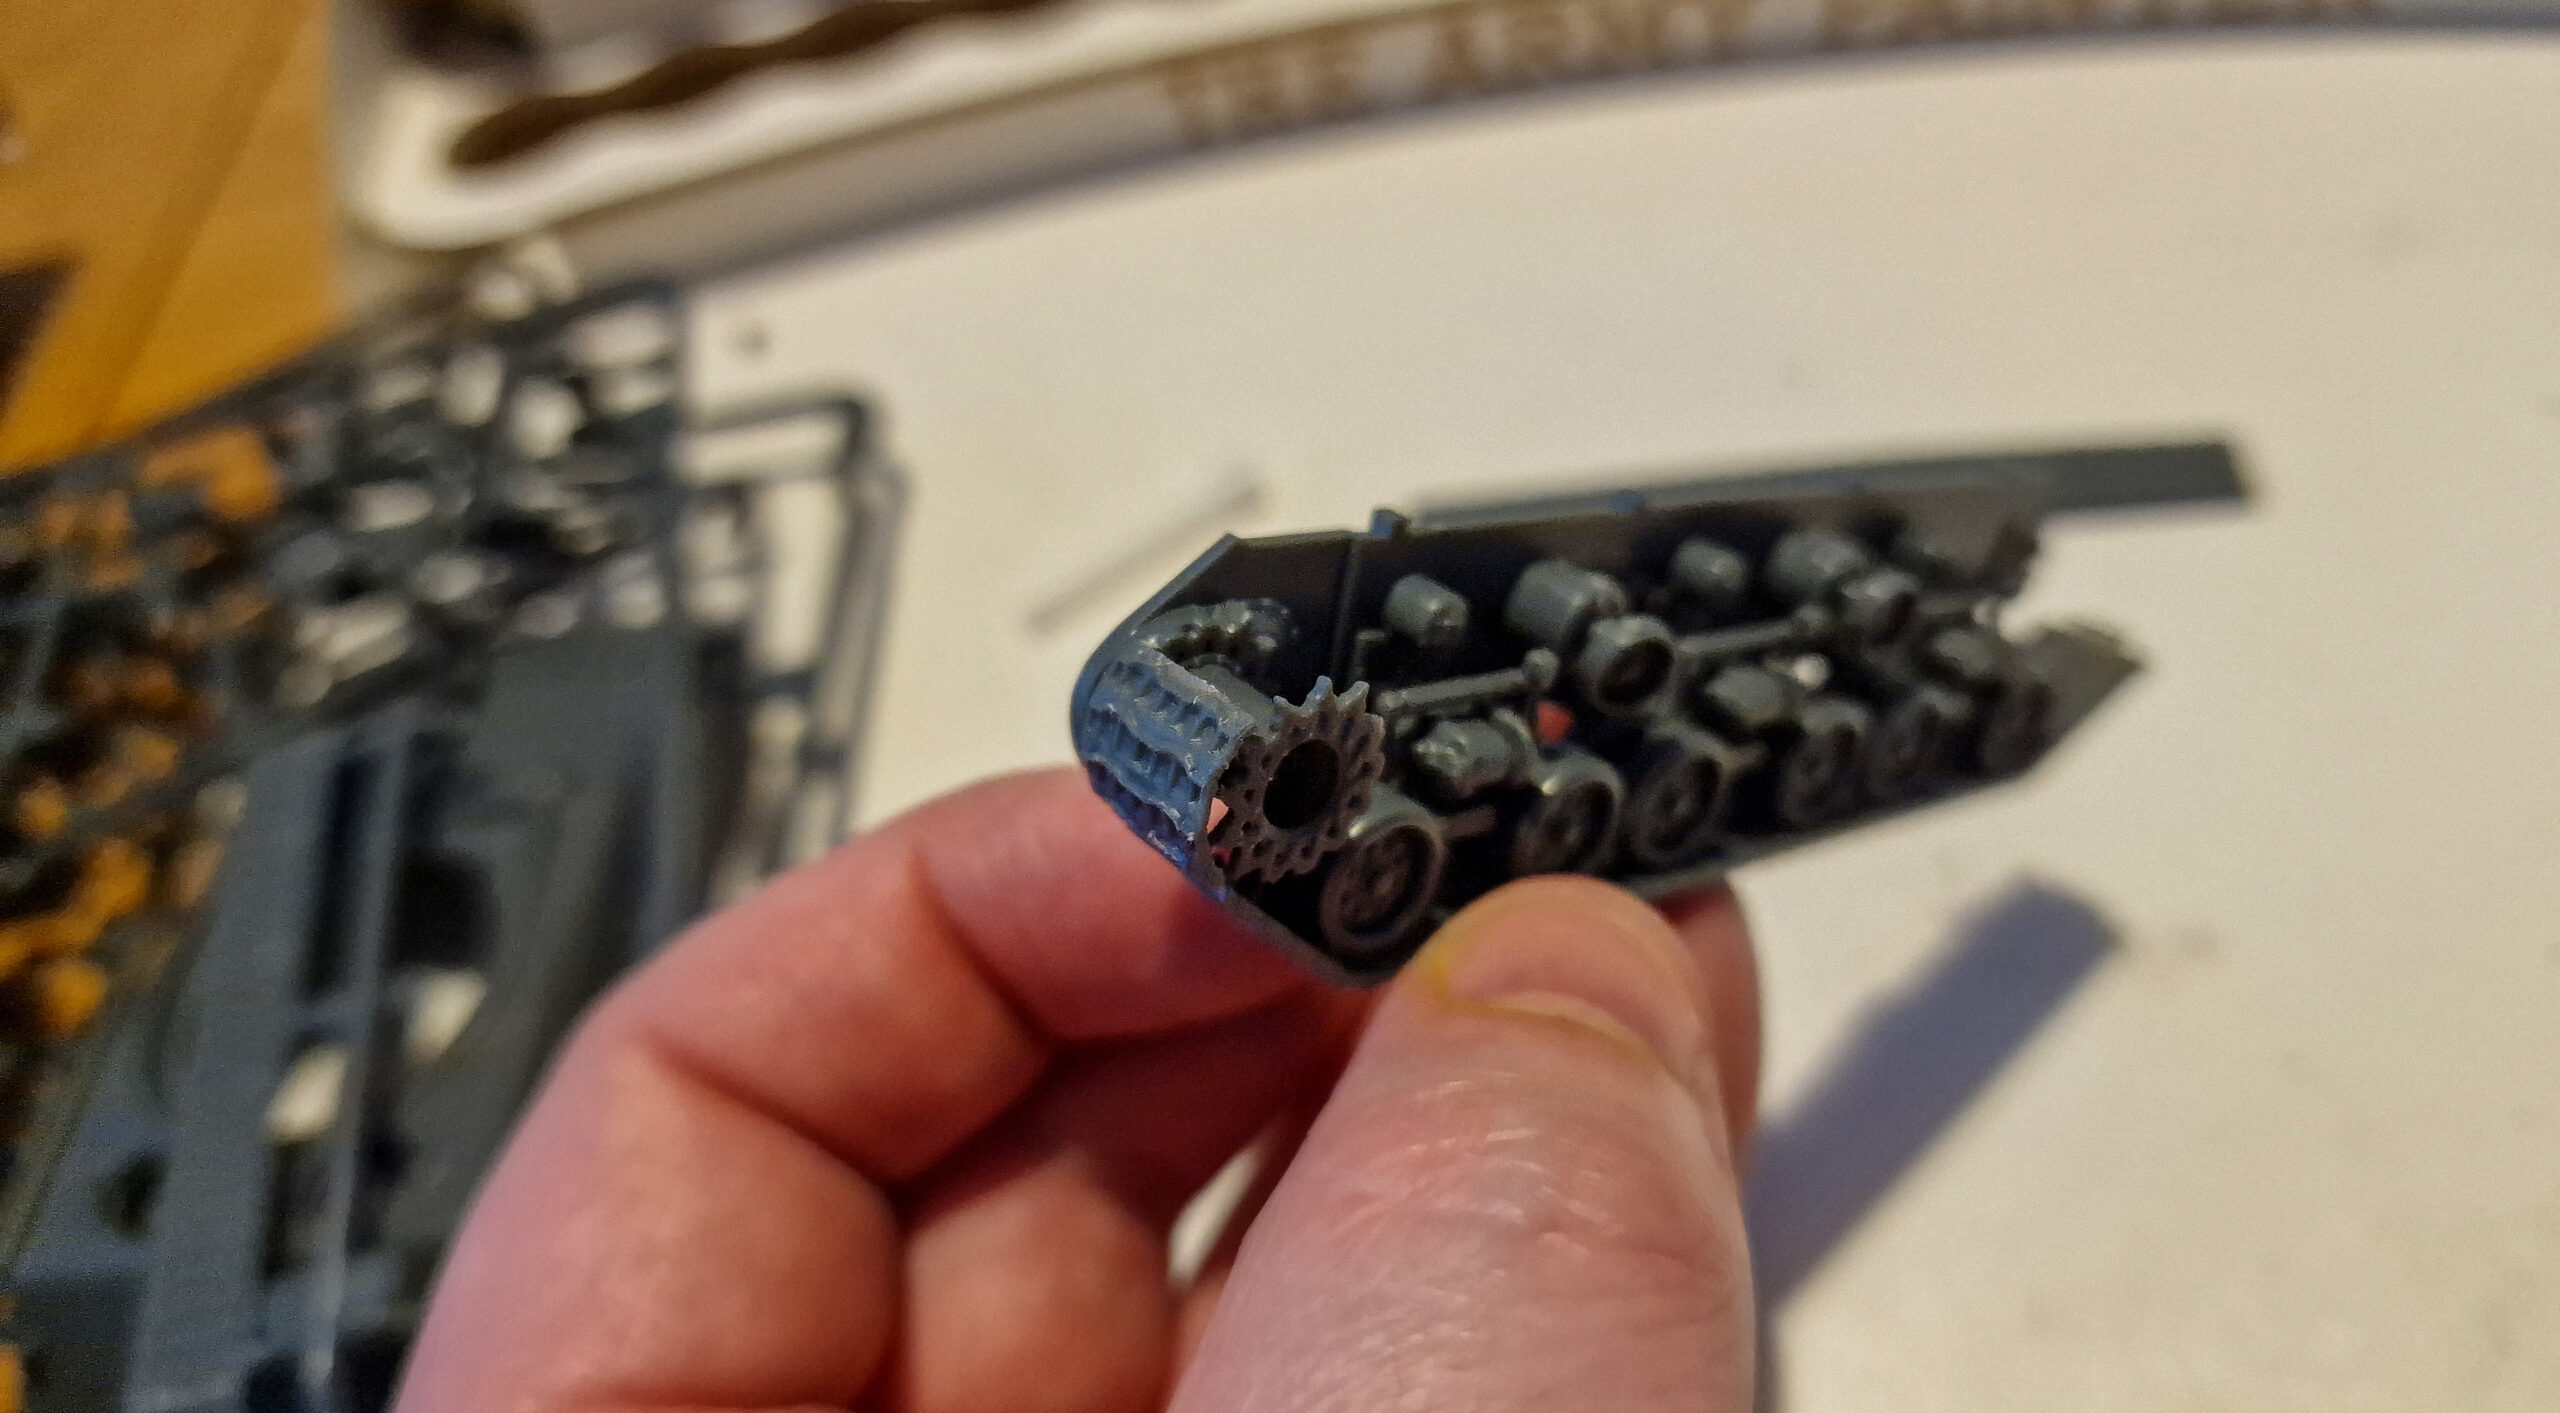

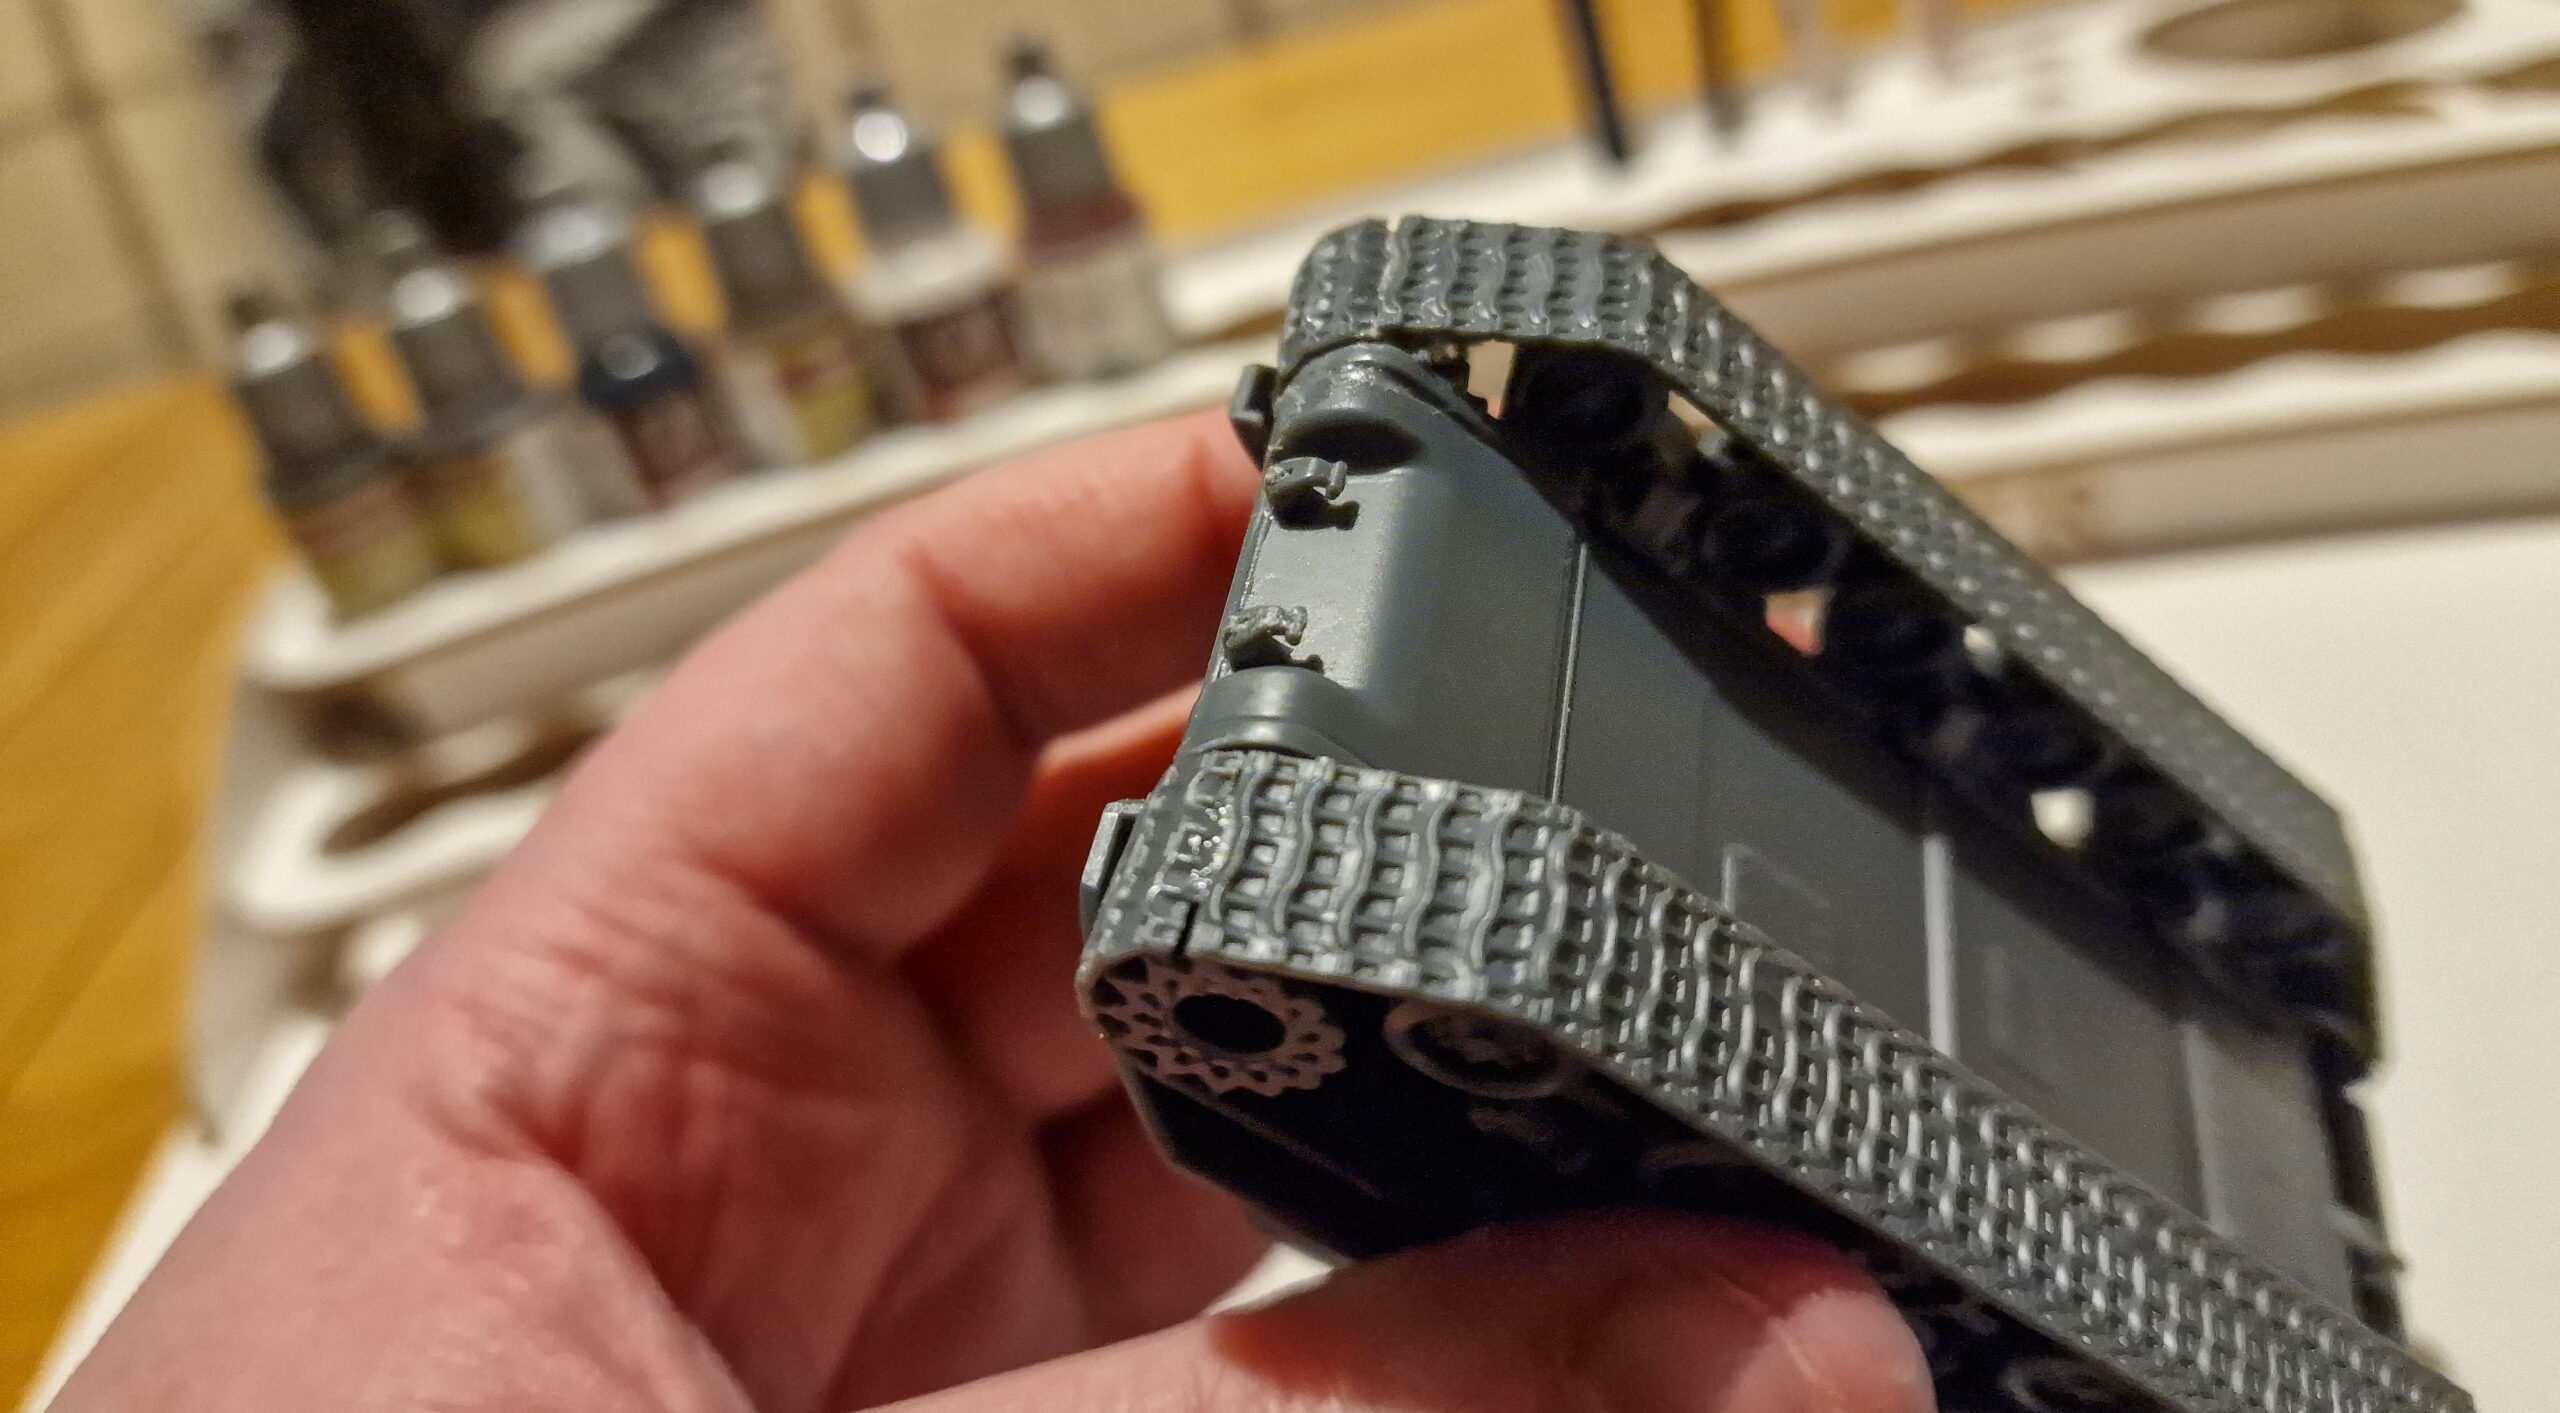
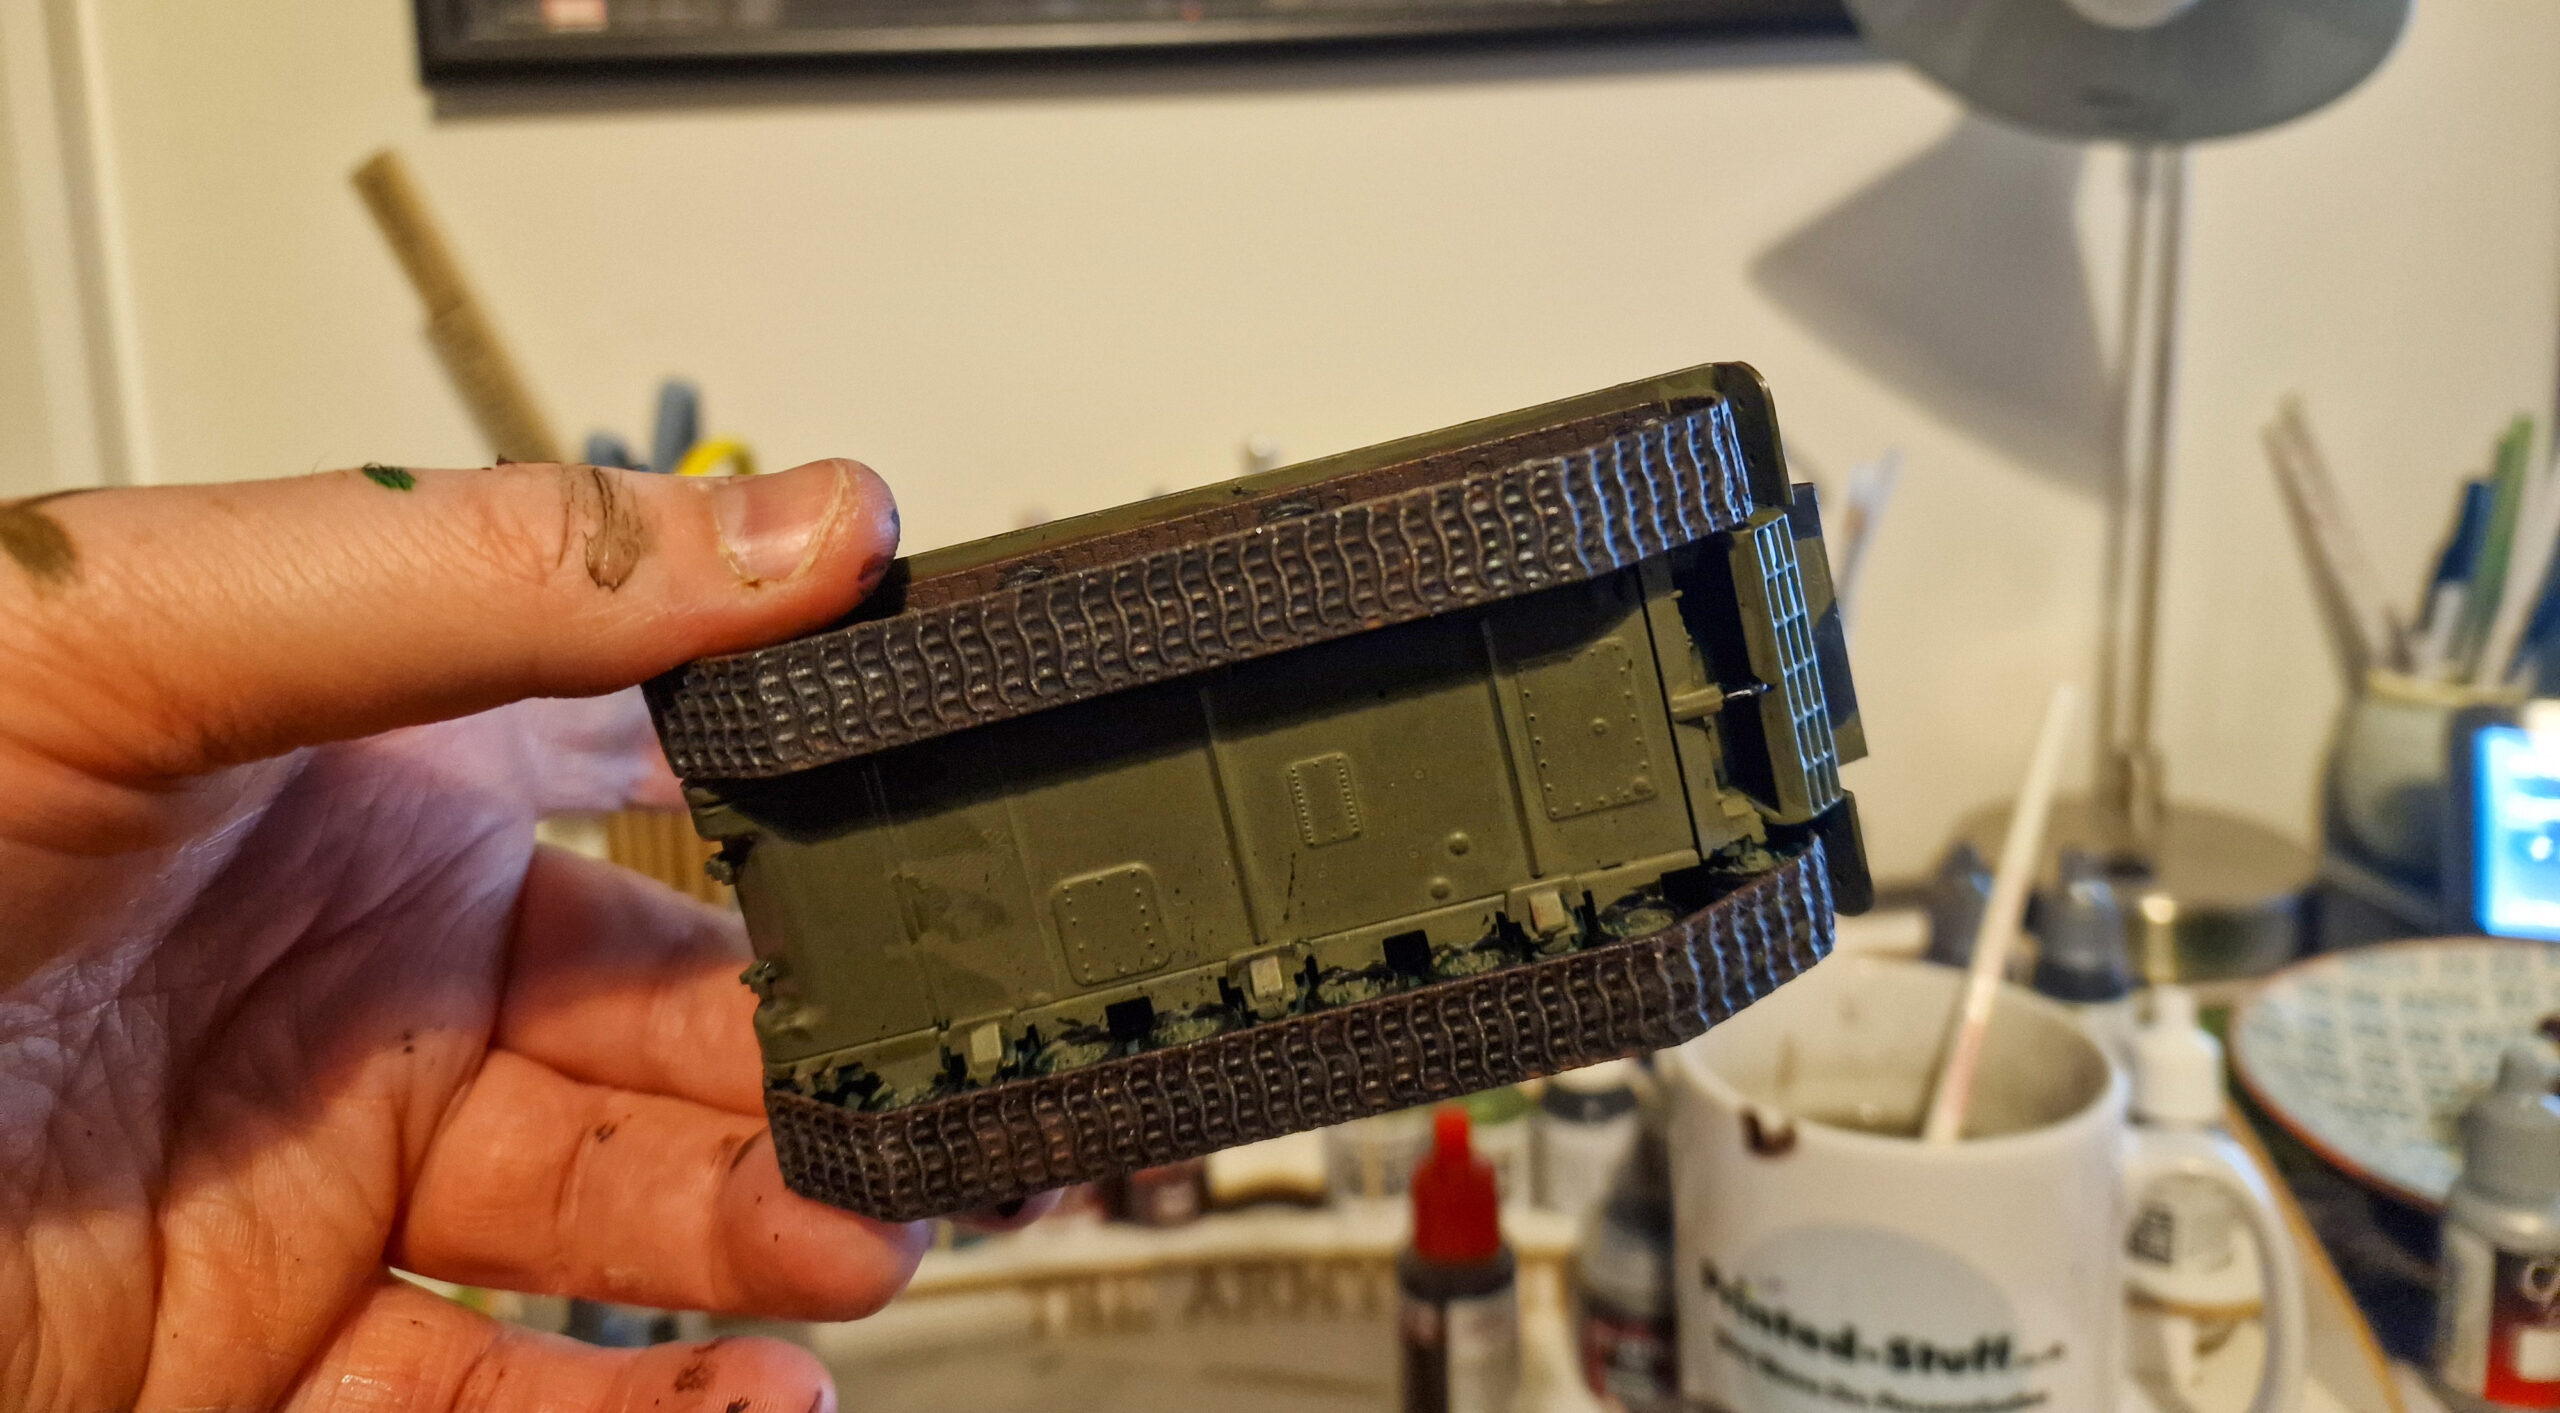
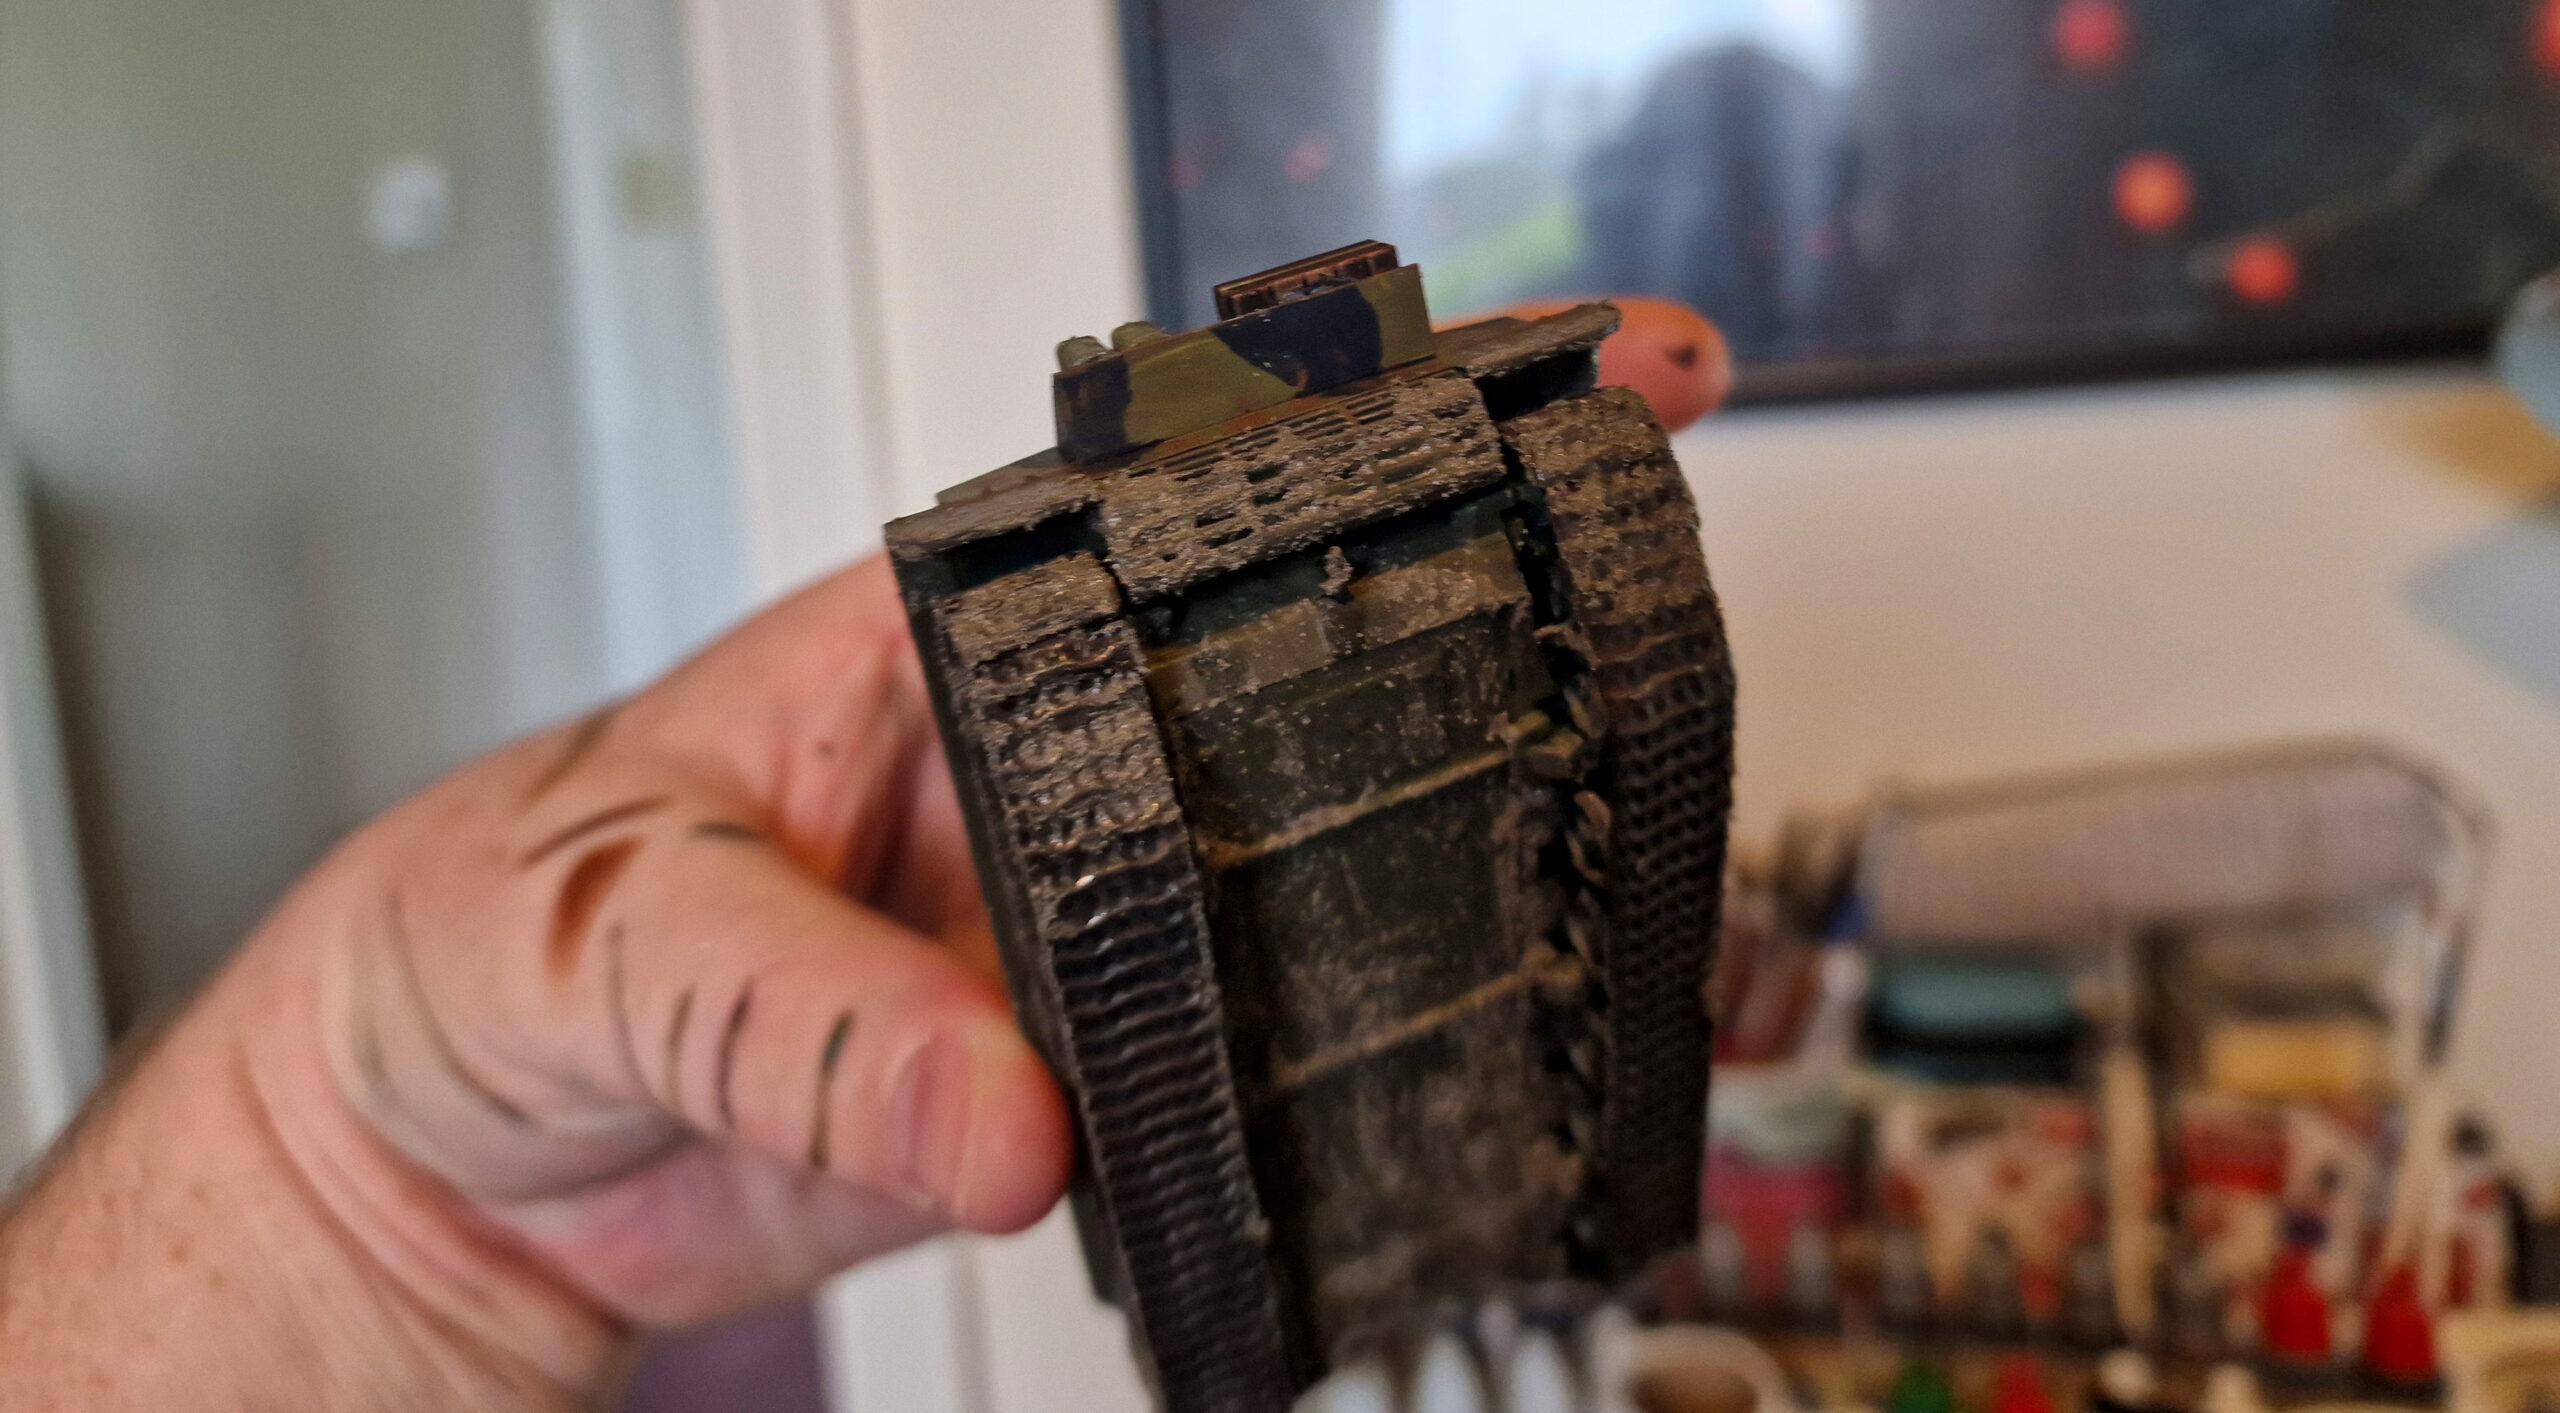
I actually failed to take my peers’ advice during this stage and failed to dry fit the drive sprockets. By the time I noticed I had mixed up the left and right ones, they had solidly set, and it was far too late to do anything about it. This ultimately made it more difficult to fit the tracks around them as they were not flush – and the end result was more of a gap in the tracks than I would have liked. It turns out that there was absolutely no need to be disheartened though, and I needn’t really have bothered with my desperate attempts to alter the flat inner edges of the sprockets with green stuff, as this was easily masked later one when weathering, but I’ll come onto that later.
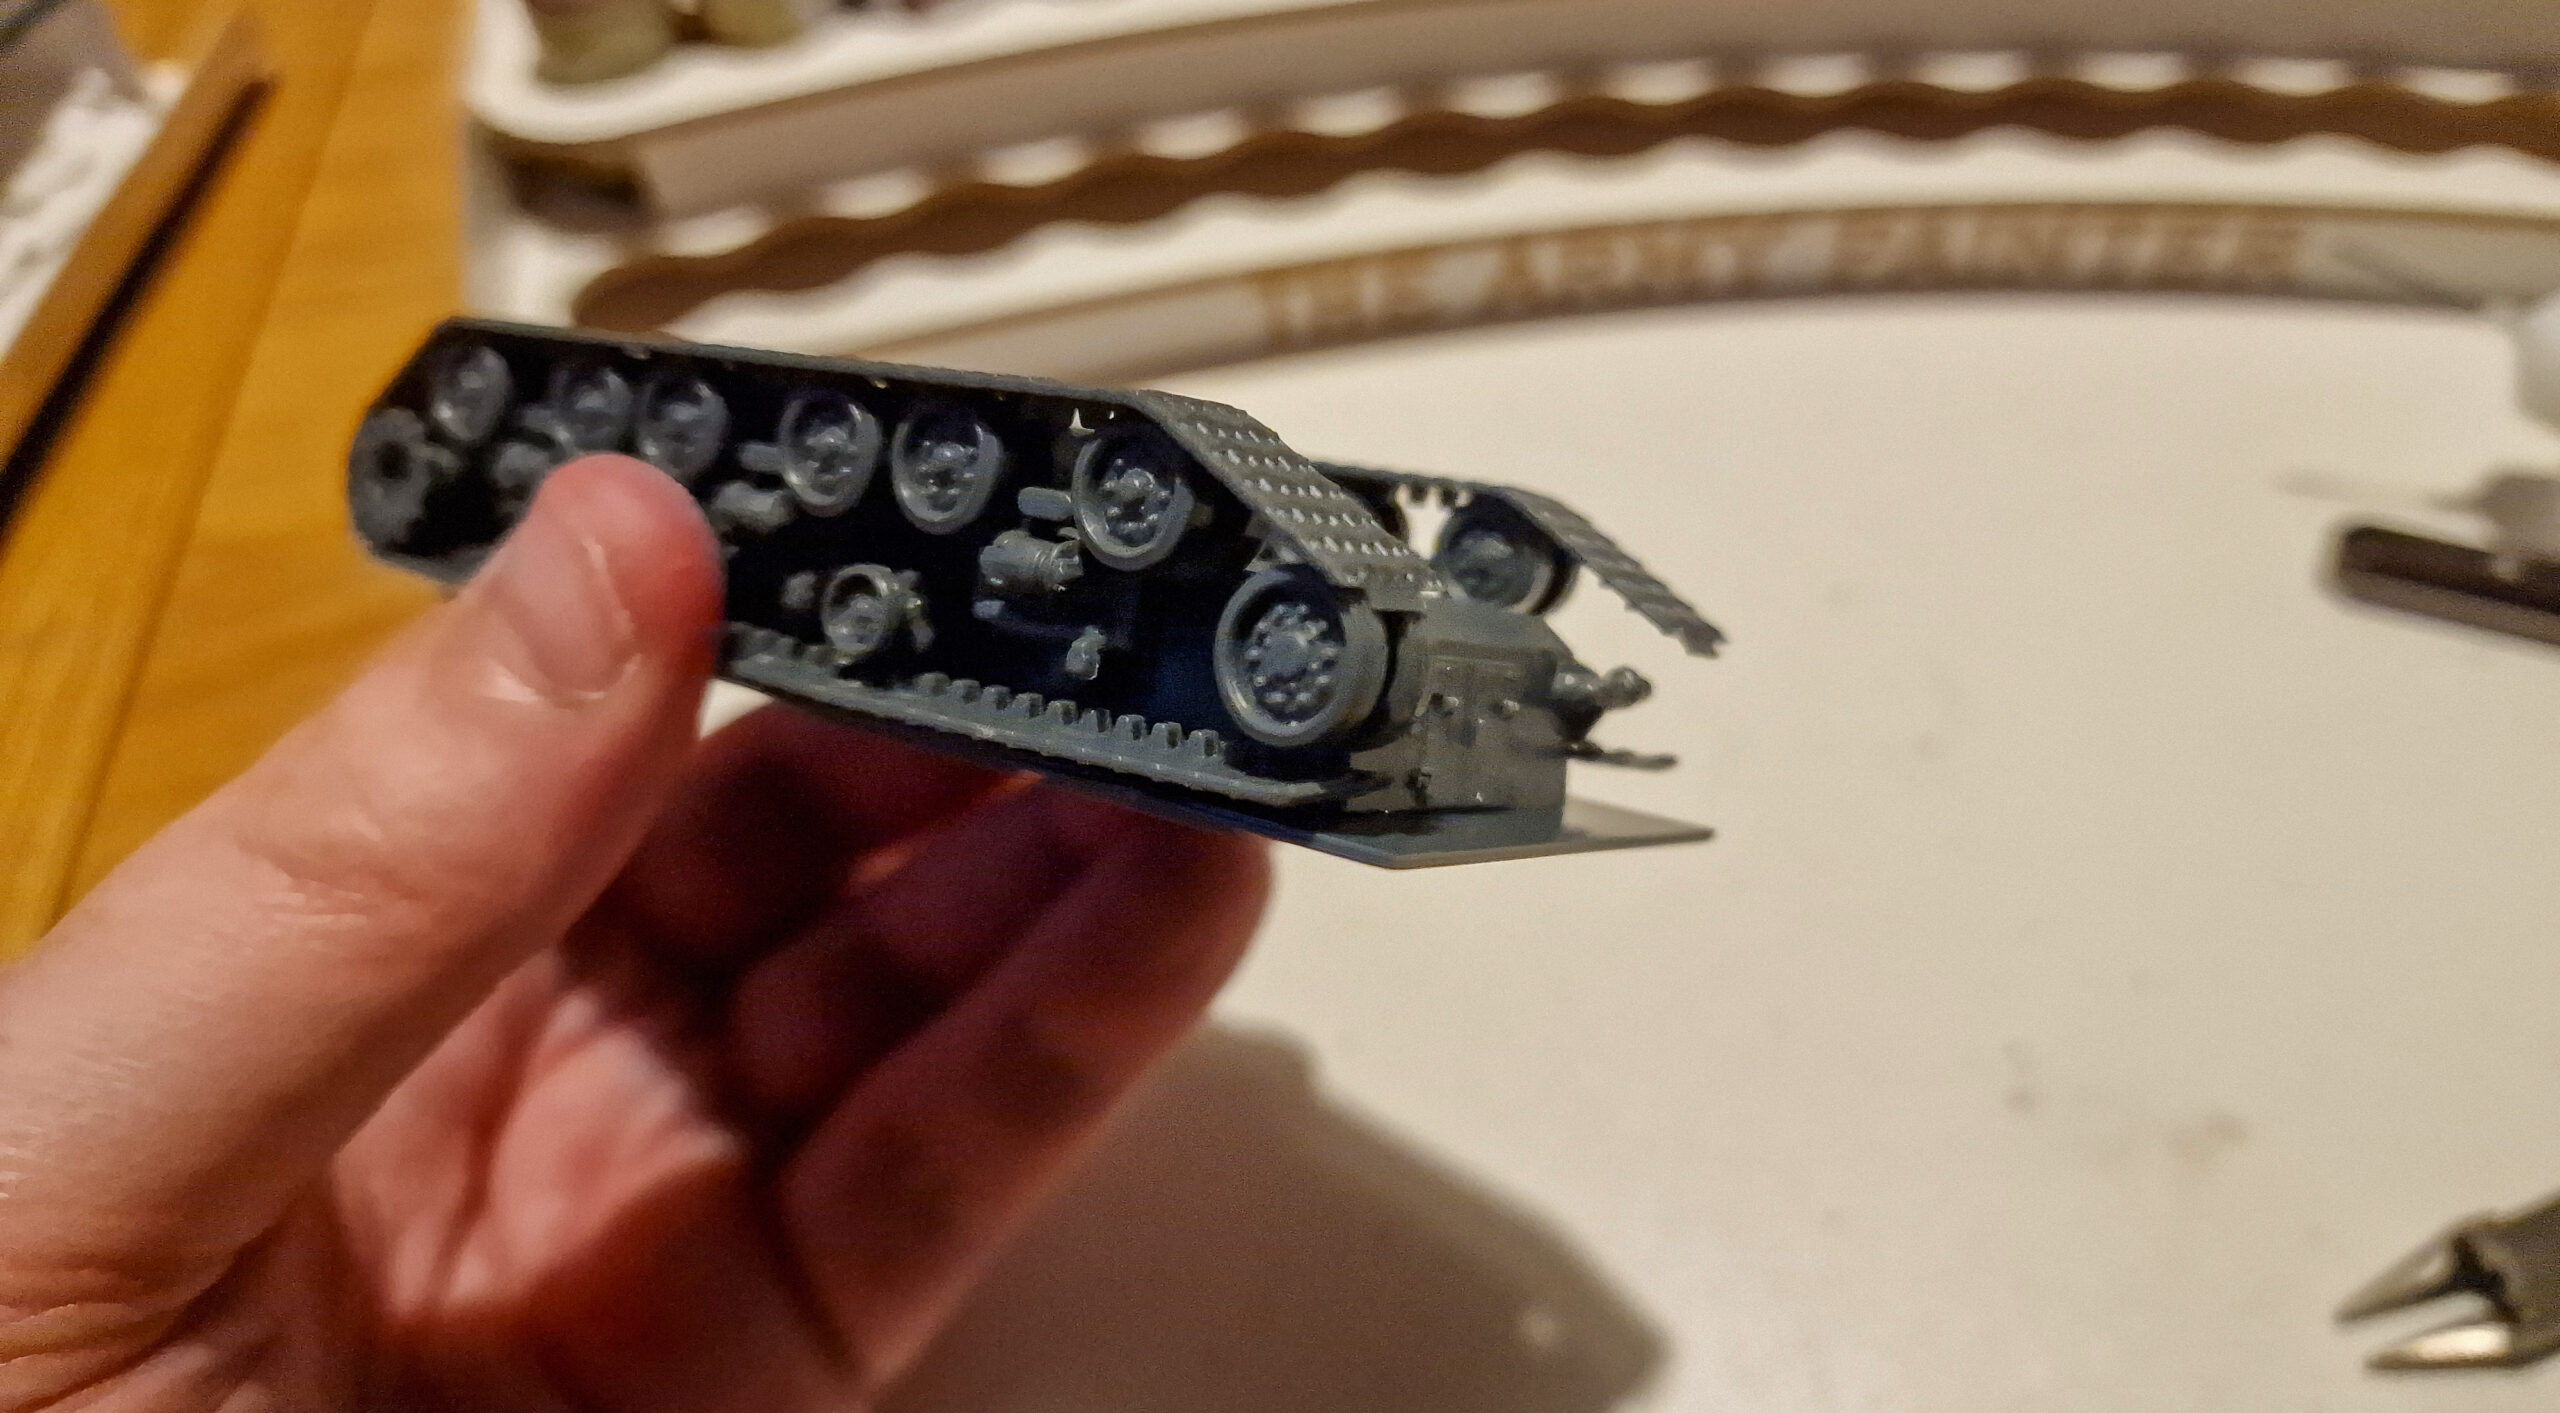
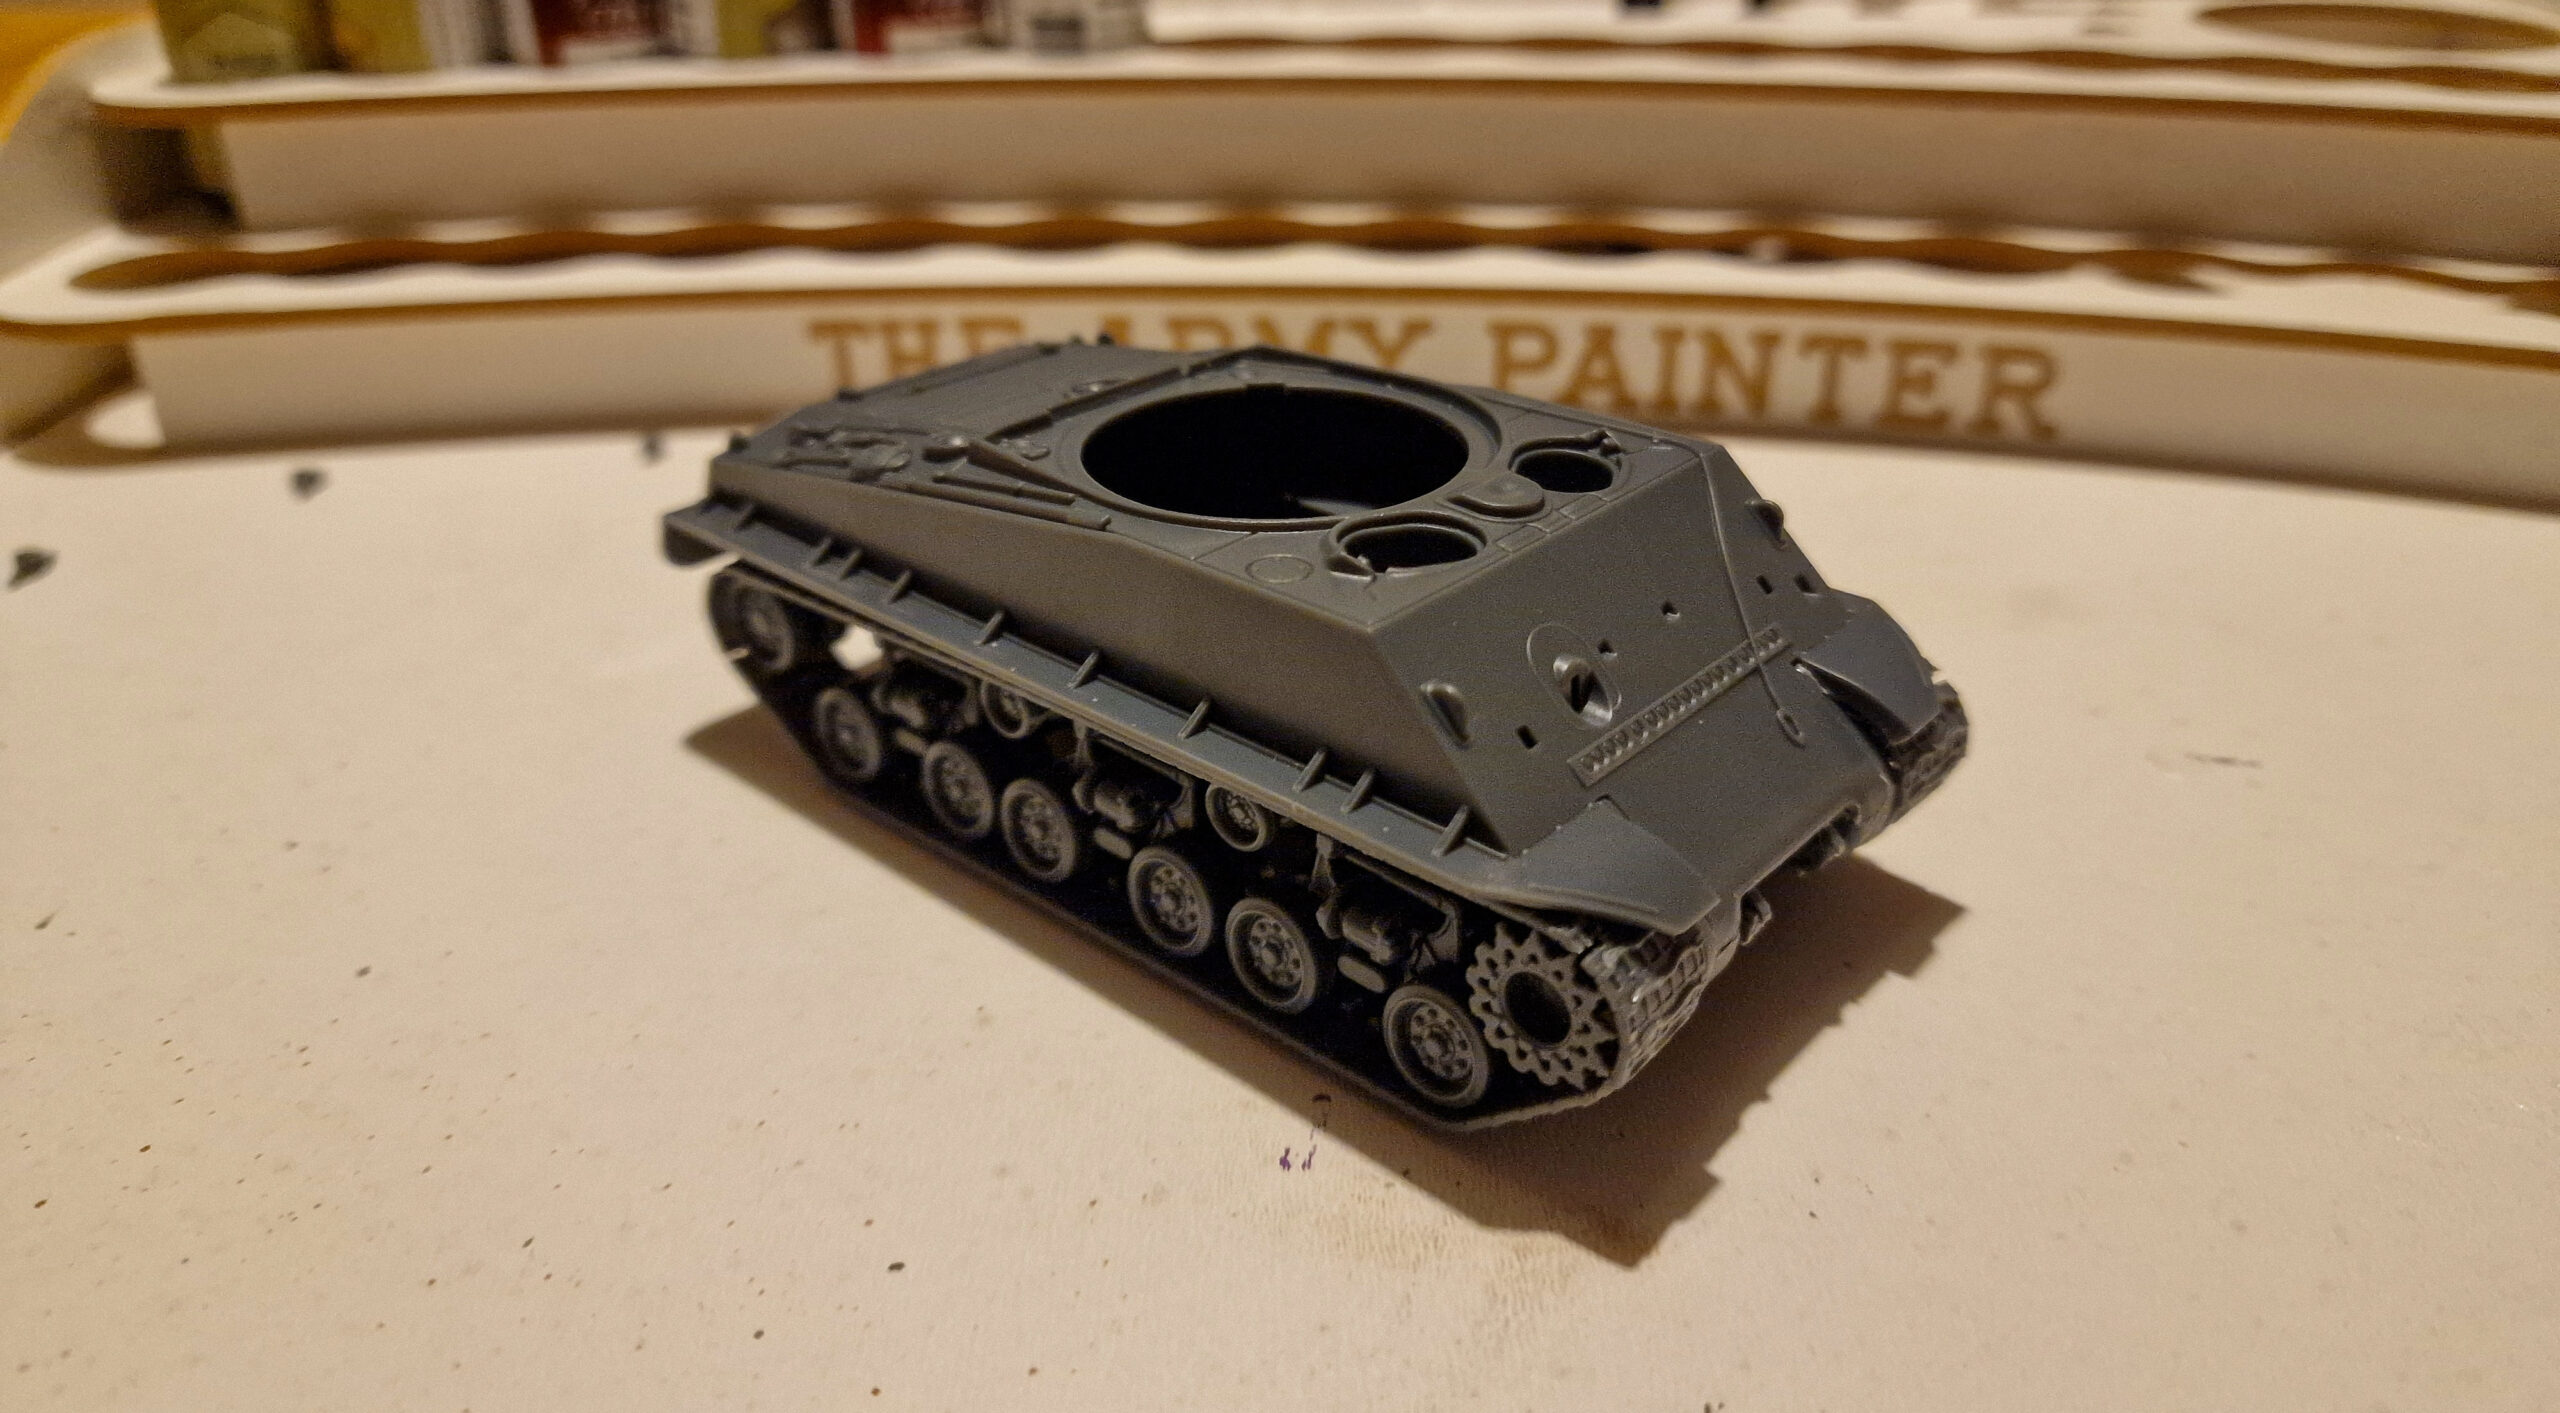
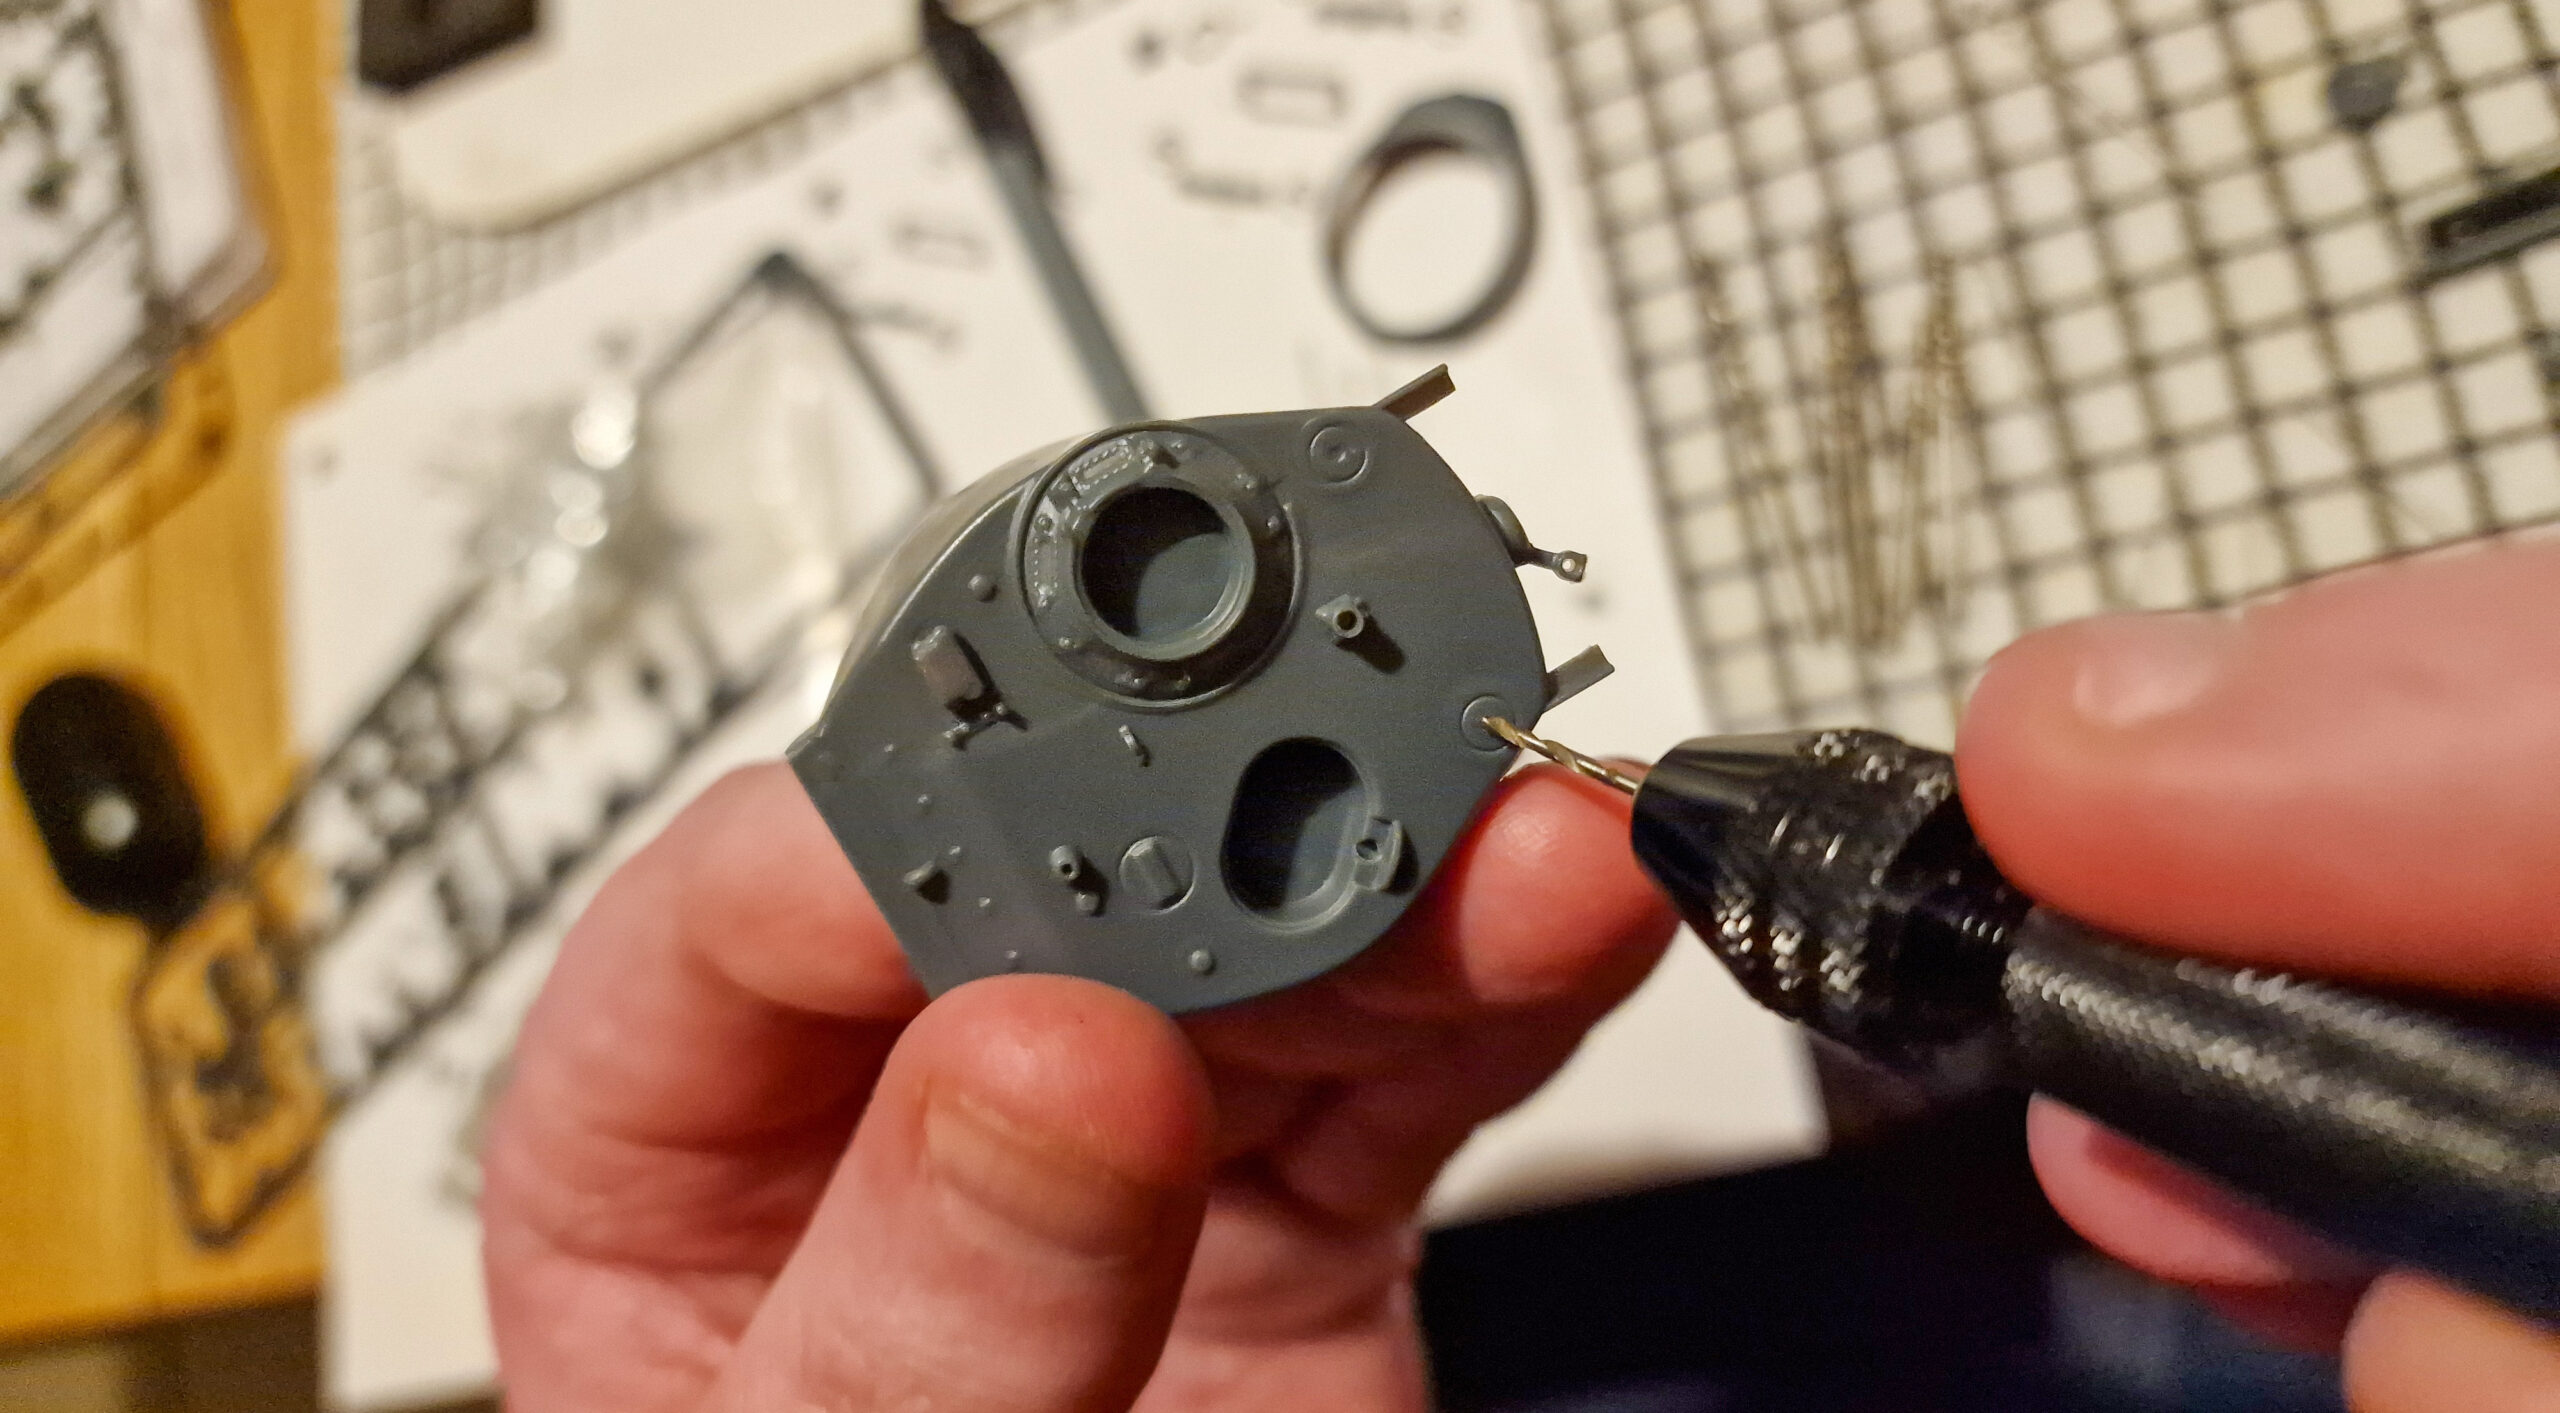
For the remainder of the build, it was pretty straightforward. The only thing I had to be conscious of were some of the smaller and thinner parts such as the HMG – they simply required a more delicate touch, particularly where it came down to cleaning them with a sharp knife. There was also a need to drill a small hole to fit an optional aerial using a pin vice – this was a simple affair as it’s very clear where the aerial sits and thus the drill point, it was just a case of picking the right drill bit that matched the diameter of the aerial attachment.


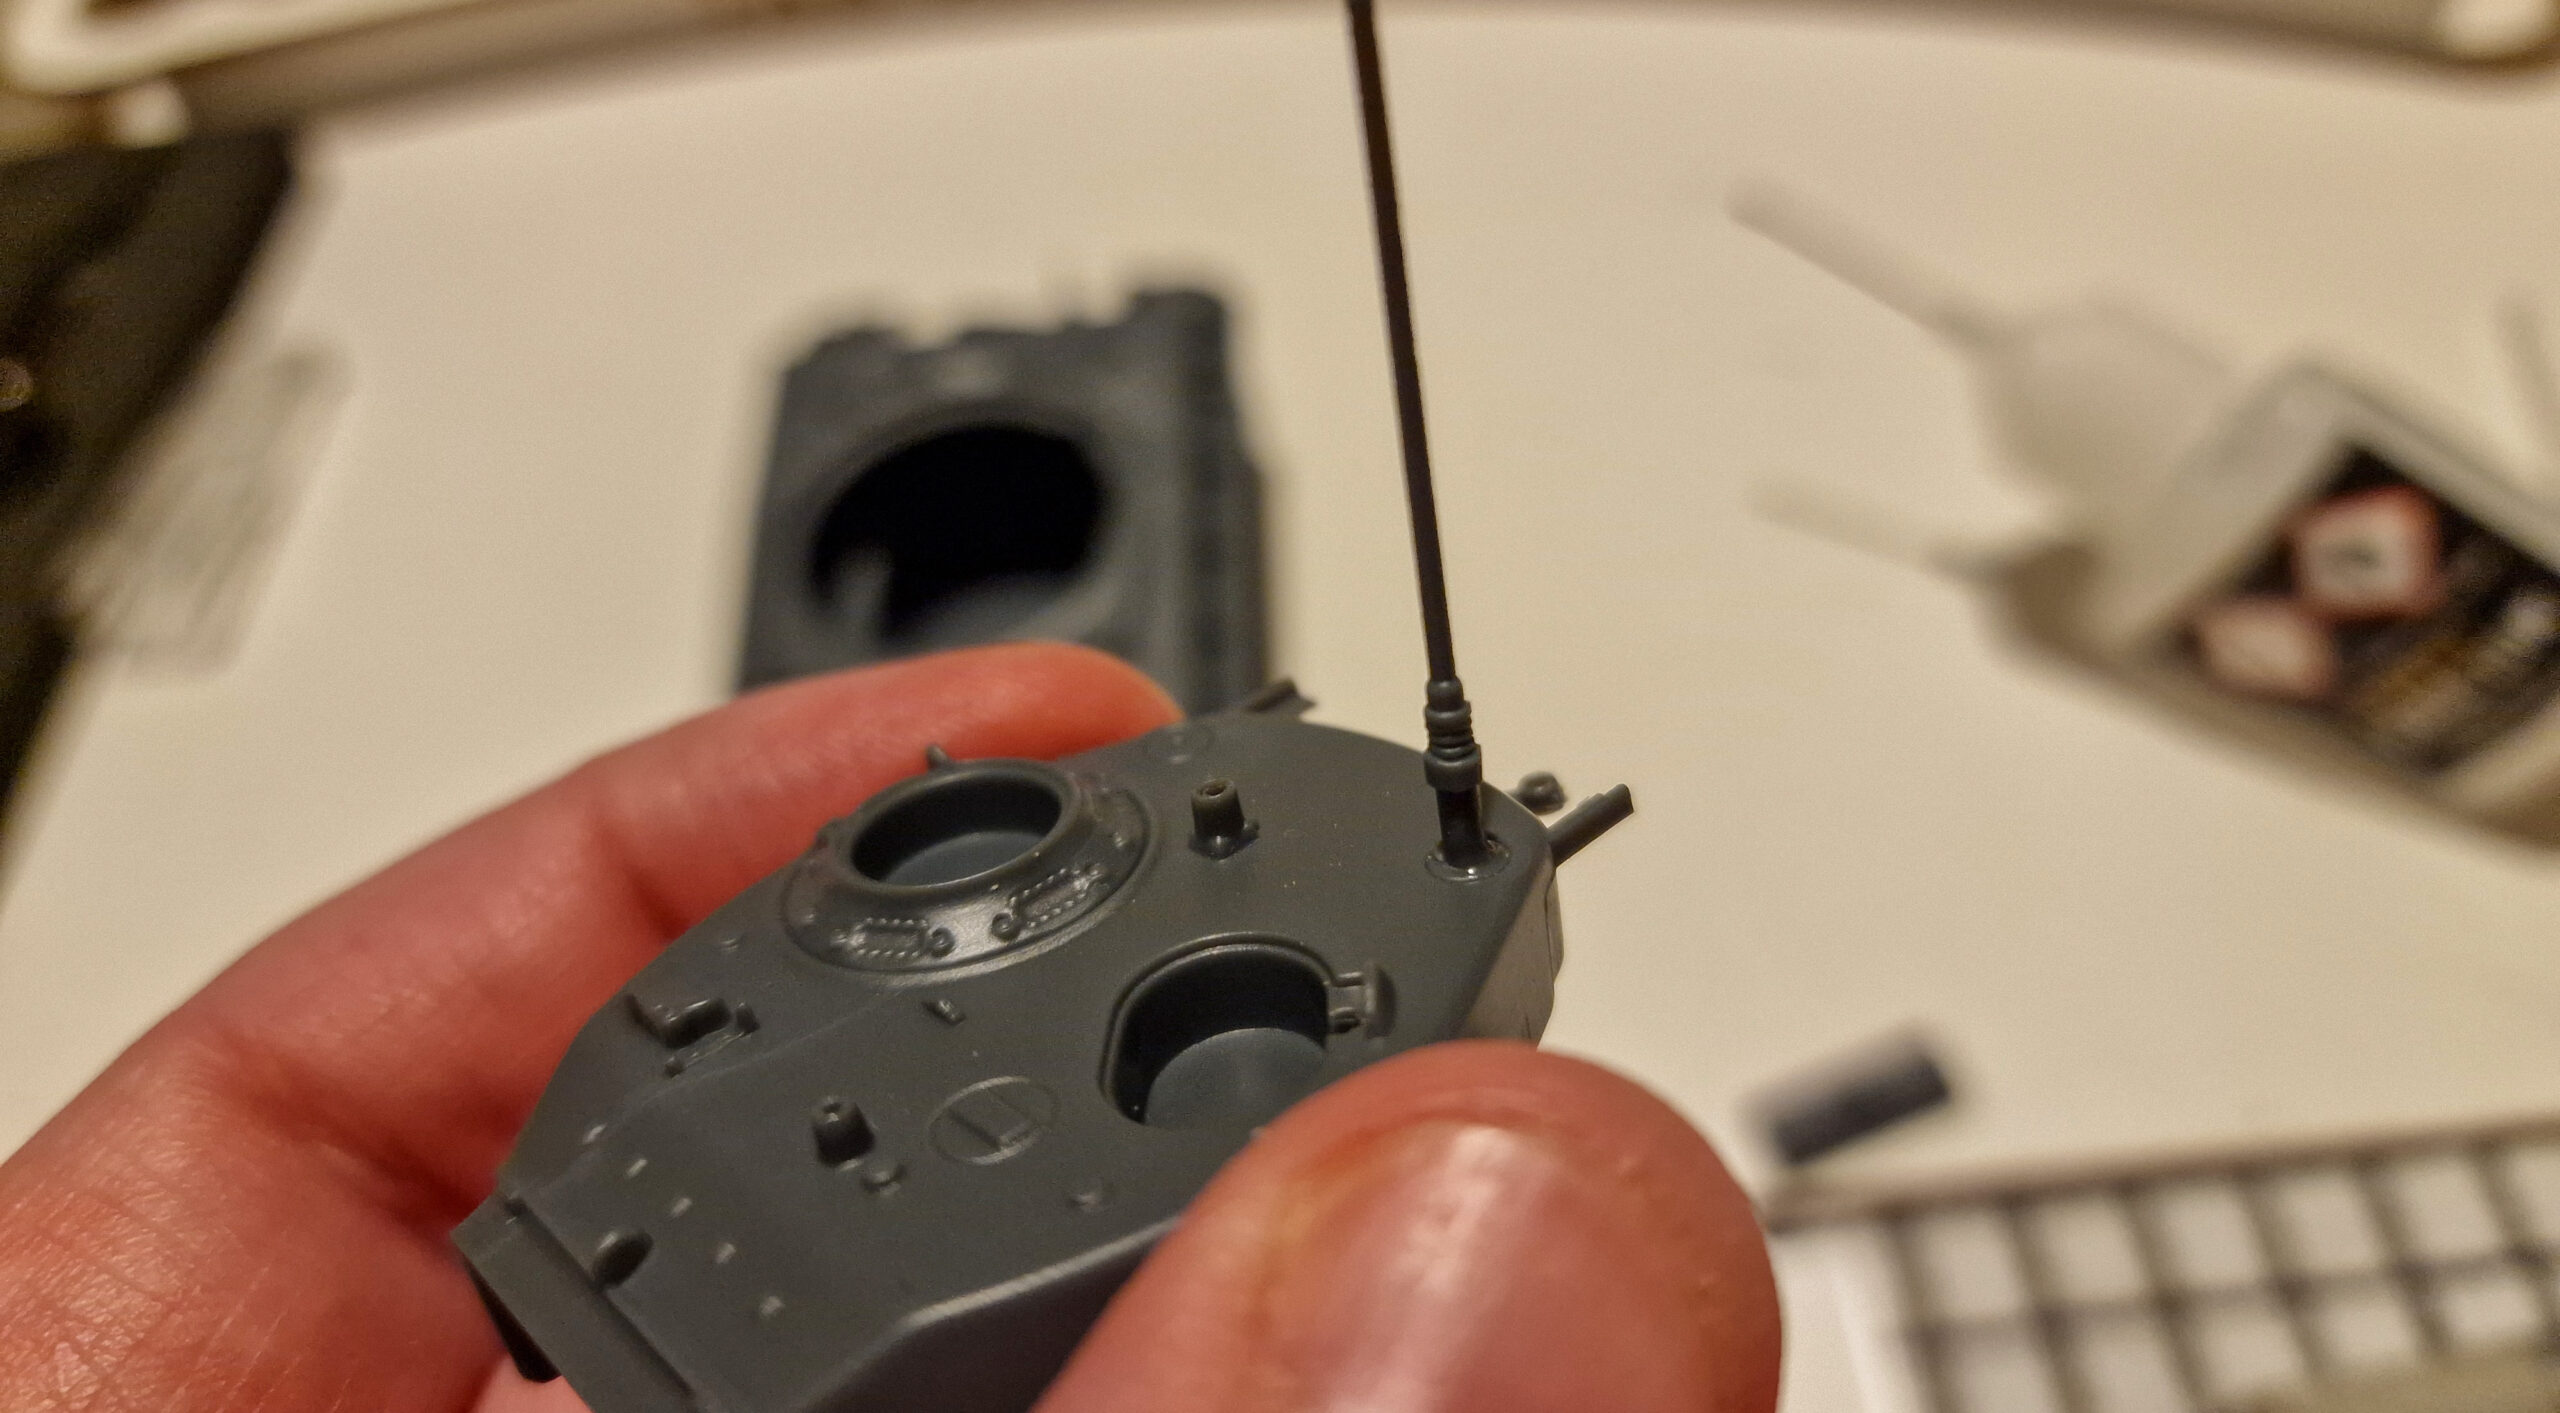
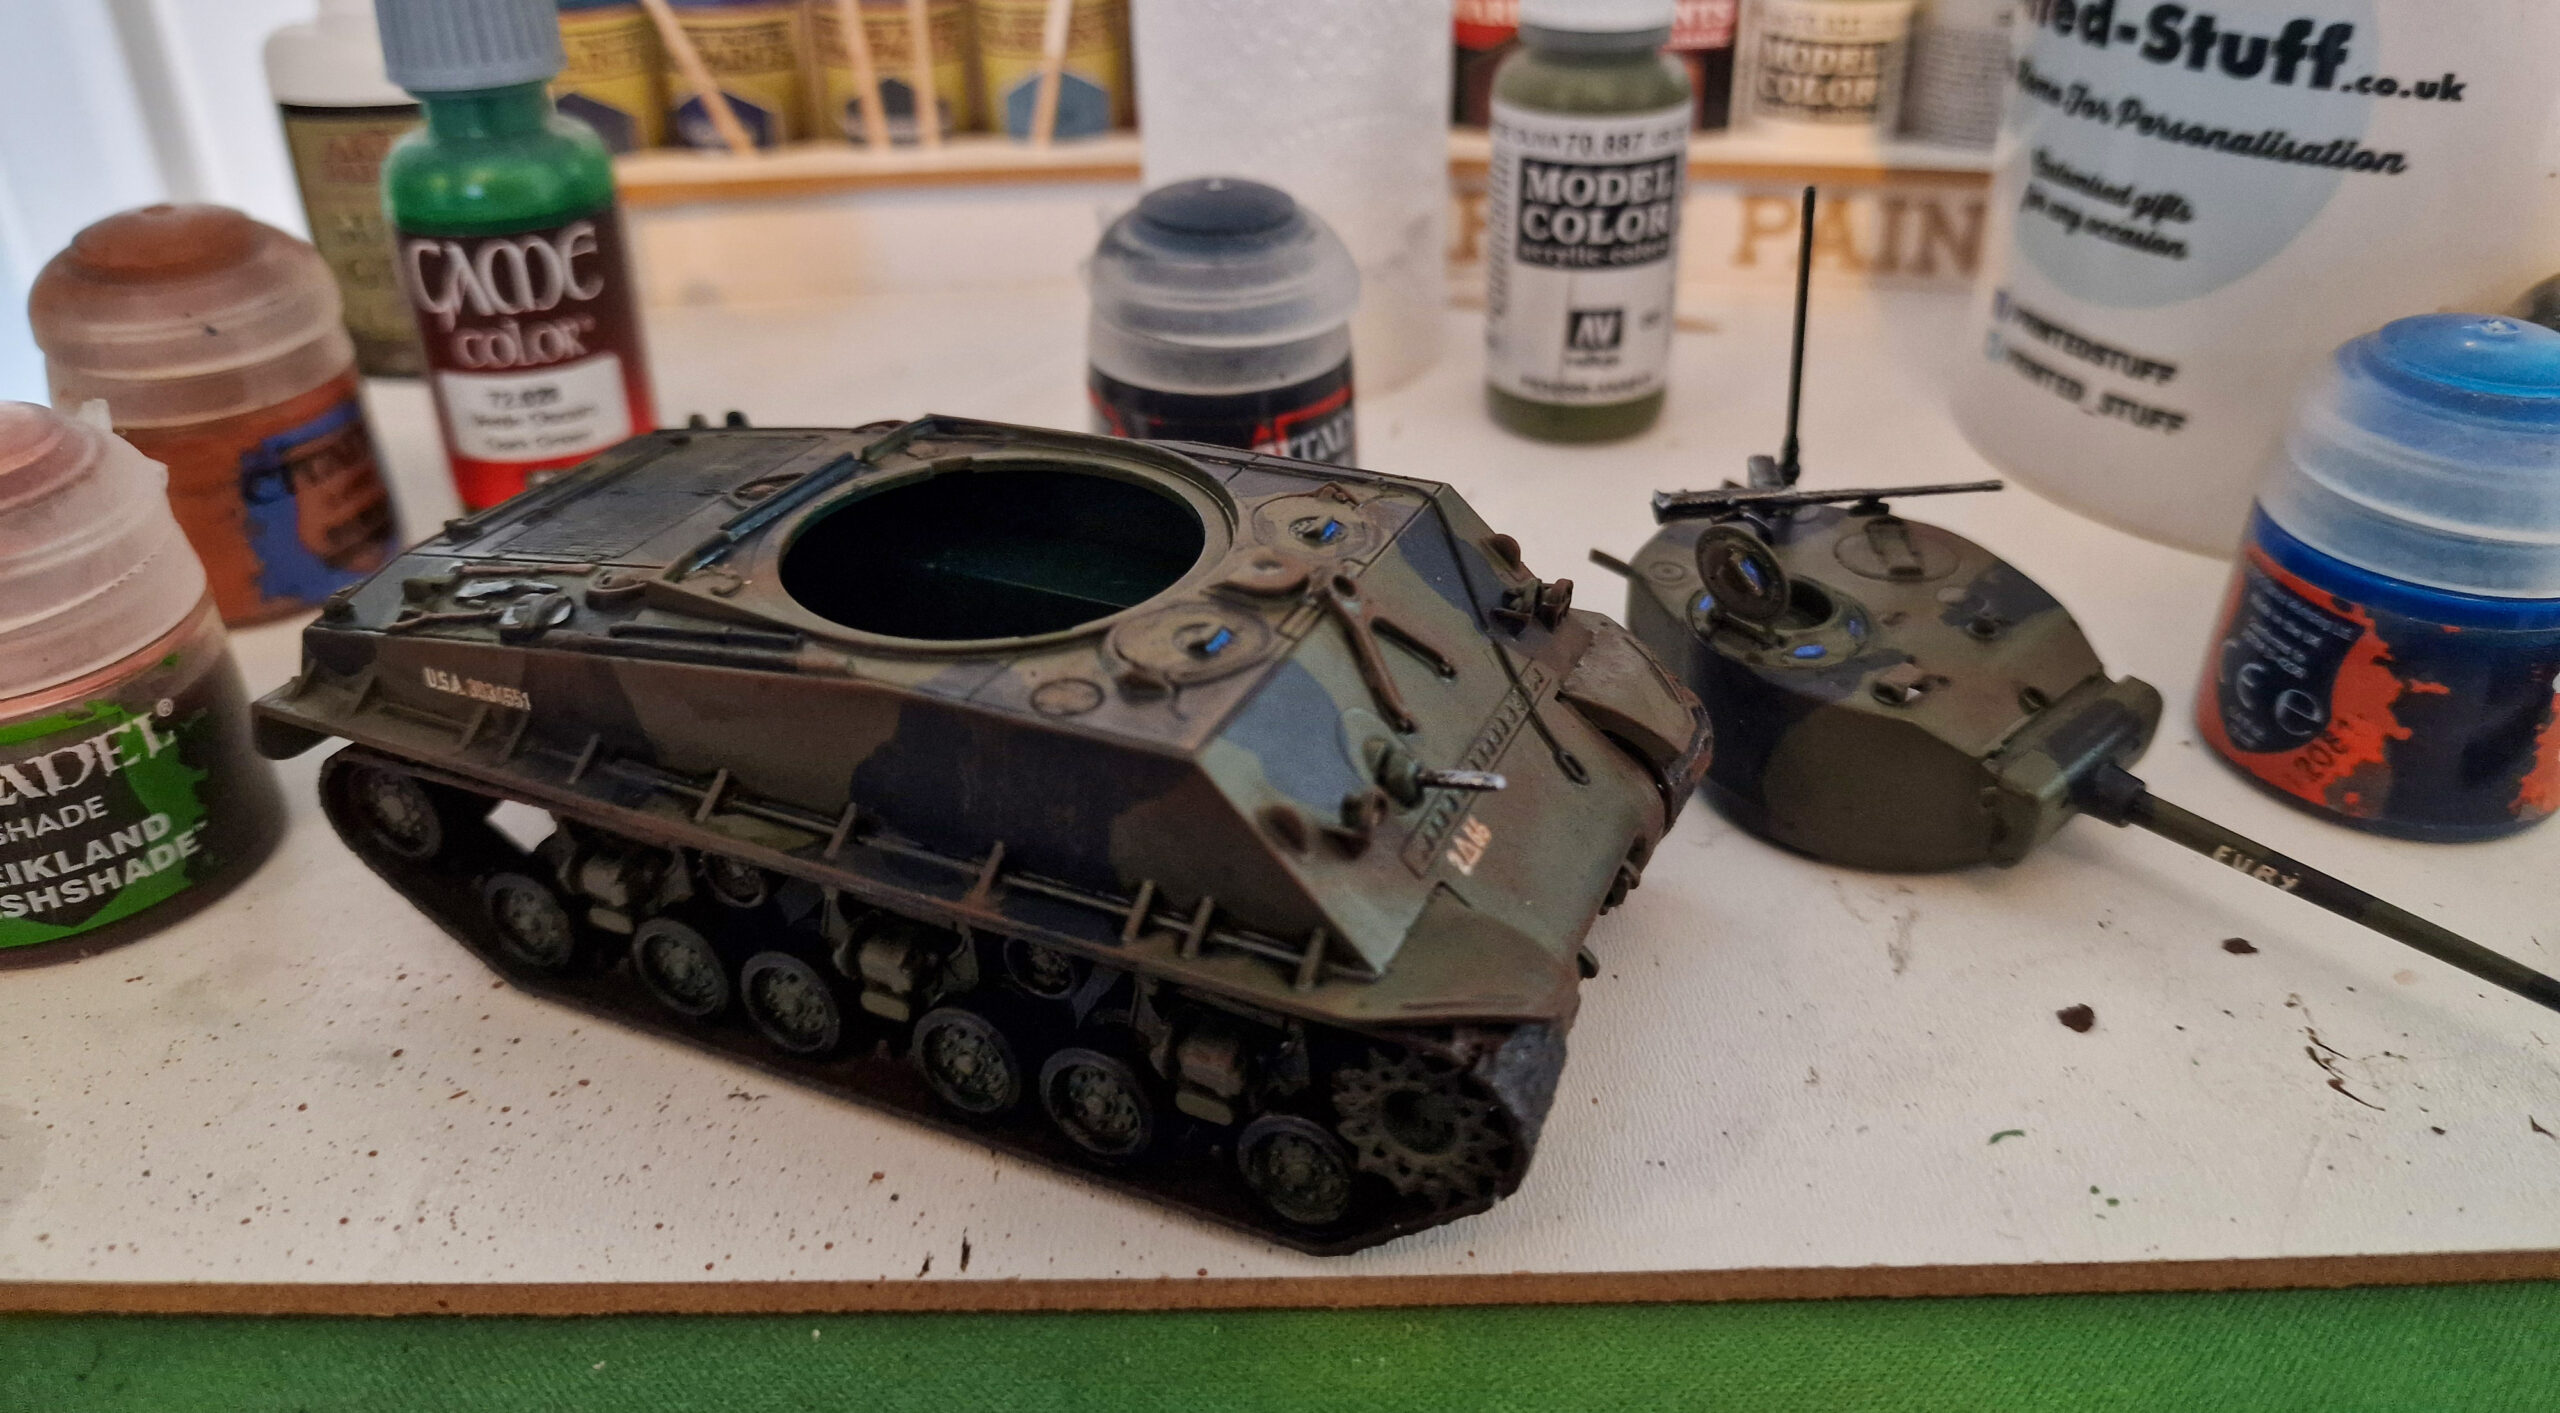
The kit comes with stowage options on the sprue, and I’d secured a few extras from the US Army Tank Force boxed set, but opted not to glue any of these on at this time – I wanted complete access to the bodywork for whatever camo scheme I eventually settled on – at the time of building I hadn’t actually decided on this!
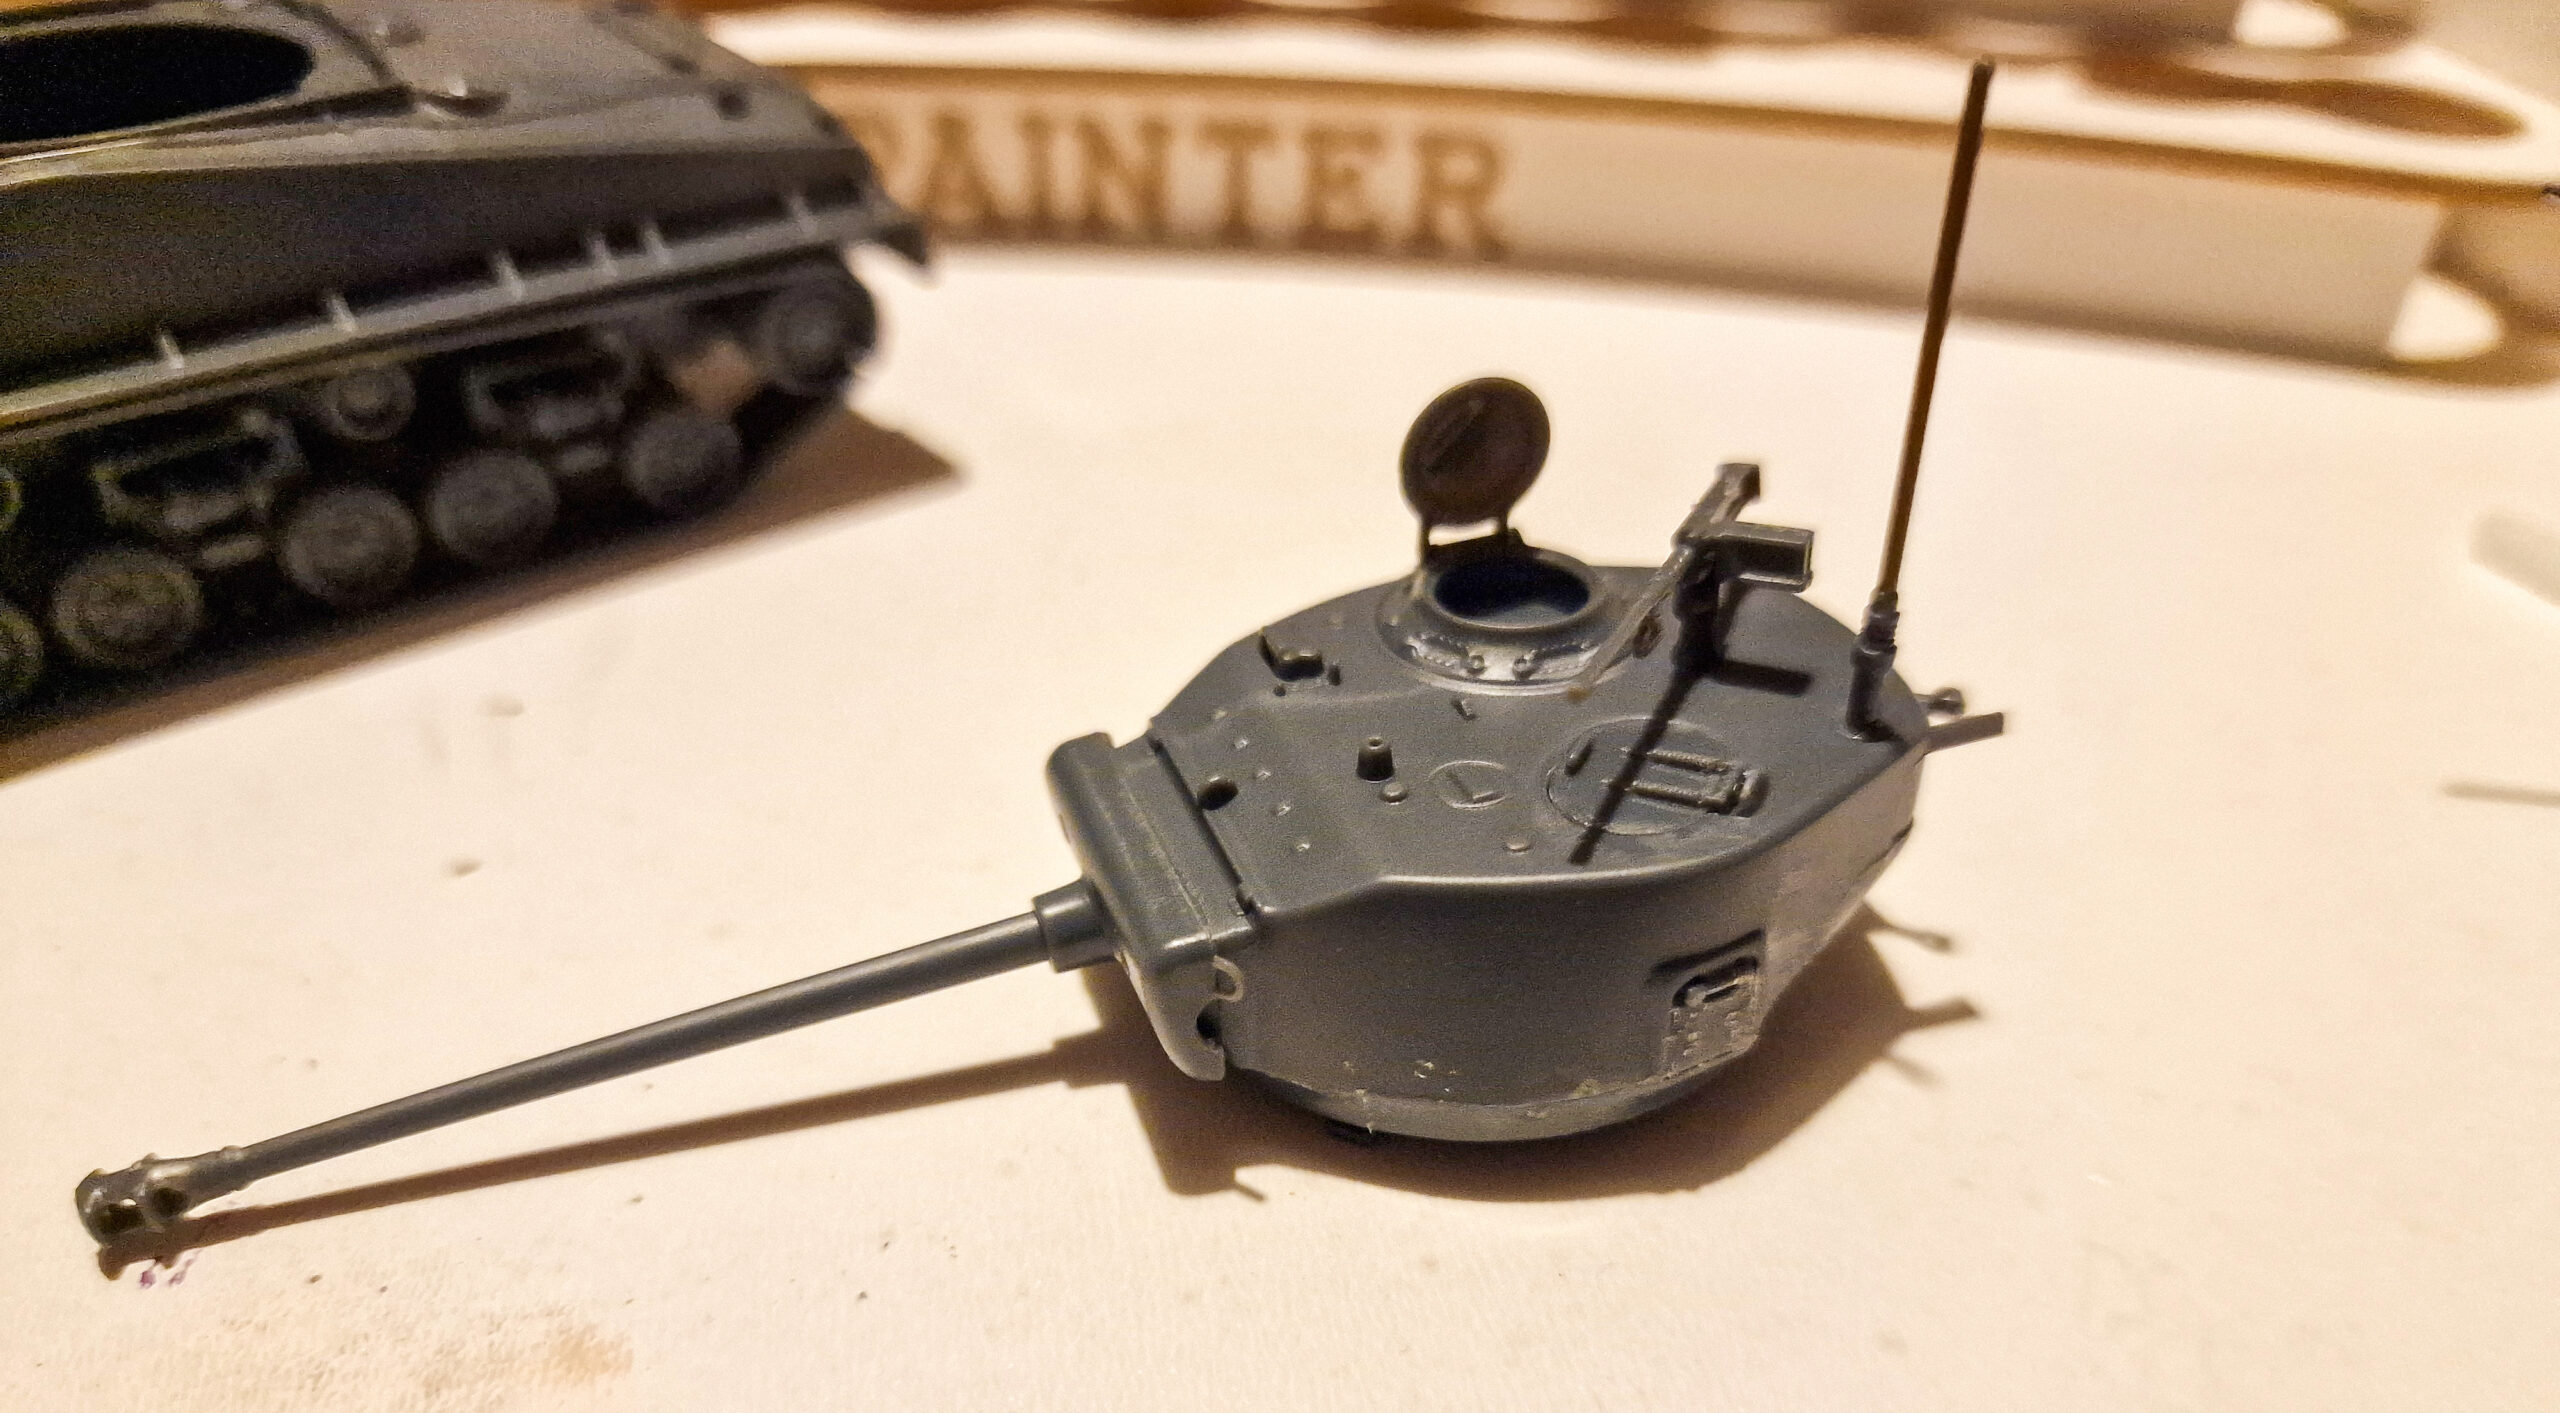
I also paid mind during the turret and main gun assembly not to glue certain elements so that the barrel could be elevated at will once complete, and obvious though it seems, not to glue the turret to the hull! The turret needs to be free to rotate during games of Achtung Panzer! after all.
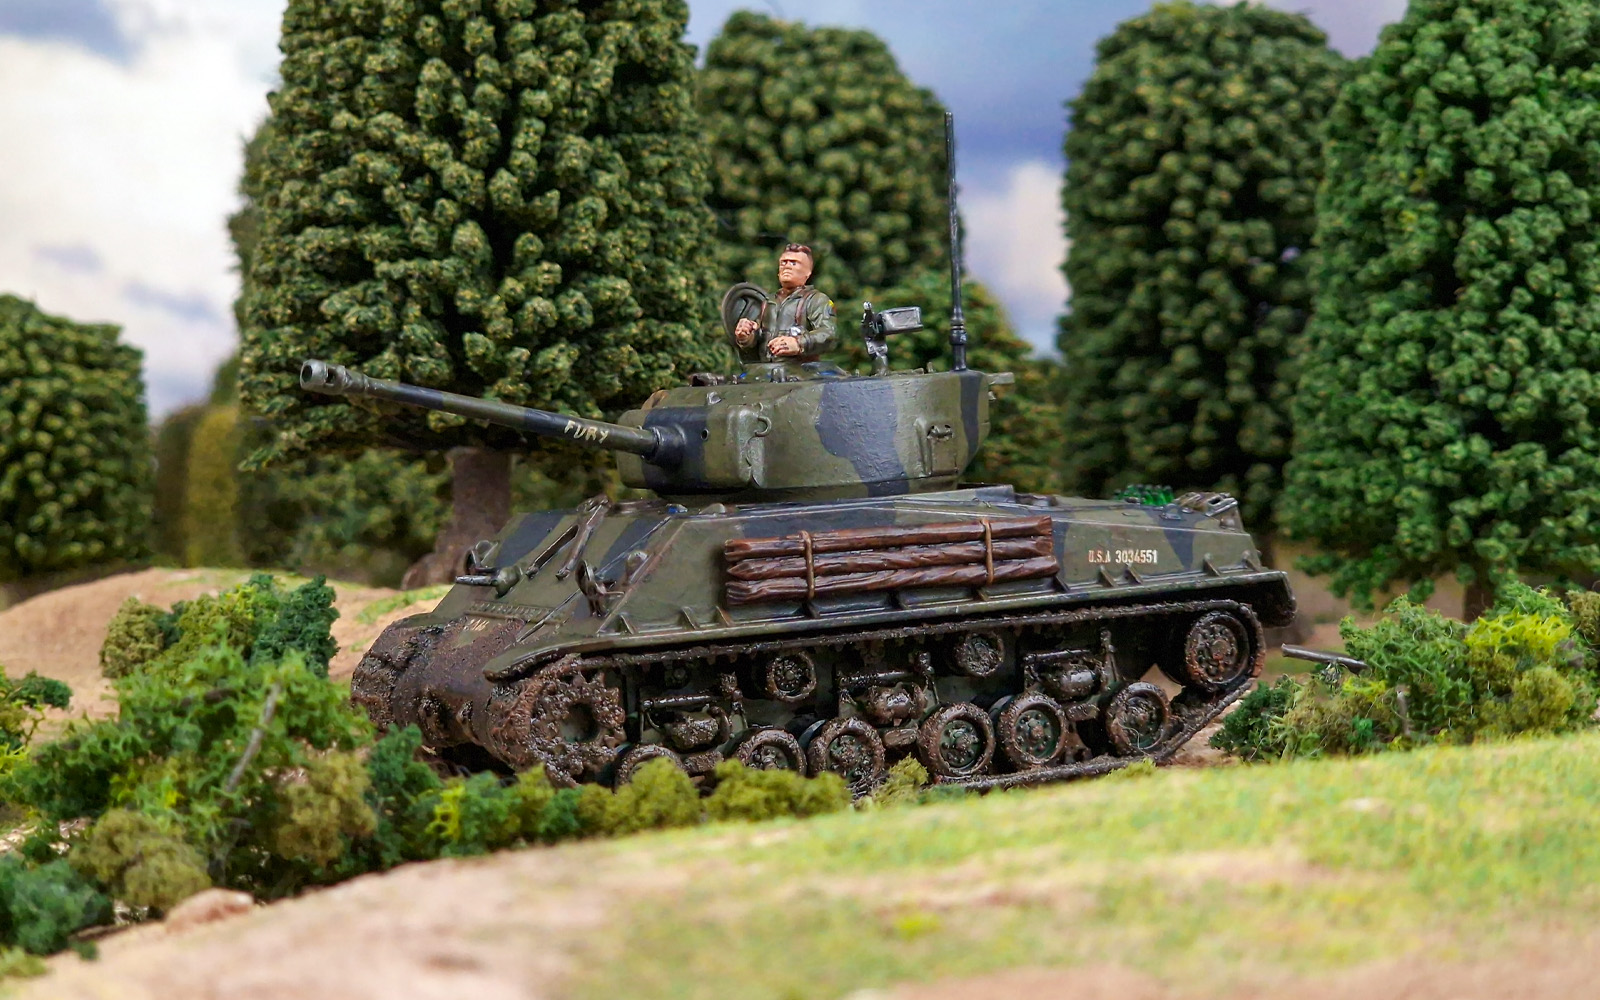
To finish off my build I opted to leave the commander’s cupola open, if the plastic sprues are going to provide me with a Brad Pitt likeness, I was definitely going to have a ‘Wardaddy’ of my own popping out the top of it!
Painting
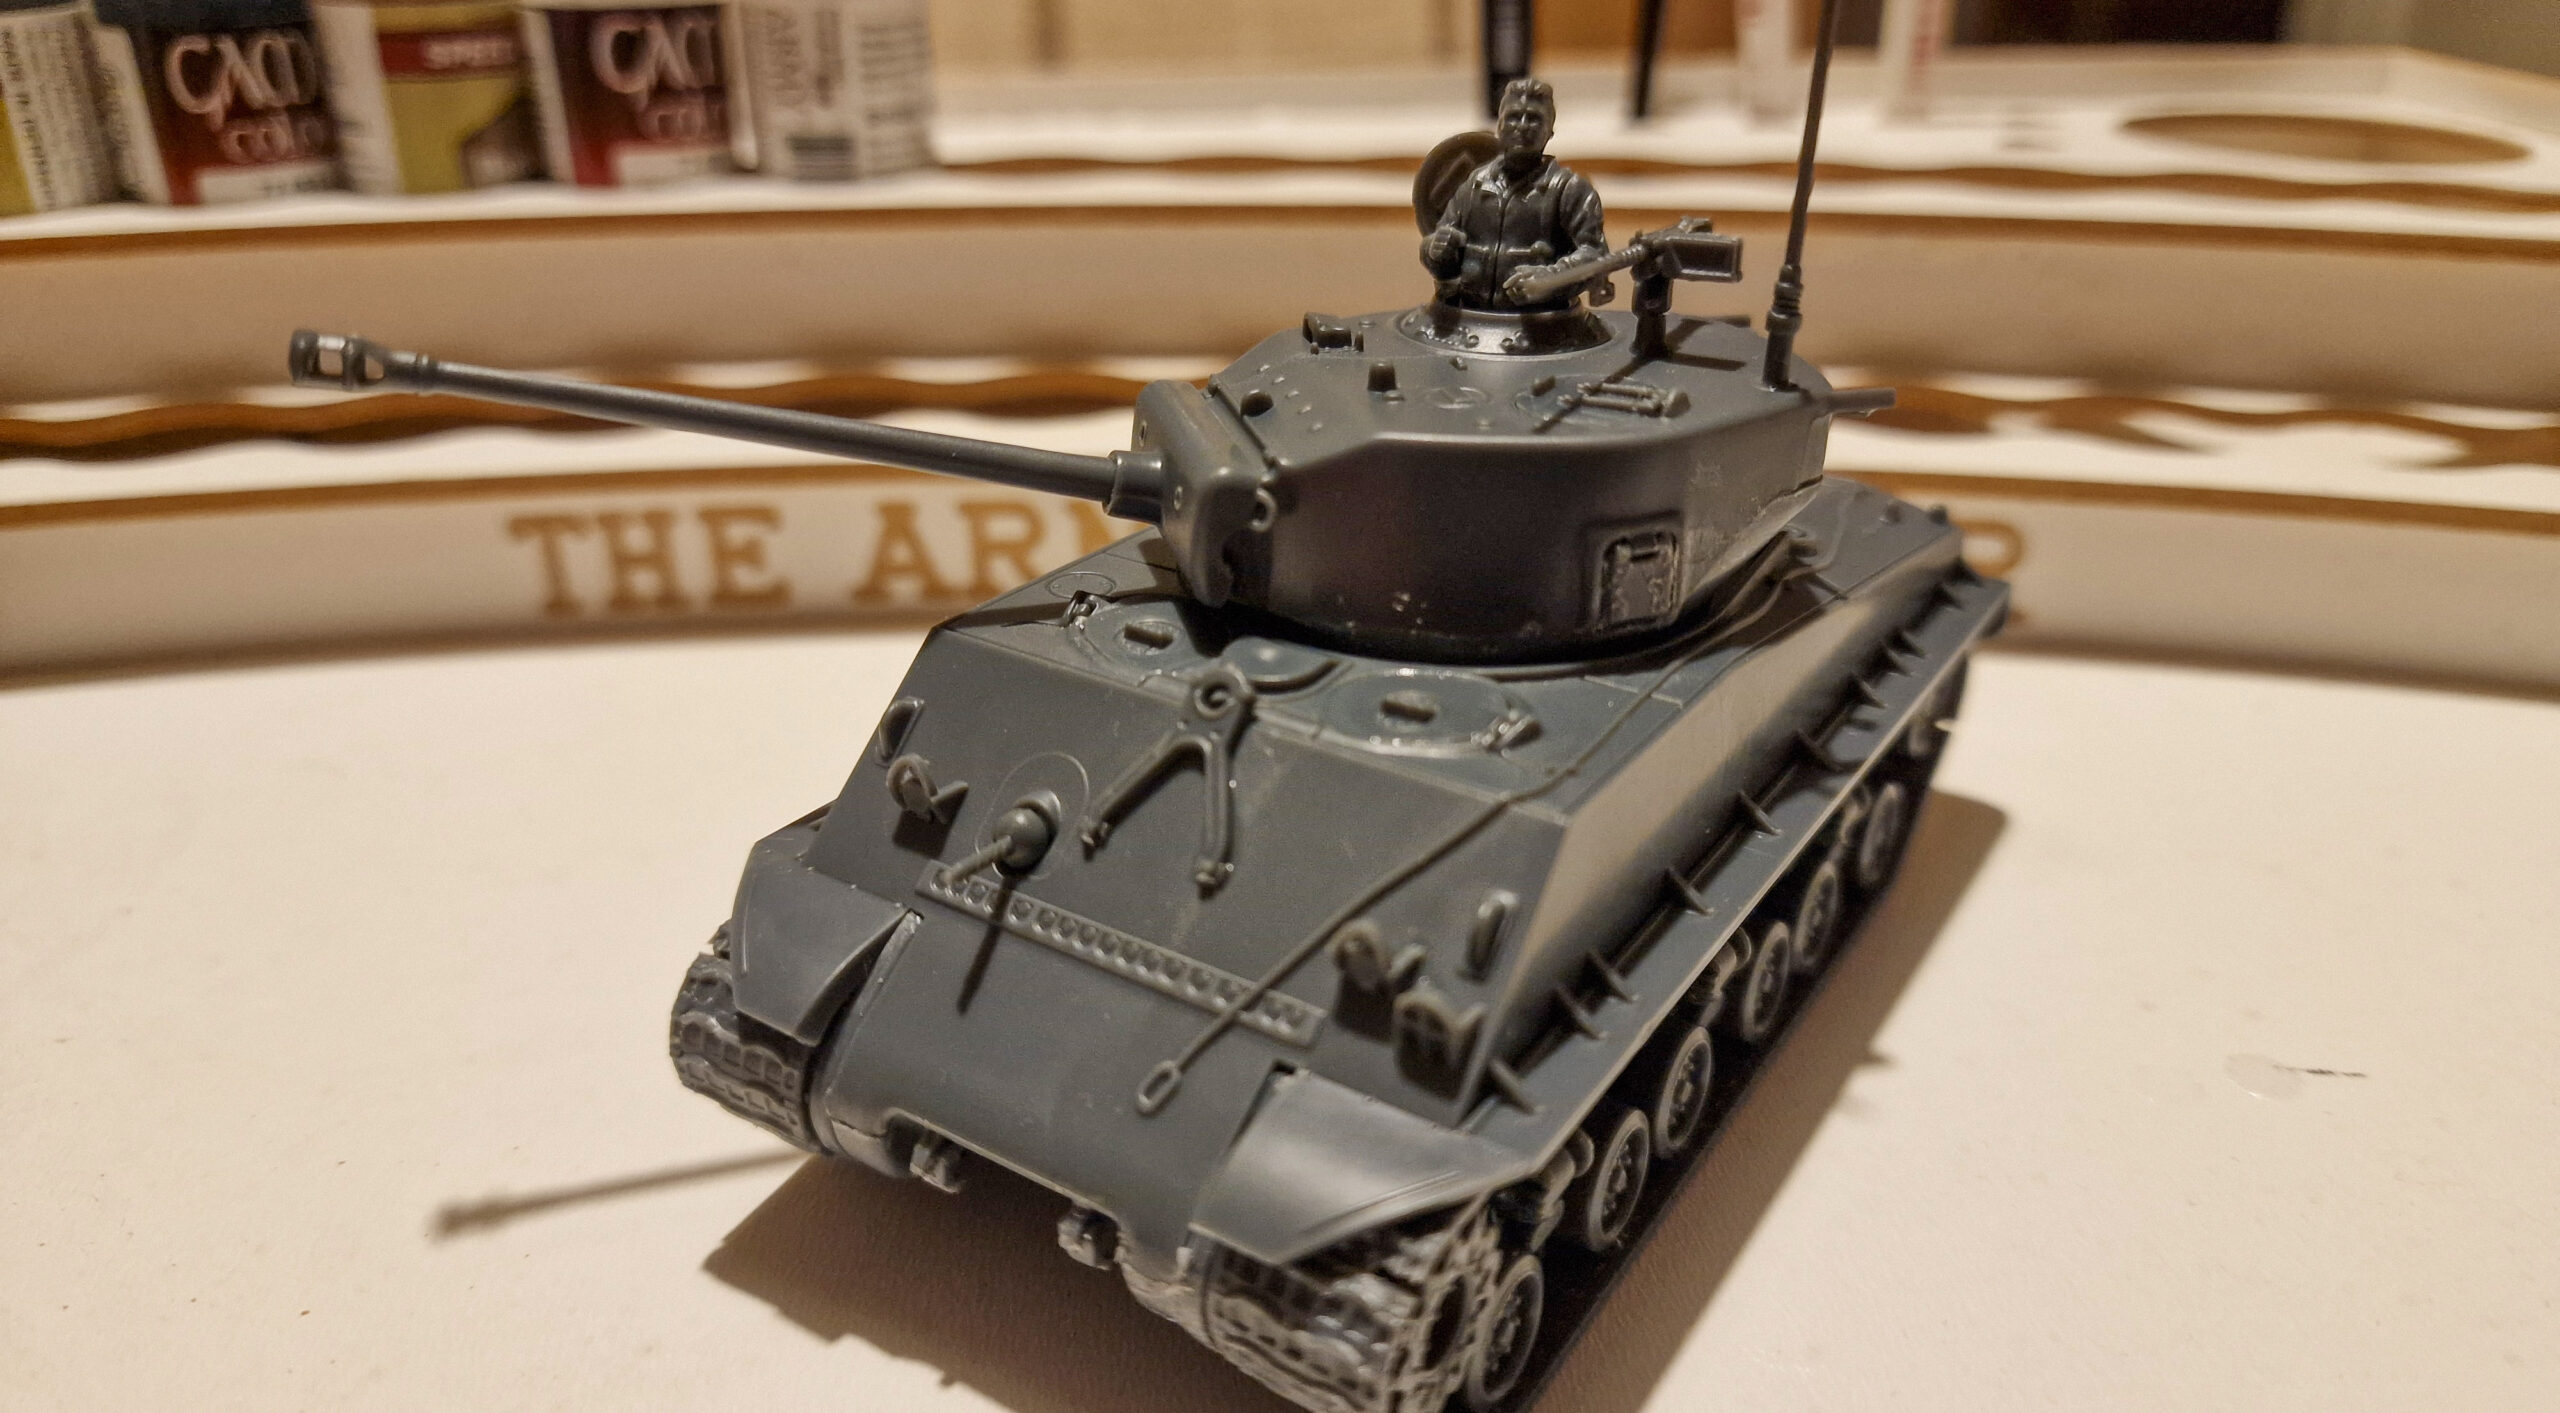
Now that it had been assembled, I actually had to decide on a painting scheme. As this was the part I was most nervous about, I consulted the boxed set’s assembly diagram. I didn’t want to try anything too extreme, but I was keen to challenge myself with at least a two-tone camo scheme. I was also conscious that I would be doing this all by hand with a brush. With my pseudo-Brad Pitt model looking me square in the eye, I settled on the Fury scheme. Not only does this kit include a silver screen ‘Wardaddy’ lookalike, but it also has the right decals for the movie tank too.
Thus determined, I began with an undercoat of Army Painters Angel Green spray, before switching to my trusty Army Painter Monster Brush and applying a basecoat of Vallejo US Olve Drab all over, except for the tracks, but fairly messily. This needed two thin coats to get an even coverage.
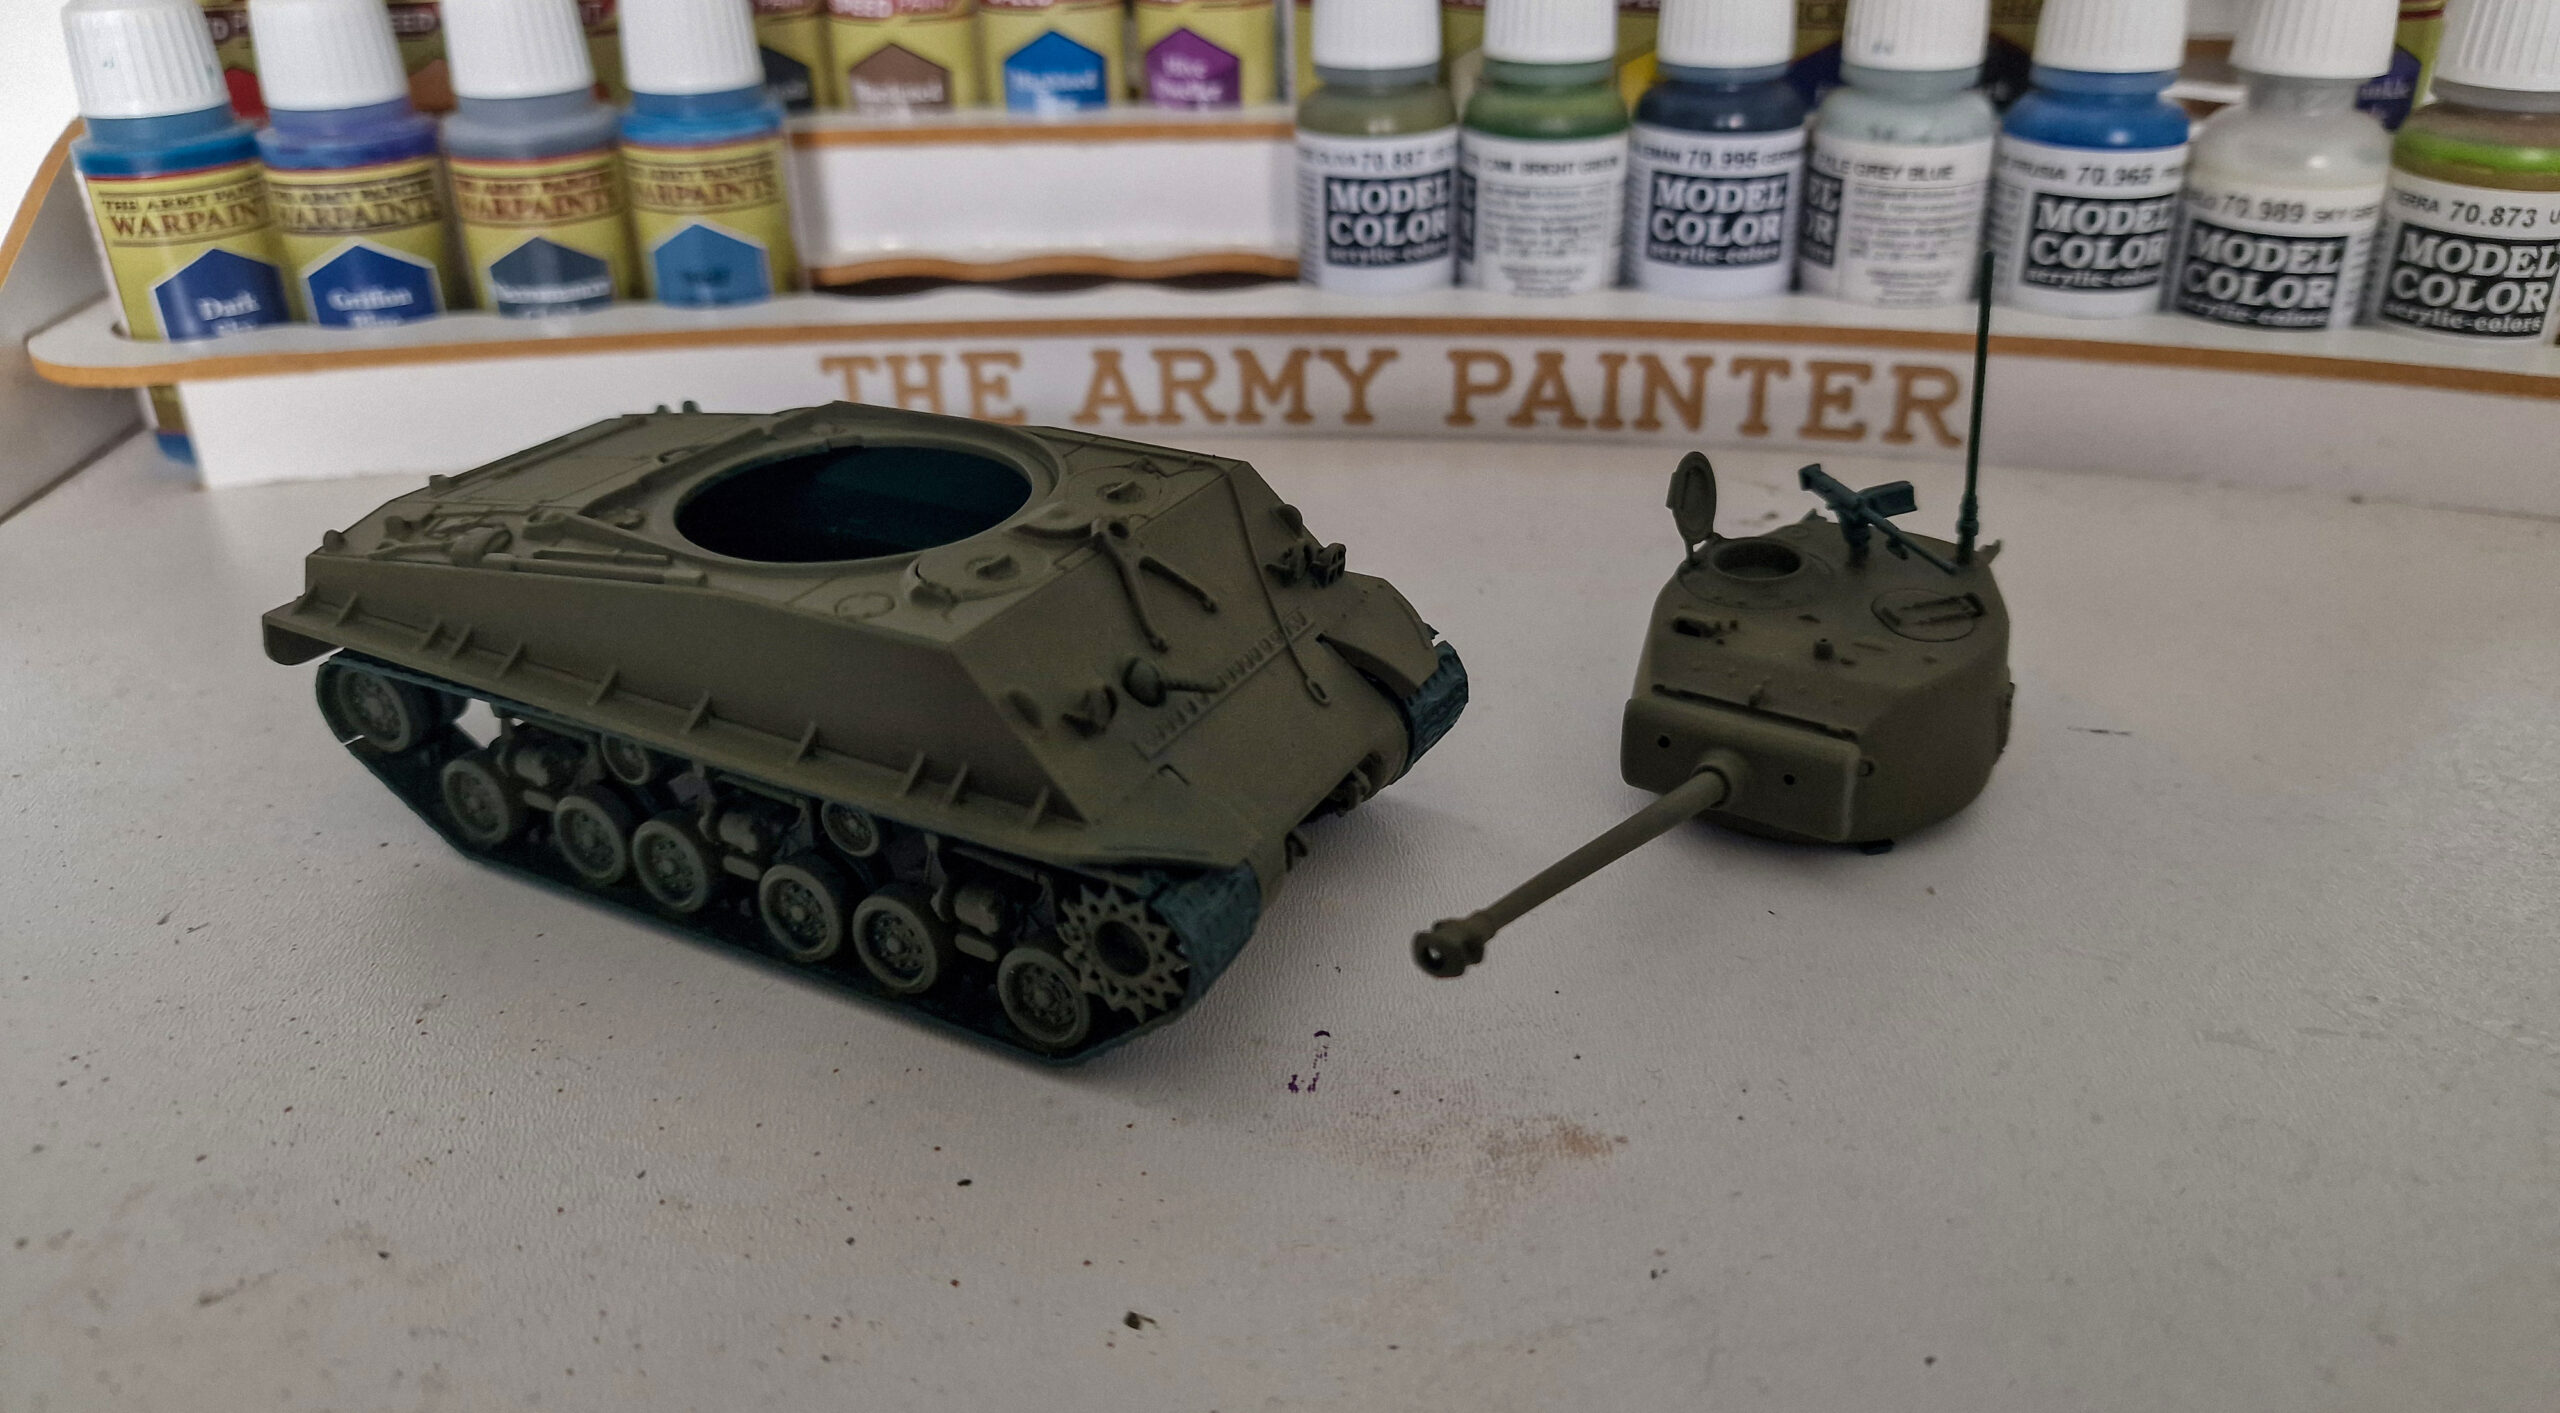
The next stage was to add the camo scheme – for this I used Vallejo German Grey. I applied this at random locations all over the hull and turret, working from the outside edges and then filling in towards the middle. Again this needed two thin coats.
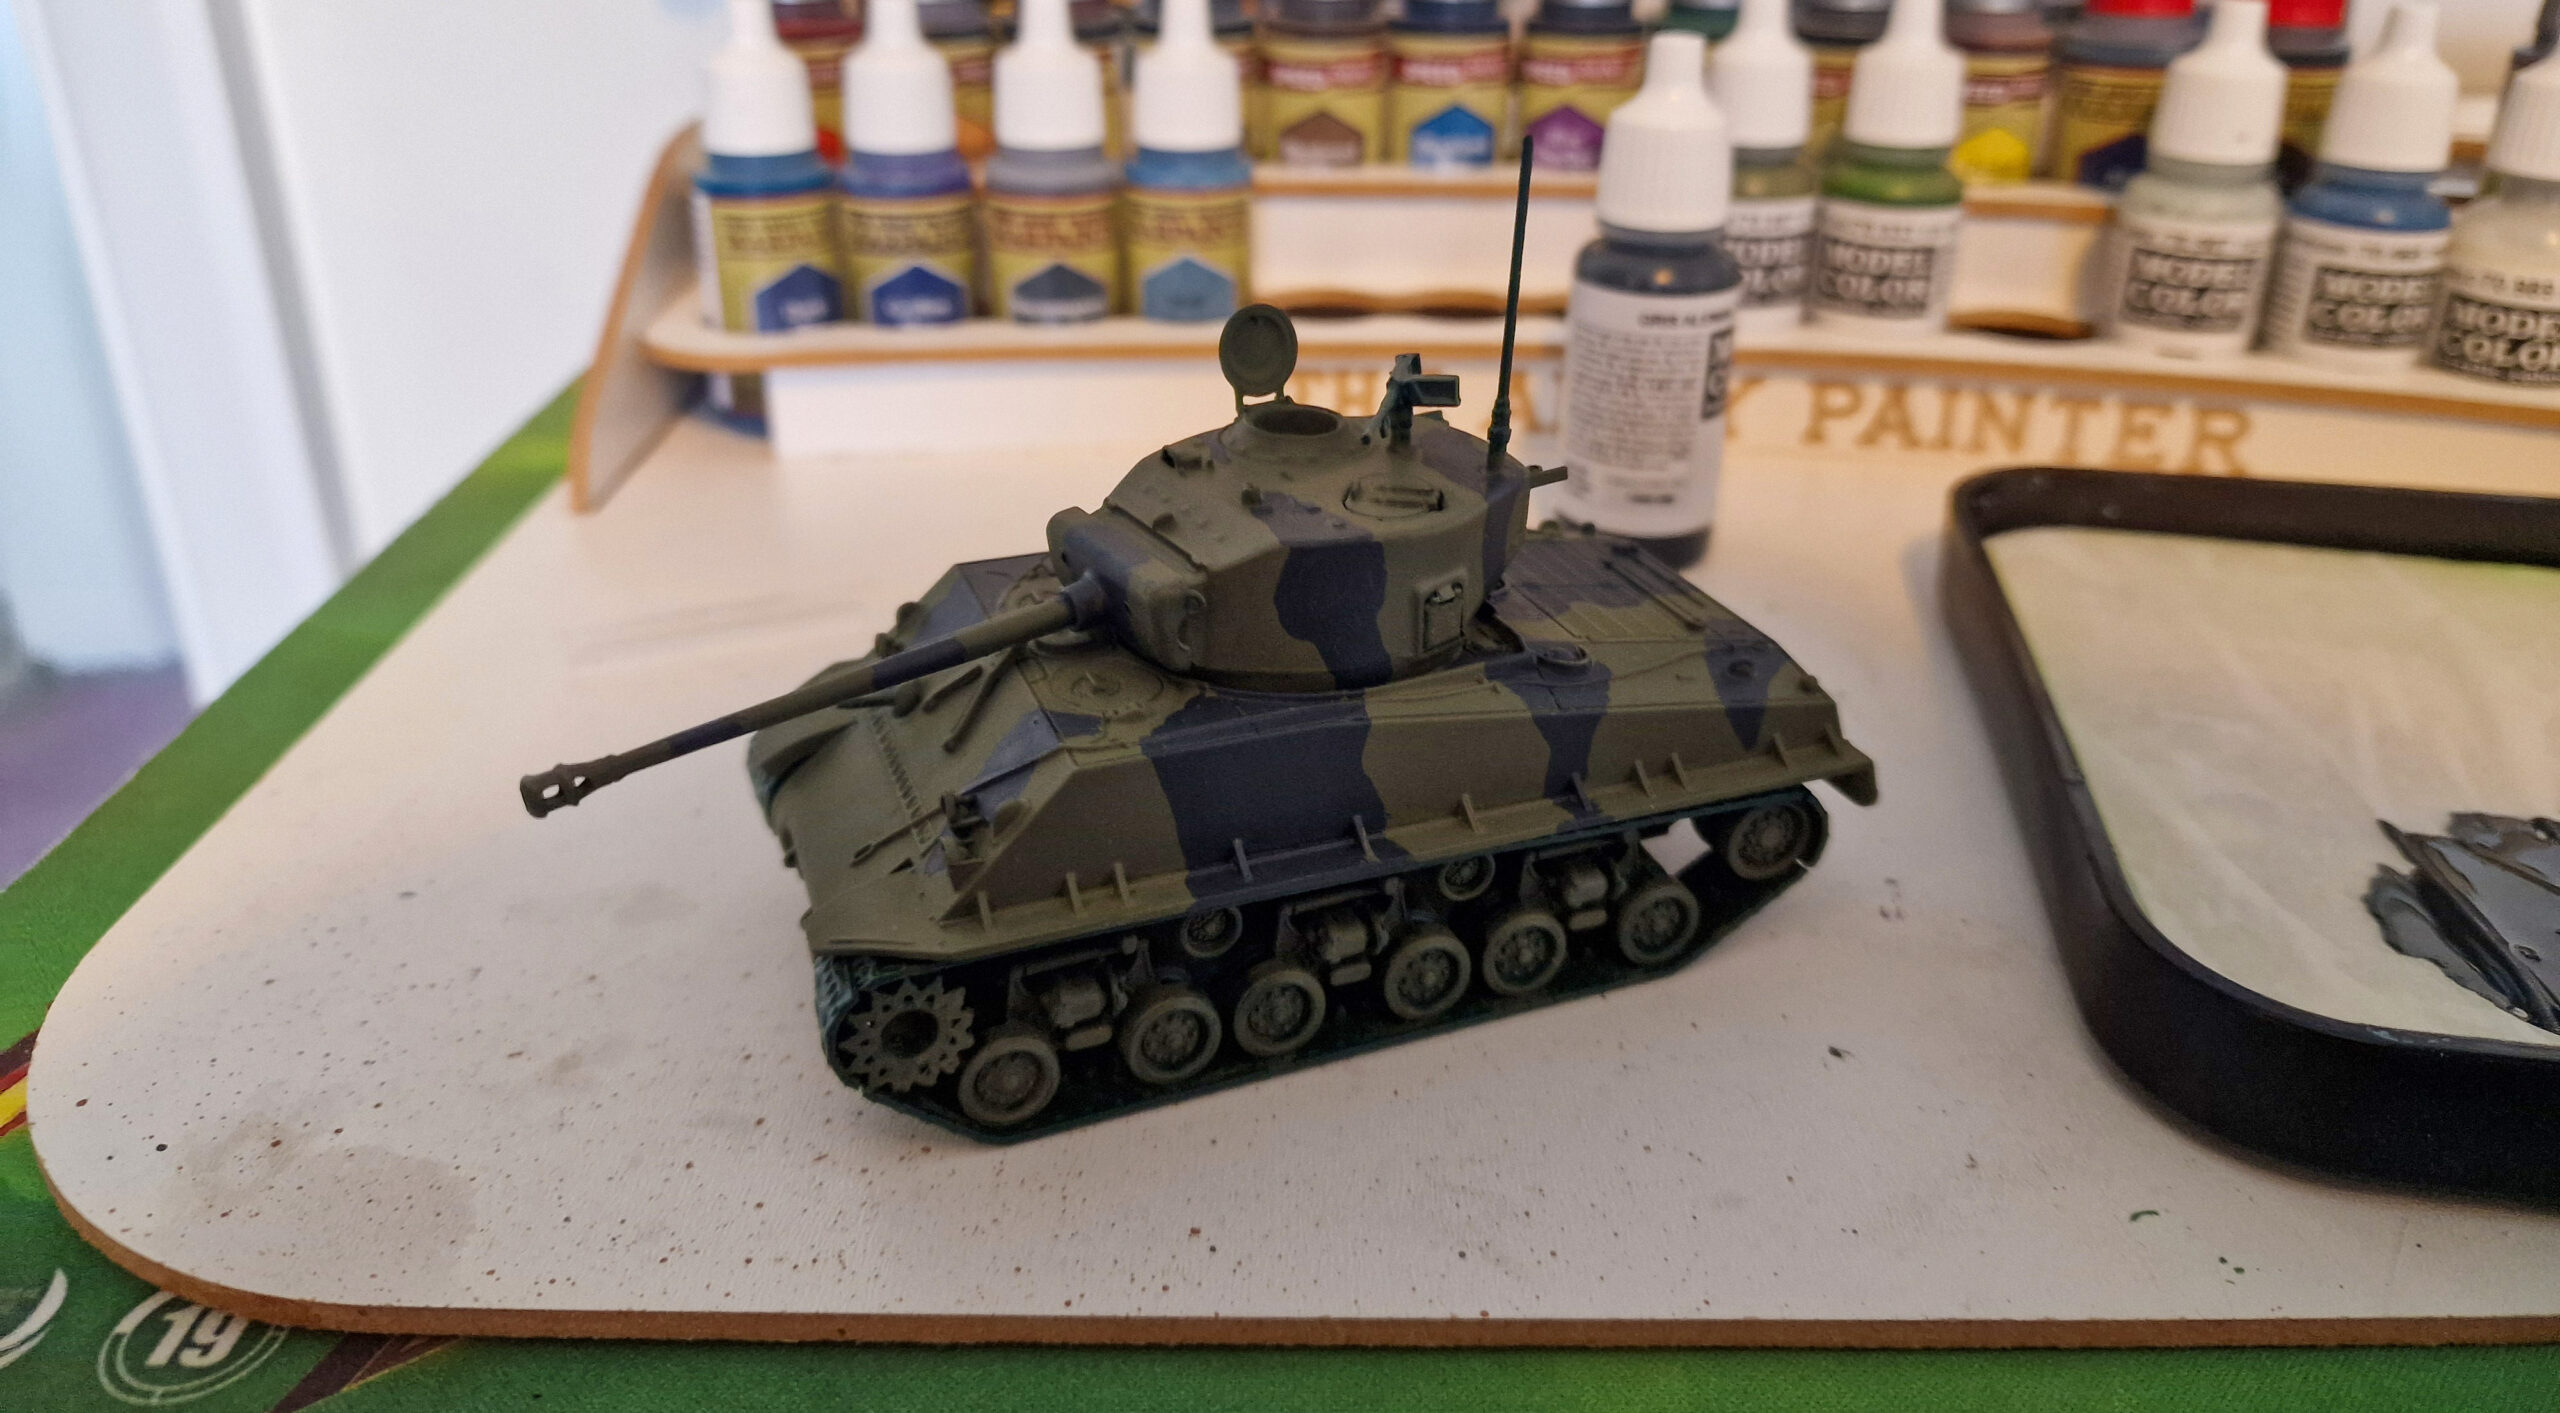
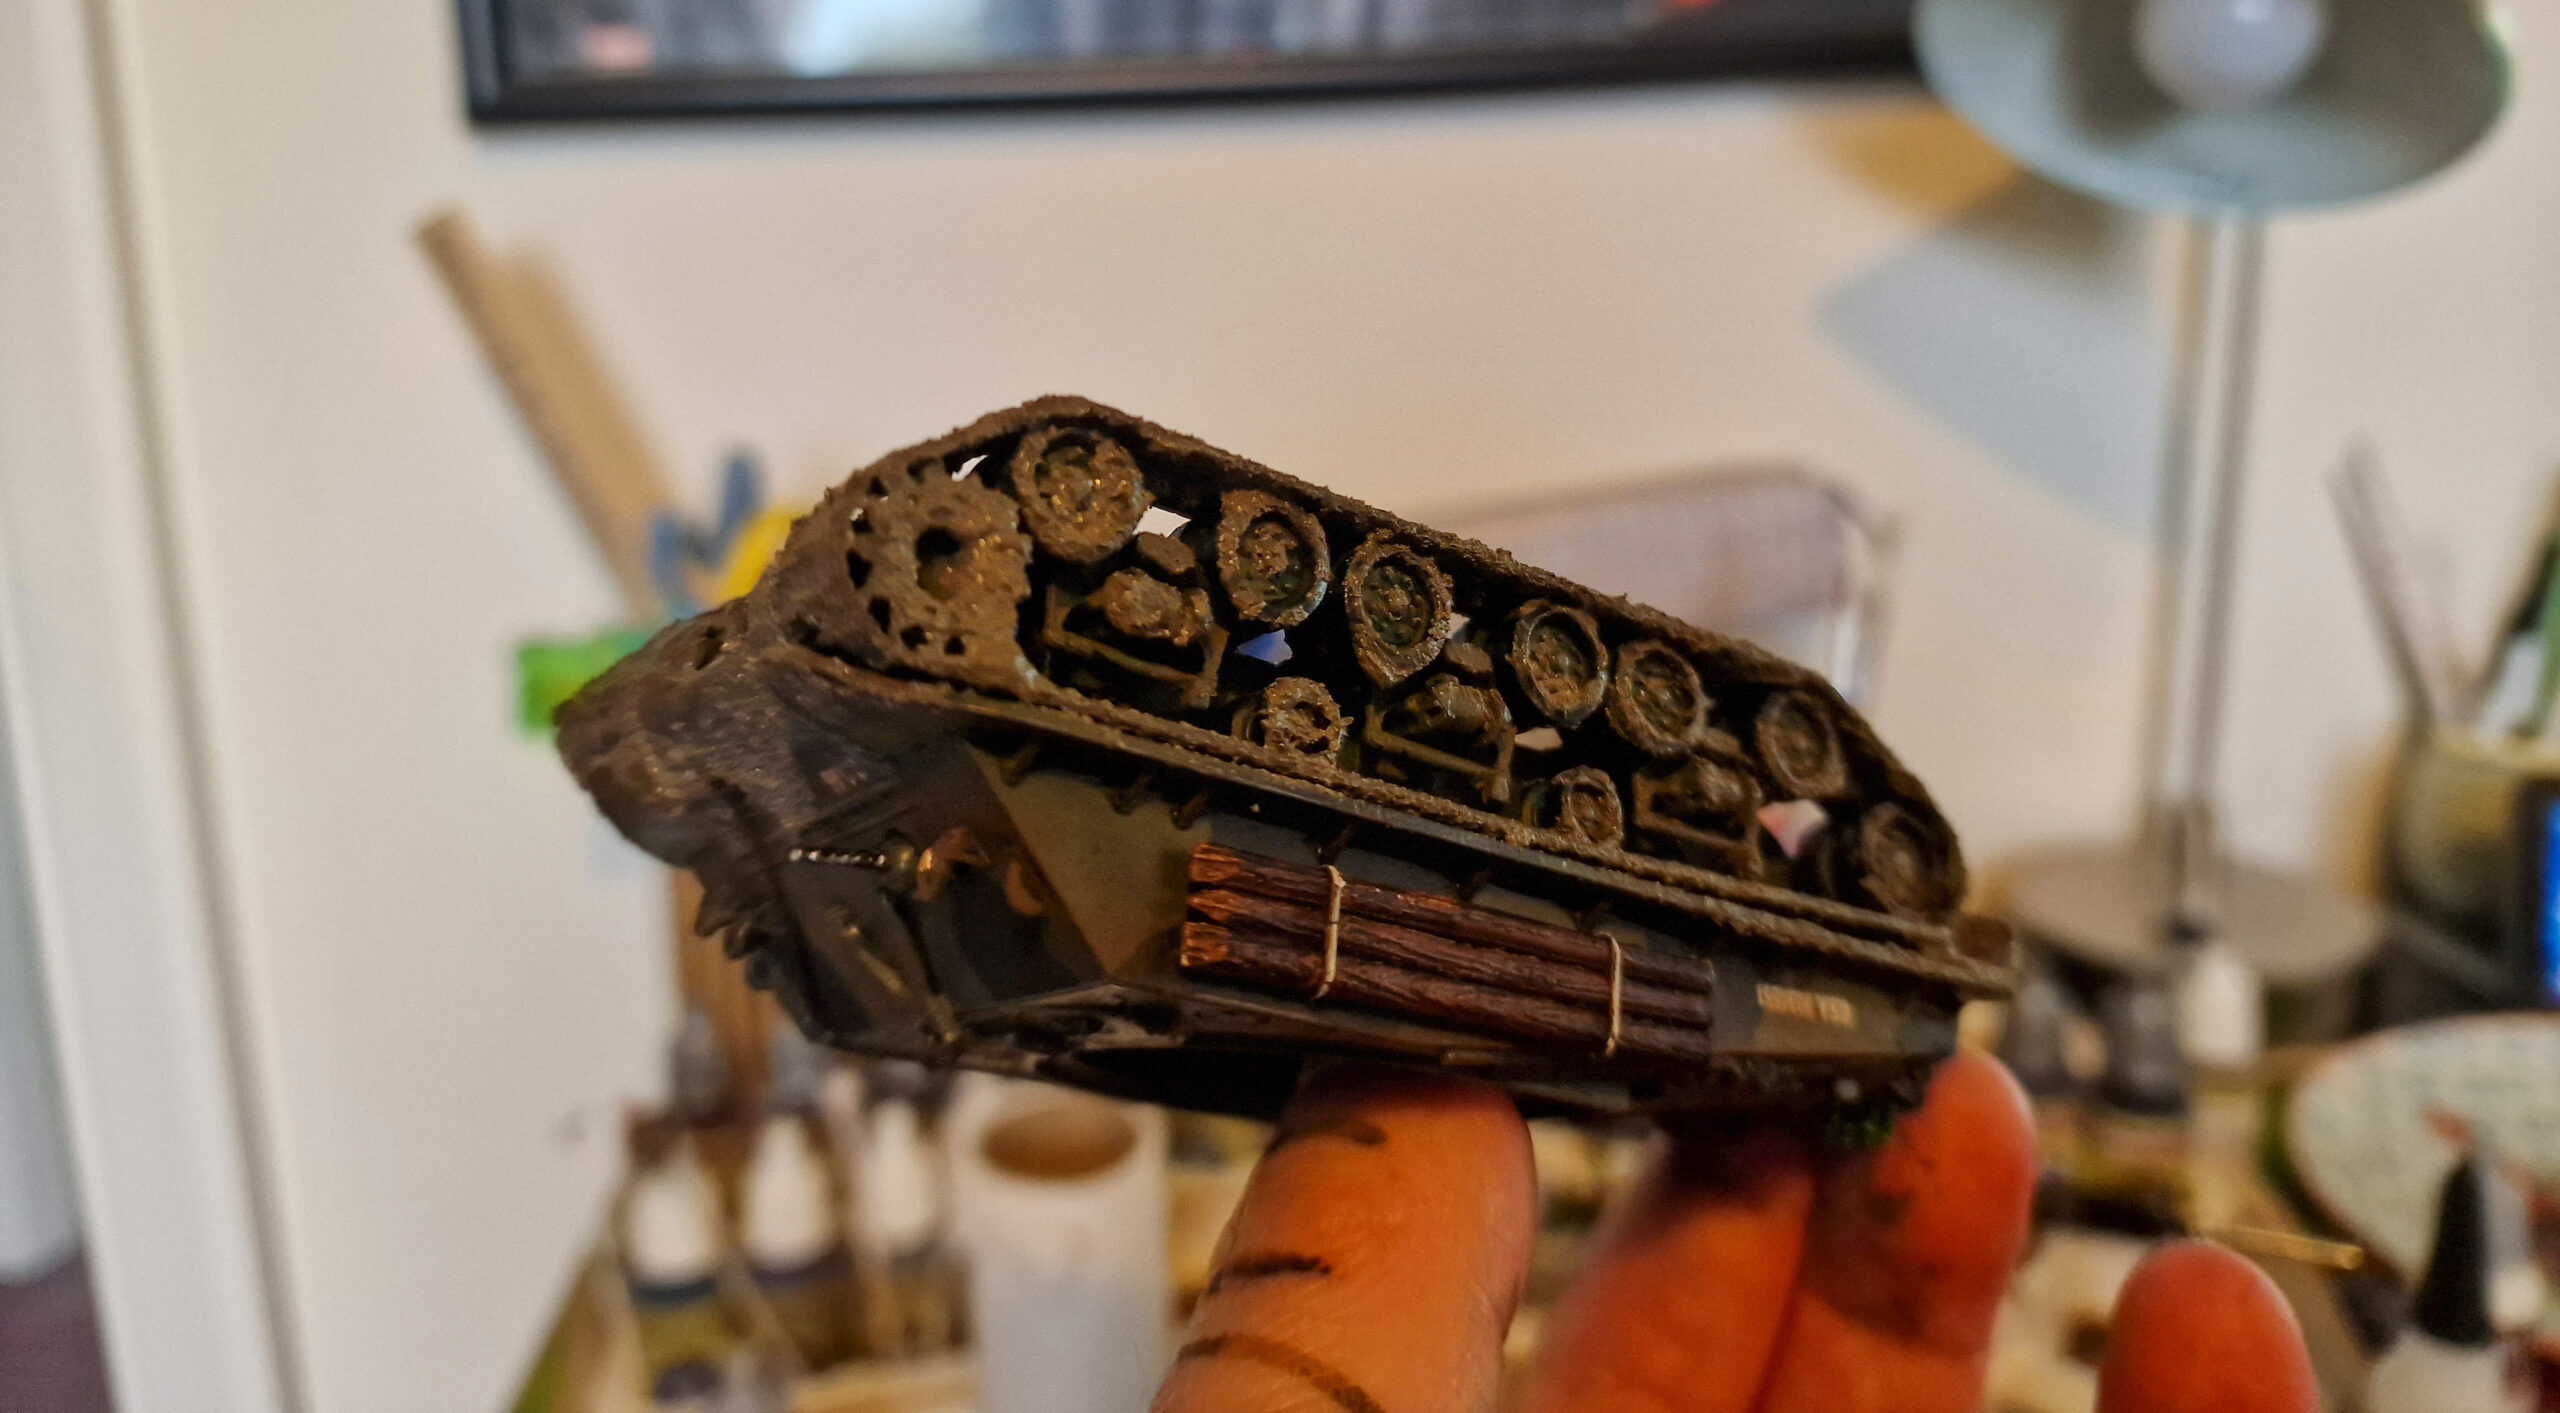
At this point I painted the tracks and the rubber of the wheels in black, before painting the tracks with Army Painter Dark Rust. This had a brighter finished than I had wanted, so I used a wash of Citadel Nuln Oil to dull them down; though this was applied quite liberally I was careful to wipe away any excess. Once dry I very lightly drybrushed the exterior of the tracks with silver.
Before applying a wash to the hull and turret I applied the decals, matching the reference model as best I could. These were a little fiddly to manage, and I tore a ‘y’ from one of the ‘Fury’ barrel markings – luckily I was able to rescue it – you’d never notice!
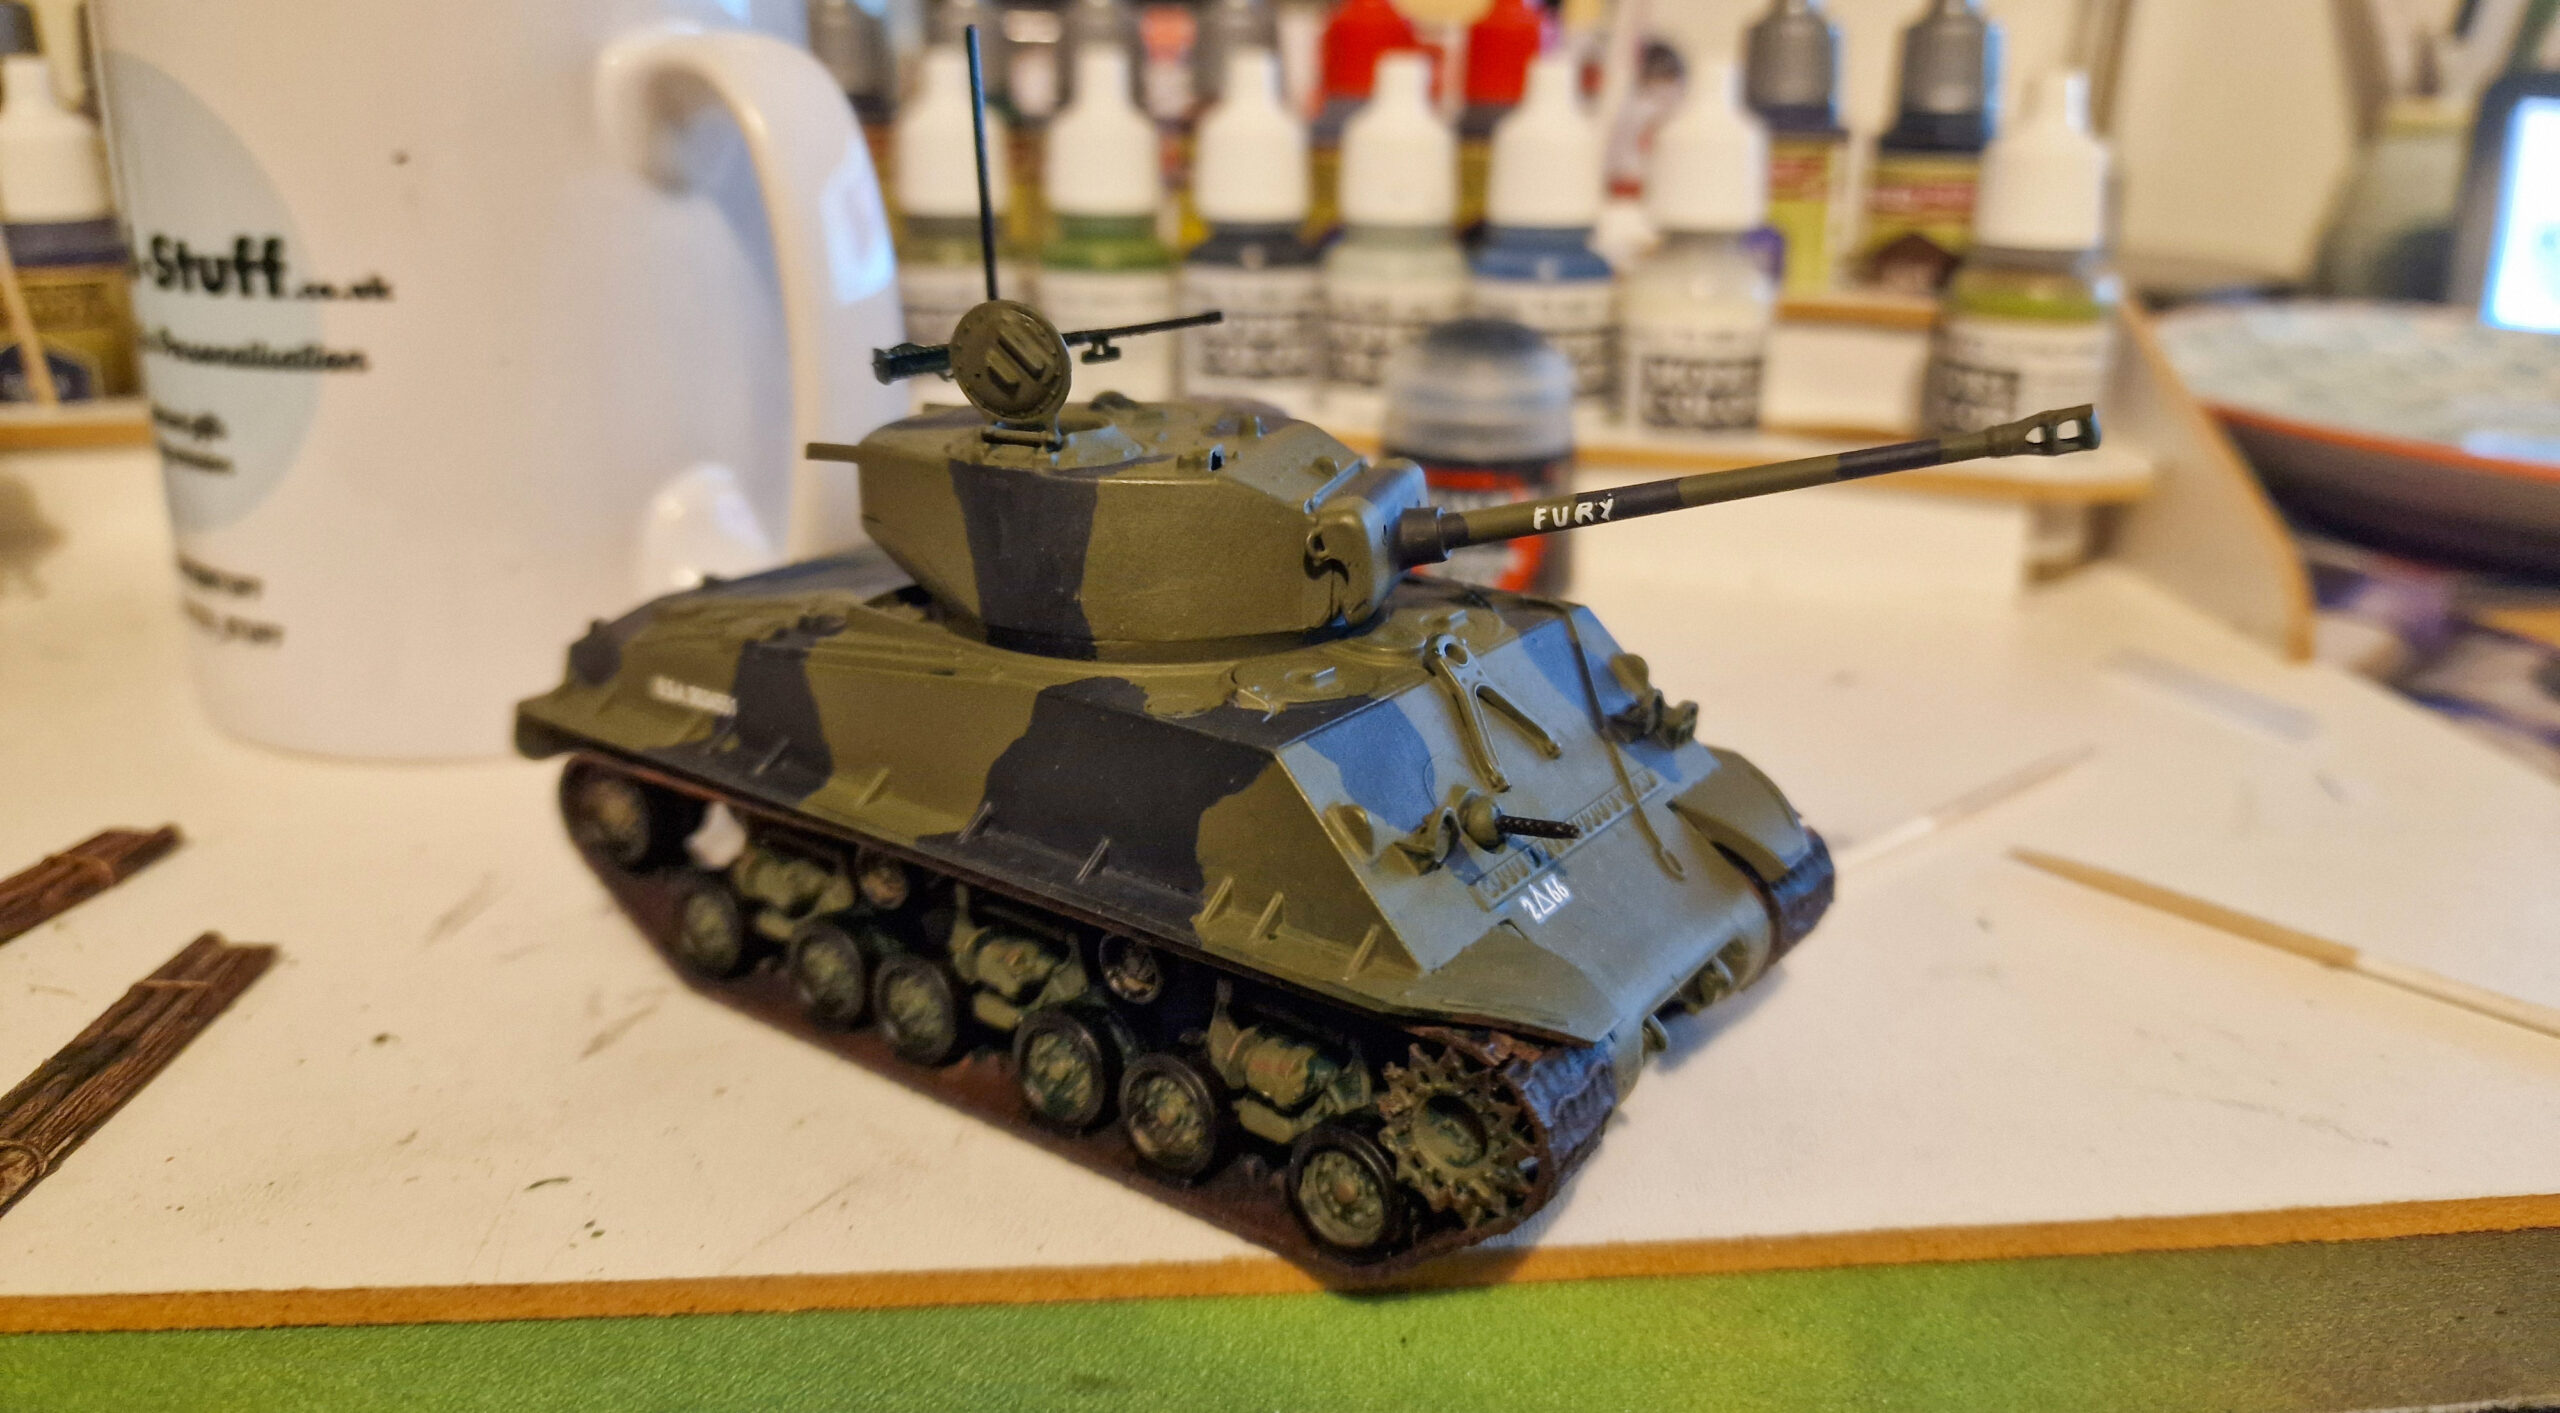
Once dry I applied a coat of very slightly thinned-down Army Painter Military Shader across all the Olive Drab and Grey armour, as well as the wheels.
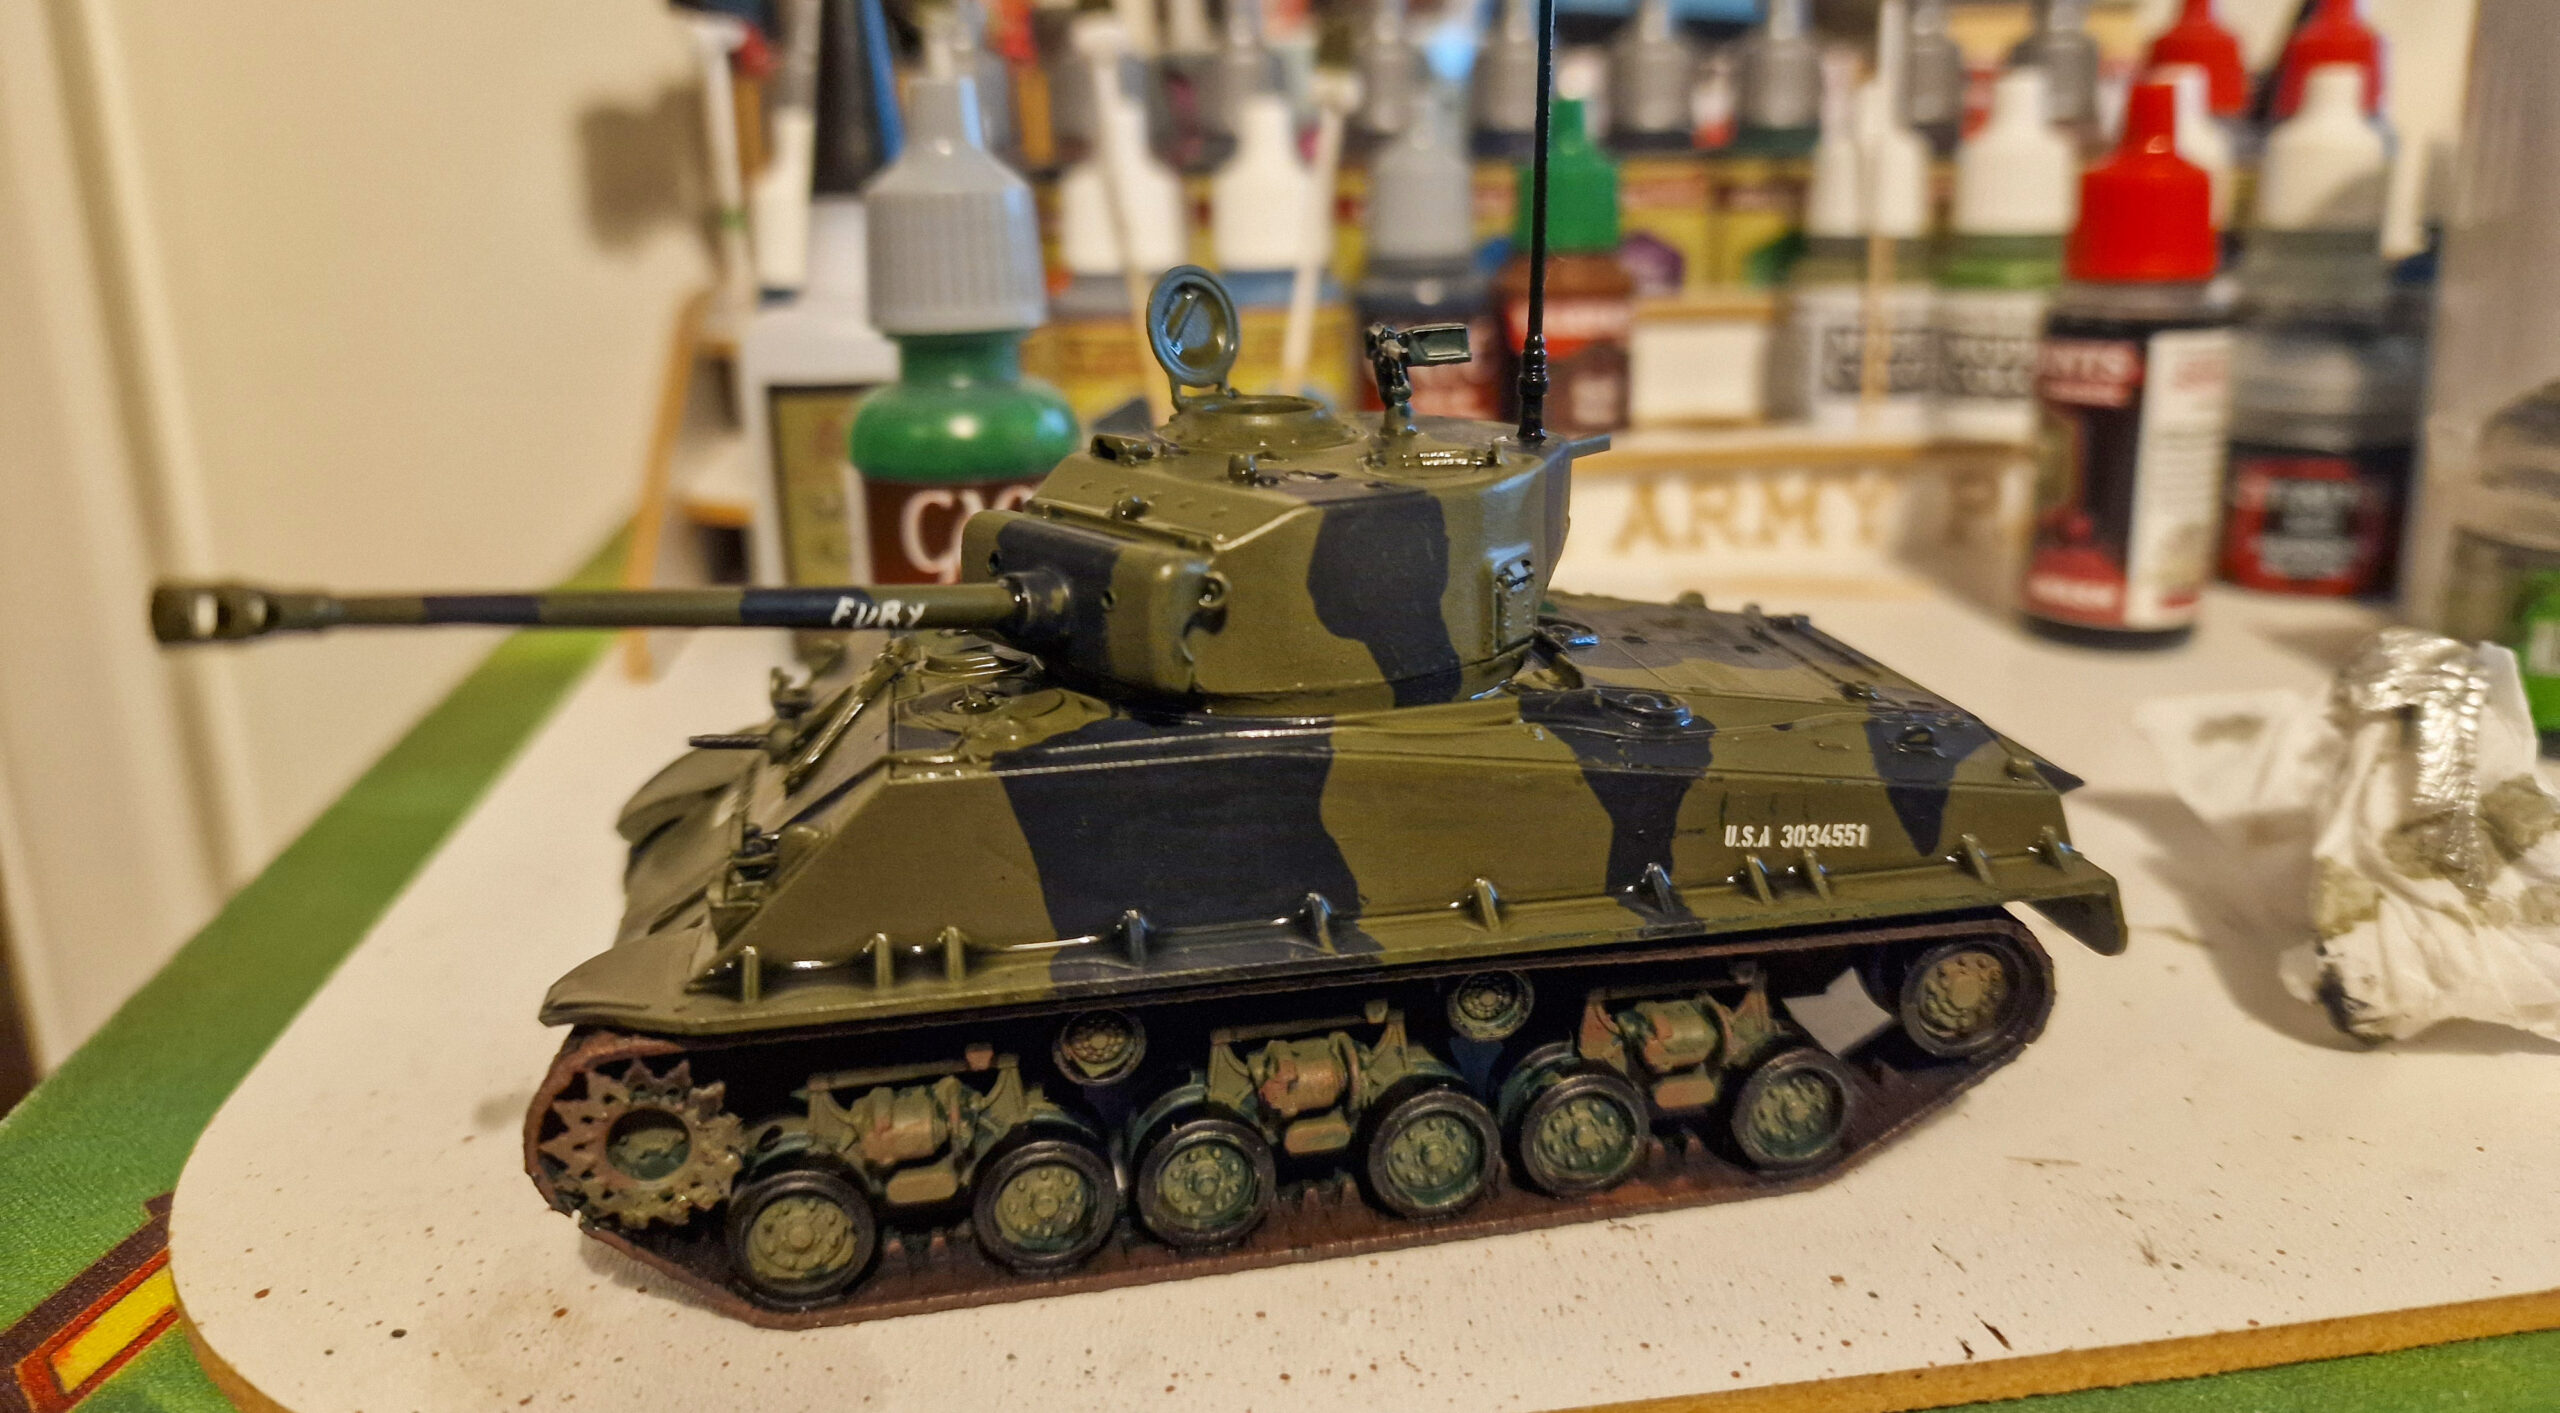
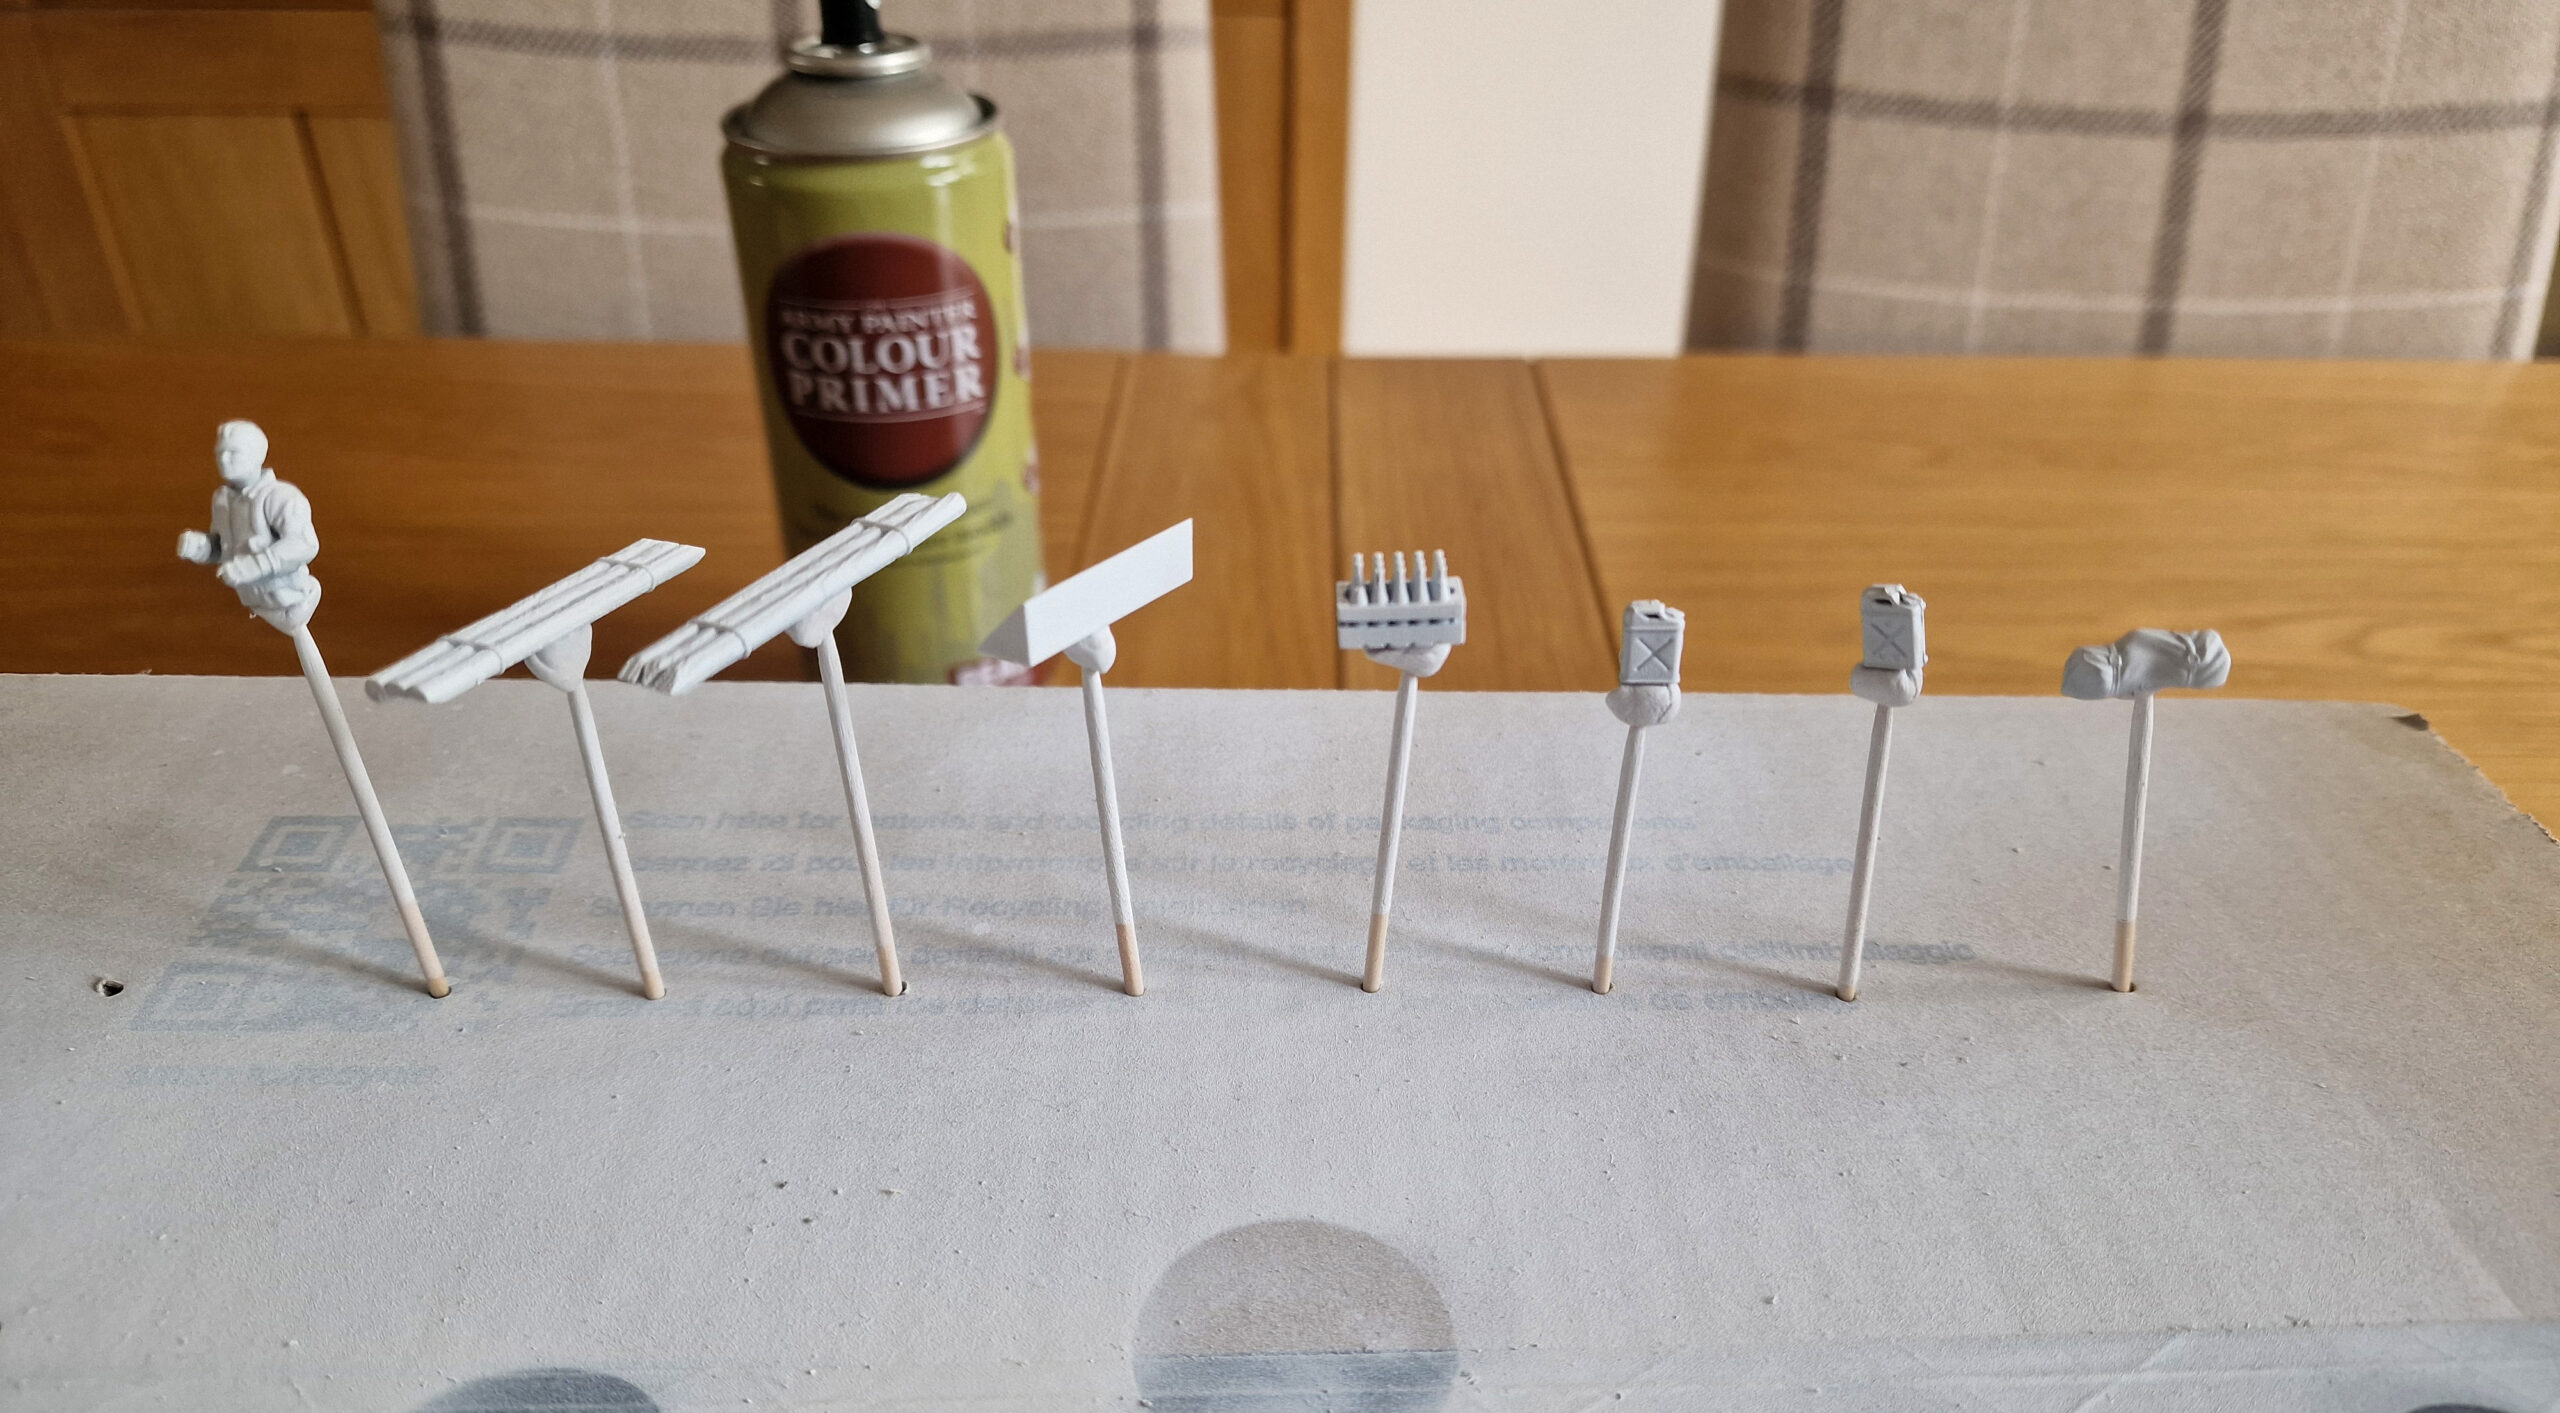
Whilst that was drying I turned my attention to my chosen stowage and my commander. These I’d undercoated white, as I’d anticipated I would be using a few Army Painter Speedpaints with these elements.
For the commander, I used:
- US Olive Drab for the uniform, followed by a wash of Military Shader, and then a second coat of Olver Drab, avoiding the recesses
- Speedpaint Crusader Skin for the hands and face, with a Citadel Reikland Fleashshade Wash, followed by a highlight of Citadel Kislev Flesh
- Citadel Mournfang Brown for the Hair washed with Army Painter Dark Tone, before picking out the very edges with Mournfang Brown again
- Citadel Skrag Brown for the straps, with a wash of Dark Tone
The Fuel Cans were painted with US Olive Drab, with a wash of Military Shader. All the wood parts were painted with Dark Wood Speedpaint, and the Bottles with Vallejo Dark Green. Th canvas elements were painted Vallejo US Field Drab, with a wash of Dark Tone before a second coat of Field Drab, avoiding the recesses.
On the tank proper, all the metal elements were picked out with Citadel Leadbelcher, washed with Citadel Nuln Oil, before being edge highlighted with Vallejo Silver. I also picked out the crew view ports in white before using Citadel Glaze Guilliman Blue to coat them.
At this point, I very carefully, using super glue to avoid scraping away dry paint, attached all the various bits of stowage and commander to the tank.
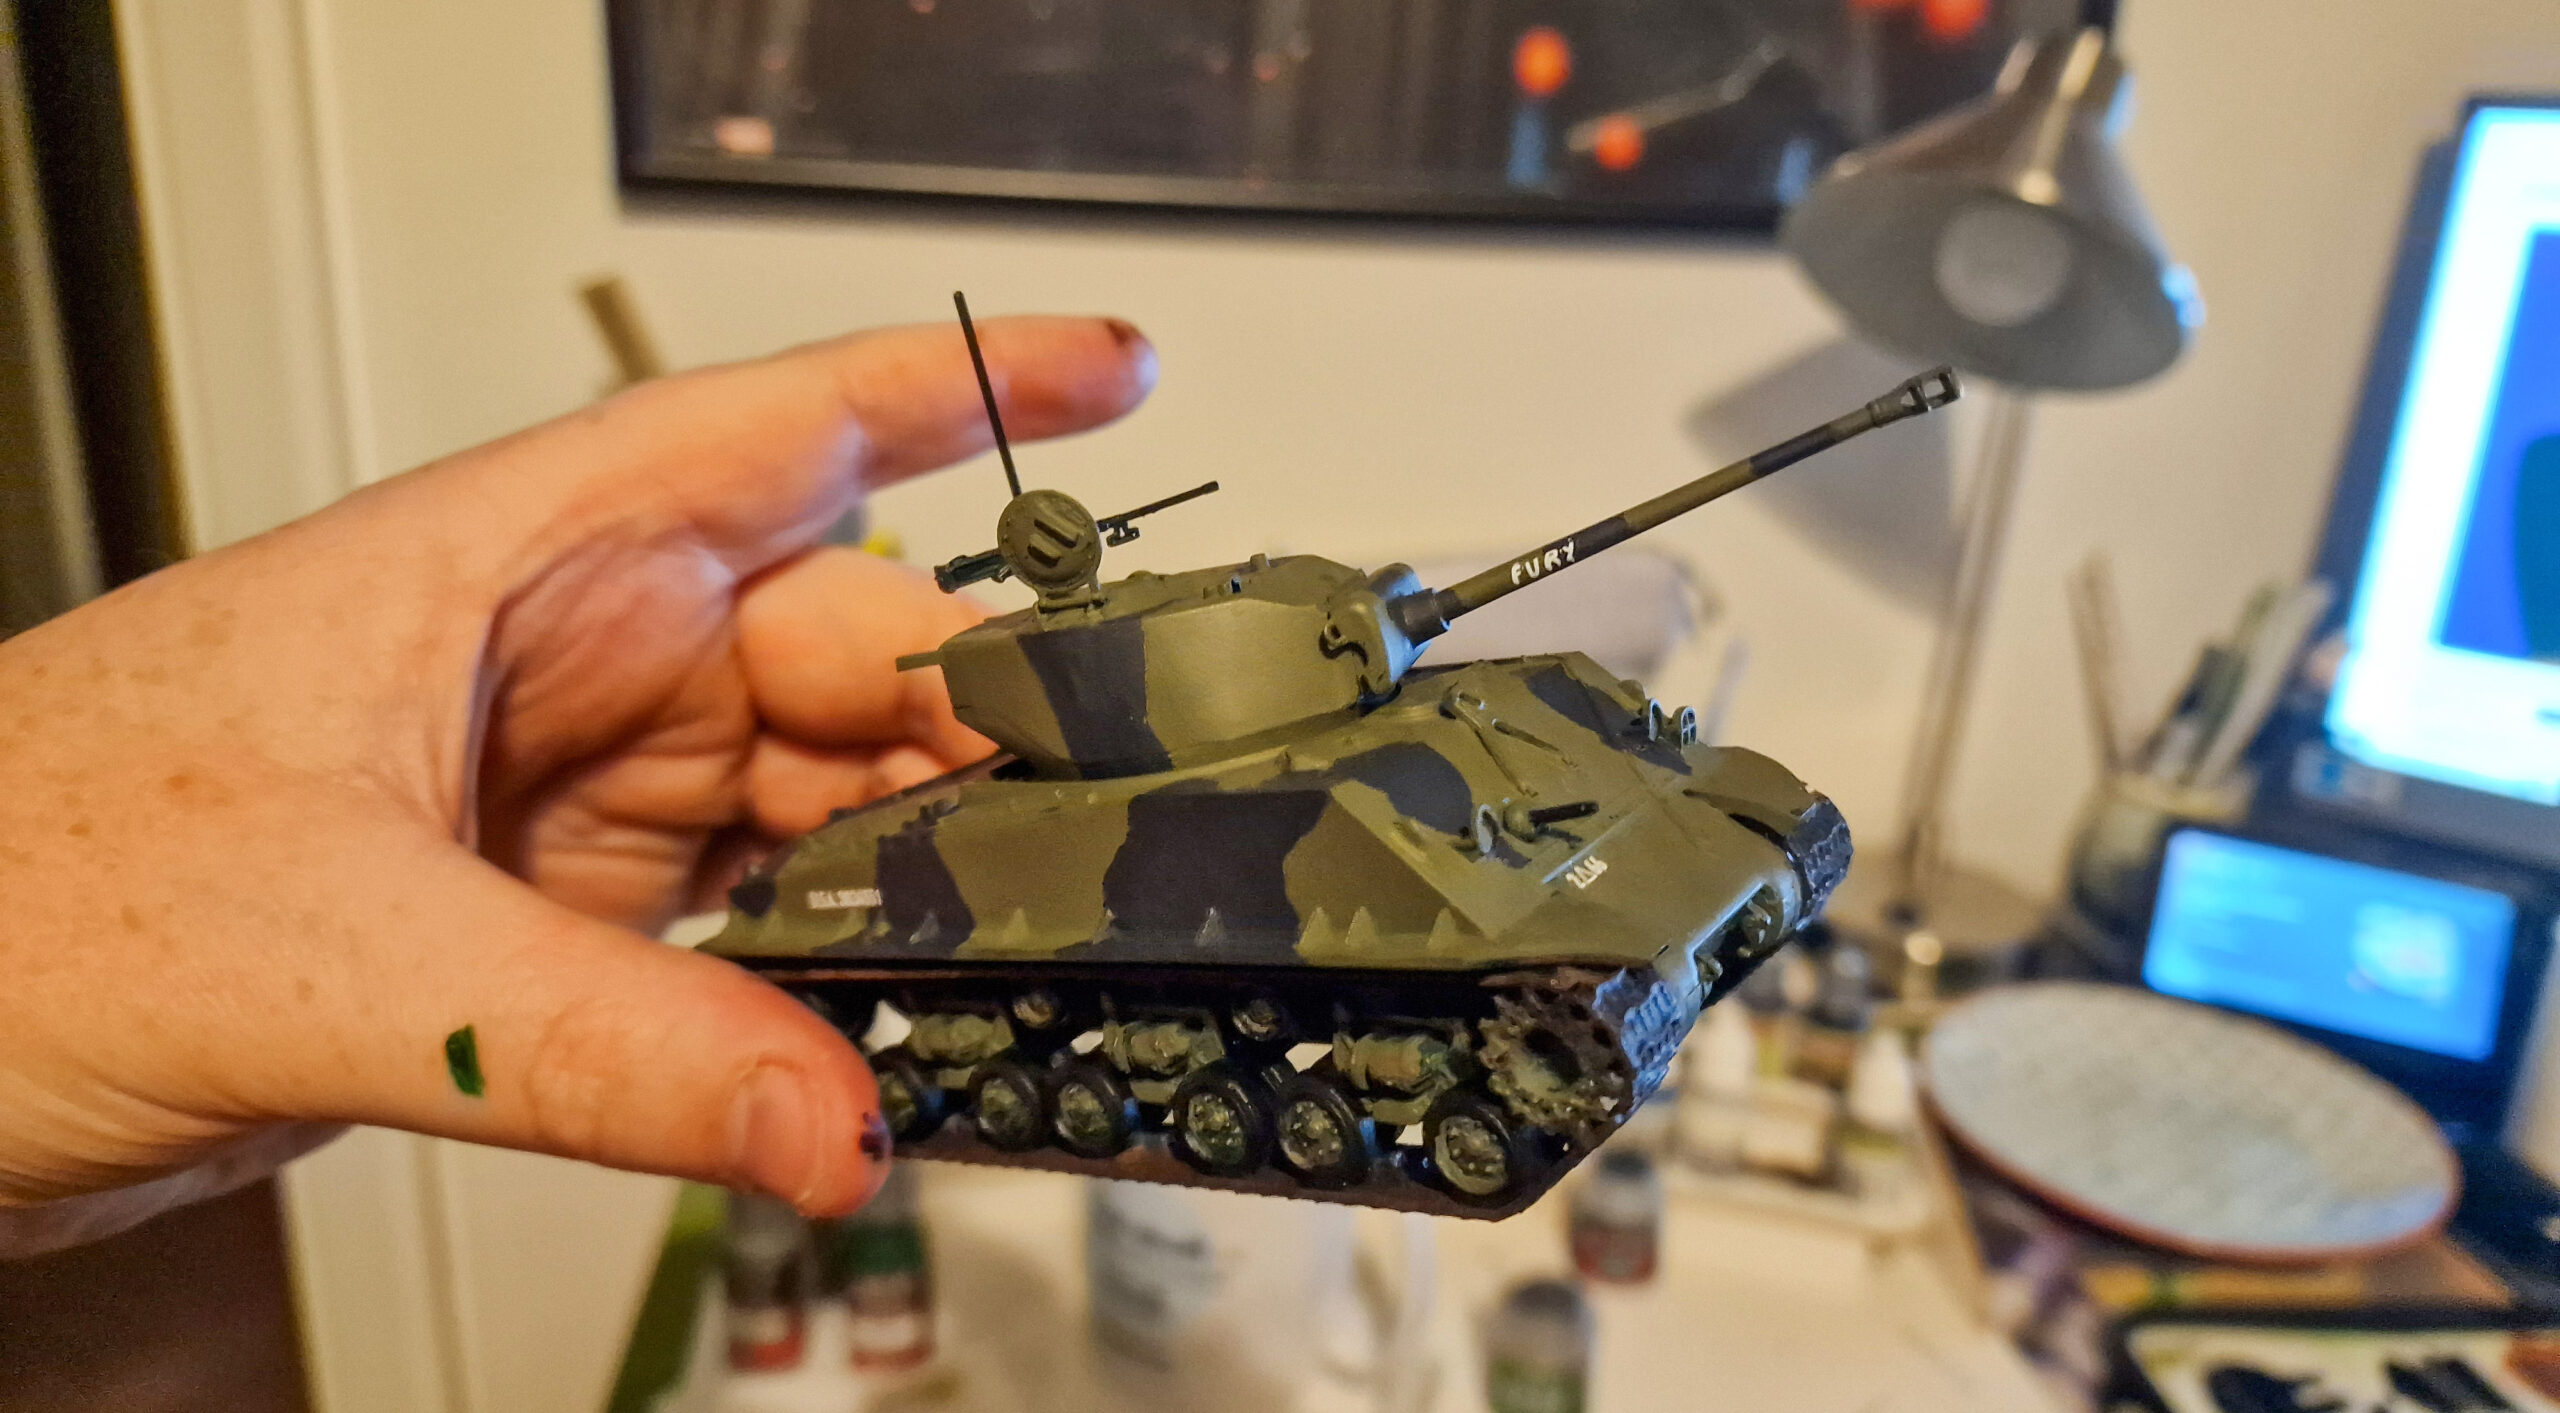
Weathering
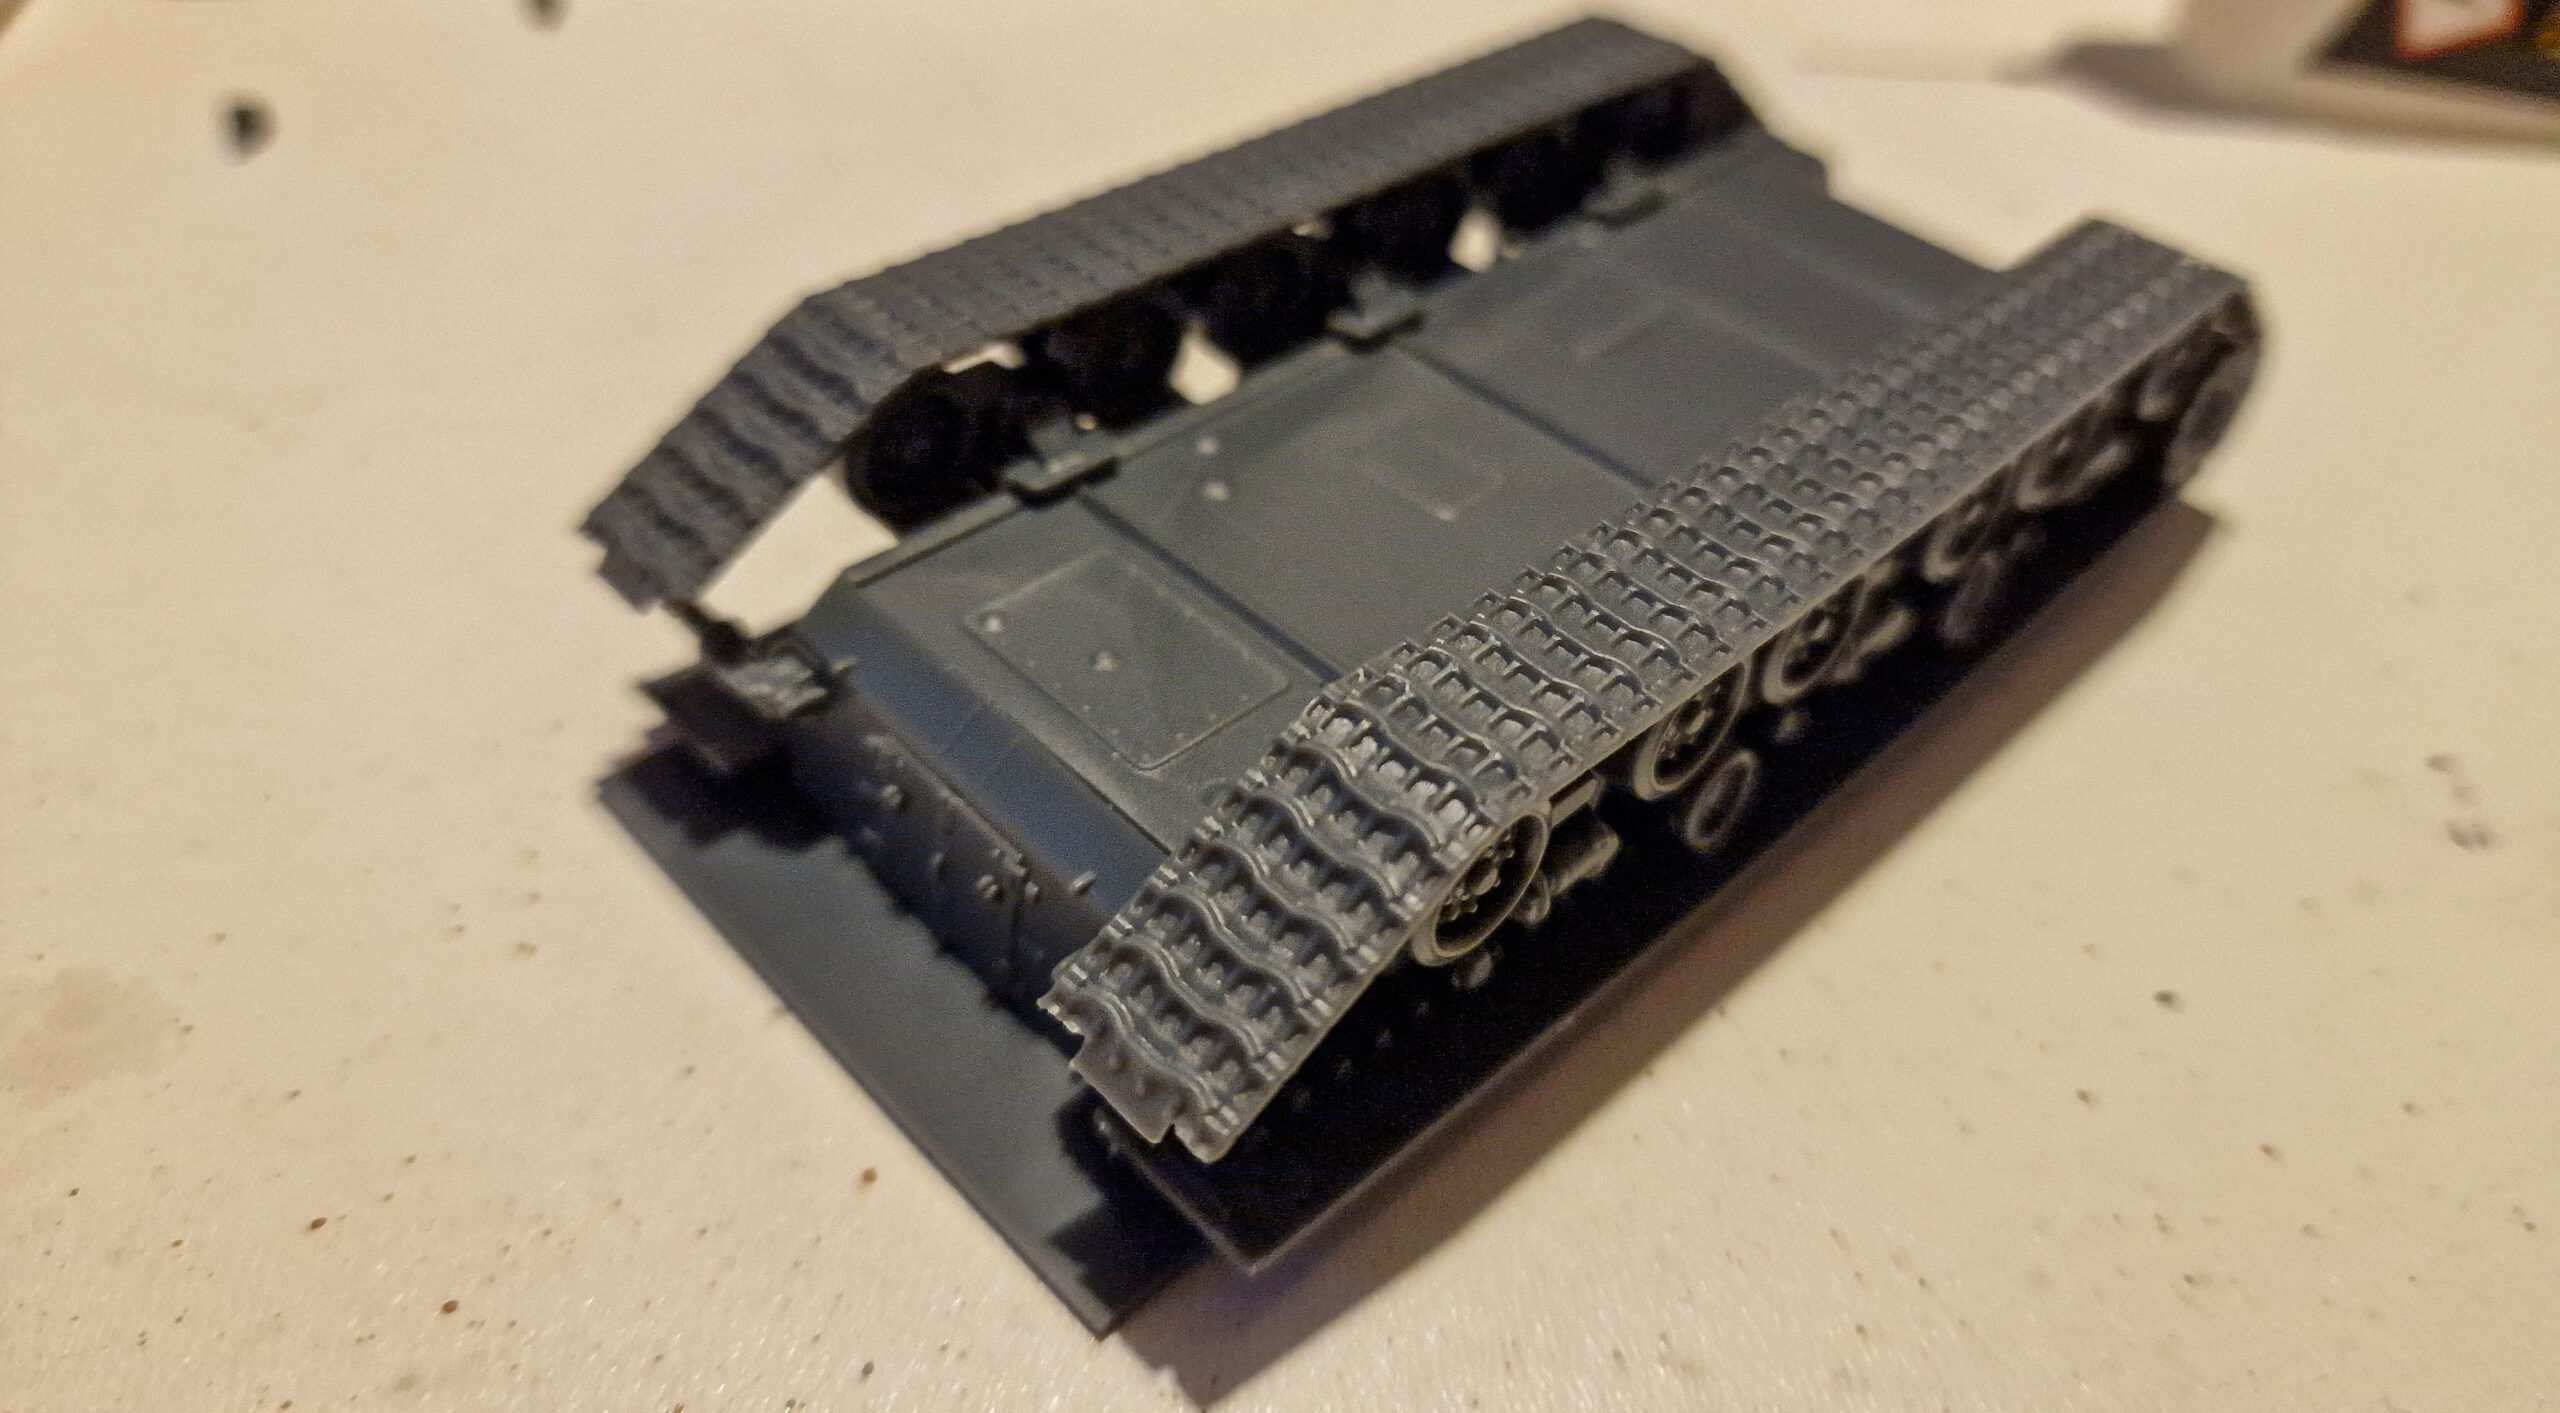
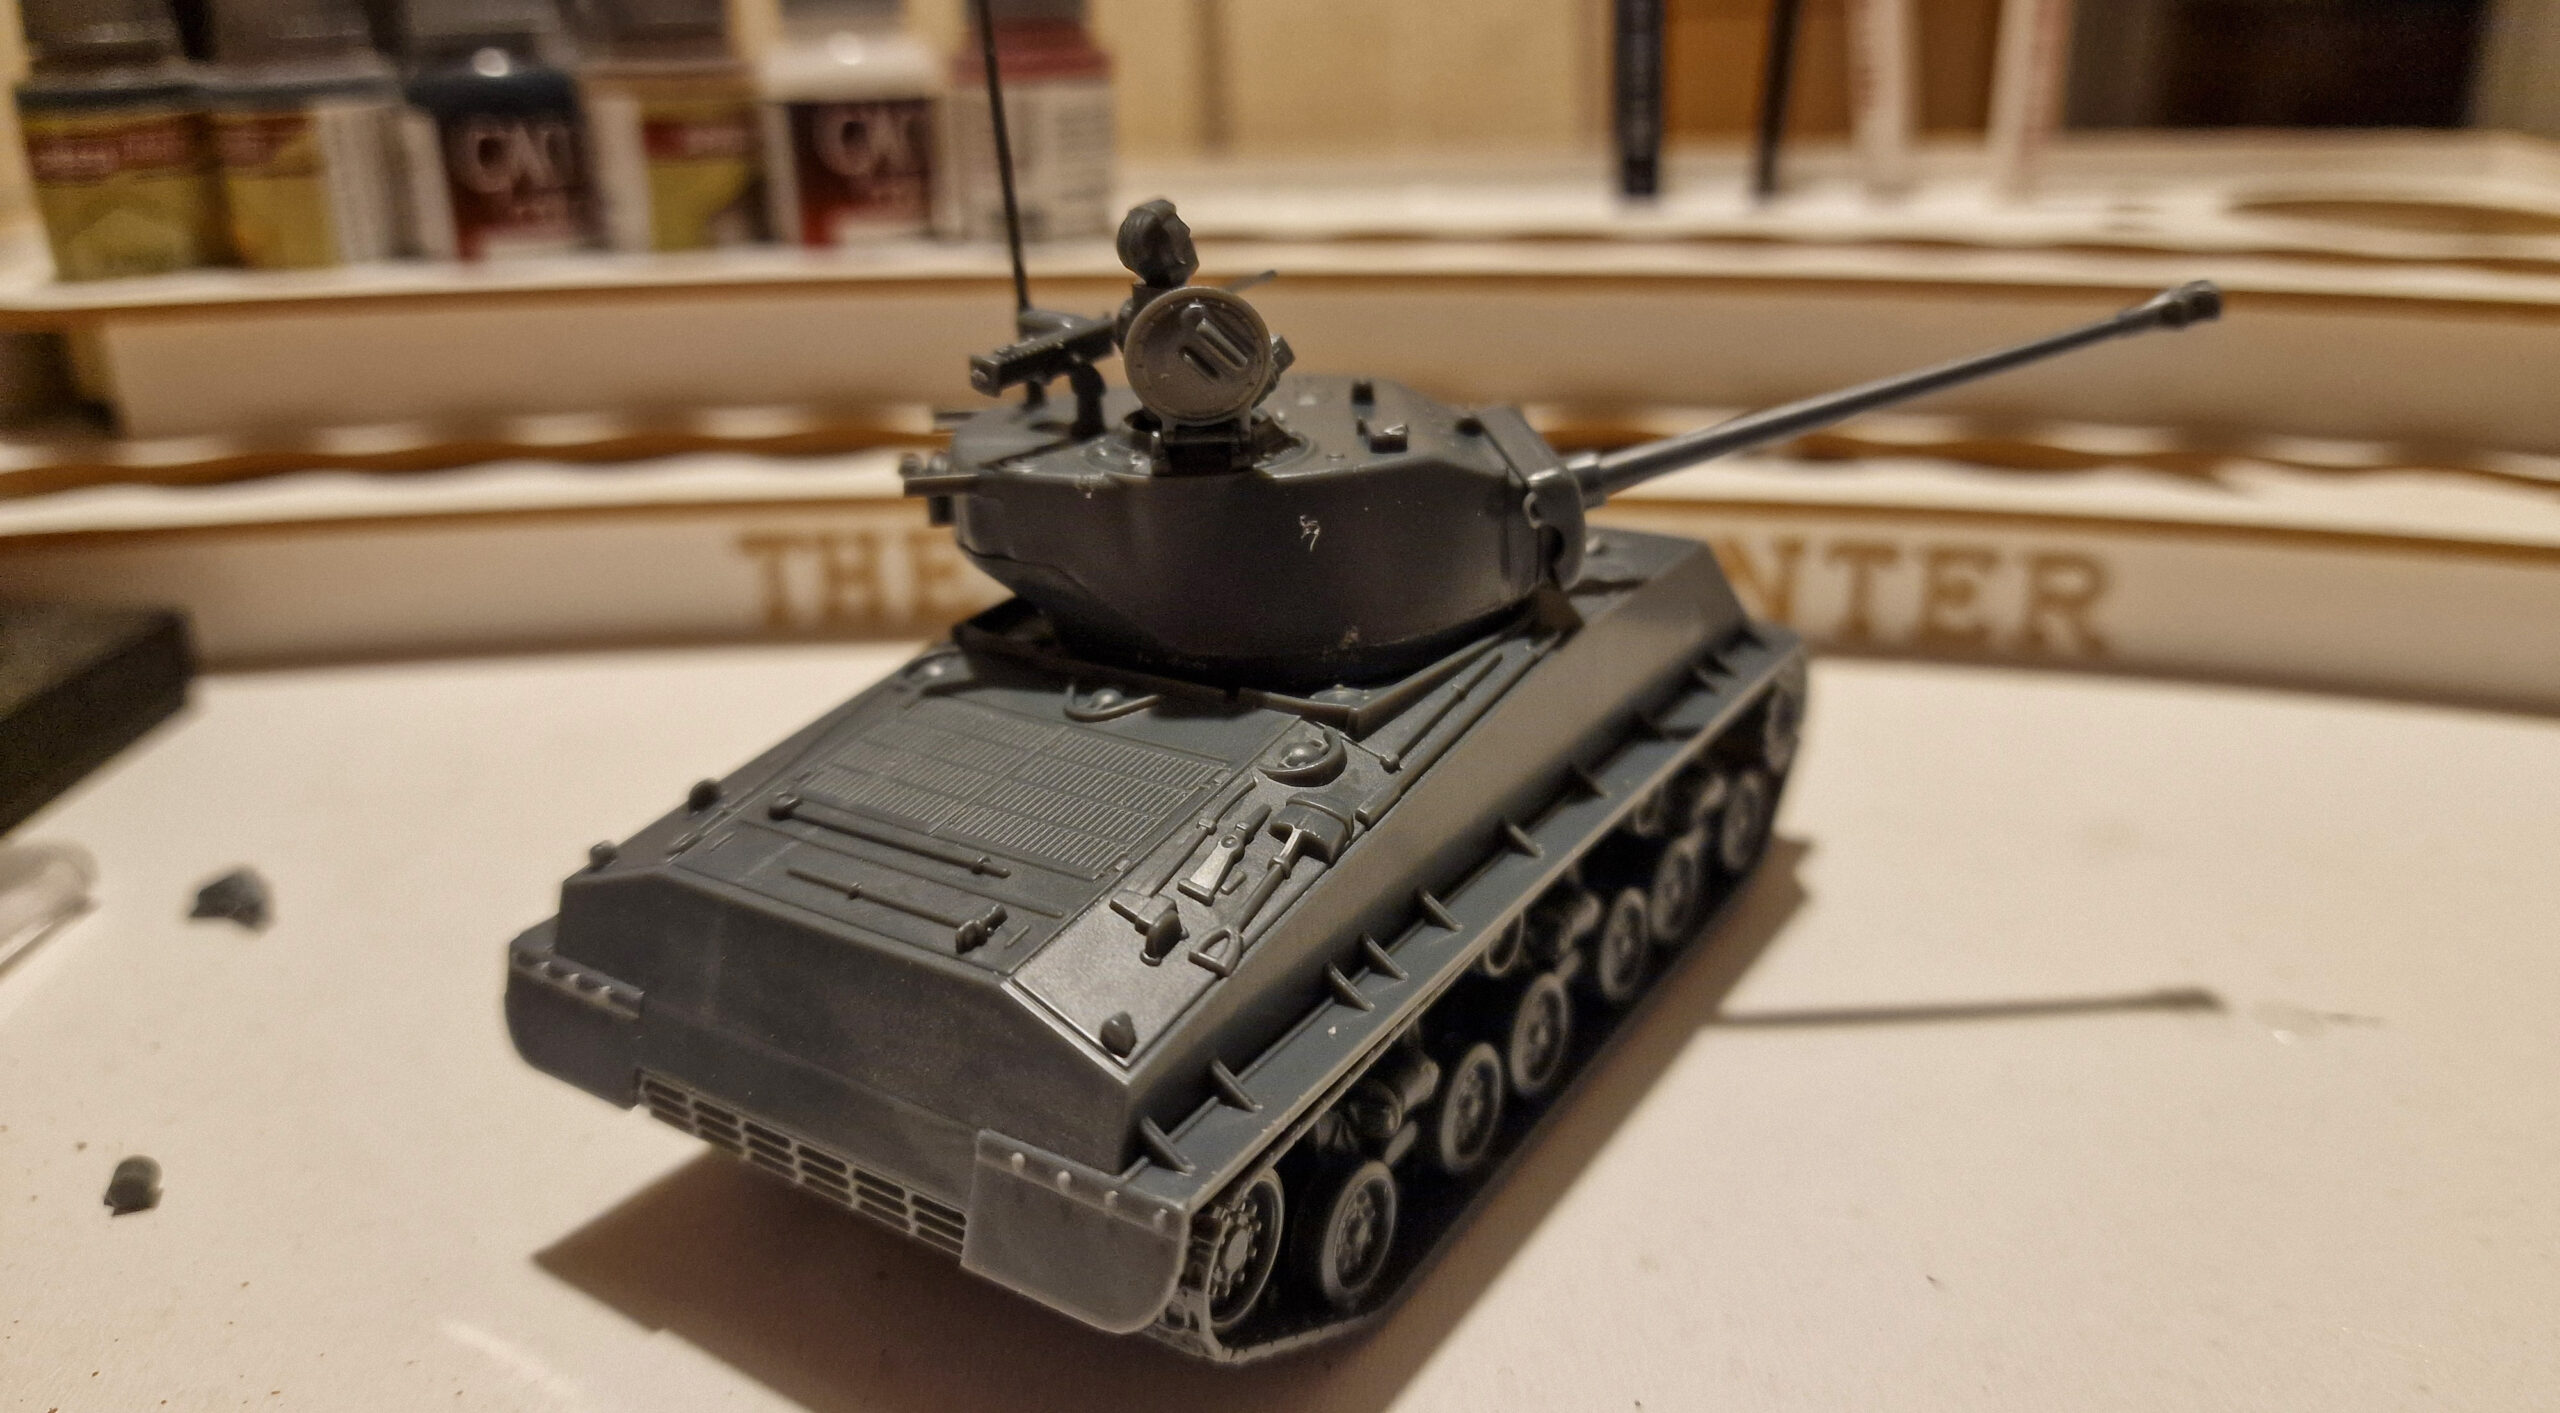
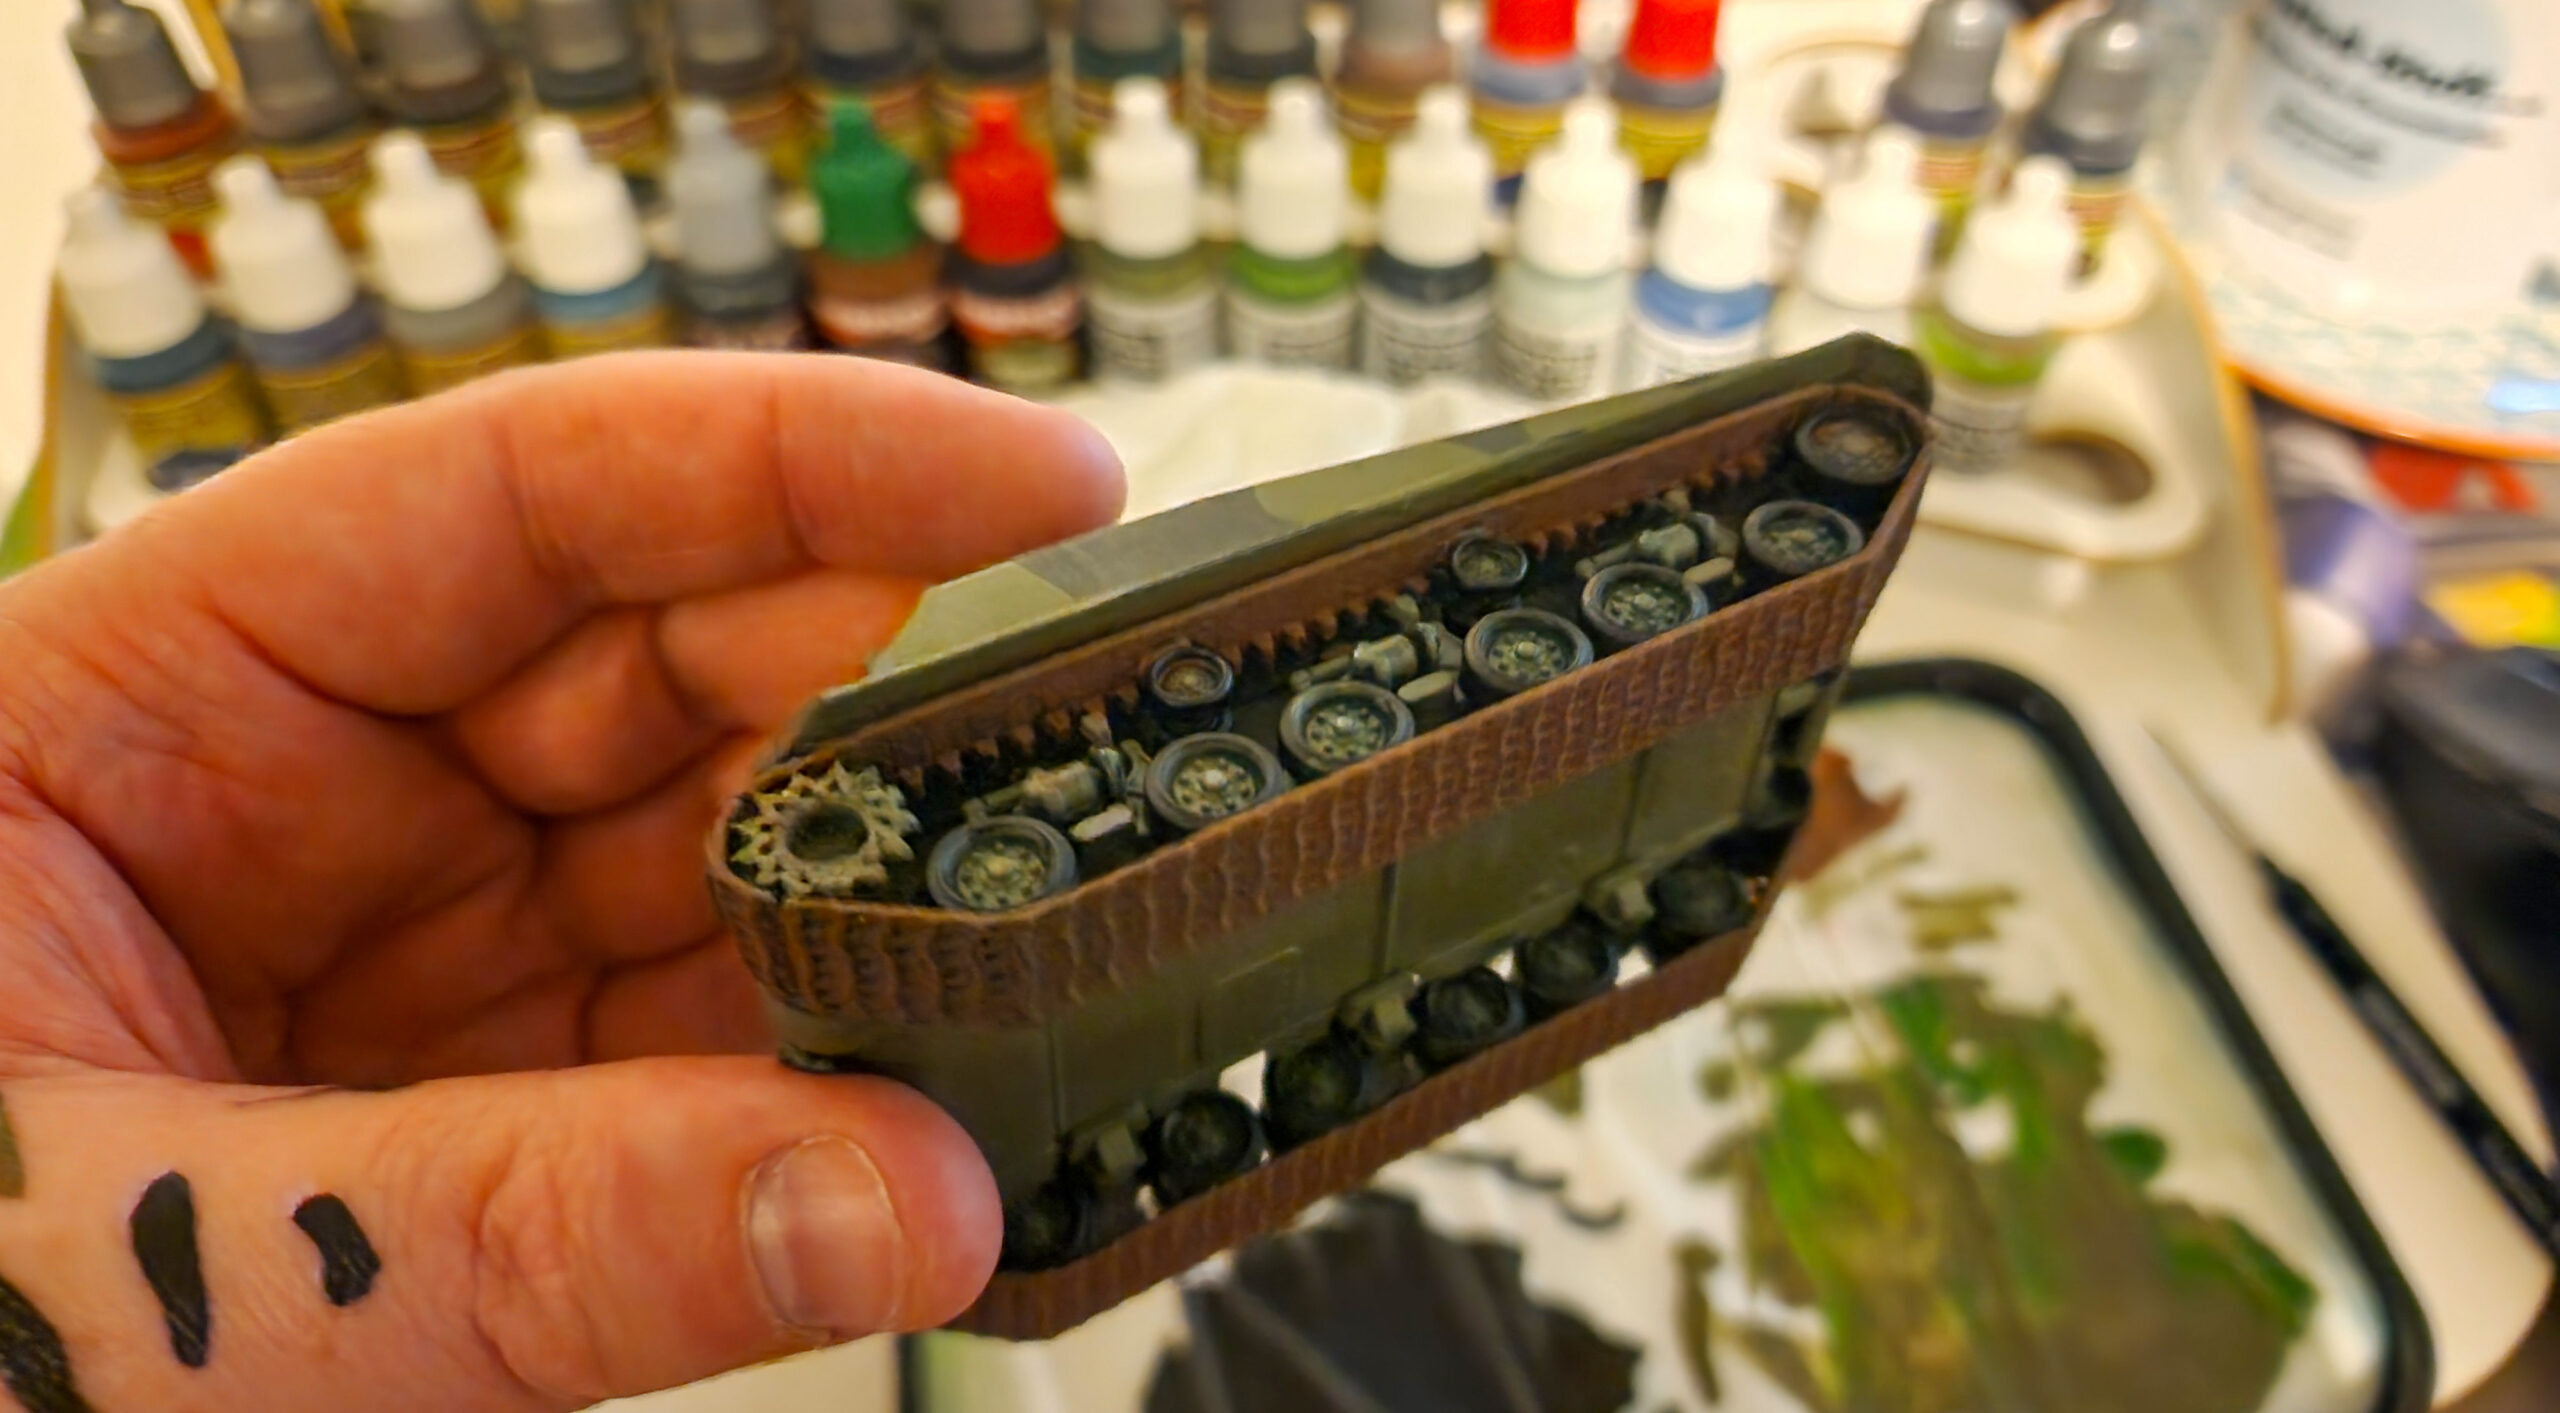
I wanted my Easy Eight to look like it had been in the thick of the fighting as well as the elements. To this end, I first applied a very light drybrush of Army Painter Dark Rust along the raised edges of the tank, but slightly more concentrated around the small, raised details, where water might have been more liable to pool – such as areas around hatches including any hinges. Once dry I applied a second stronger wash to the latter areas, using Army Painter Strong Tone.
Then for perhaps the most enjoyable part of the entire process, slapping lavish amounts of Vallejos Diorama FX Dark Earth across the entirety of the tracks, across the interior of the track assembly, and the lower hull, making sure to use it to mask my earlier mistakes. Allowing plenty of time for it to dry, I then gave it a liberal coat of Army Painter Dark Tone, undiluted, before drybrushing these areas, with next to no paint on the brush at all, with Citadel Mournfang Brown.
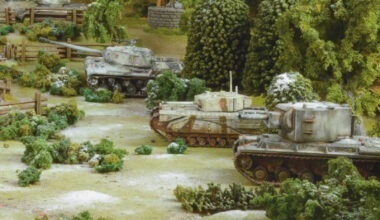
Once that was done – I applied a coat of Army Painter Anti-Shine Matt varnish to everywhere but the mudded textured areas, and with that my tank was ready for battle! Let’s see how it squares up against the wide variety of armour types in our upcoming multiplayer battle – if I do well, I may need to christen my commander with his own moniker, recruit some more US armour and let loose in a full-blown Achtung Panzer! campaign!
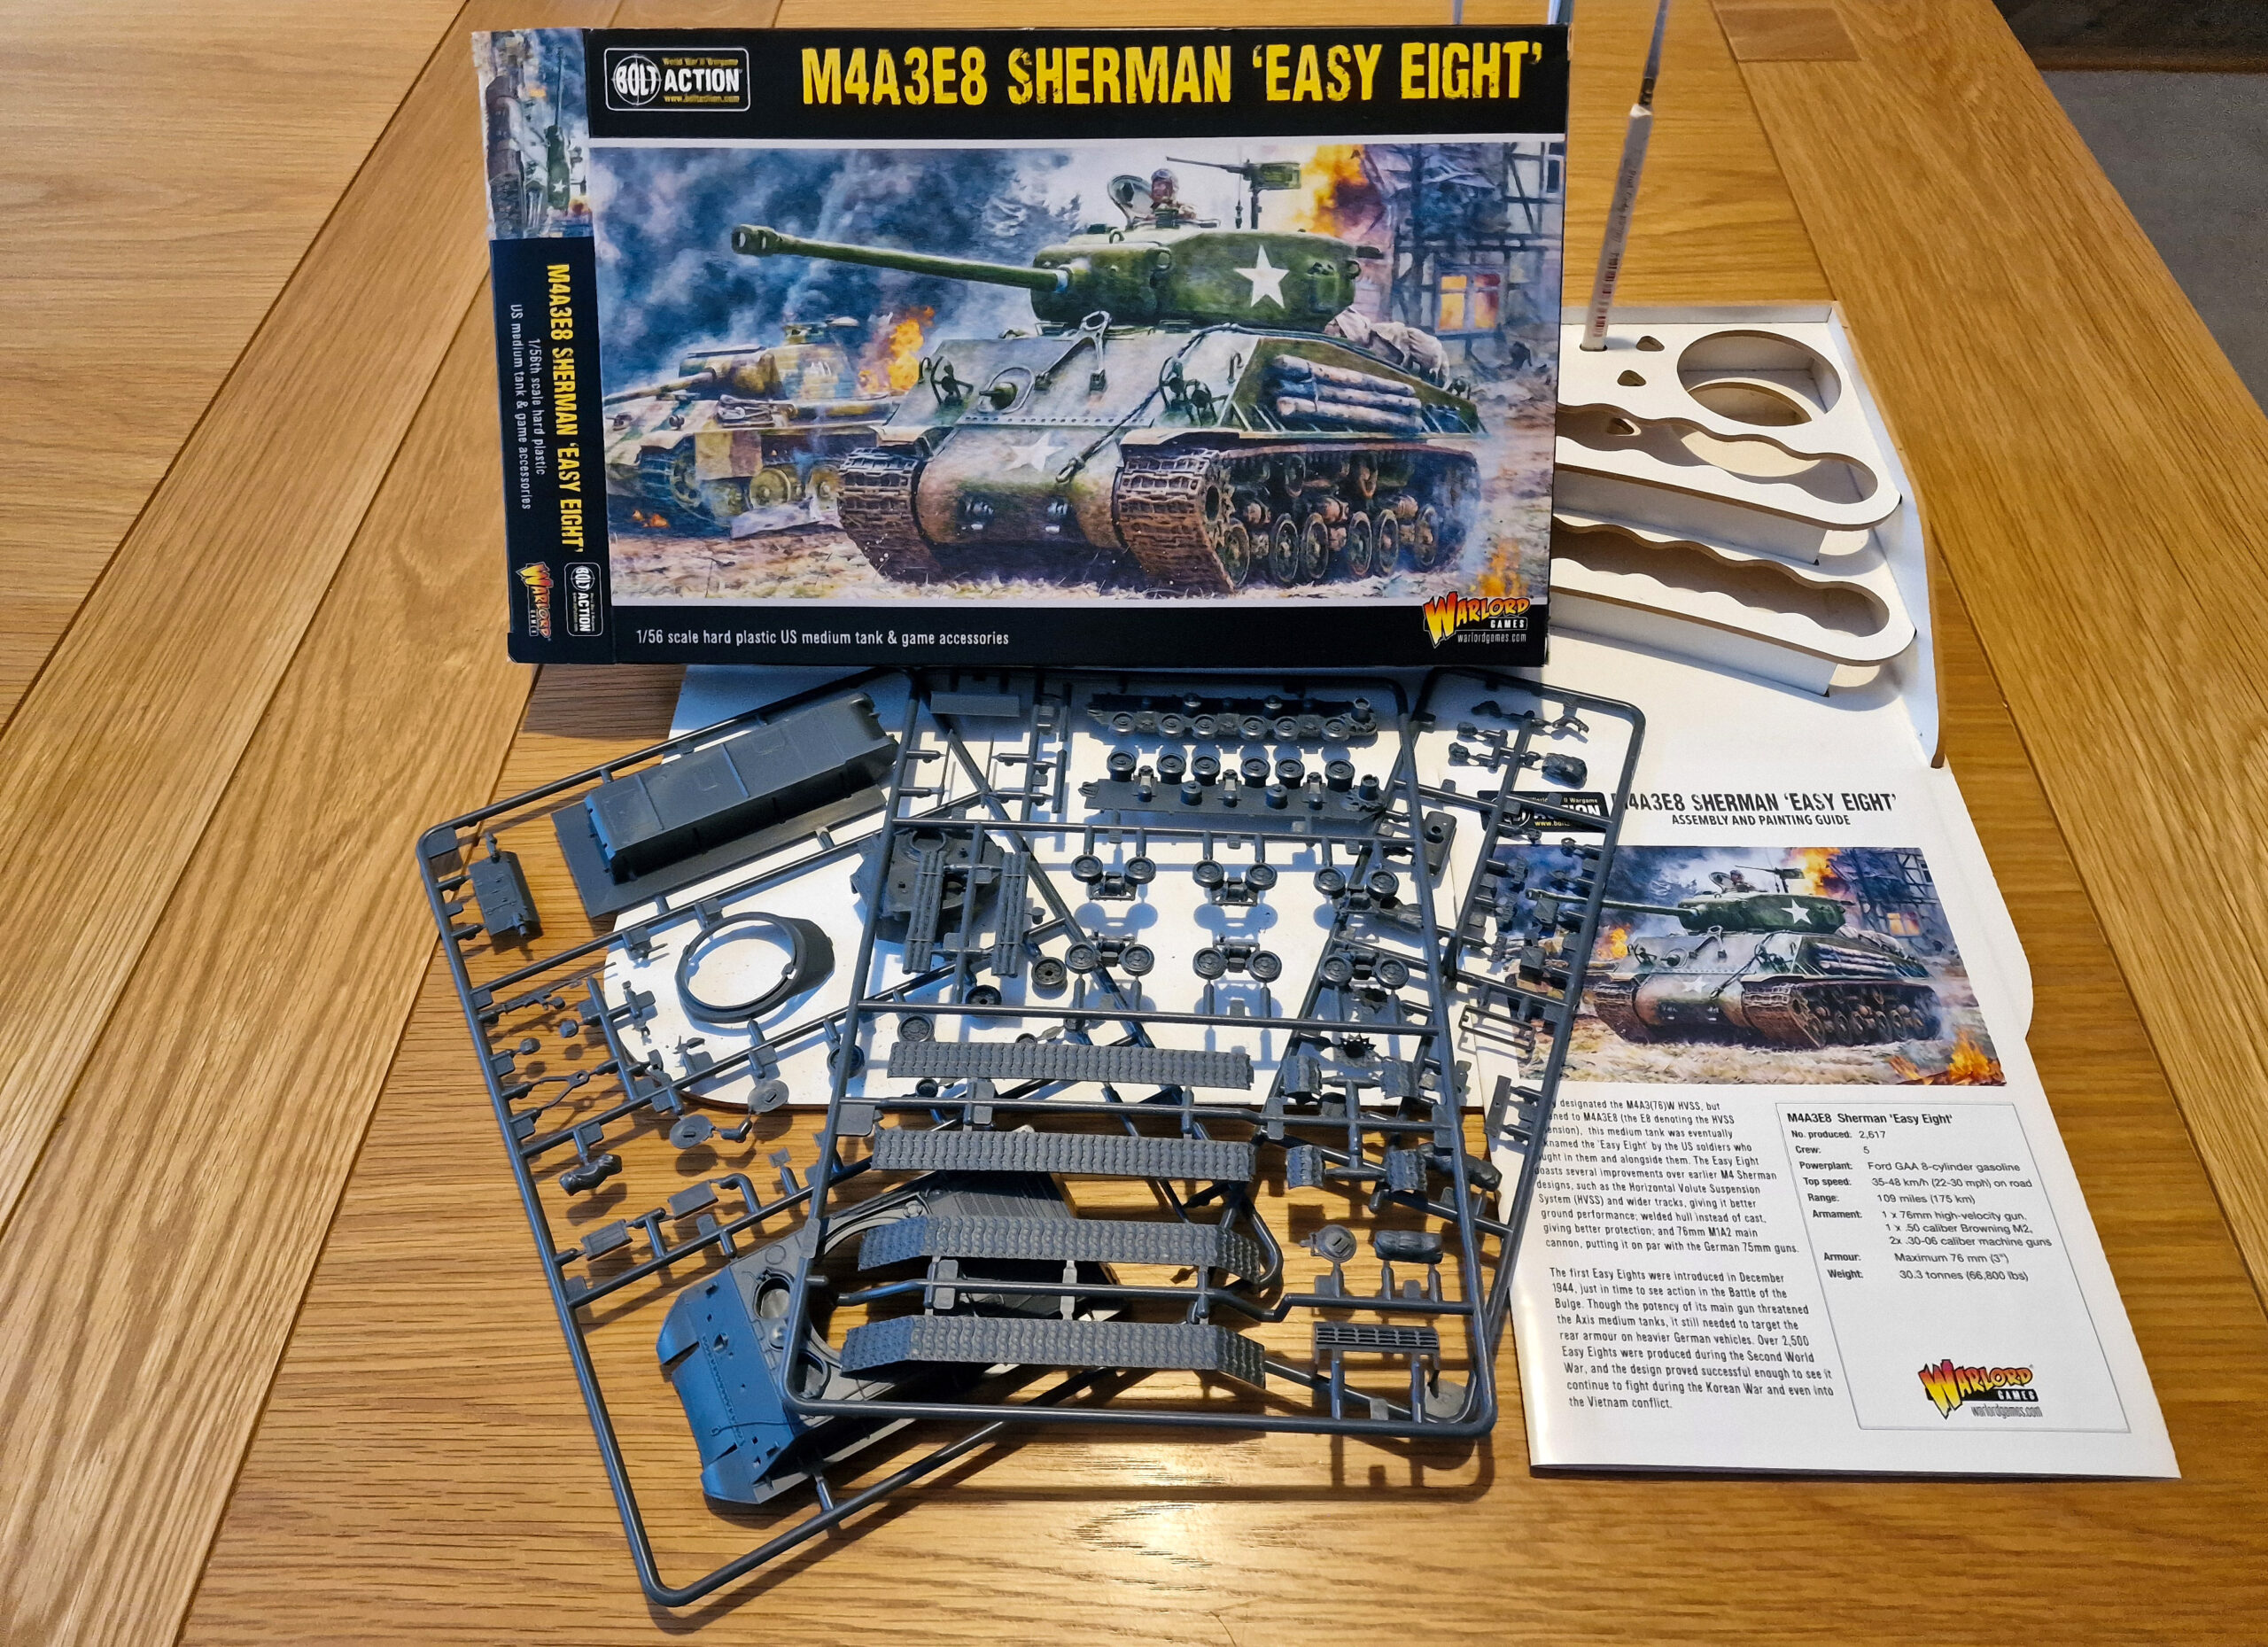
M4A3E8 Sherman Easy Eight Plastic Boxed Set
Initially designated the M4A3(76)W HVSS but shortened to M4A3E8 (the E8 denoting the HVSS suspension), this medium tank was eventually nicknamed the ‘Easy Eight’ by the US soldiers who fought in and alongside them. The Easy Eight boasts several improvements over earlier M4 Sherman designs, such as the Horizontal Volute Suspension System (HVSS) and wider tracks, giving it better ground performance; welded hull instead of cast, giving better protection; and 76mm M1A2 main gun, putting it on par with the German 75mm guns.
The first Easy Eights were introduced in December 1944, just in time to see action in the Battle of the Bulge. Though the potency of its main gun threatened the Axis medium tanks, it still needed to target the rear armour on heavier German vehicles.
Over 2,500 Easy Eights were produced during the Second World War, and the design proved successful enough to see it continue to fight during the Korean War and even into the Vietnam conflict.

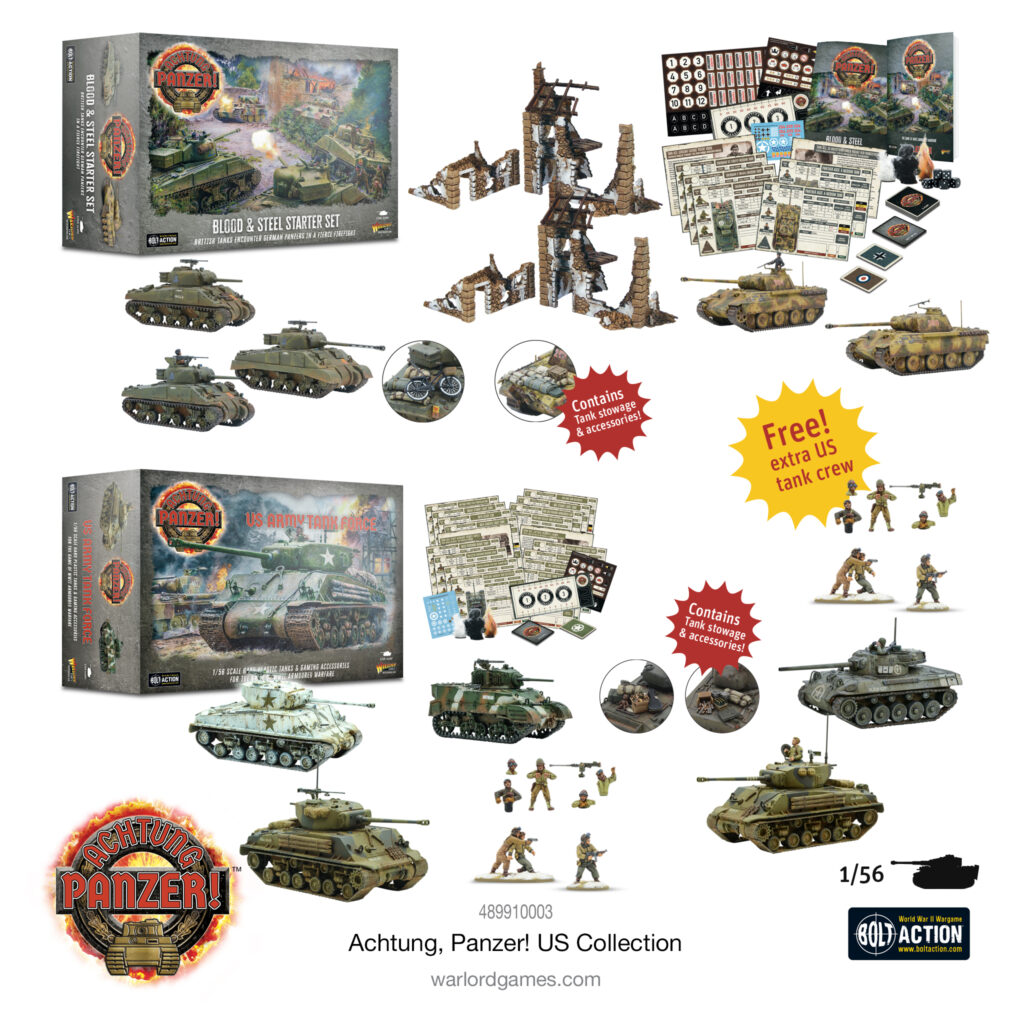
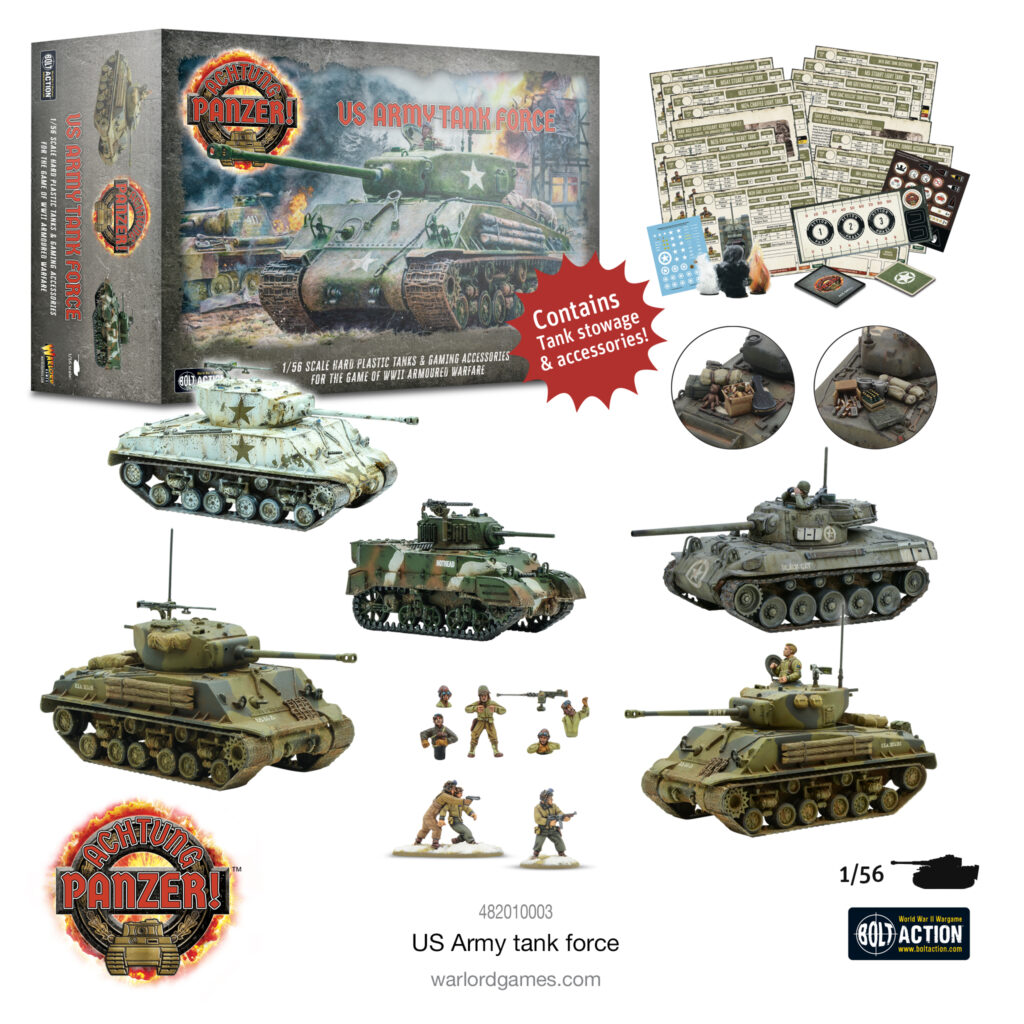
Achtung Panzer! US Army Tank Force
The Achtung Panzer! US Army Tank Force gives you five classic American tanks to help liberate the oppressed nations of Europe and bring the might of US industry to the tabletop. This balanced, powerful force is built around a trio of the ubiquitous Sherman M4A3E8 ‘Easy Eights’, which combine serious firepower from their 76mm guns with decent levels of mobility and protection, supported by a pair of fast lighter elements – the M18 tank destroyer is capable of annihilating enemy armour from ambush, while the M5 Stuart is perfect for scouting, flanking, and harassing the foe.
In addition to these five awesome plastic vehicles (and a fantastic set of characterful stowage items), the included US-specific Asset cards, plus Datacards for 16 different tanks (allowing you to field an even greater range of American armour!), Tank Ace and Ace Skill cards, game tokens and markers along with mounted and dismounted tank crew figures give you everything you need to take the fight to the Axis. Give ’em hell!
Also Available
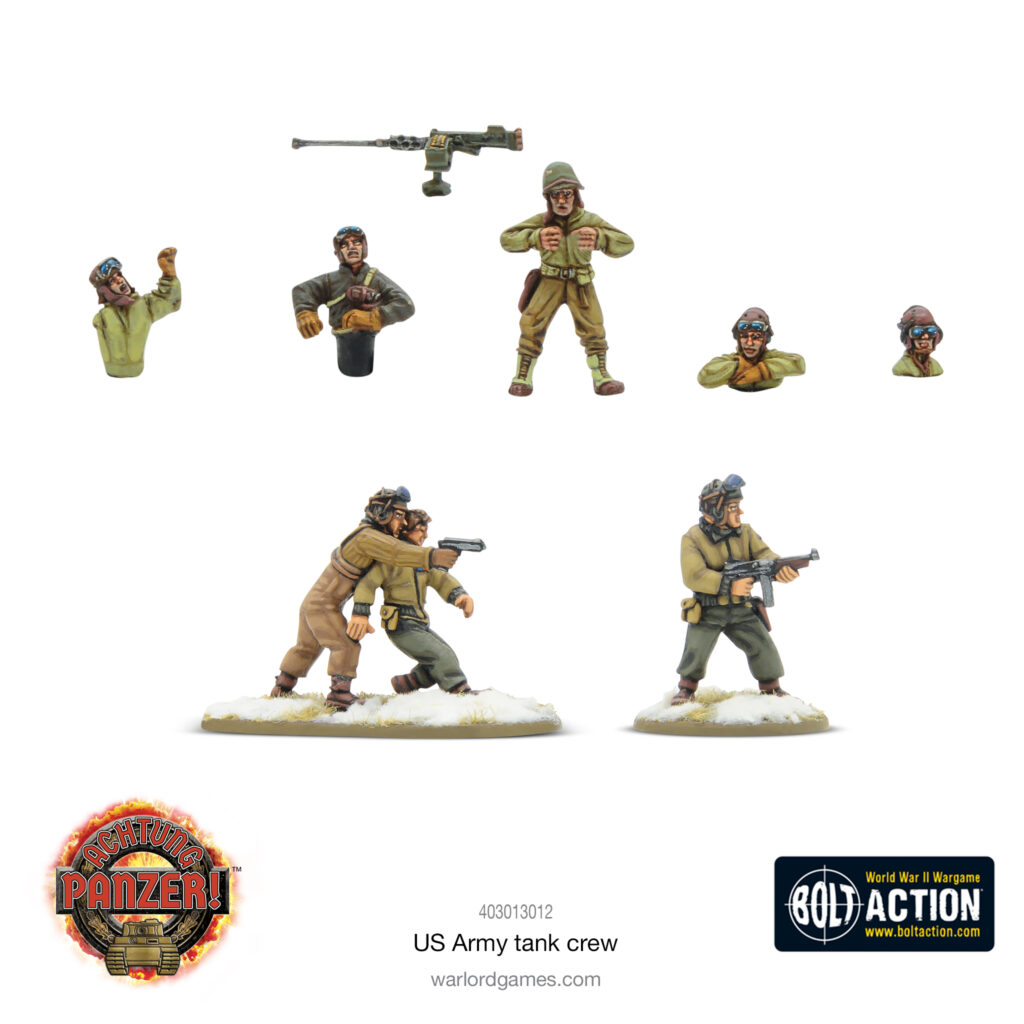
The perfect way to jump into Achtung Panzer! on the side of the United States, the Achtung Panzer! US Collection nets you both the Blood & Steel starter set and the above US Army Tank Force, along with an extra set of US tank crewmen included for free! The crew are also available separately, suitable for both Achtung Panzer! and Bolt Action collections!