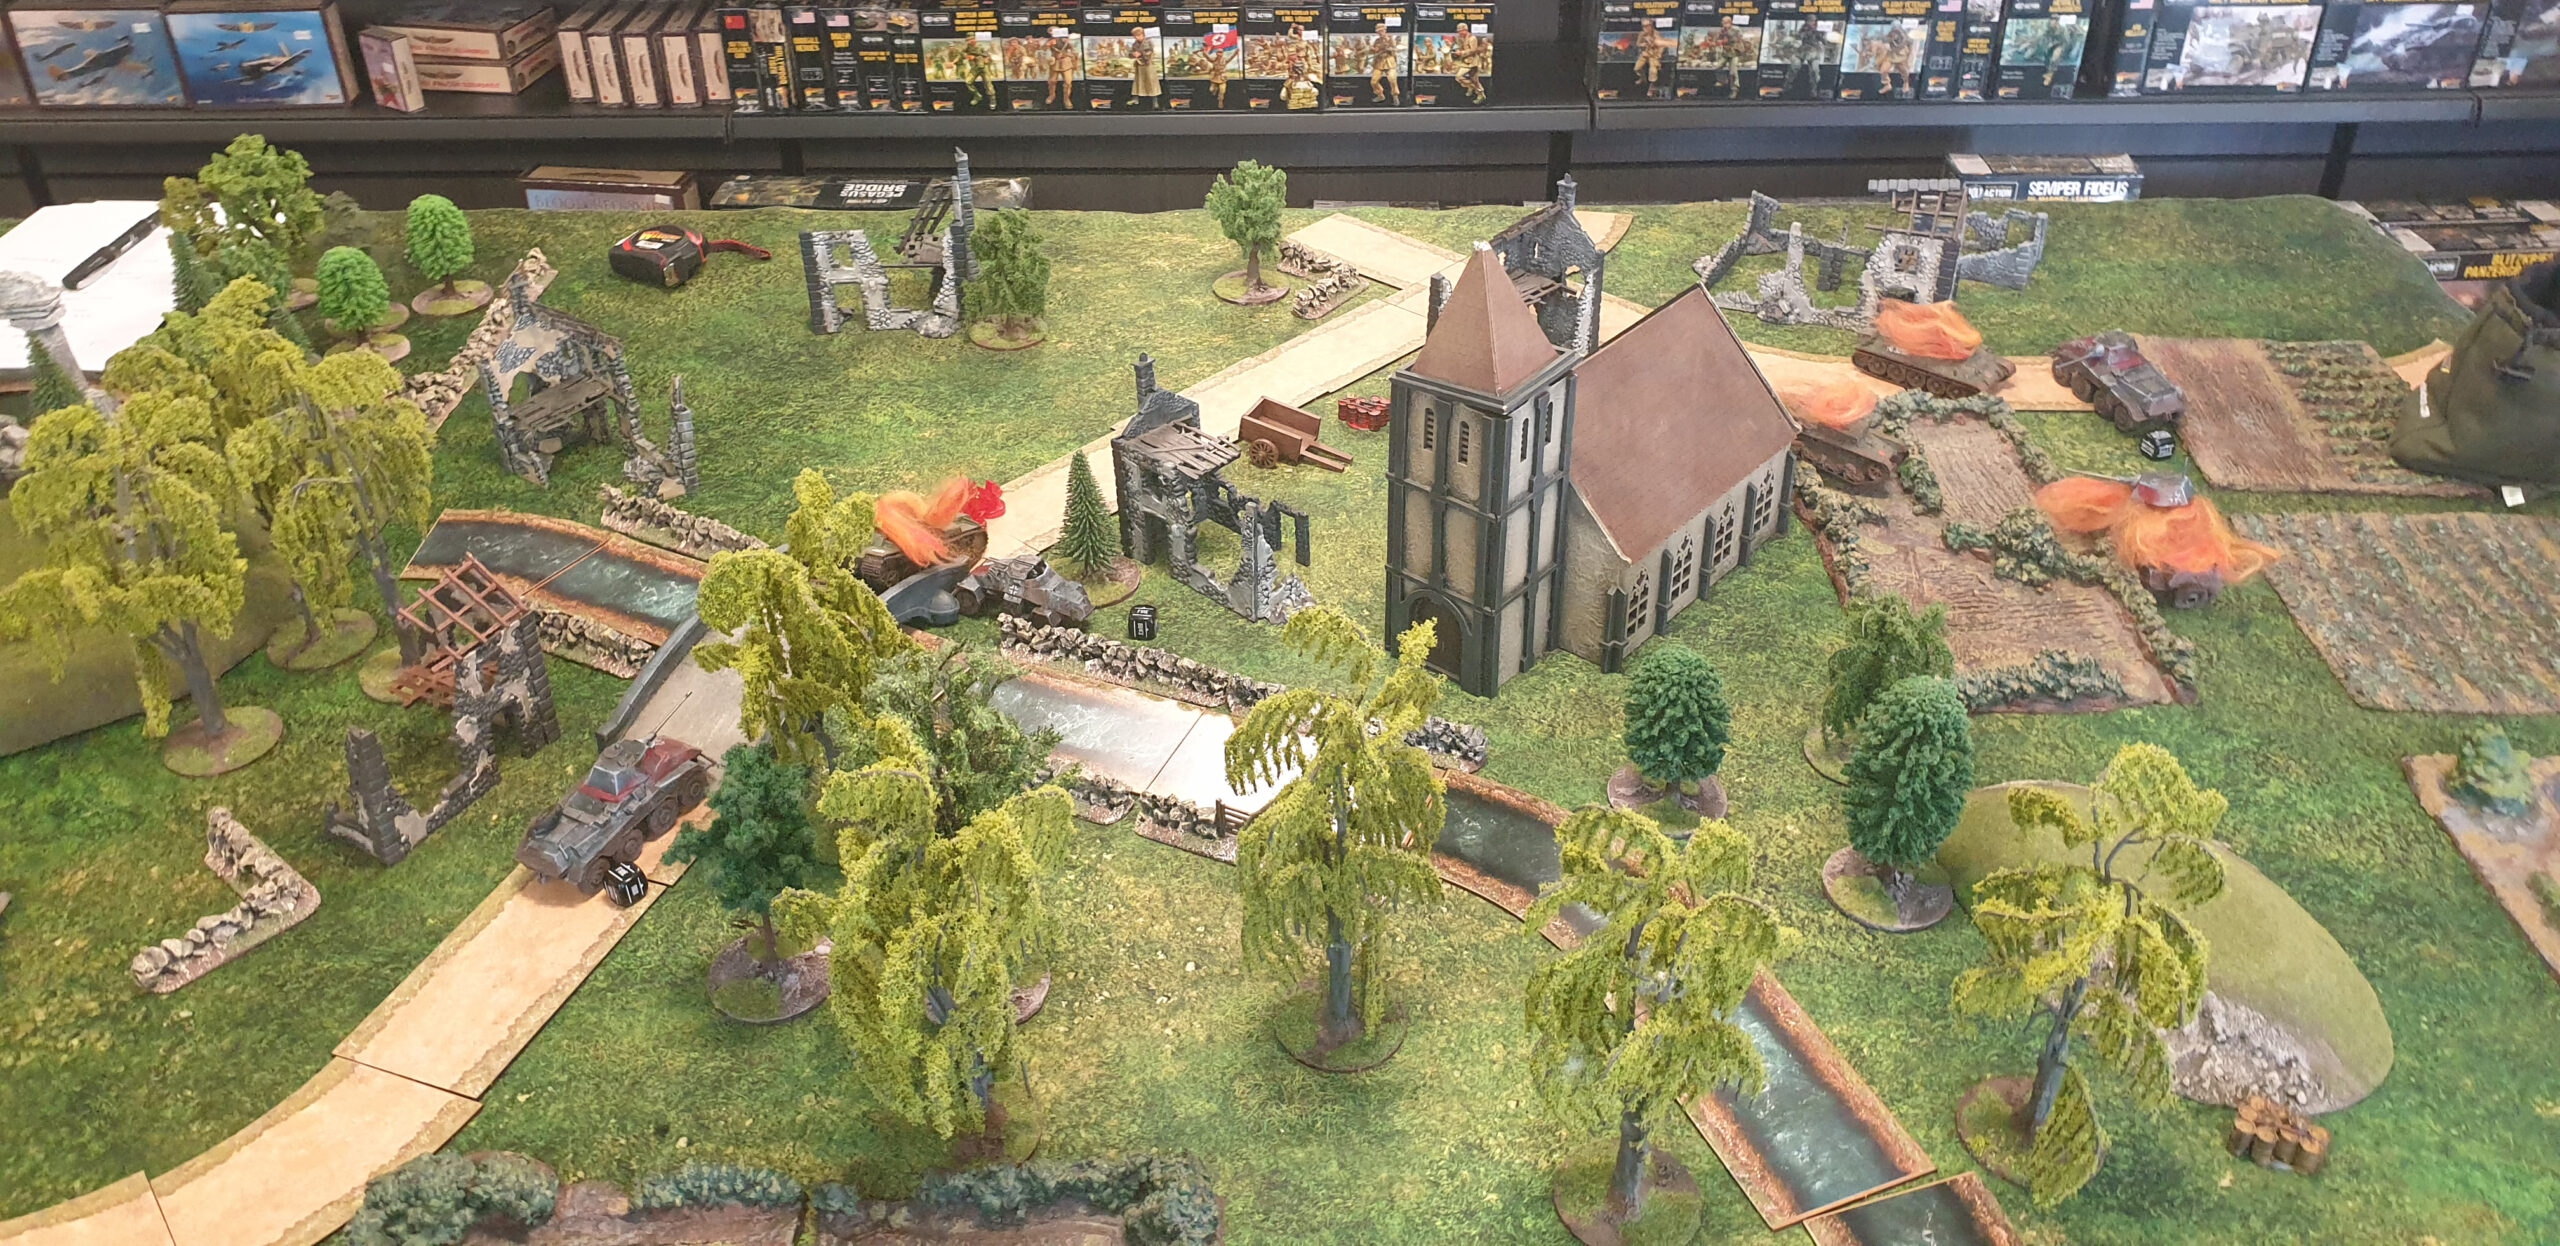
The training wheels are off! Having earnt some experience in their round one ‘blue-on-blue’ matches, with some of their tank crews even accruing new skills in the process, the generals are ready for the crucible of combat. Ammunition is now live as Axis and Allies converge; furious WW2 vehicular combat is joined in earnest – accompanied by a frankly concerning amount of good-natured heckling and displays of rivalry between more or less every roll of dice.
The second round of games saw our players battling it out for control of key objectives using a slightly modified version of the Tank Battle Scenario found on Page 20 of the Tank War supplement; games were once again played on a 4’x4’ area with D3+2 objectives to be fought over. Over to our generals for the rundown on each game:
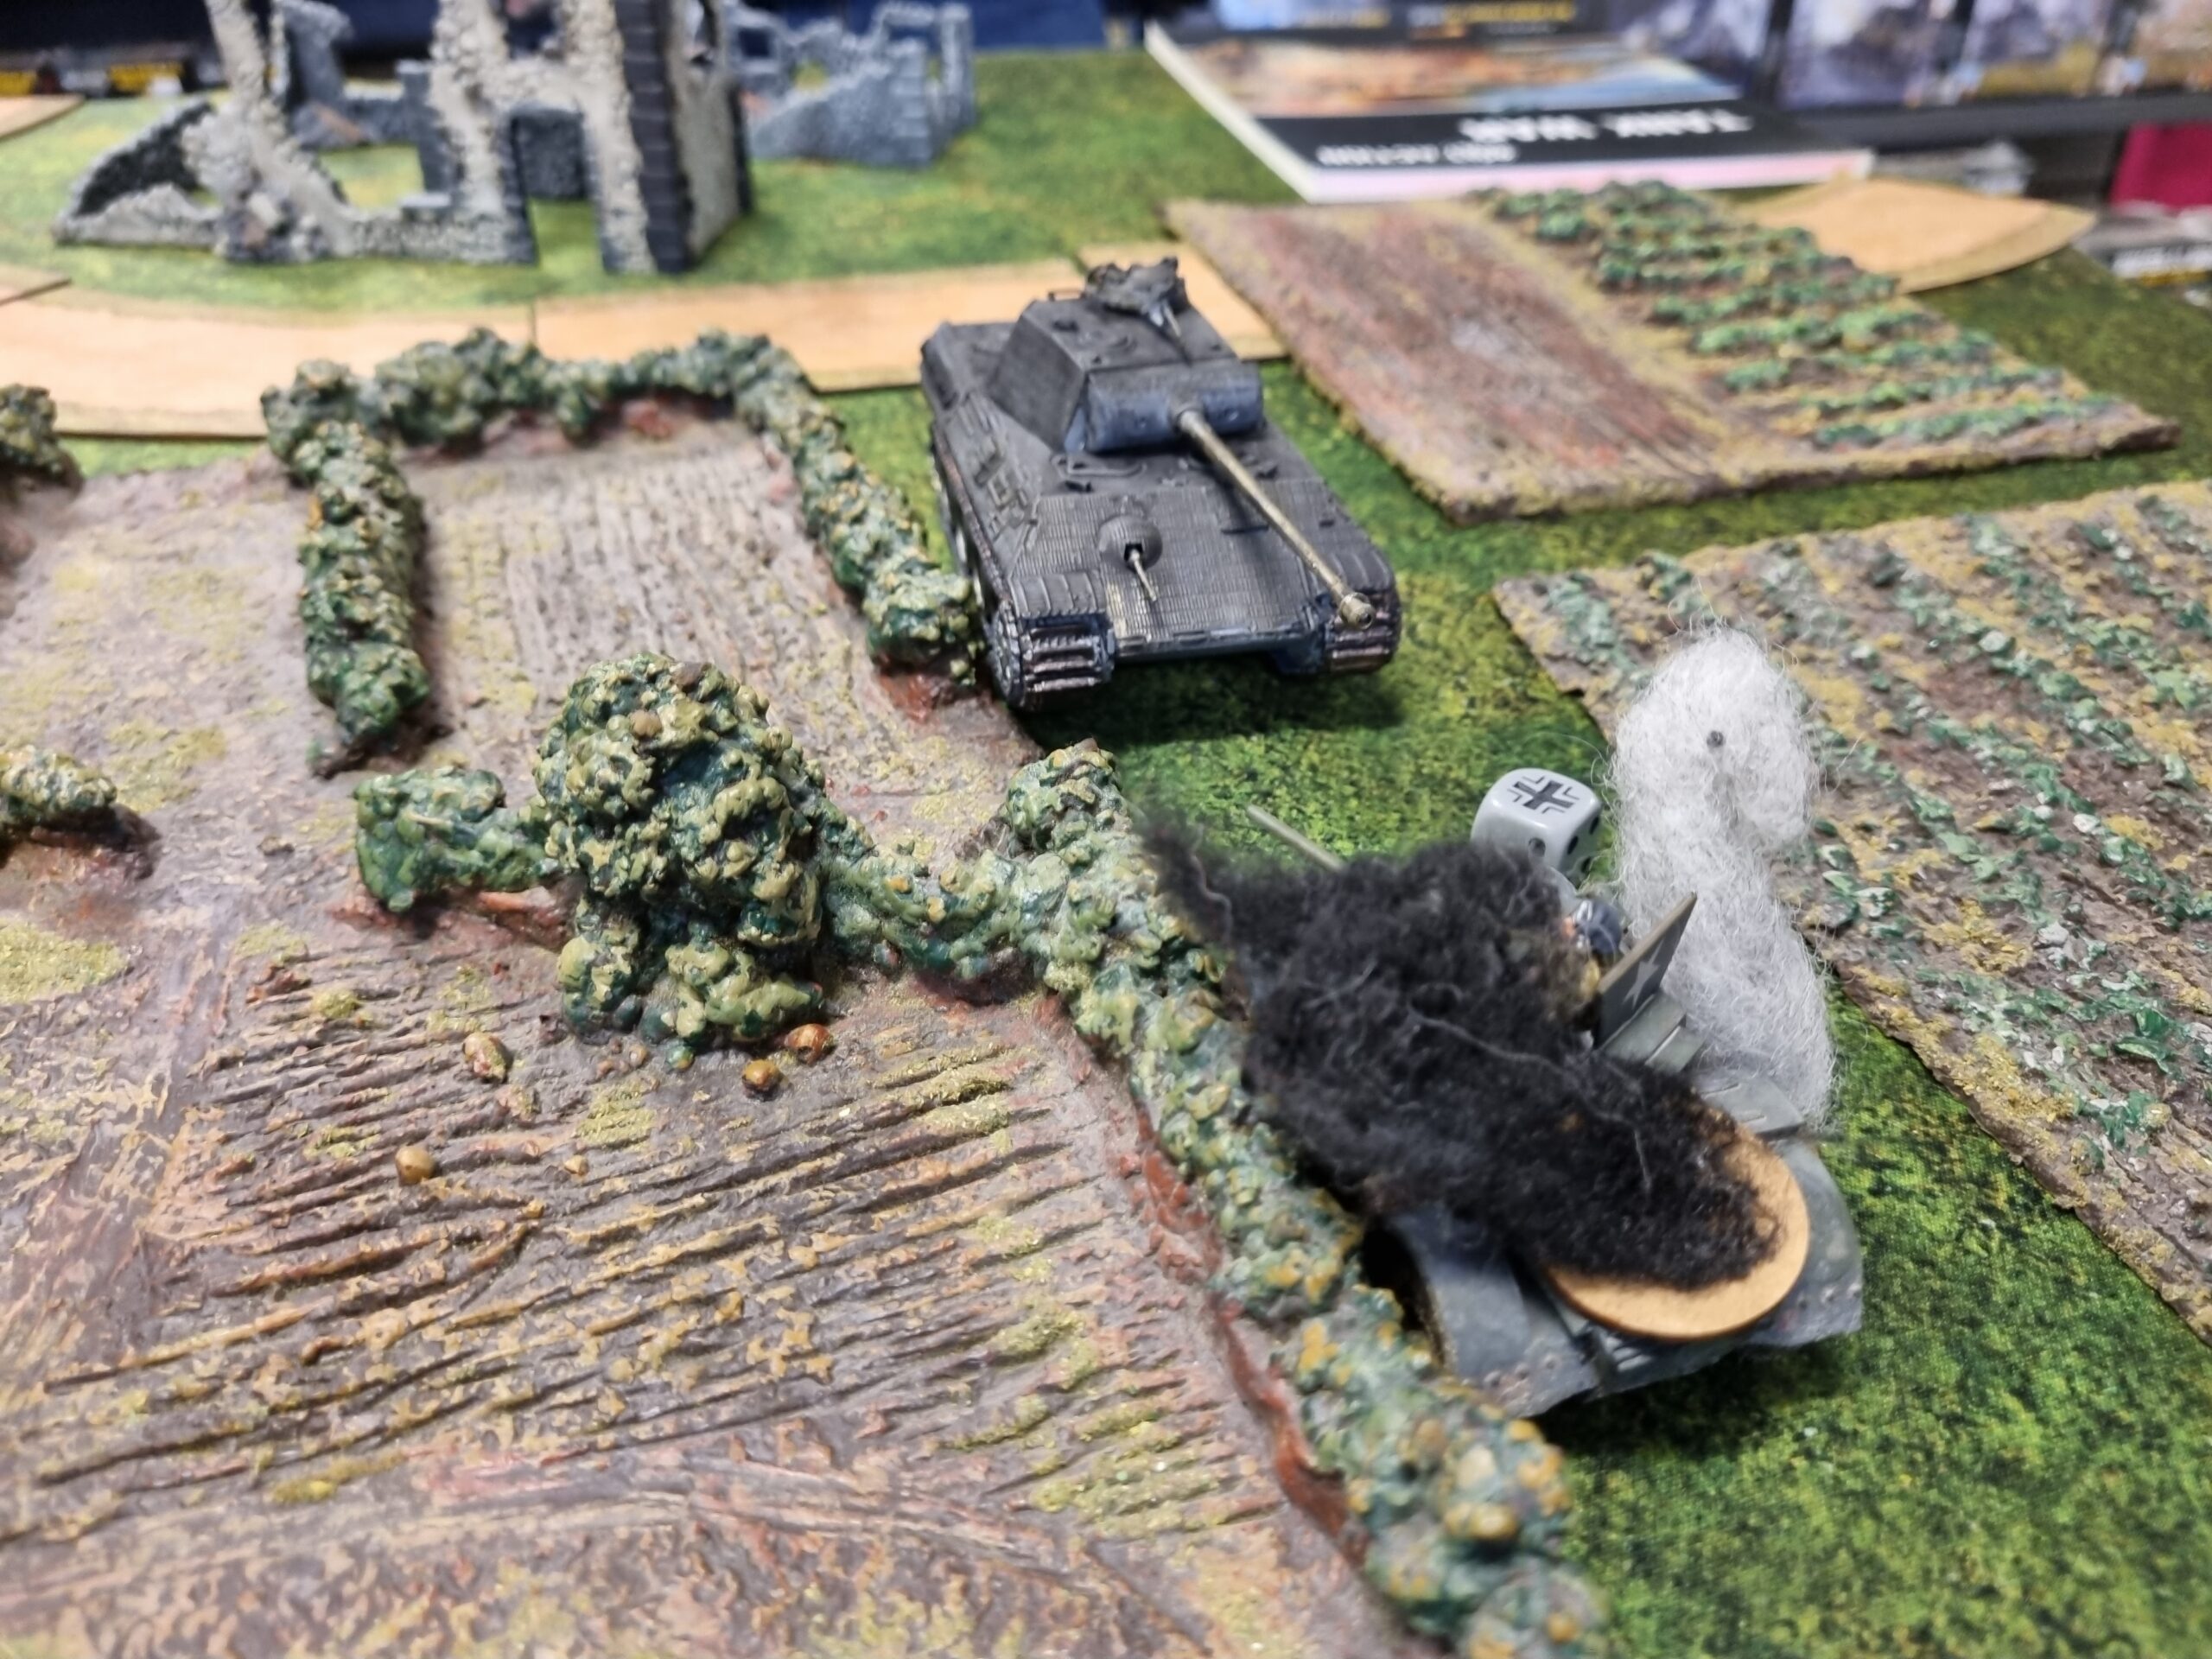
Bernard’s Soviets vs Jon’s Germans
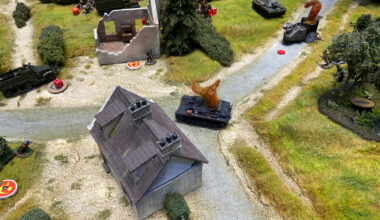
Bernard: We rolled low for the number of objectives, with only three total. One was placed on each side of the board and the third placed on the central bridge; it was clear that control of this objective would be crucial in determining the victor.
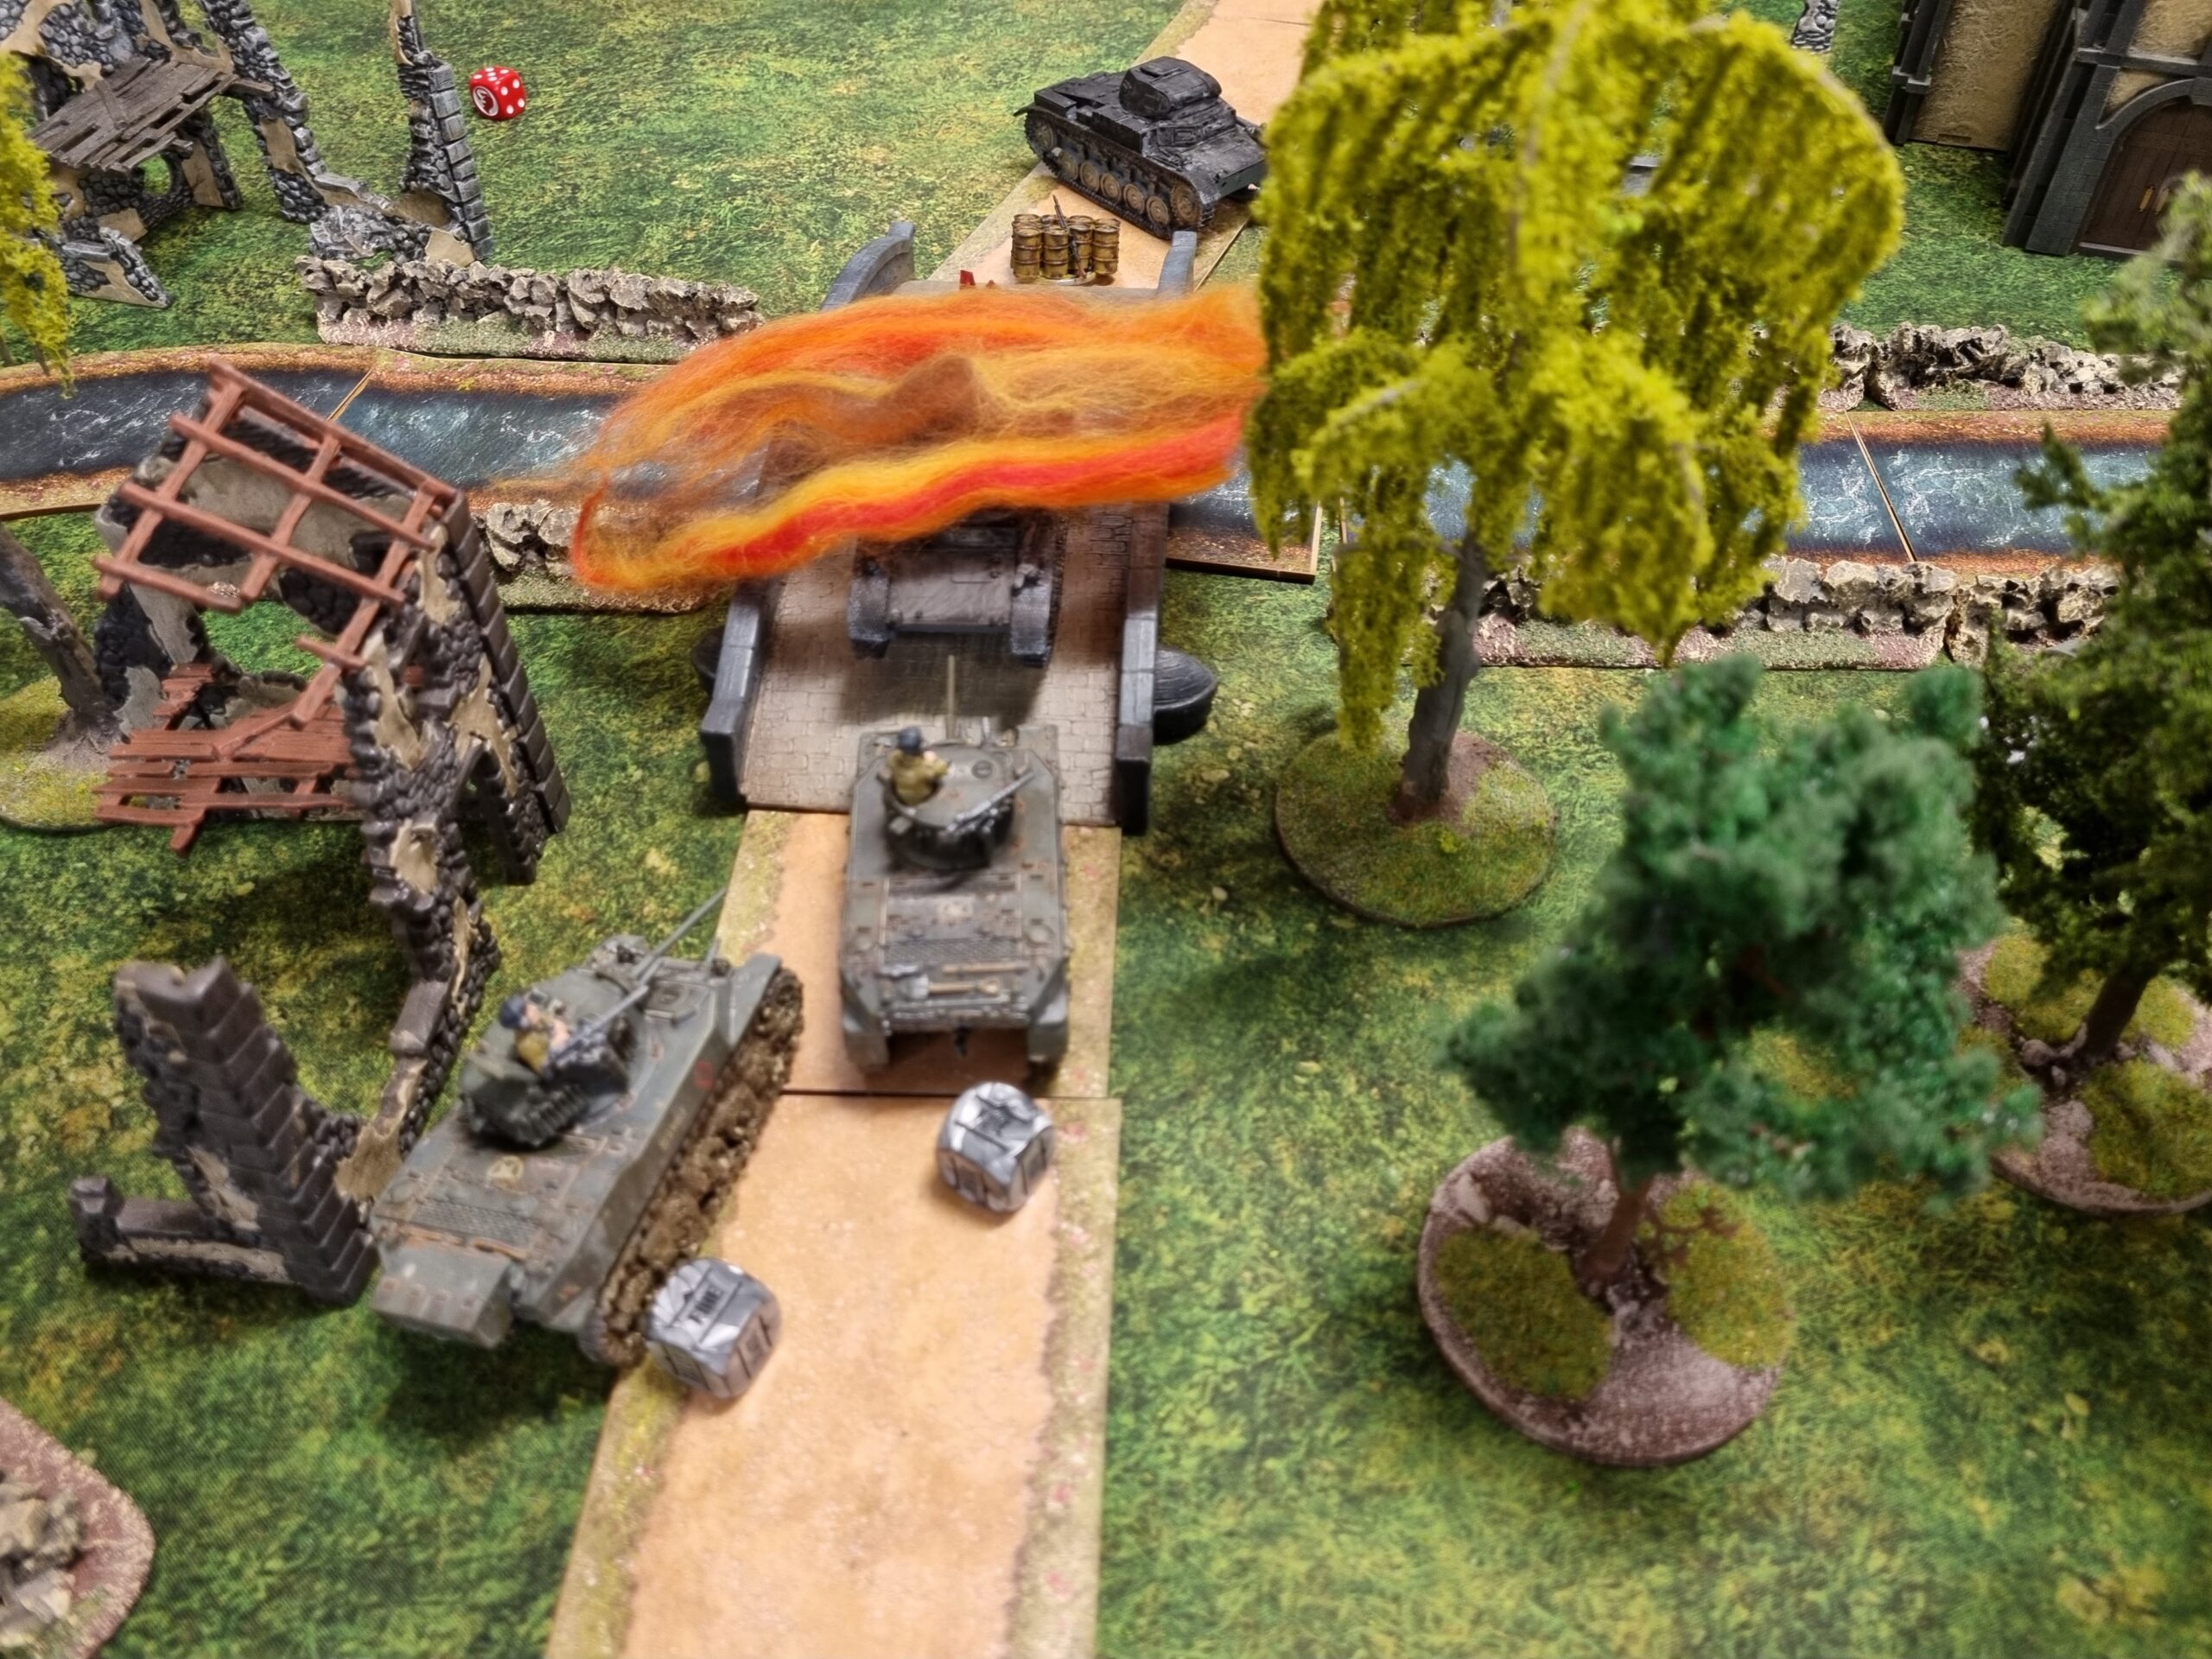
Turn 1: Jon’s Sd.Kfz 221 armoured car claimed the objective on the hill closest to his board edge, with two Puma armoured cars following suit to act as its protection. I therefore ran my KV-1 heavy tank up the road and stopped it just in front of the bridge to capture that objective, but Jon’s remaining Puma rolled up opposite to contest it. The T34/76 medium tank moved up too, whilst the OT-26 flamethrowing light tank captured the remaining objective.
Turn 2: The first shot of the game sailed wide as the KV-1 fired upon the closest Puma. Two of the Pumas neglected to return fire, instead seeking cover behind the ruined house and whatever foliage they could find to mask their approach. Unperturbed, the T34/76 moved up and fired at the closer of the two but once again failed to hit anything. The last of the three Pumas actually scored the first hit of the game, but the KV-1’s thick armour held true. The 221 turned, leaving the objective to set up a potential flanking shot on the KV-1 in a future turn. The OT-26 was last to move up, but the flame it spouted proved true to the disappointing round of Soviet shooting. Thankfully, it passed its fuel test.
Turn 3: I finally hit something! The OT-26 rumbled forward, firing at point blank at the command Puma, but Jon sneakily passes his break test on a double one, before unleashing a barrage of consecutive sixes! The Puma lurking behind the house drew a bead on the T34/76 that had been stalking it, obliterating the Soviet tank – much cursing ensued. Concerningly, the other Pumas managed to inflict a number of pins on my KV-1 before it had a chance to activate – though suffering no damage, these pins were enough to prevent it from passing its command check. Elsewhere, other shots flew and missed their marks and the 221 repositioned, once again peeking at the side of the KV-1.

Turn 4: I drew the first dice with glee and unleashed the full might of the little OT-26 upon the command Puma. With a distressing six pin markers already suffered, the crew promptly abandoned the vehicle to its fate – this kill put the OT-26 very close to gaining a skill. Perhaps in retribution, the 221 then finally fired its long-threatened shot into the flank of the KV-1, the Panzerbüchse particularly potent at point blank range. The KV-1 survived, but was forced down, with four pin markers inflicted. Not satisfied, Jon fired one of the remaining Pumas at it, this time finding the fuel reserve and detonating the tank. Spurred on by his fellow’s tremendous efforts, the last Puma fired upon the flamethrower tankette. Through a combination of weak side armour and the volatile flamethrower fuel, the OT-26 ceased to be. With my entire force totally obliterated, the objectives became just a little bit irrelevant…
After Action

Bernard: I enjoyed the game, it was very relaxed but played at a quick pace, lasting only about 45 minutes. I did my usual thing of chucking the heavy tank forward, knowing it needed to try and get an early kill; unfortunately the gunner seemed to have been away with the fairies and couldn’t hit a barn door. The same seemed to be true of the T34/76. At least the OT-26 did quite well (as usual) – forcing break tests when it hits is very useful.

Jon: This game was much closer than my last. There was lots of close-in action between my Pumas and Bernard’s KV-1 whilst they were wrestling for control of the central bridge objective. I also discovered how scary flamethrower tanks can be after my command tank crew abandoned their burning vehicle – and rightly so with that many pins! I’m still relatively new to Bolt Action so I’m extremely pleased to have scored my first official win, especially from such a fast-paced ferocious game that was buckets of fun.
Conor Hind’s British vs Conor Trainer‘s Germans
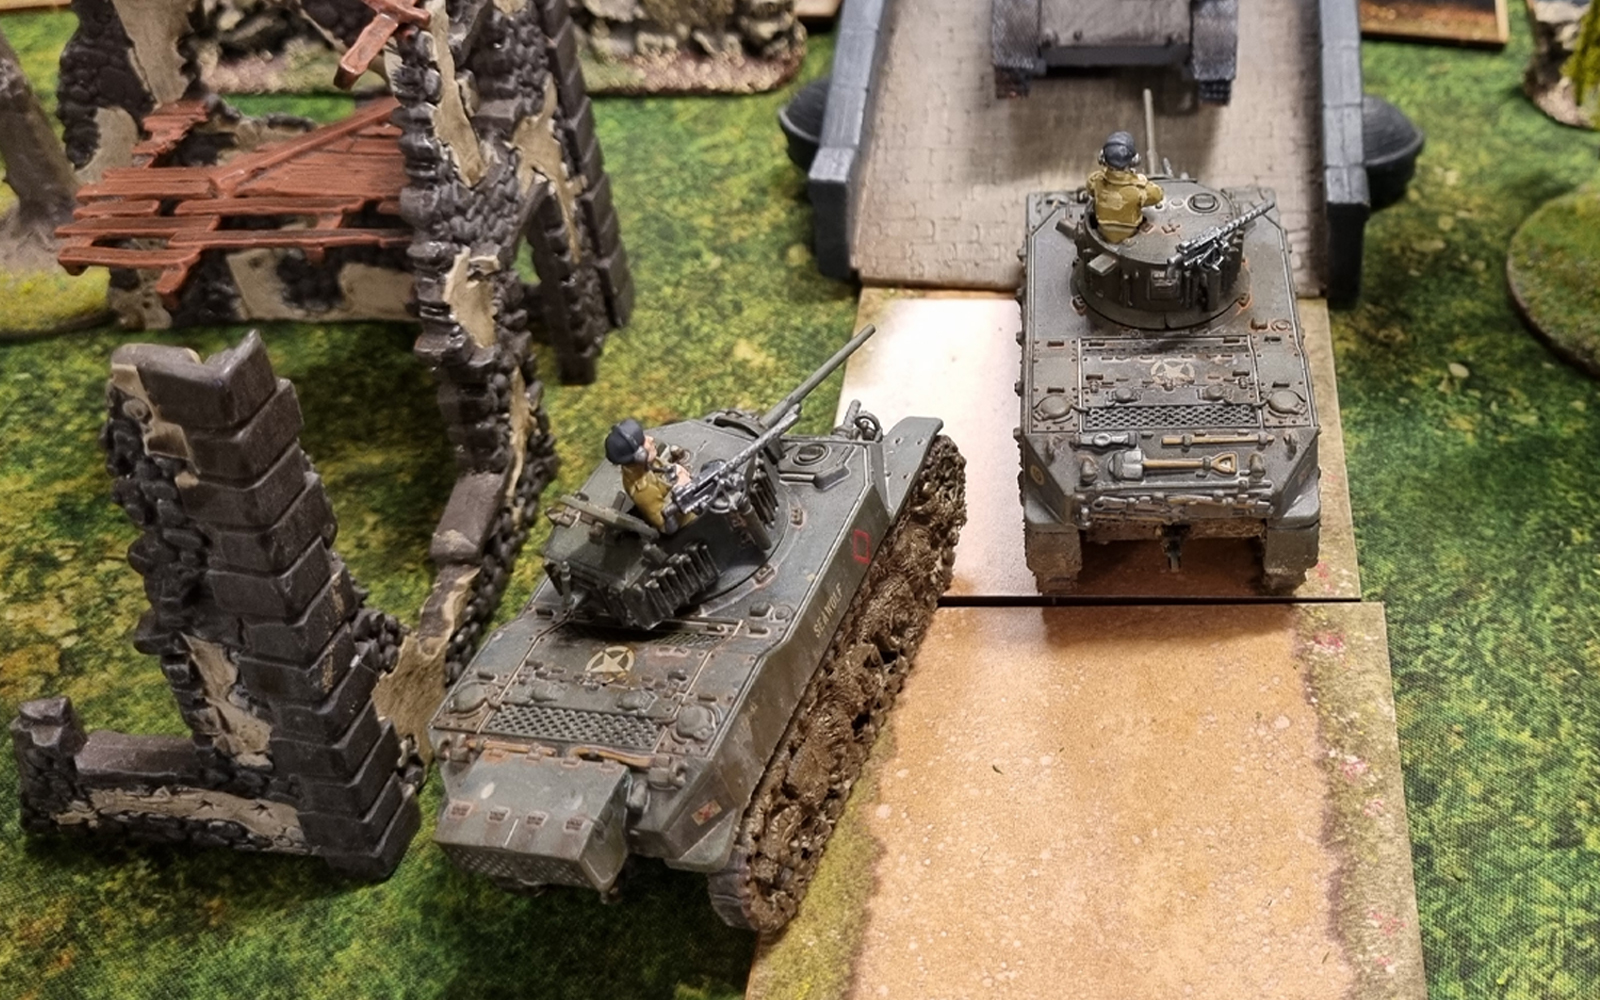
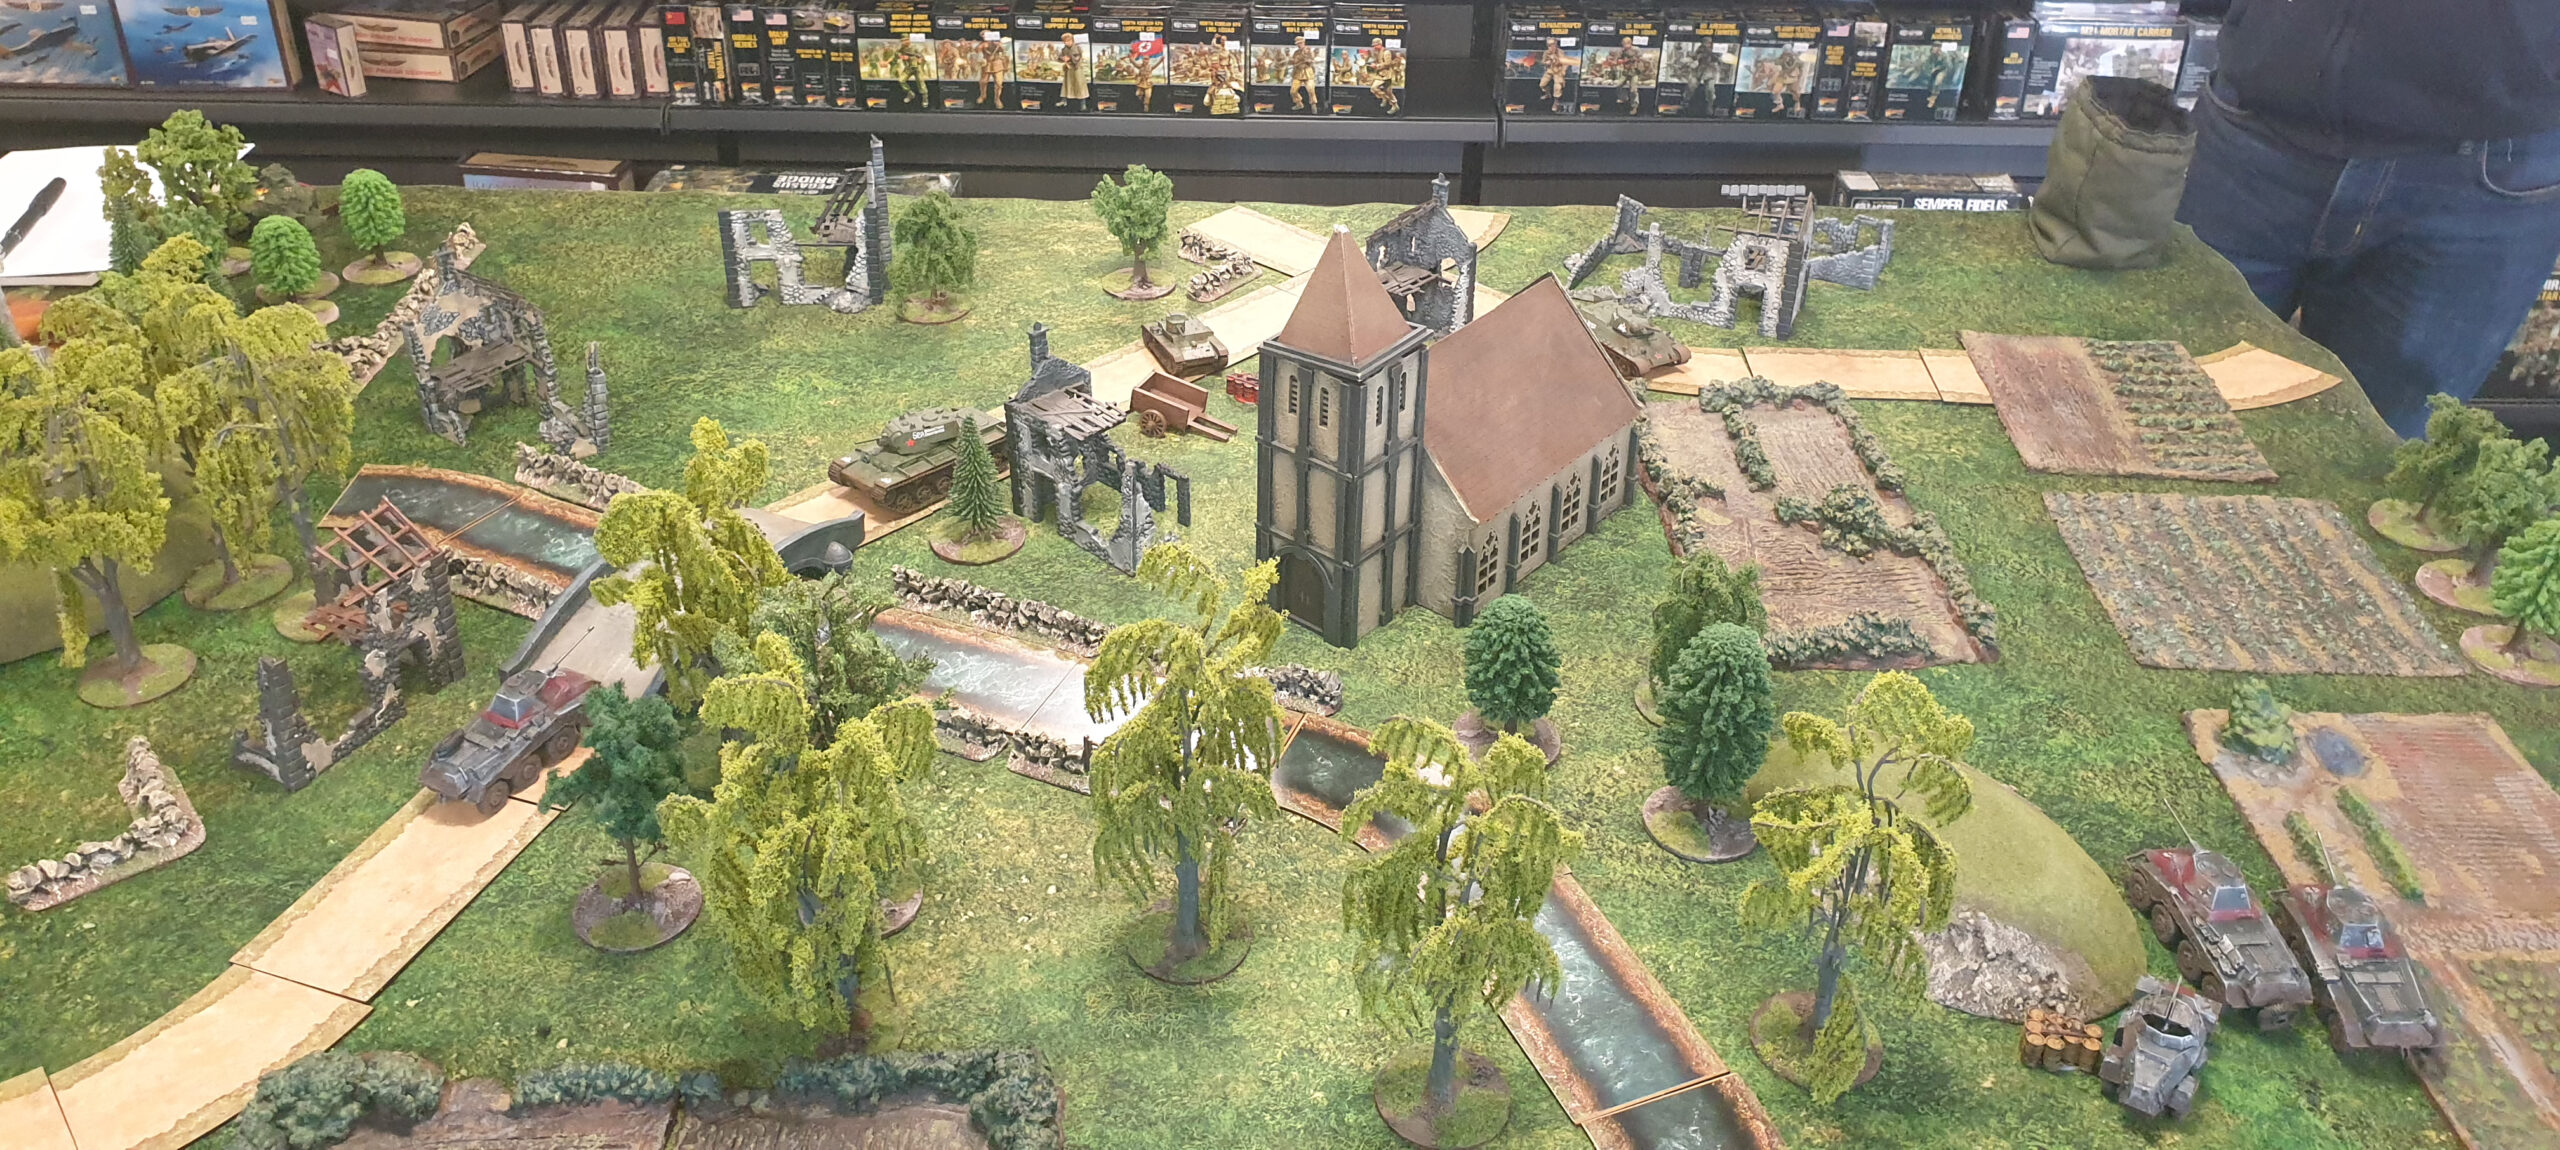
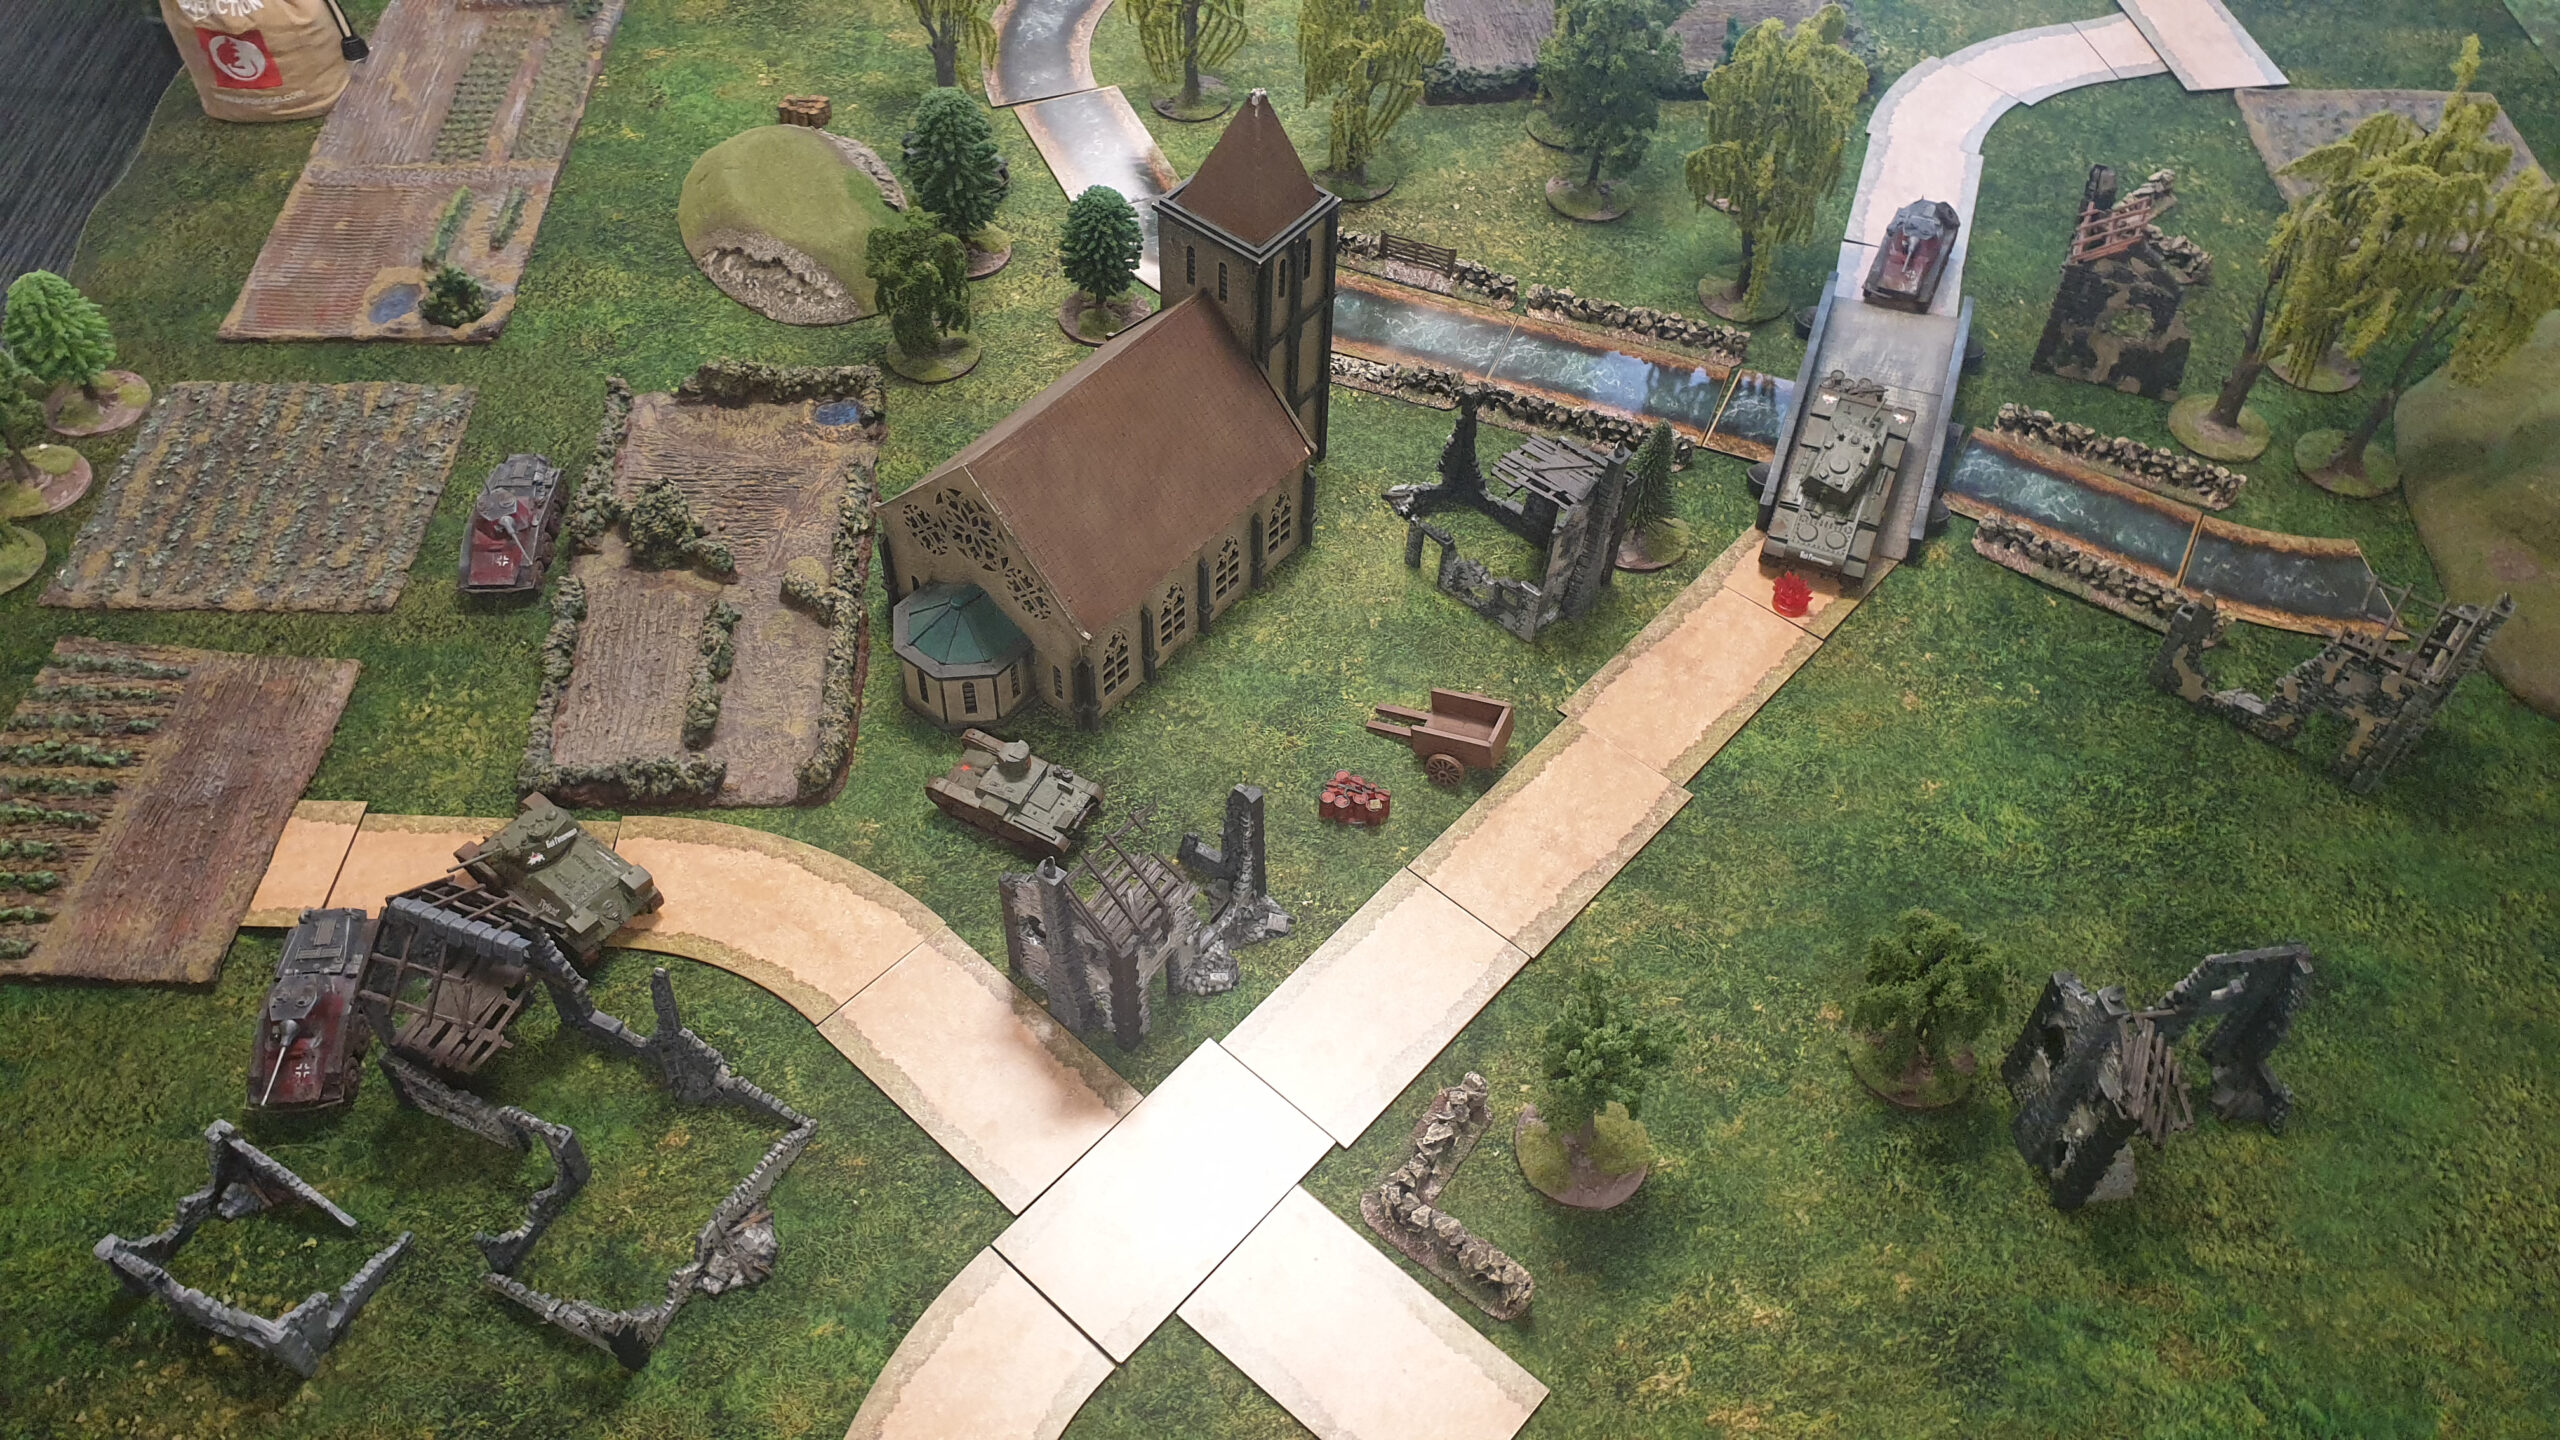
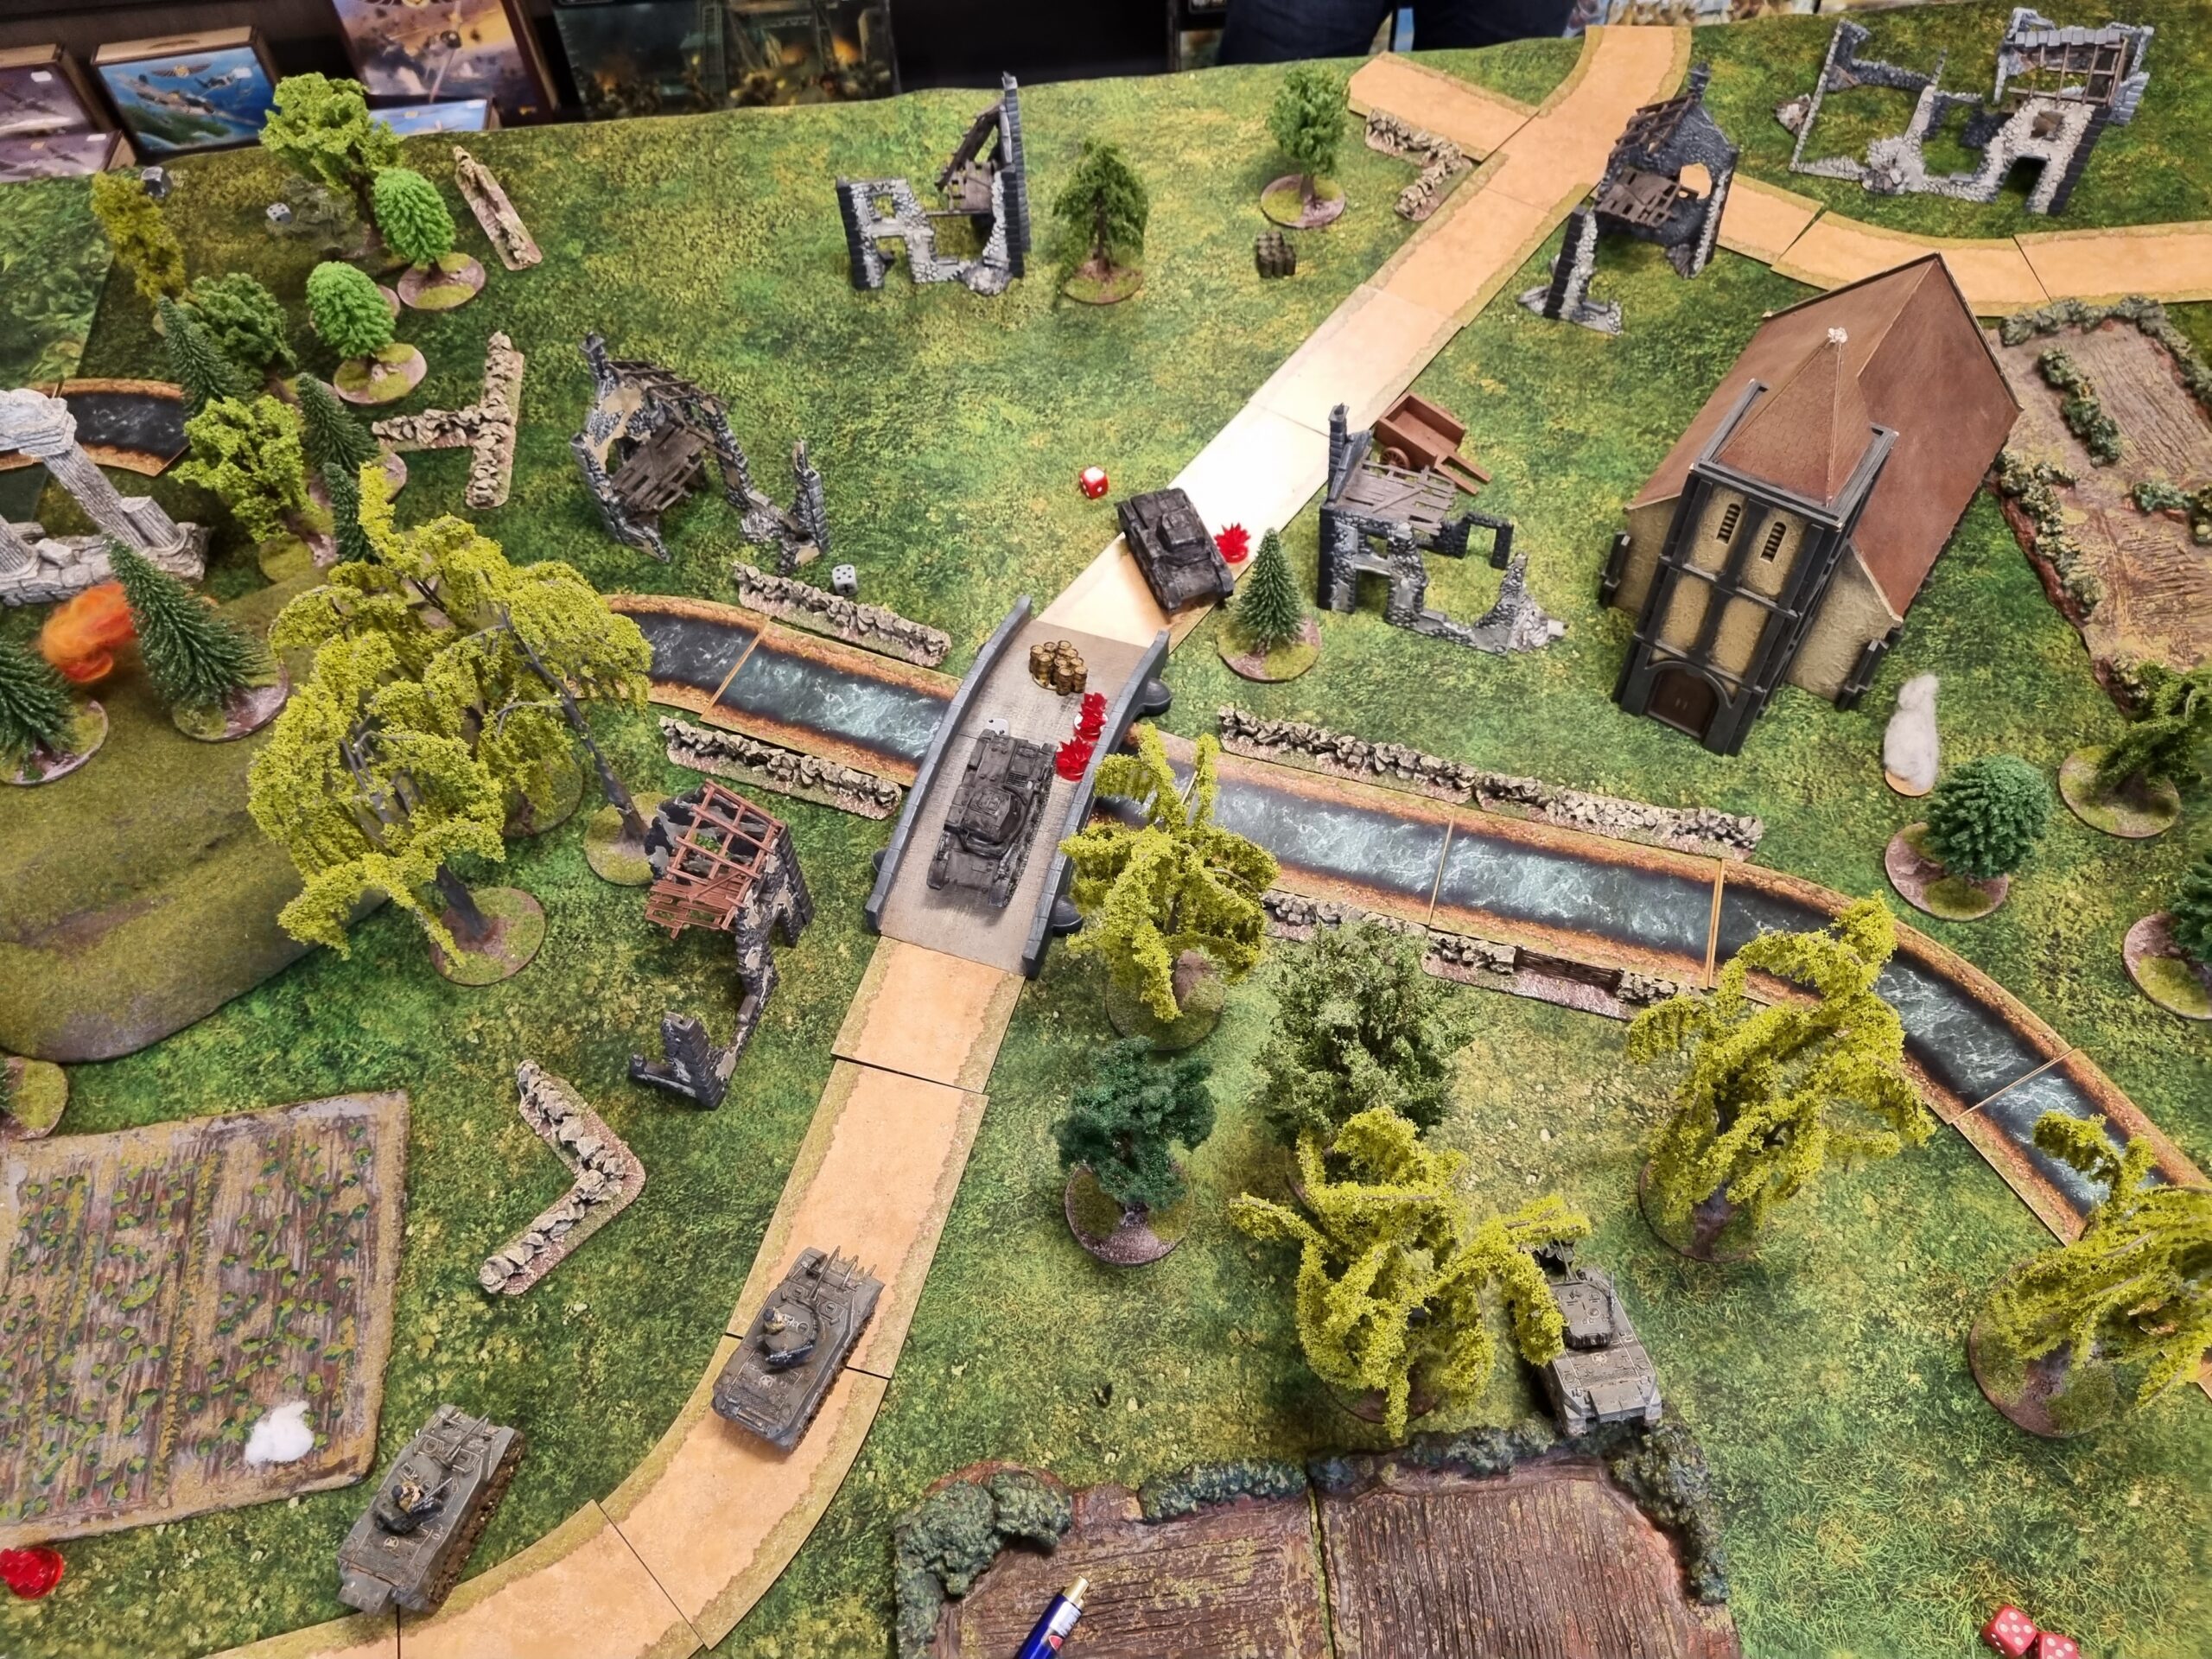
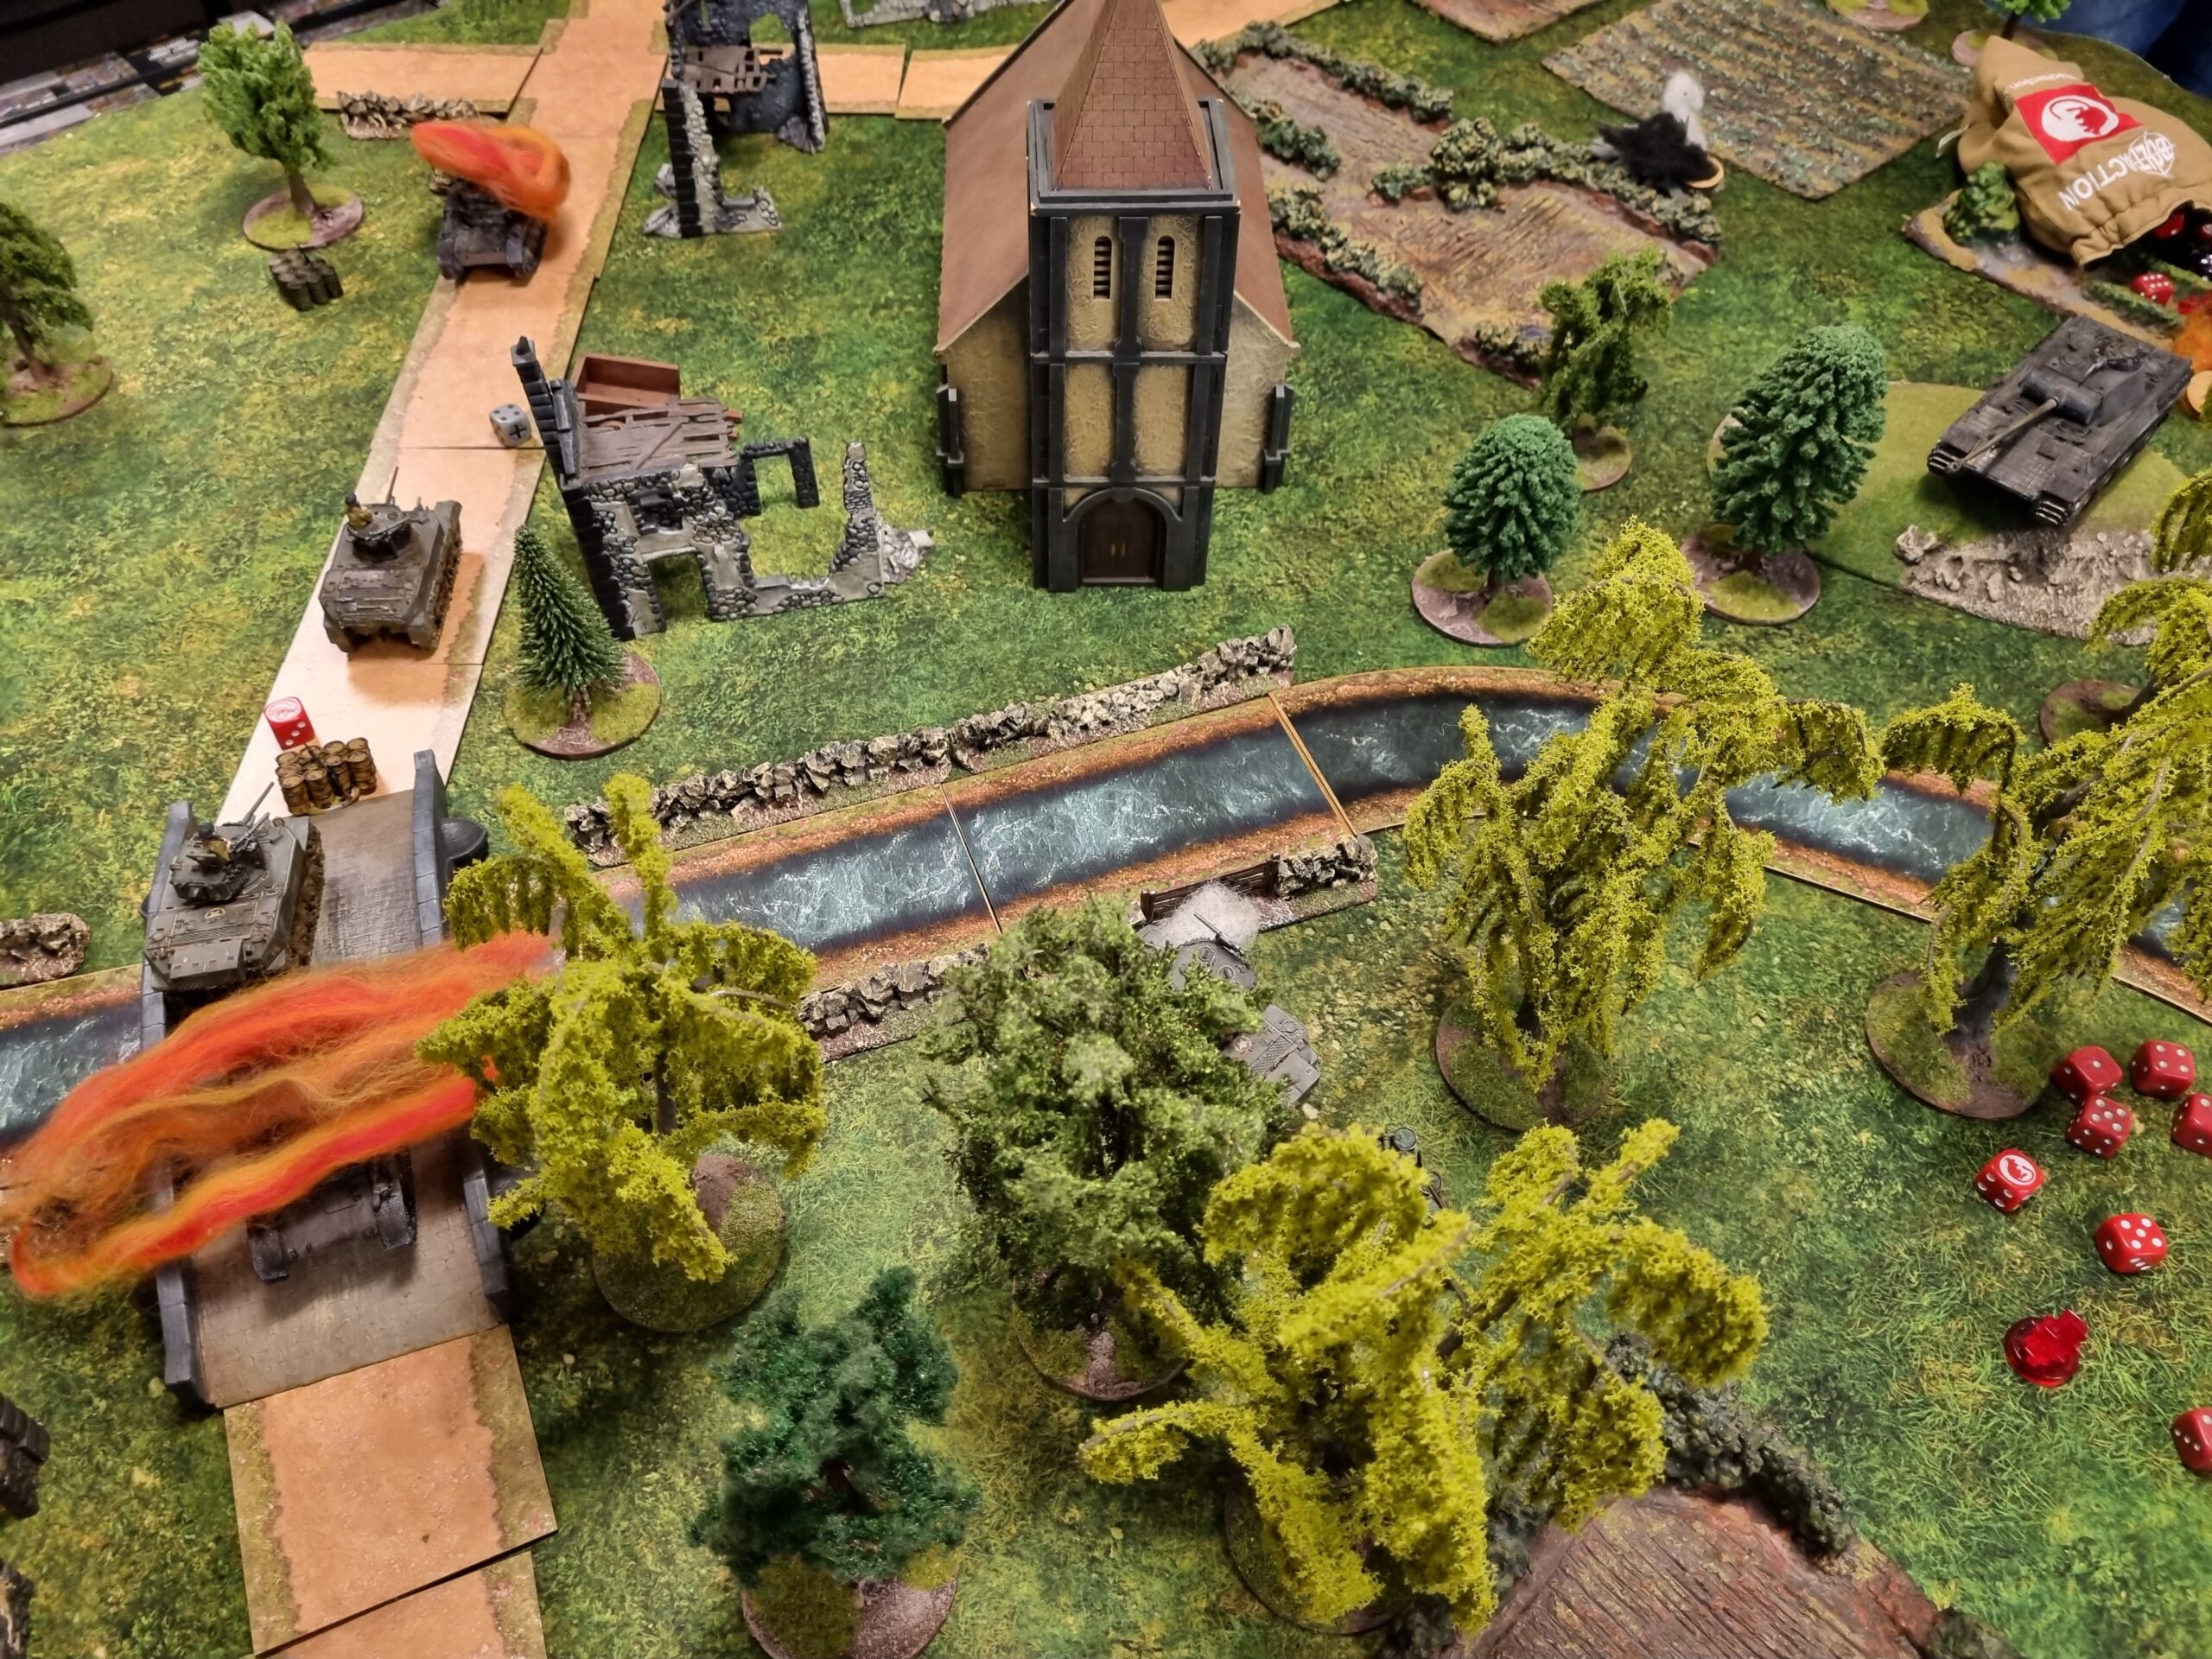
Conor H: The board we were playing on had plenty of line of sight blocking terrain, a road running up the centre of the board, a river, and a bridge. We rolled three objectives, one near each player’s deployment area, and the third on a central bridge. Crucially, this was the only route across a river that spanned the board. Knowing full well that this would be a chokepoint and a dead tank would stop any advance, we agreed that tracked vehicles could pass a knocked-out vehicle, rather than preventing any access to the river-locked objectives for either player.
Turn 1: Conor T immediately zoomed both his Panzer II light tanks down the centre of the road to secure the bridge objective, whilst I advanced Assegai (all my Stuart light tanks are named), and the Daimler armoured car up the road, taking fruitless pot-shots at the Panzers. In an unexpectedly aggressive turn, Conor T rolled his Panther medium tank up the side of the board and fired at close range at the poor, little, exposed Daimler. The diminutive recce vehicle was immobilised twice over, prompting the crew to hightail it from the battle.
Perhaps hearing through the radio network that the Daimler had been knocked out, the commander of Seawolf ordered a speedy advance towards the bridge objective and took a well-aimed shot against the foremost Panzer II’s position, immobilising the tank on the bridge. Meanwhile, Helen advanced into the treeline to secure the objective on the British riverbank, bringing the total of objectives captured to one each, the objective on the German side left ignored for the time being.
Turn 2: Fresh from its initial triumph, the Panther surged forward gaining a superb position overlooking the British side of the river. Seawolf fired point-blank into the beleaguered Panzer II, but it weathered the storm, albeit now with four pins! Assegai tried to one-up his platoon commander by attempting to dispatch the German tank once and for all, but failed. Helen shuffled up closer to the action (wary of the Panther angling its turret at her flank) and took a shot at the Panzer II on the far side of the bridge stunning its crew. Despite my best efforts, I failed to cross the river and the objectives remained at one each.
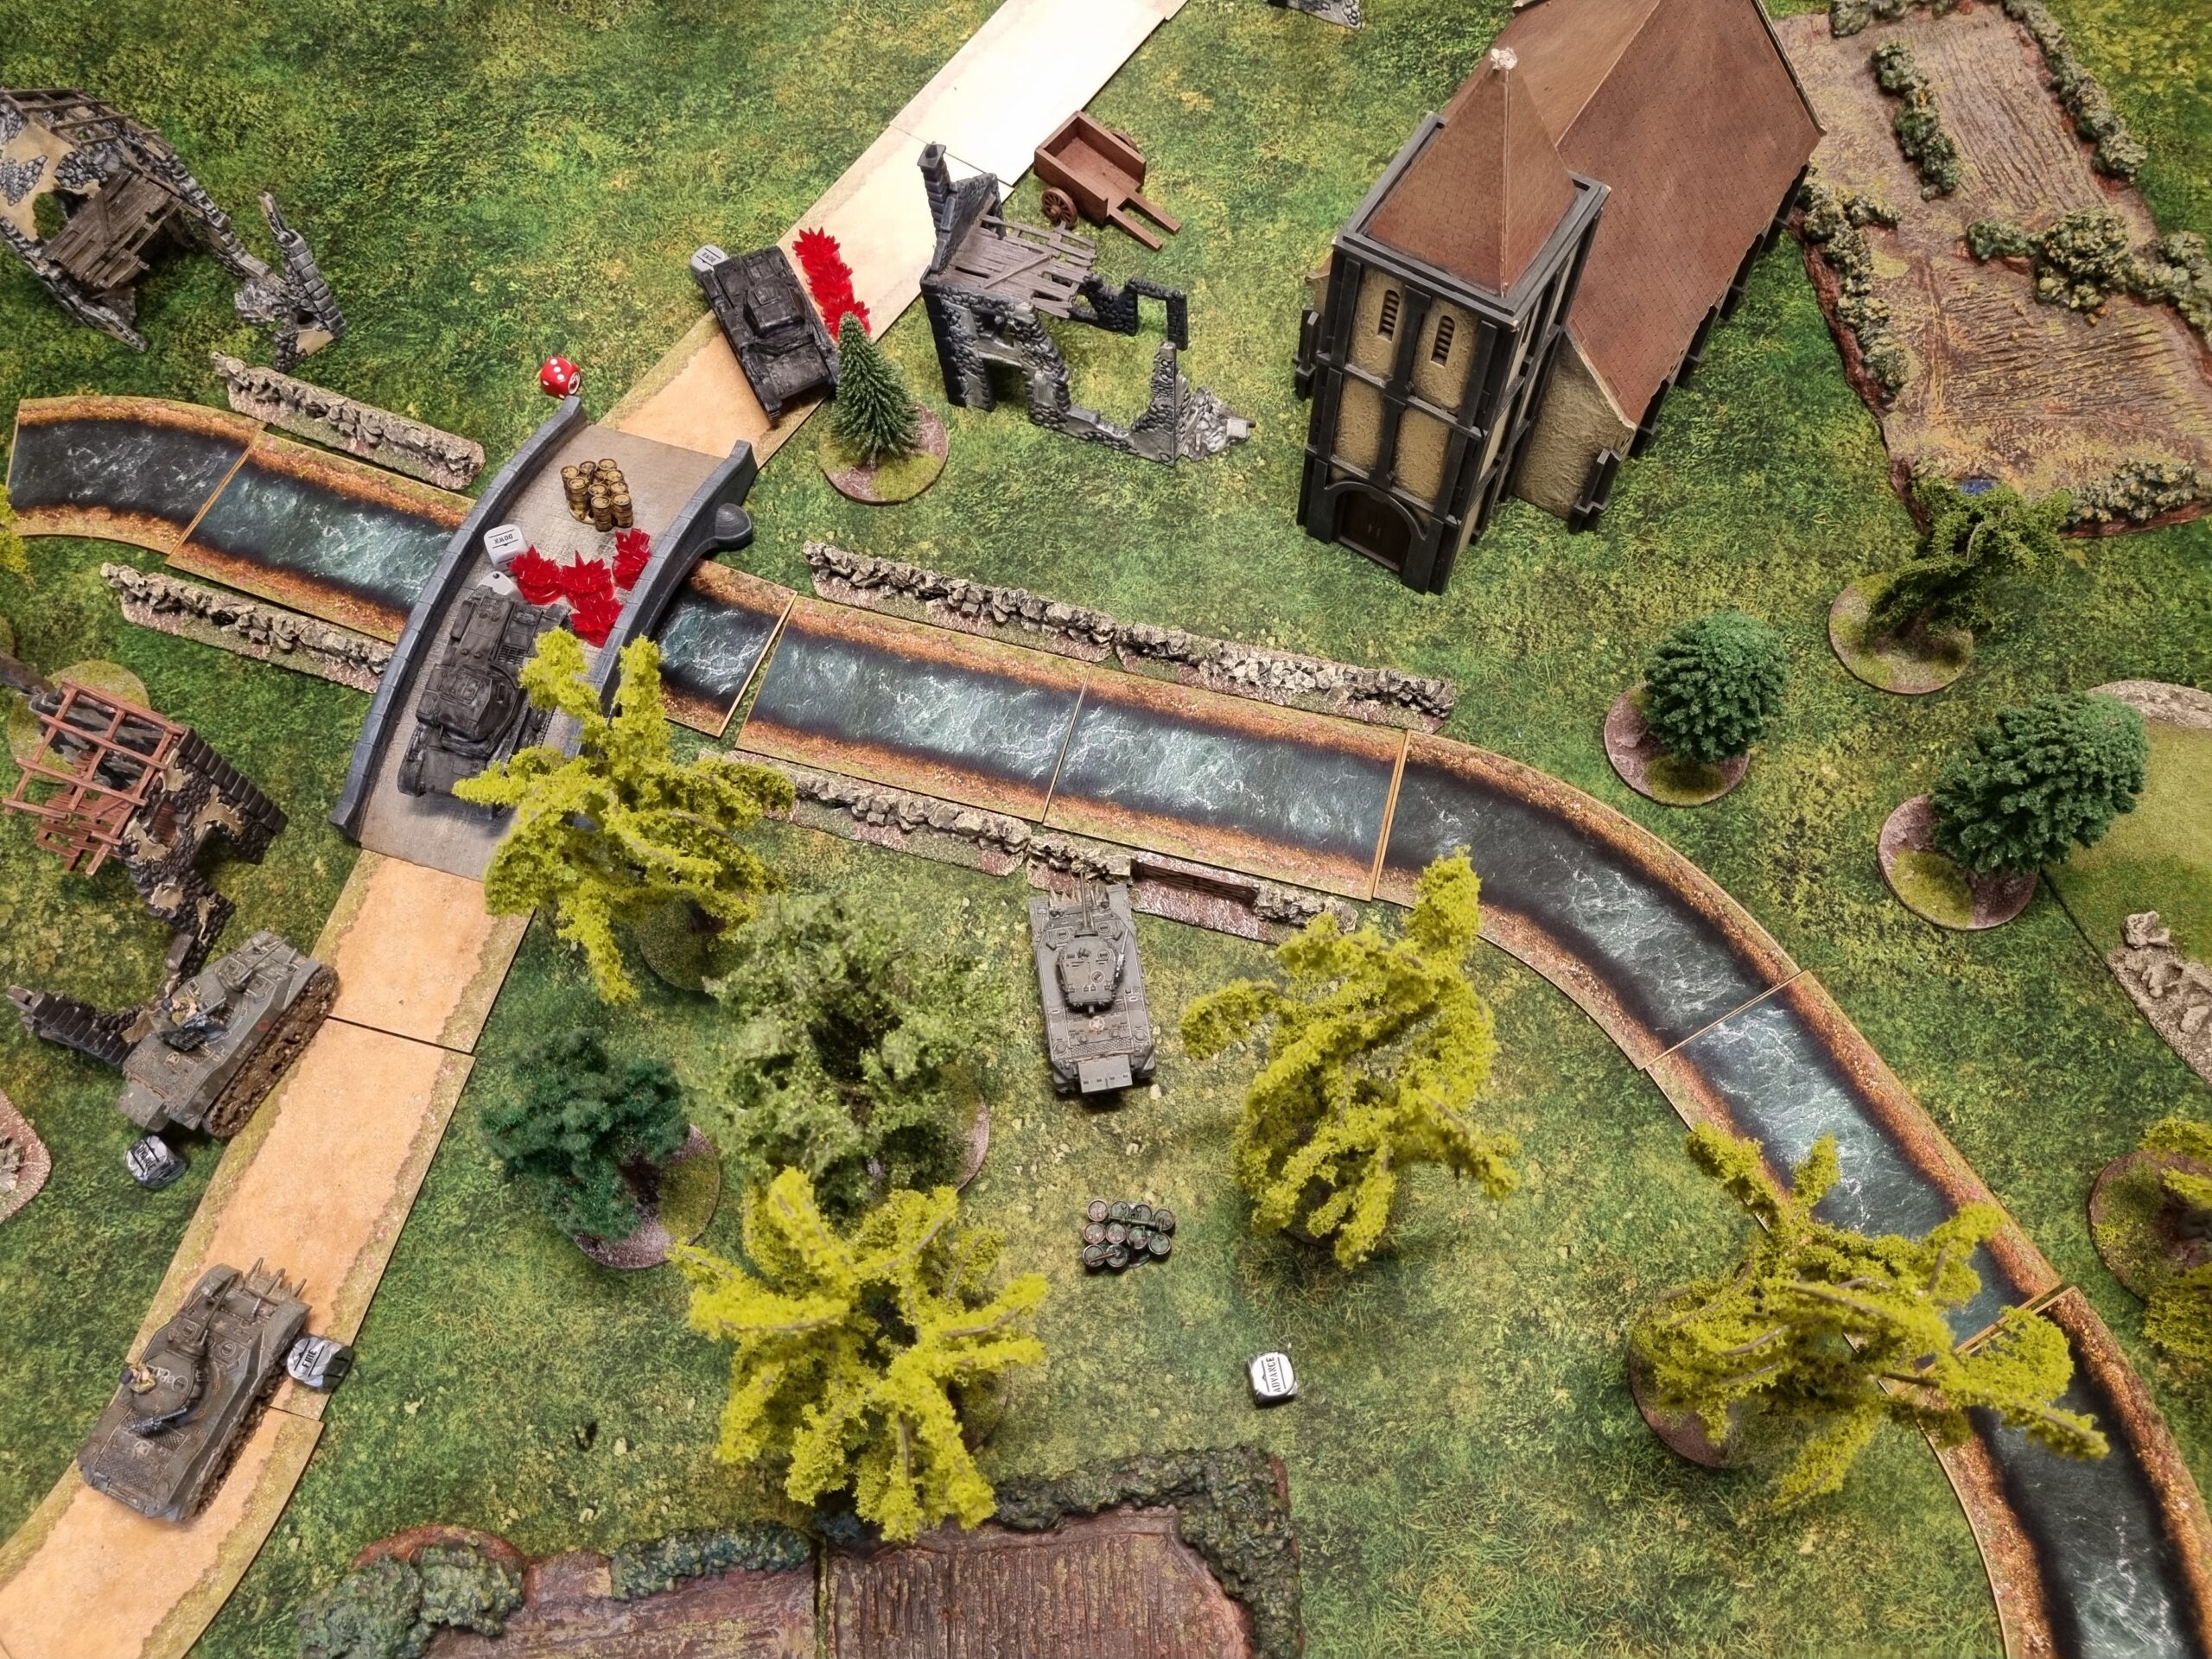
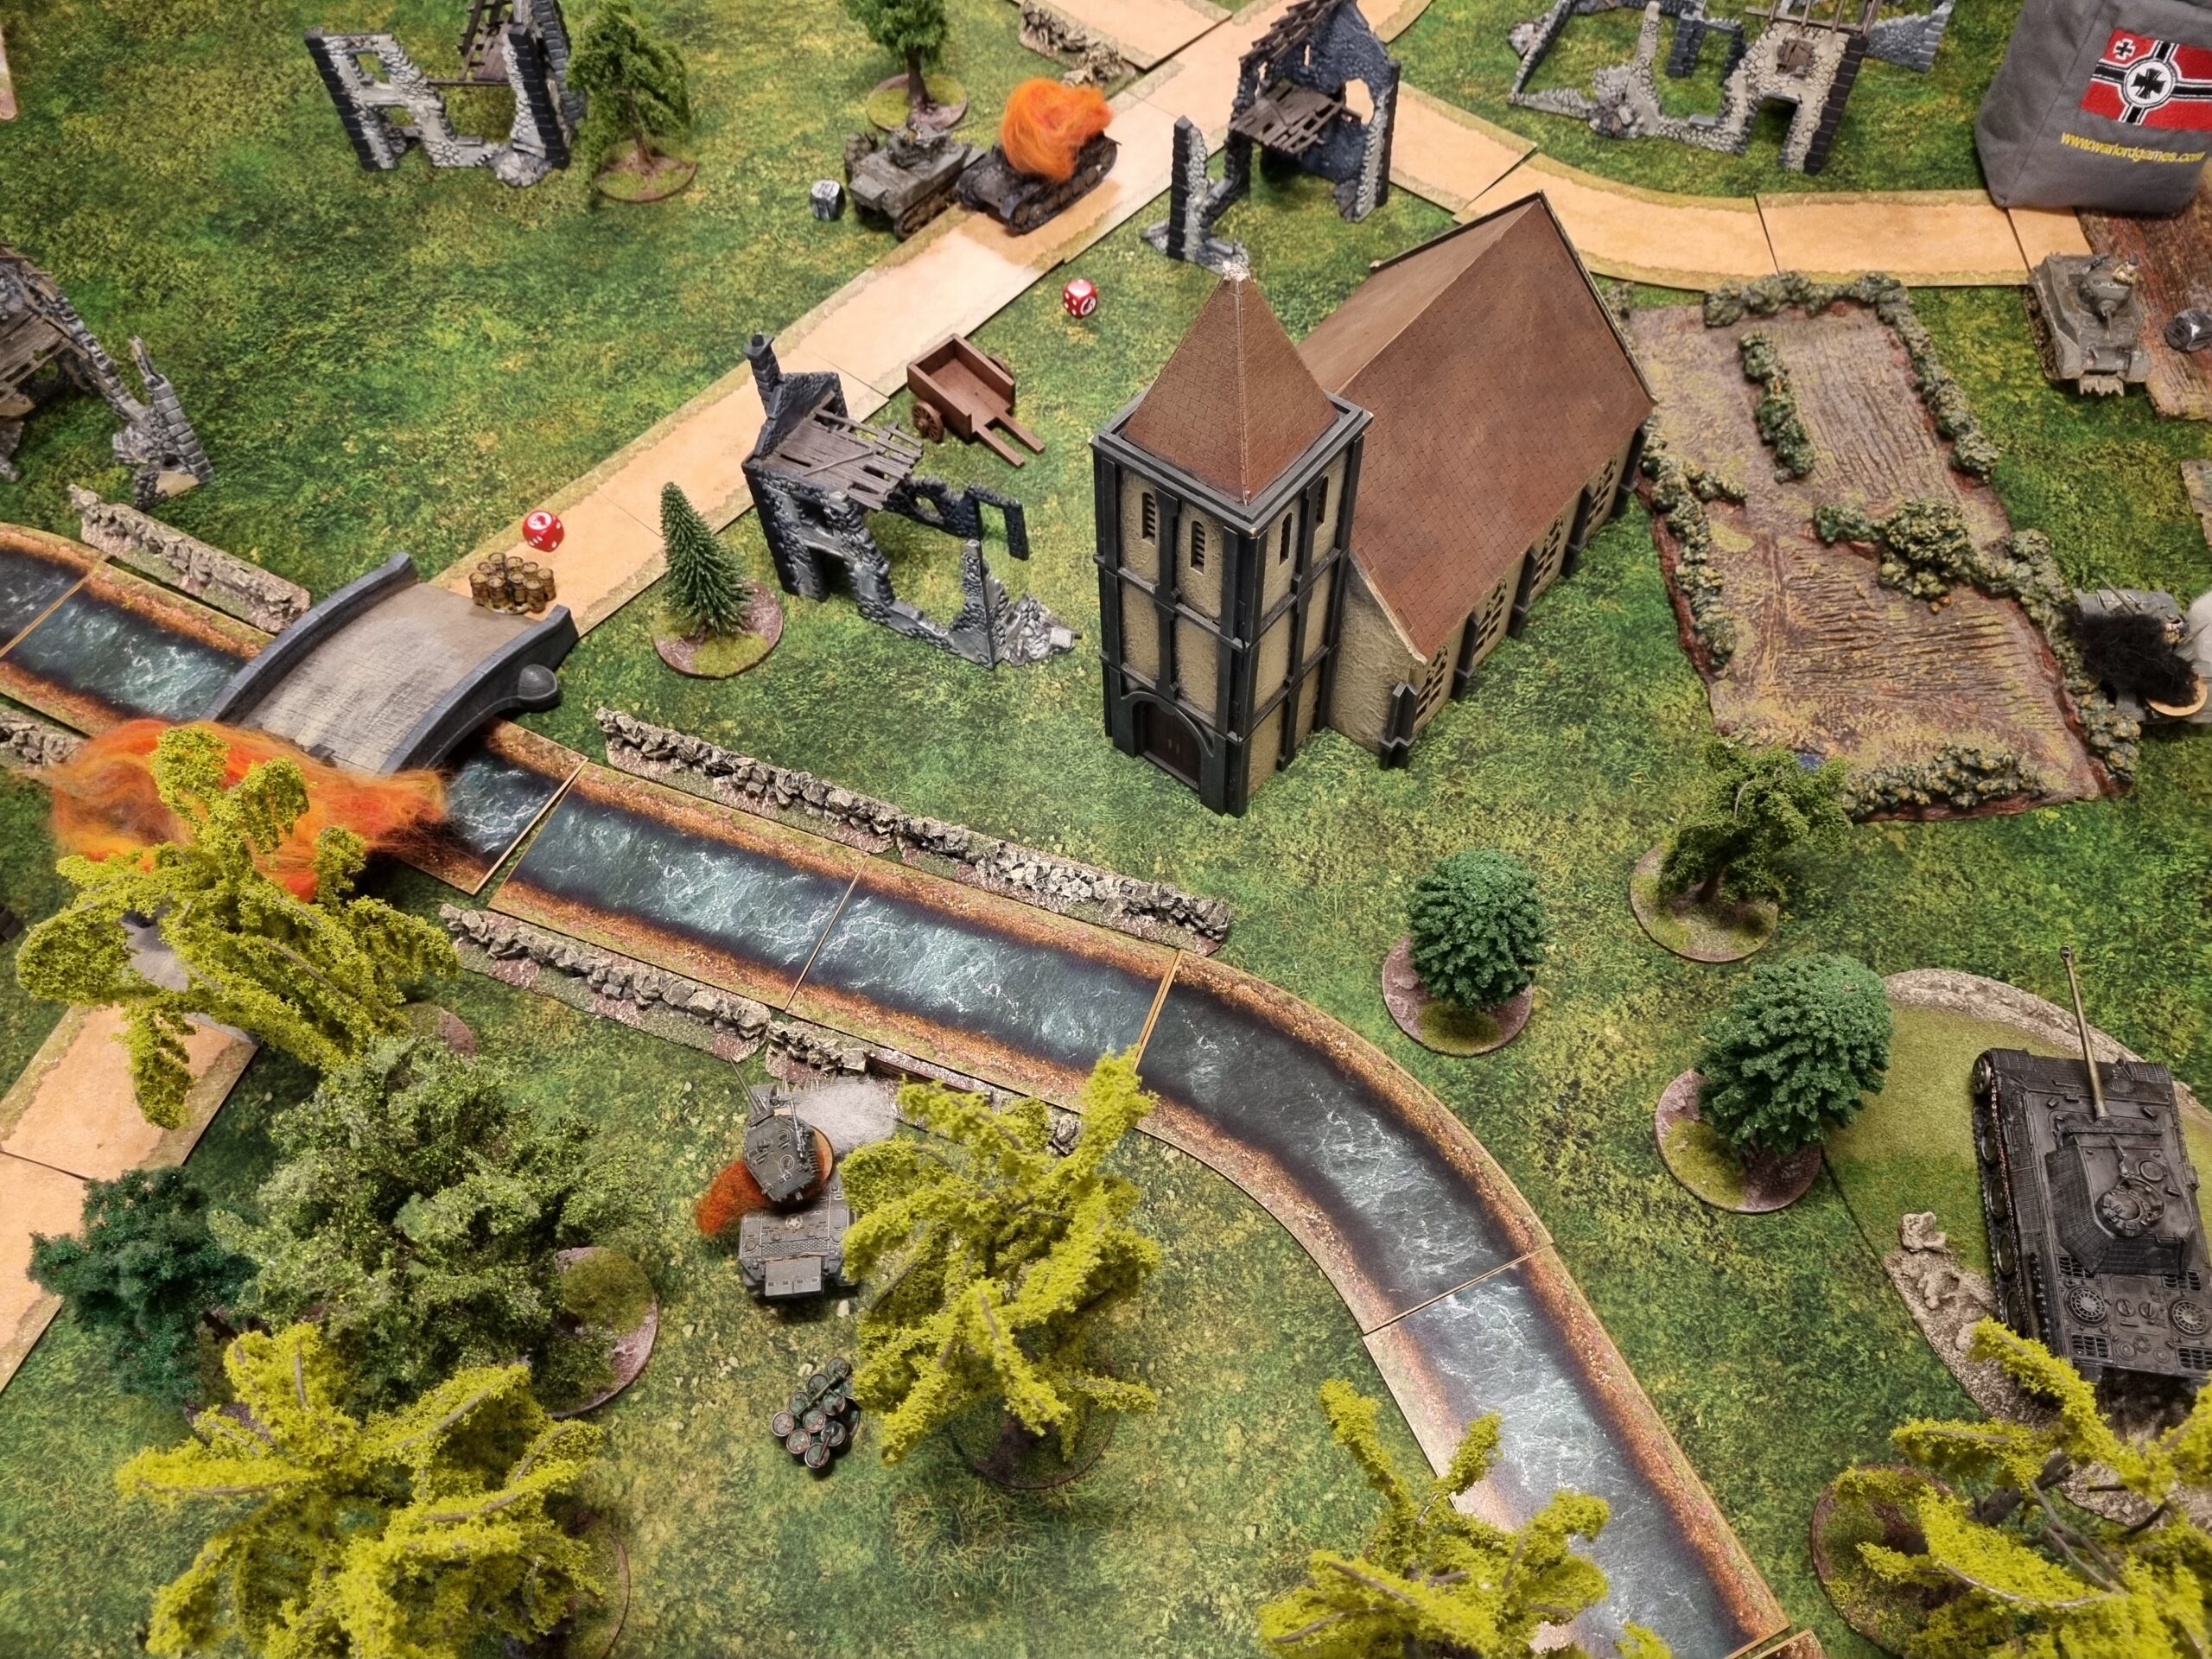
Turn 3: Assegai tried to start the third turn with a bang by advancing into point-blank range of the Panzer II on the bridge, but missed! Was there anything that could shift this damnable tank? I breathed a sigh of relief, however, when the Panther opened up on the flank of Helen, and royally fluffed its penetration roll. The rest of my activations for the turn were put into trying to destroy the Panzer IIs, to no avail. Conor rallied both vehicles, and the board was cleared of pins. This bridge bottleneck was becoming a tad concerning.

Turn 4: This turn began with Helen and the Panther exchanging fire, with both crews’ inexperience starting to show as both shots wandered astray. In the centre, it took two Stuarts to finally knock out the Panzer II that had held the entire British platoon up for three turns! Sensing that the better part of valour was discretion, and that the loss of the middle objective was somewhat inevitable, Conor T reversed his second Panzer II back towards the thus far unclaimed objective. The British held two objectives at the end of the round.
Turn 5: The vengeful Panther unleashed its full might once more, leaving Helen a smouldering wreck. Whilst this left the objective she had been guarding undefended, Conor T had no way to reach it. Seawolf advanced over the bridge at last and took a shot at the remaining Panzer II, ensuring (rather pointedly) that it would not become another roadblock as its twin had been! The Panzer II duly exploded. Assegai followed Seawolf across the bridge.
Turn 6: The two Stuarts consolidated their position, harassed by the now out-of-position Panther, but suffering no damage. All three objectives lay firmly in British hands.
Turn 7: Other than a cheeky attempt to nab some experience points by firing upon the Panther and hoping for a lucky result, not much happened in this final turn. Conor T could do nothing to wrest control of any objectives from me. That’s two wins in a row for me (and maybe a target on my back!).
After Action

Conor H: That was “a damn close-run thing”, to misquote Wellington as many have done before me. It did not play out at all like I would have expected, I thought ‘T’ would have rushed me with his Panther to take advantage of its superior armour and armament to bulldoze them head-on. Instead, he flanked to prey on the Daimler and left himself out of position. Both Panzer IIs holding me up for longer than I would have considered reasonable. A great game with plenty of back and forth action.

Conor T: So I think it’s safe to say I did not play this one correctly. Using the Hair Trigger skill I’d earned in the first game on the Panther to run in and take out Hind’s little Daimler on the first turn was admittedly hilarious (and incidentally is exactly what I said would happen in the course of pre-game taunting), but ultimately did little to affect the larger game. With this rookie mistake I ended up moving the Panther out of the thick of the action early on and as such cleared the way for Hind’s well-deserved win!
Total Experience Points After Game Two
Bernard:
- KV-1: 0 points
- T34/76: 0 points
- OT-26: 42 points
Conor H:
- Seawolf: 36 points
- Assegai: 55 points (skill gained: Leadfoot – extra 6” move on an advance or run order when used)
- Helen: 0 points
- Daimler: 51 points
Jon H:
- Command Puma: 0 Points
- Puma 2: 43 points
- Puma 3: 43 points
- Sd.Kfz 221: 20 points
Conor T:
- Panther: 108 Points (becomes Regular & second skill gained: Adrenaline Rush – main gun may be fired a second time in a single activation but must be against the same target)
- Panzer II (1): 20 points
- Panzer II (2): 20 points
Previous articles in the Warlord HQ Tank Wars series: