The Second World War was, in many ways, the last hurrah of the big-gun capital ship as the supreme implement of naval power after a centuries-long reign (we won’t count the latterly-modernised Iowas as they were really designed more for shore bombardment and prestige cruises). The scourge of mines, submarines, and, in particular, increasingly modern and capable carrier-based aircraft would rapidly push these huge (and terrifyingly expensive) armoured behemoths into the pages of history, to be replaced by ever-larger aircraft carriers and submarines as the primary combatants of modern naval warfare.
While their real-life fate was often sad and somewhat inglorious, there’s no denying that battleships were both vital to the Second World War at sea, and really, really cool – for that reason, they’re a crucial component of Victory at Sea! However, just like in real life, the threats to these steel titans are many and varied, and nothing will put a smile on your opponent’s face faster than sinking your pride and joy early in the game! It is therefore imperative that you keep your capital ships protected wherever possible – luckily, there are a number of ways that you can do so!
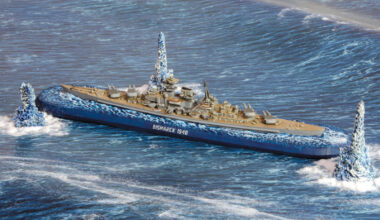
In order to protect against threats, first we must understand them, and understand what it is we’re trying to protect. For that, we need an example ship. Enter the Vittorio Veneto of the Italian Regia Marina. Historically, the Vittorio Veneto was damaged on several occasions, by torpedoes (both airdropped and submarine-launched) and bombs, but never received a hit from enemy gunfire. On the Victory at Sea tabletop, however, she’s far more likely to see incoming shells as well, and will serve well (in her 1943 configuration) as our demonstration vessel!
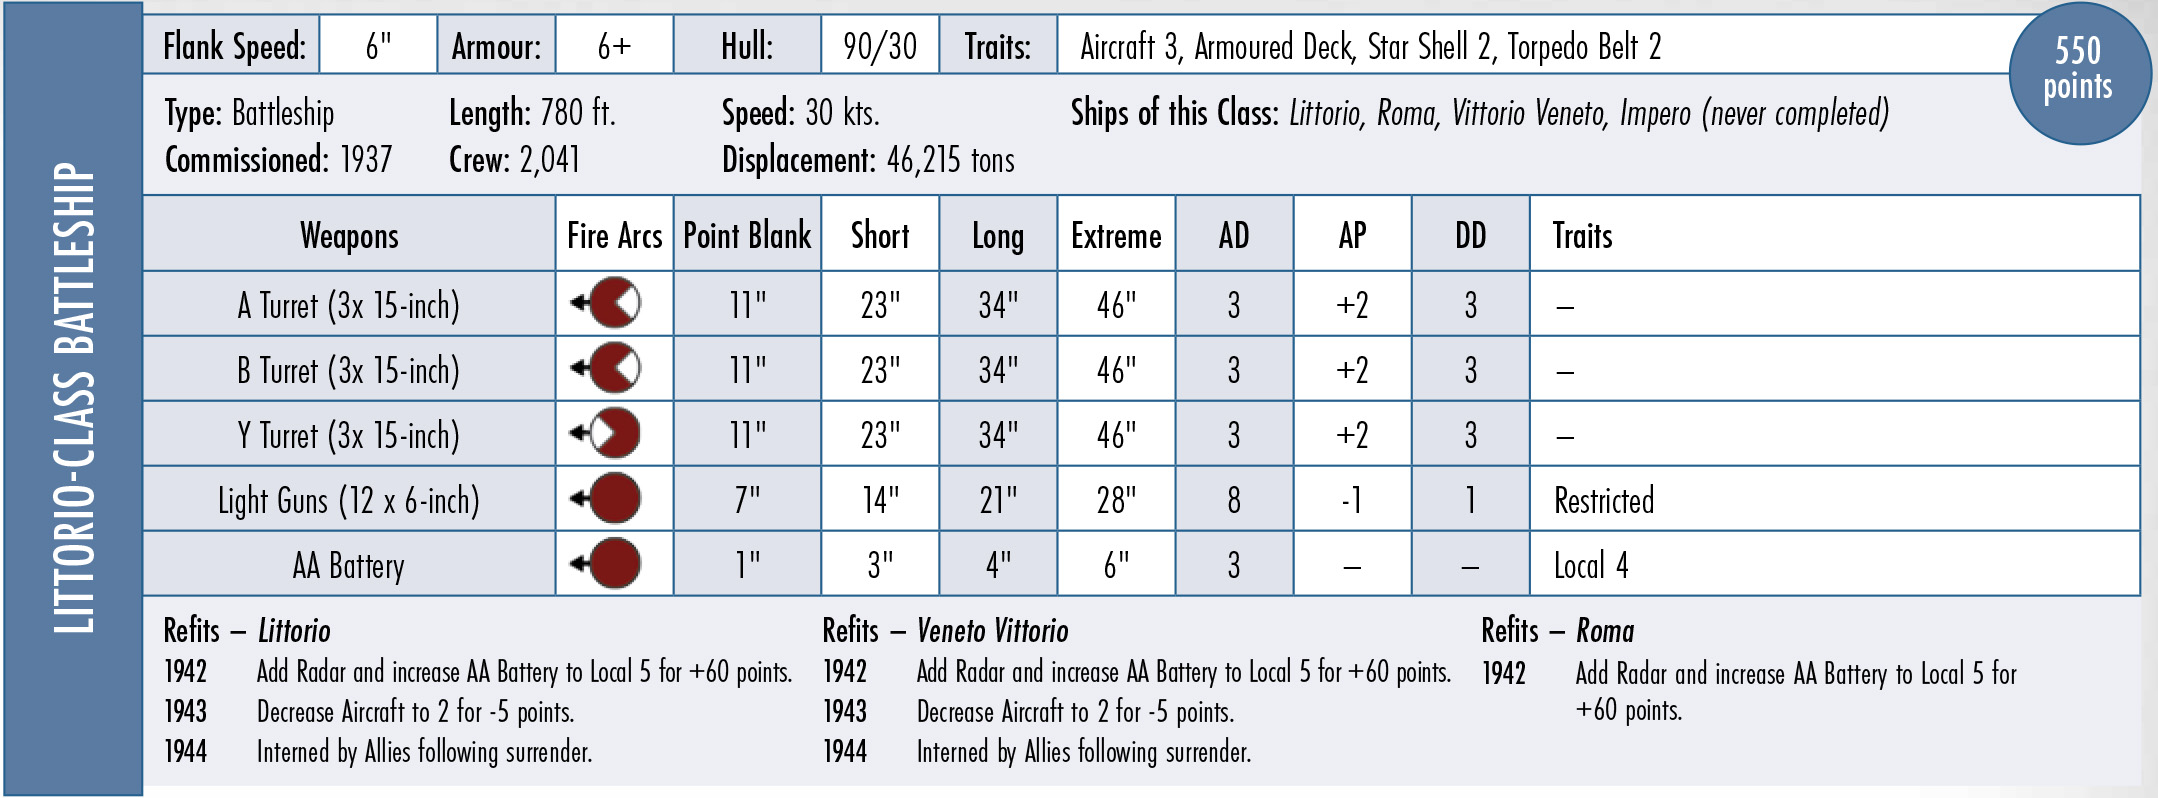
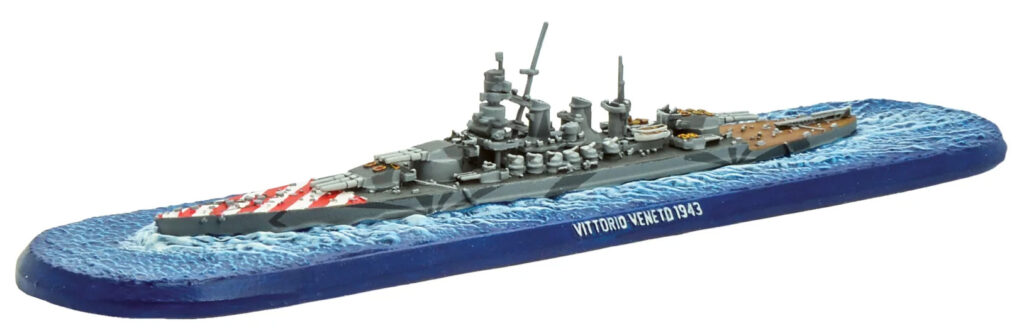
With a 6” Flank Speed and 6+ Armour she’s both well-protected and reasonably mobile, and has an impressive Hull rating of 90. With an Armoured Deck and Torpedo Belt 2, she’s also reasonably capable of surviving hits from torpedoes and Plunging Fire, although she is by no means invulnerable. The single most deadly existential threat remains torpedoes (and other weapons with the Devastating special rule), which can (rather annoyingly) be delivered by a wide range of adversaries! The best way to avoid being sunk by torpedoes is of course to avoid being hit by them – fortunately, torpedoes have a notoriously short range (usually – we see you, IJN players!). If you can keep the enemy at arm’s length, you can avoid a lot of punishment – and with the Vittorio Veneto’s 9×15” main battery, dish out some serious hurt in return! However, your opponent is highly unlikely to be so obliging, and most methods of torpedo deployment tend to be rather faster than the average battleship, so simply sailing away may not be a viable option!
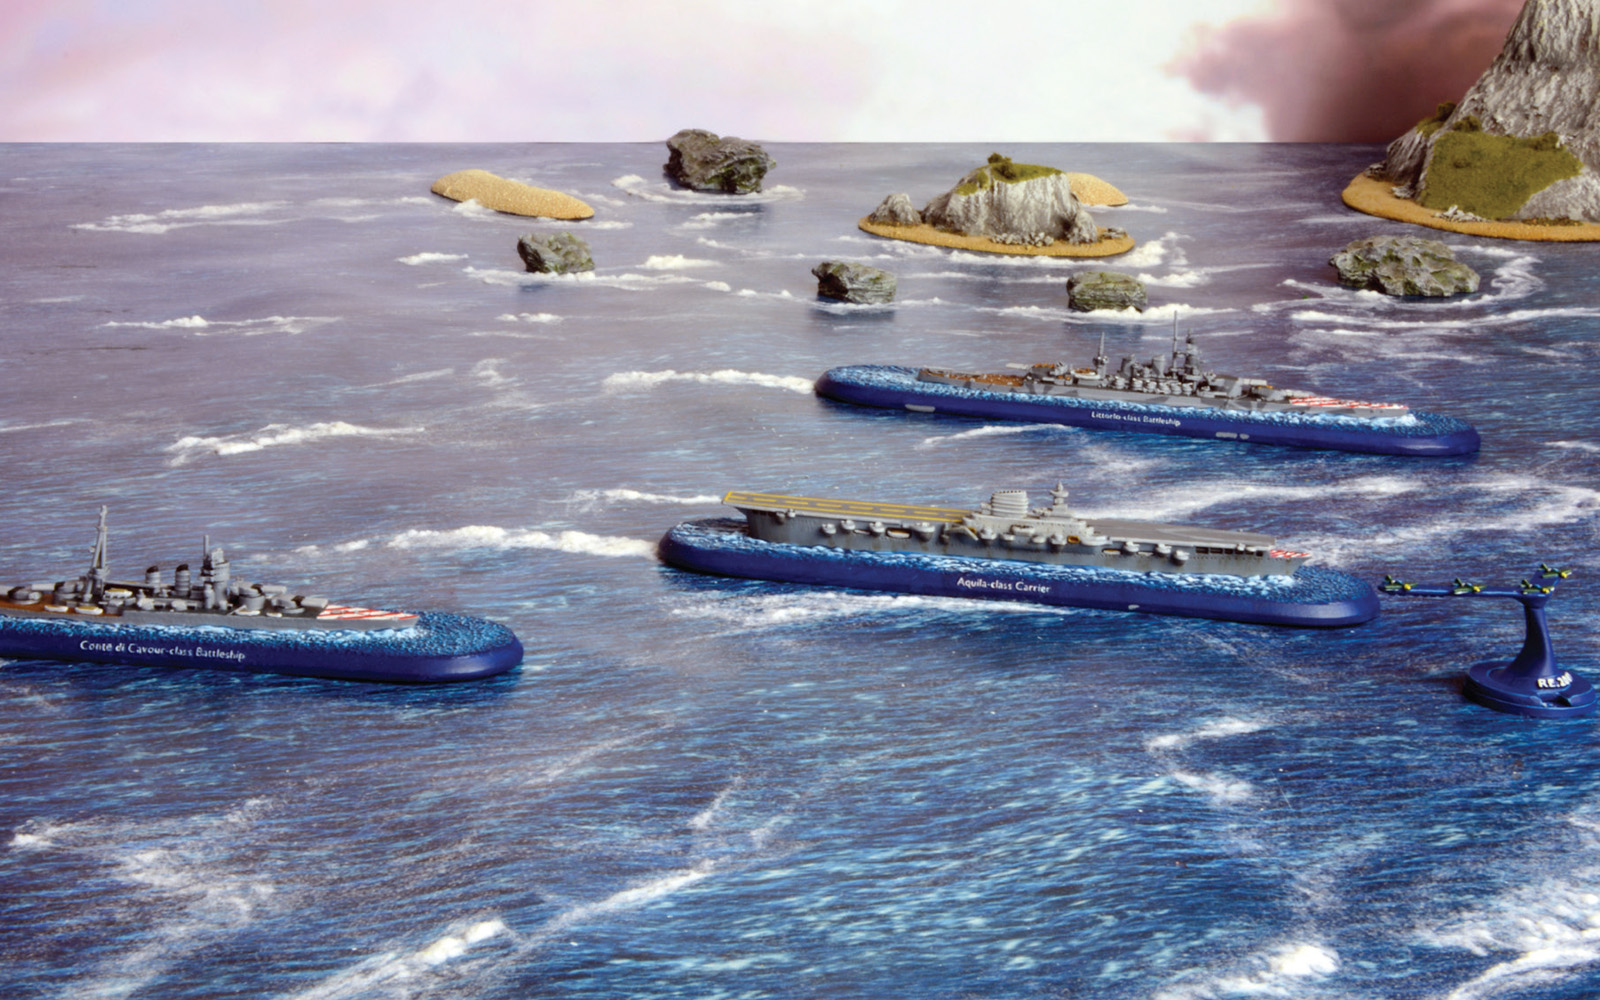
A general rule for effective defence of your battleships is the concept of ‘defence in depth’ – very simply, think of your fleet in terms of a set of concentric circles. At the very centre is whatever you want to keep safe – in our case the Vittorio Veneto. Radiating out from that, you then have various ‘layers’ of units which can protect against different threats – a bit like an onion! The theory here is that an enemy attacker may evade one or more layers of this defence, but something will get them in the end! This is a massive oversimplification of the real-world naval concept, but it can work very well on the tabletop as well. The below shows an example of how I might array my fleet:
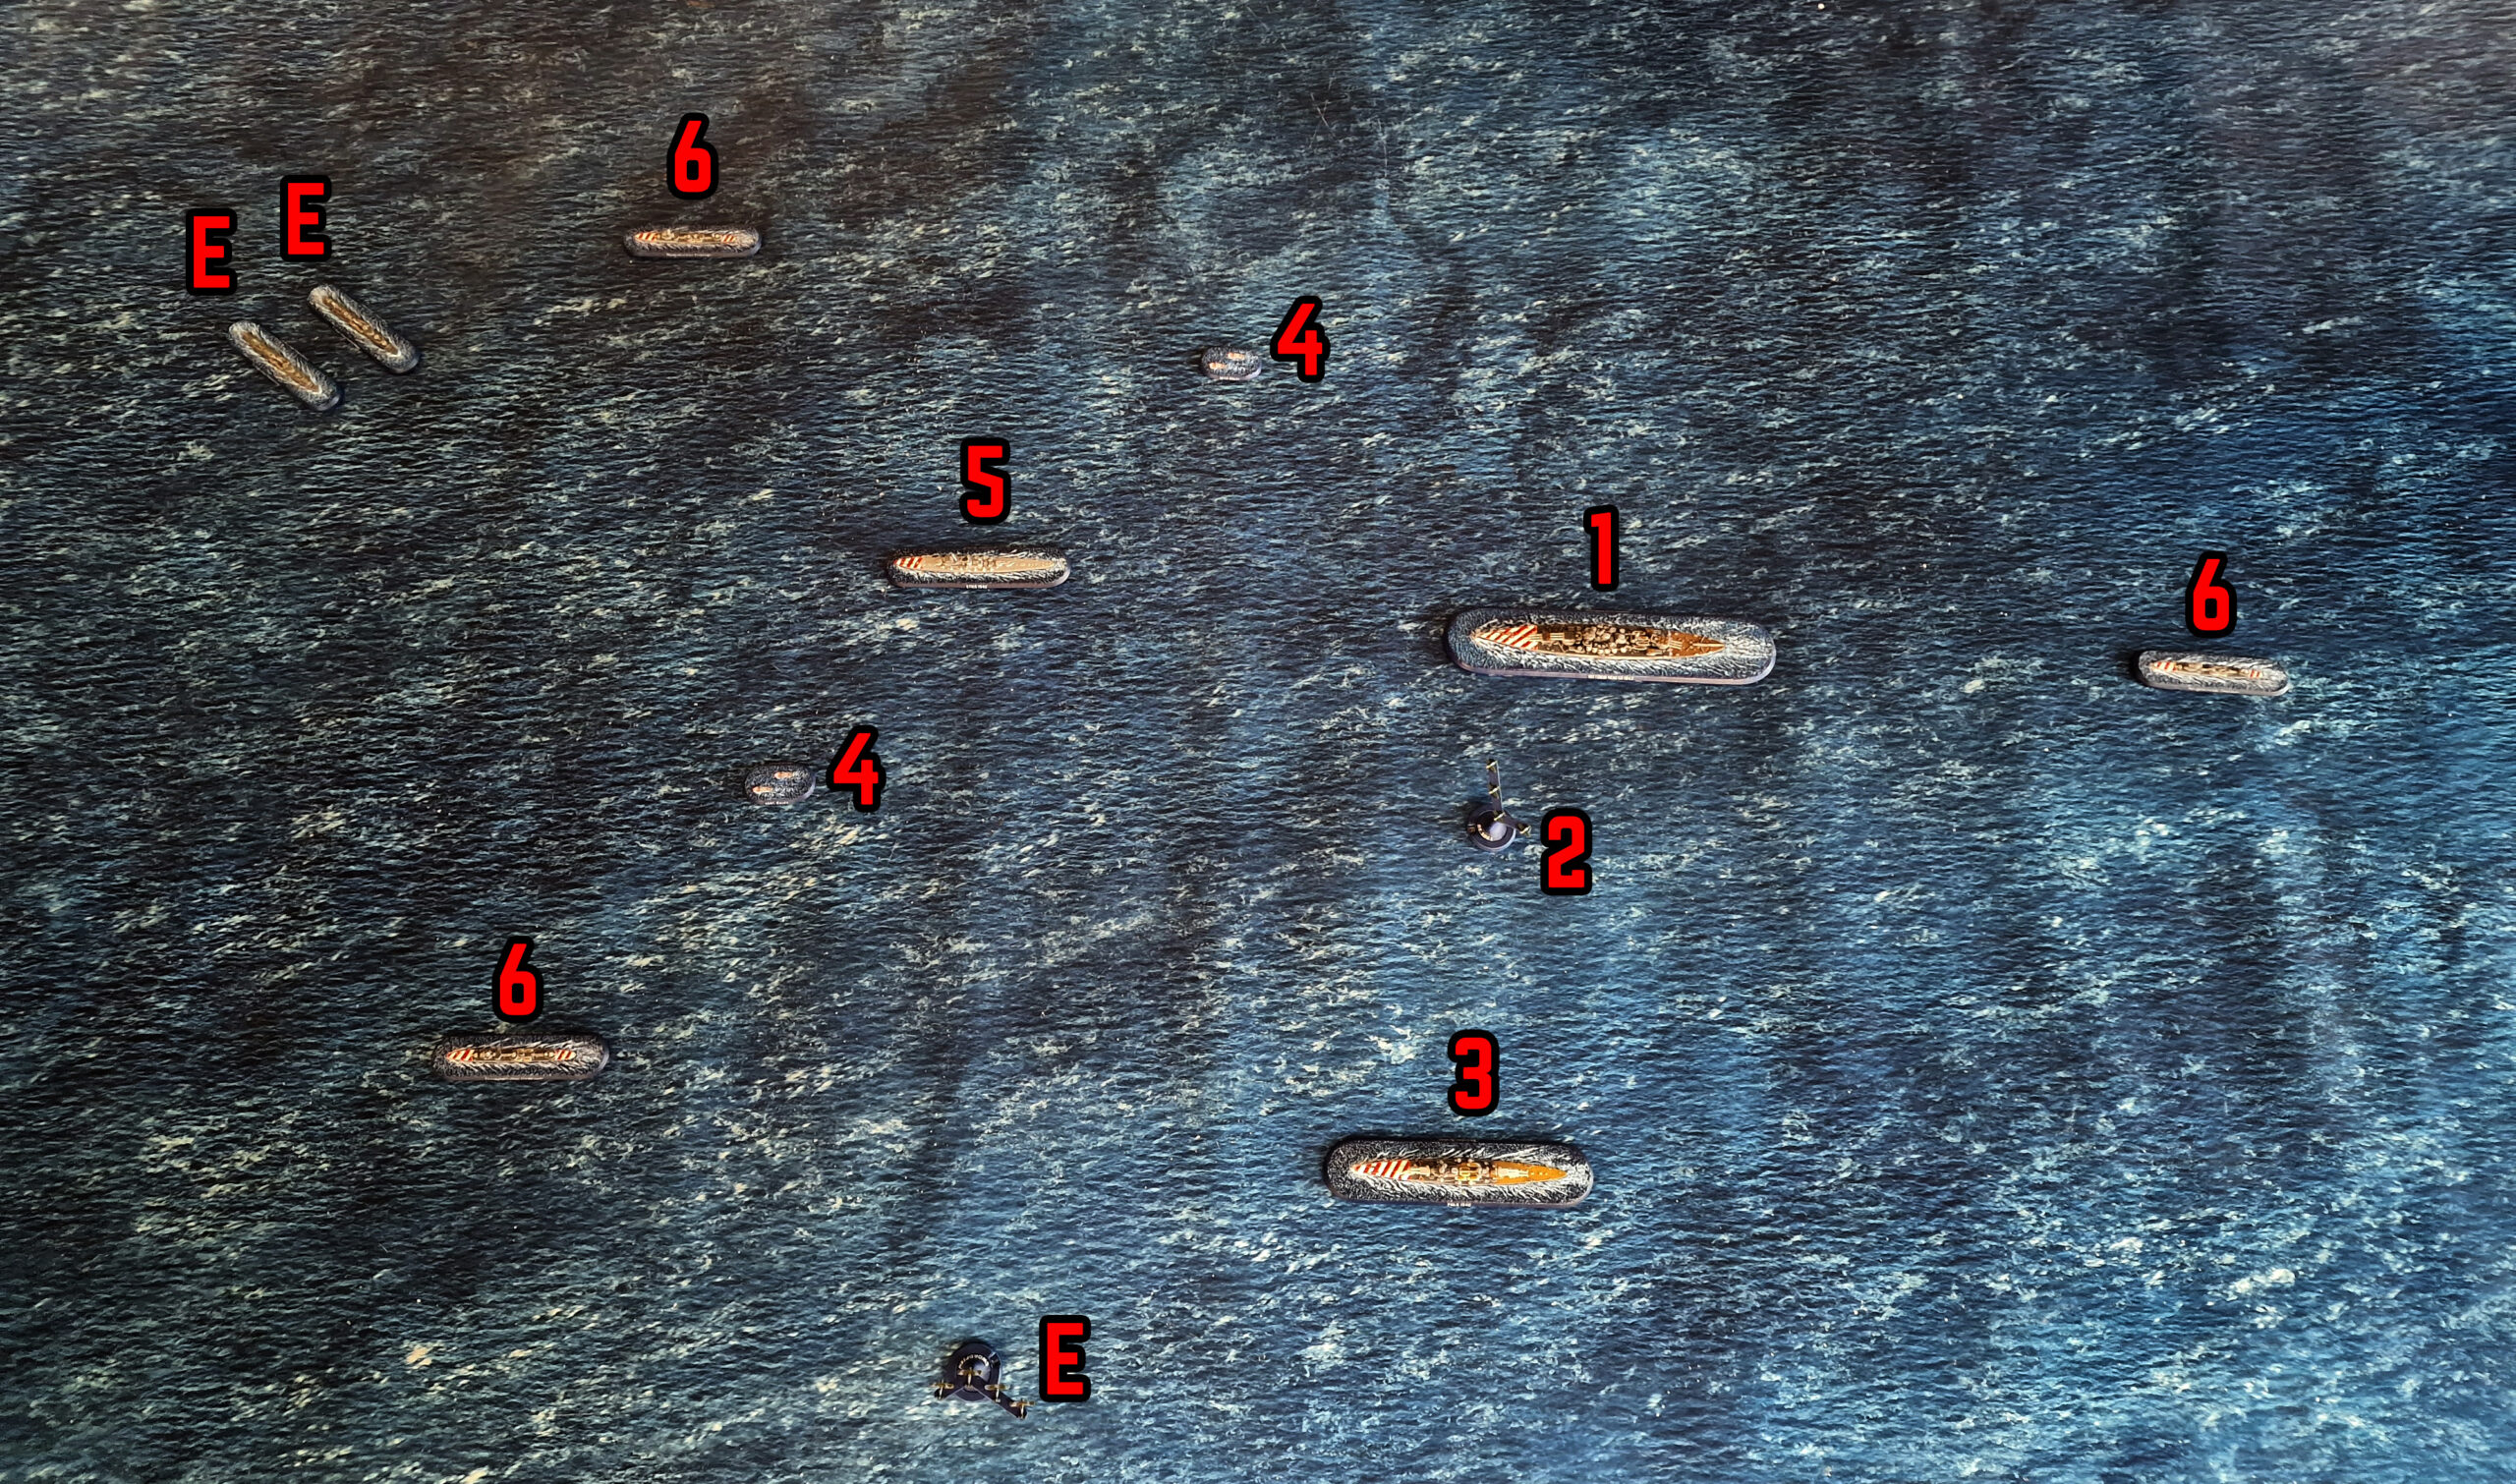
2. RE.2001 fighters stand by to intercept the incoming Swordfish flight (E).
3. A Zara-class heavy cruiser provides immediate anti-aircraft and anti-surface support.
4. Motor torpedo boats can swiftly move to counter the incoming Tribal-class destroyers (E).
5. An Etna-class light cruiser is ready to quickly intercept any enemy breakthrough.
6. Navigatori-class destroyers provide the outer screen for the fleet.
The eyes and ears (and indeed first line of defence) for any fleet are the destroyers. Produced cheaply and in large numbers – reflected on the table via their relatively small points cost –destroyers are ideally placed to attack or defend as needed. They can keep even the largest enemy warships honest with the threat of torpedoes, while also providing a limited amount of anti-ship and anti-aircraft firepower. Torpedoes aside, they really aren’t designed for stand-up brawls with anything larger than themselves, but any enemy looking to force its way through this outer screen is at risk of sustaining serious damage on the way, and of course while it’s fighting the destroyers, it’s not engaging Vittorio Veneto! With their high speed they can also react quickly to enemy attacks and lay down concealing smokescreens to hide the fleet at large.
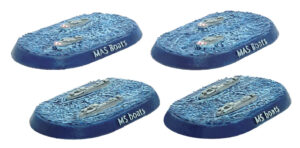
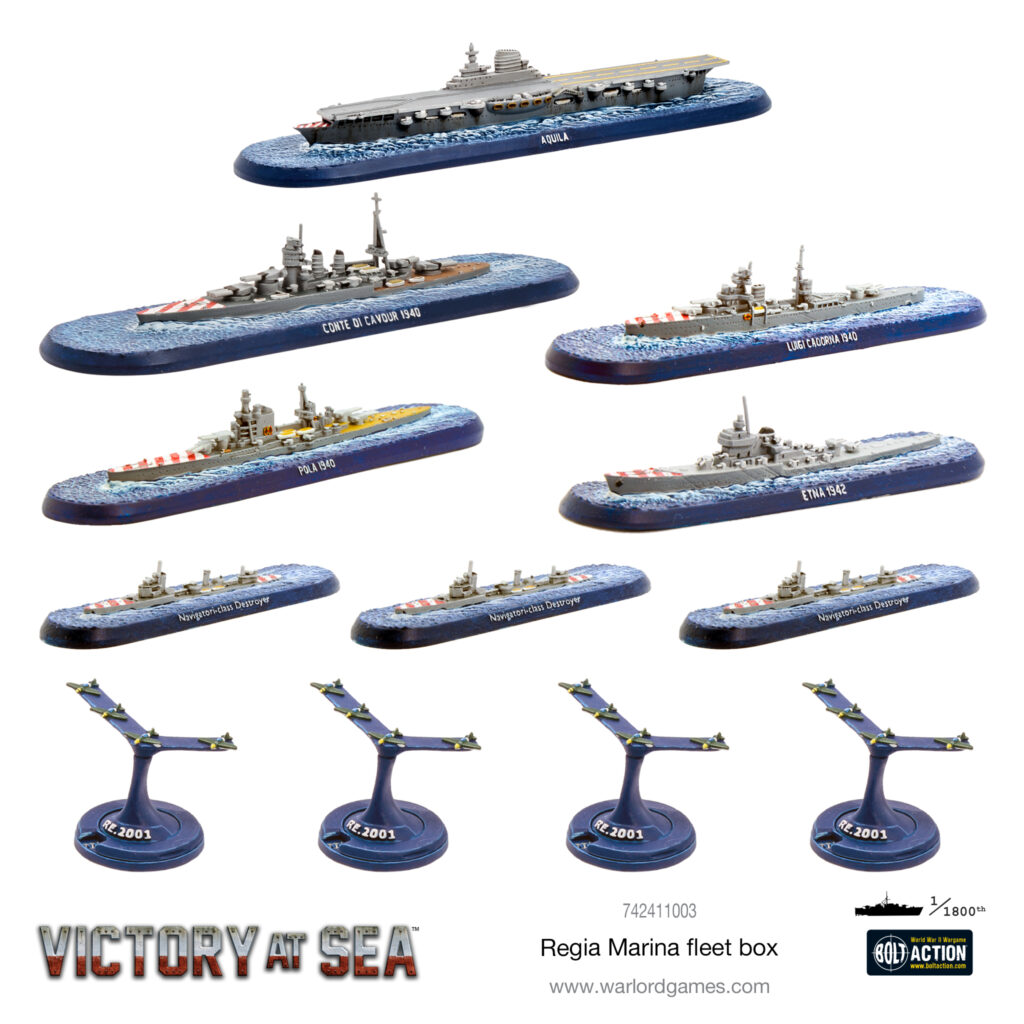
For battles fought in more coastal seas (such as those in the Mediterranean, handily for this example –ed.), an Italian fleet can also call on the support of a wide variety of motor torpedo boats, including the frankly rather concerning MT explosive rams and the very capable MAS series. Much more of an offensive weapon than a defensive one, these can also be used to break up enemy attacks or buy time for the rest of your force to reposition or manoeuvre. Their depth charge capability also allows them to engage any enemy submarines that might be marauding in the depths! Similarly, while the Aquila was never completed, the Regia Marina can call upon the services of a large and unsinkable aircraft carrier – the Italian landmass itself! A variety of airfield-based fighters are on call to defend the fleet against enemy strike aircraft, with the Macchi C.202 Folgore being particularly capable. Similar to the torpedo boats, Italian dive and torpedo bombers can also be used to harass enemy formations and keep their attention focussed elsewhere. The mobility of the small craft and aerial assets means that they can really operate in any ‘layer’ of our defensive scheme – I find it best to hold them behind the destroyers as a rapid reaction force, ready to intervene wherever the enemy press.
Next in from the destroyers should be your cruiser force, with the lighter ships outermost. This is where most of your anti-aircraft firepower will come in, along with increasingly heavy surface gunnery and levels of protection. Light cruisers (particularly Italian pre-war designs) tend to boast excellent speed, allowing them to quickly close with the enemy and intercept incoming attacks, and although their firepower tends towards the weaker side, their relatively low points cost means you can bring plenty of them to the fight! Nothing puts an enemy battleship off its stride quite like being charged by a squadron of light cruisers with malice (and torpedoes) aforethought! This tactic can be somewhat wasteful, however, so it’s really best used only if the enemy has decisively broken through your destroyer screen. The heavy cruisers, meanwhile, are the ideal companions for your valuable battleship, mounting yet heavier anti-aircraft weaponry and main guns, and often possessing an effective dual-purpose secondary battery of light guns. While not designed to go toe-to-toe with enemy battleships by themselves, any destroyer or cruiser that’s made its way this far into your force will have a very bad day if they run into a Zara-class laying in wait!
We’ve spent most of this article assuming that Vittorio Veneto is sat at the centre of our defensive formation doing nothing – this is highly unlikely to be the case in a real game! Against enemy surface combatants she can put up a furious fusillade of 15” gunfire at long range, while her 6” secondary battery can batter lighter opponents into submission at close ranges. With a Local 5 AA battery, she’s also more than capable of holding her own against enemy aircraft – provided there aren’t too many of them! In the worst case, where an enemy strike makes it through, her armour and Torpedo Belt 2 give her a fighting chance of withstanding some serious hits to fight another day. Make sure she’s supported by the heavy cruisers, and even a determined attack by an enemy battleship is far less likely to succeed – but remember, isolated battleships very quickly get turned into wrecks.
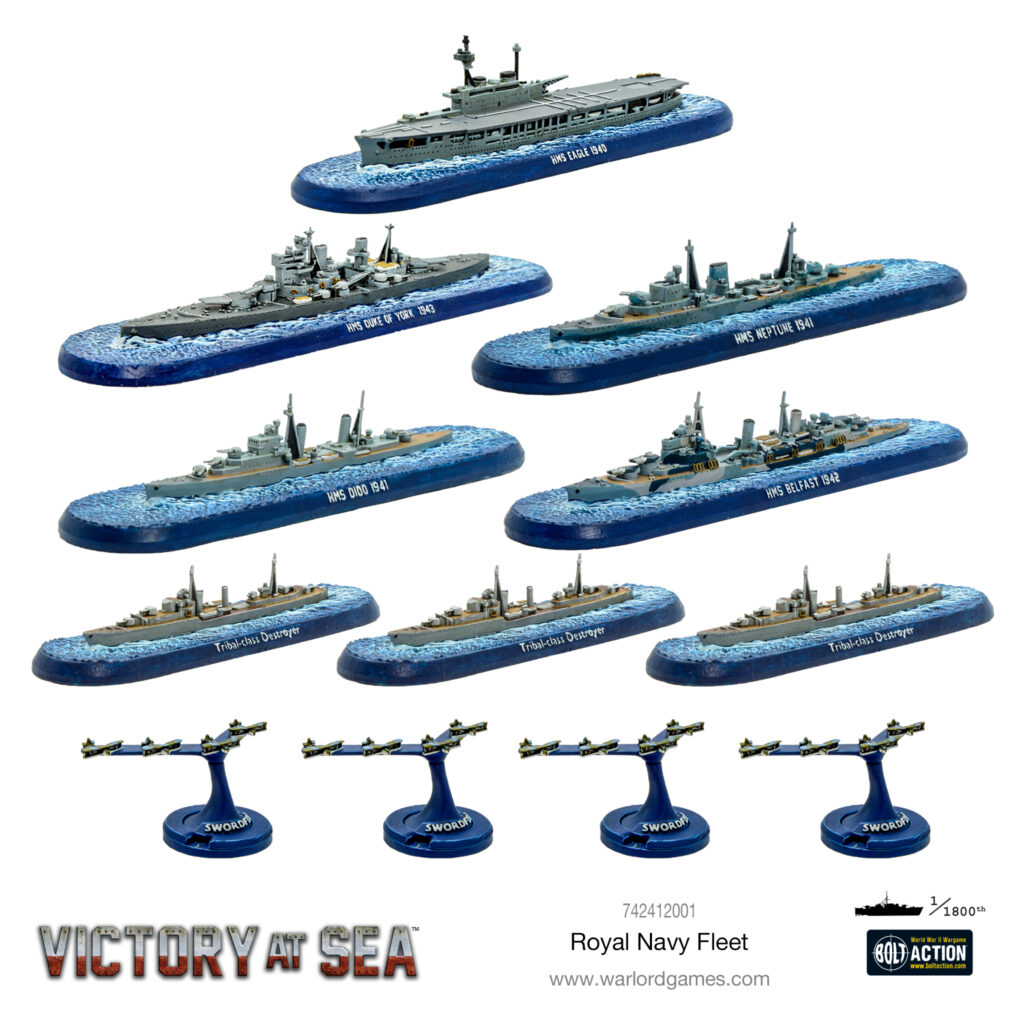
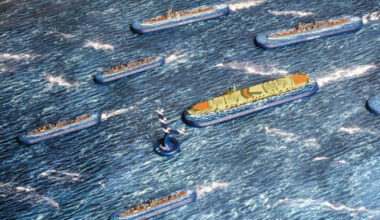
The final thing to note is the distances between the layers of your protective formation. Let’s imagine that Vittorio Veneto is under attack from a swarm of British Tribal-class destroyers, which have a Flank Speed of 7”. If by some cunning trick or luck of the dice they manage to penetrate our own destroyer screen, we don’t want them to be able to immediately get in close and launch a torpedo run on our cruisers at point-blank range. Given that their Mk IX torpedoes have a 3/6/9” range, that gives them about a 10” realistic threat range (remember, torpedoes always suffer a -2 modifier to hit) that we want to avoid. Spacing your lines of defence about 12” apart will go a fair way towards negating this kind of ‘slashing’ attack through your fleet and will leave enemies that try stranded in no-man’s land (or should that be no-man’s sea?), to be dealt with at your leisure. This isn’t the only way to protect your battleships, but it’s certainly the one I tend to default to – after all, nobody wants to spend their hard-earned points (and painting time!) on a whacking great ship that gets sent to the bottom in the first couple of turns! Similar techniques can be employed in protecting other strategically important assets in your fleet, such as ever-vulnerable aircraft carriers or merchant convoys in escort scenarios, no matter which flag your fleet sails under.
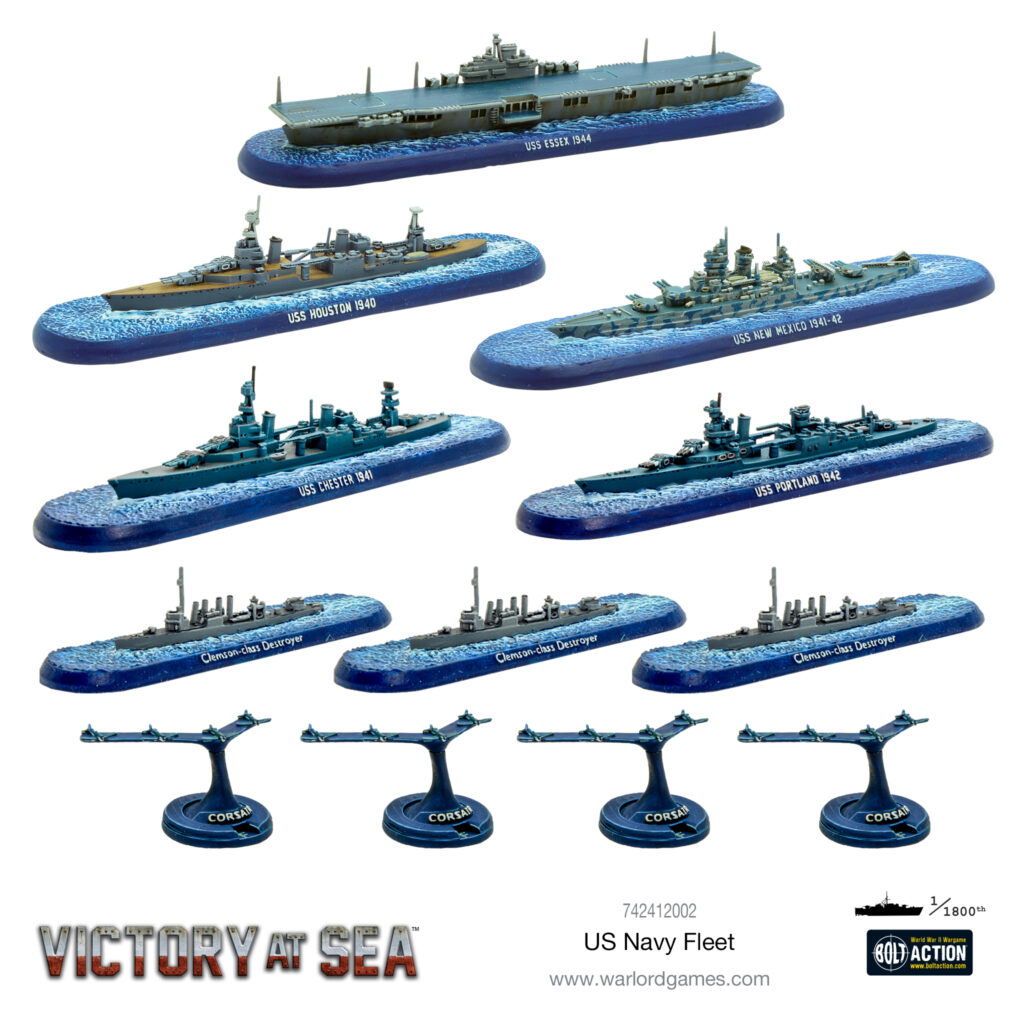
Our starter fleet boxes are all armed with a handy mix of all the elements we’ve talked about in this article (with the exception of the MTBs – available separately), giving tabletop admirals all the tools they need to layer their fleet defences and ensnare any enemy vessels attempting to break through in deadly fire traps.