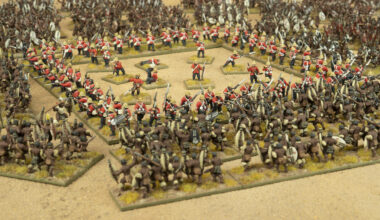
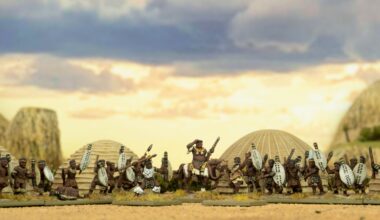
Studio Painter Andrés Amián is a man with deadlines to meet, and a lot of models to paint. He’s trying out a drastic solution to speed up painting Epic Battles: Zulu! – no primer! Will it work?
Epic Battles projects always mean small miniatures, but lots of them! As a result, I’m always trying to find ways to speed up my painting. While I’d love to be able to spend days on each strip, there are ninety-six bases of Zulus in the Isandlwana box, and they won’t paint themselves!
I found myself wondering, given that the Zulu sprue is in a tan colour which is actually very similar to how I’d prime it for painting, could I apply the paint straight on to it without priming? What about Speedpaints? Could skipping the primer stage save me some valuable minutes? Well, I decided to find out, and I’m passing on my experience on to you!

I would definitely advise washing the sprues with warm, soapy water to get rid of any mould release agent left on the plastic. This should improve the paint adherence to the plastic, which is vital since we’re not priming the figures. I tried a sprue straight out of the box and found that the paint stuck well to the surface, but without primer I think you’ll want as much adhesion as you can get.
From there it all went surprisingly well! I’ll run you through my recipe and the few little tips I picked up.
Take your preferred skin tone for the Zulus; I went for Army Painter Speedpaints Dark Wood. I covered the whole strip with and let it dry. I worked my way through figure by figure so I don’t need to come back to the same place. Once you apply the speedpaint, you ideally want to avoid brushing back over it as much as possible, as this is one area where the lack of primer can cause issues.

Once the first coat is well dry (I left it about half as long again as I usually would), it’s just a matter of starting to apply the rest of the colours. I used Speedpaints Grim Black for the hair and the shield fronts. The shield straps and civet tails were painted with Great Hall Grey. For the back of the shields I used Tomb King Tan. I used Leather Brown for loincloths, the spear cords, and arm bands. I painted the clubs and rifle stocks with Dryad Brown, always leaving a little of the base colour showing underneath to give a wood grain effect.

Spears shafts were done with Army Painter Historical Mid Battle Dress, but any light brown colour would do. I painted the spear heads and other metallic parts Gun Metal. You could absolutely stop here, and the miniatures would look fantastic already. It’s vitally important to seal the models with a coat of Matt Varnish at this stage, as this will both protect the paint (even more important without primer!) and knock back any glossiness from the paints.
I decided to take these models a step further to add a bit more definition. I hit the loincloths and civet tails with a Strong Tone wash, and gave all the metals a wash of Dark Tone. Finally, I highlighted the black parts with Strap Grey, and the parts I’d previously painted Tomb King Tan with Great Hall Grey.

With the painting done, it was time to base. I used a classic PVA and sand base, painted it with Leather Brown, and followed up with a Dusty Skull drybrush. The edge was finished off with Tundra Taupe. Finally, I dropped on a little static grass, and that was that!

Painting without primer might not be for everyone, but I found it a pretty effective way to punch through these models quickly. I painted four bases at once, and it didn’t take long – I probably spent more time on the basing than the actual painting!
Want to try Andrés’ advice out on some Zulus of your own?