Although I used these techniques to populate the battlefields of Black Seas, they are equally suited for Victory at Sea and Cruel Seas if suitable adjustments are made for scale.
Land Ahoy!
What great gaming table would be complete without some awesome-looking terrain? Well, Black Seas is no different. Although it is a game that can be played without any terrain at all. There’s nothing better than a few well-placed pieces to increase the level of immersion in our games.
In this article I will be taking you through a step by step guide on how to create quick, easy, durable islands and headlands for Black Seas. Before we start, here’s a list of everything you will need:
- Upholstery foam
- A selection of aerosol paints
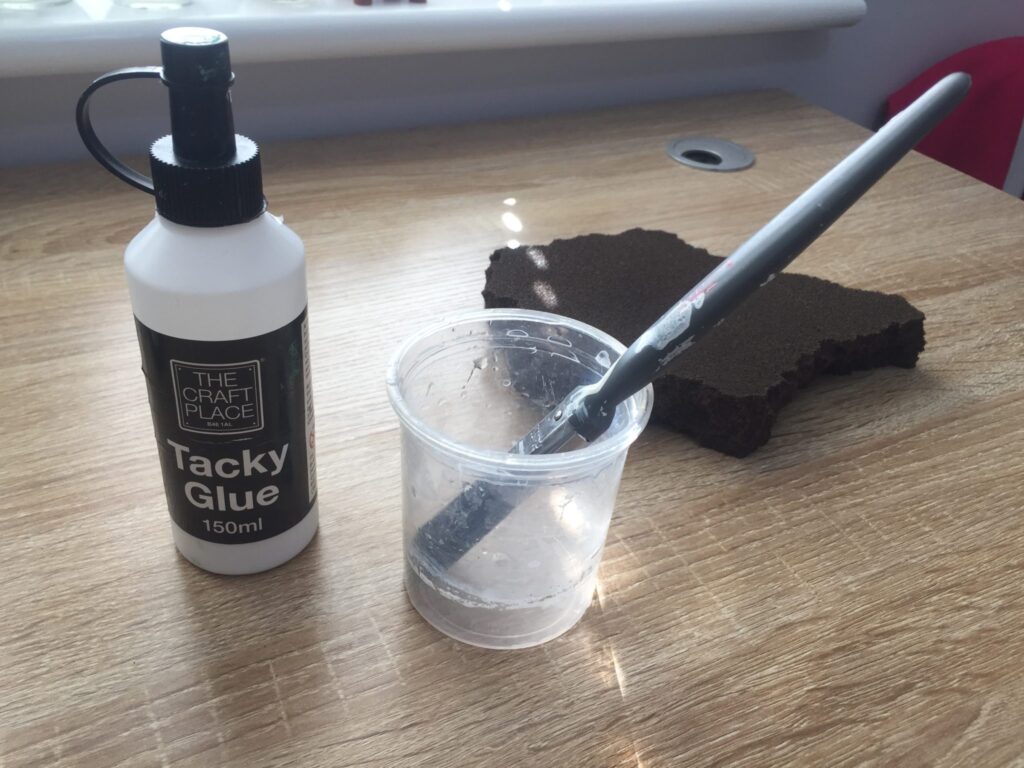
- PVA Glue
- Water
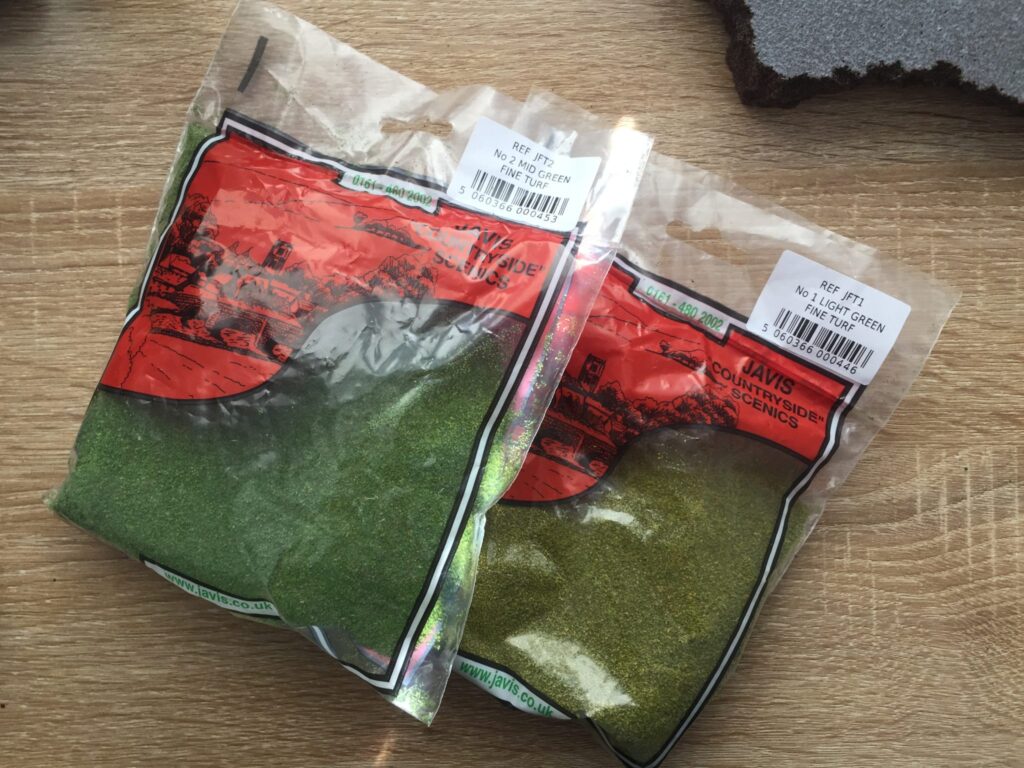
- Good flock mix
- Match sticks
- Clump foliage
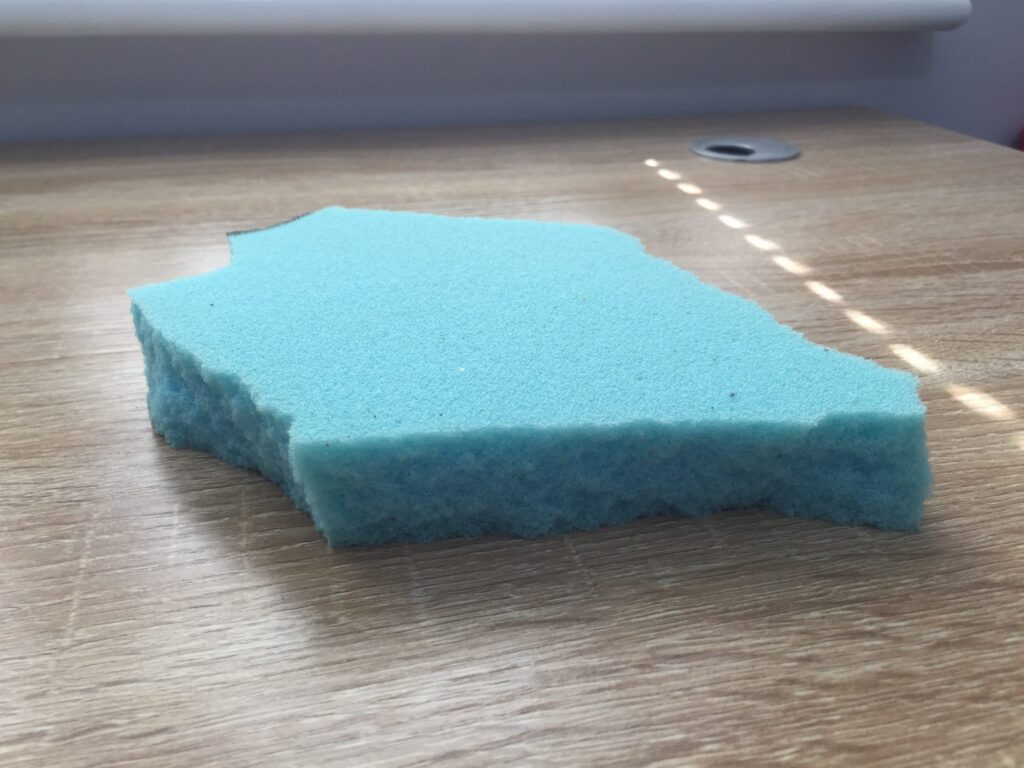
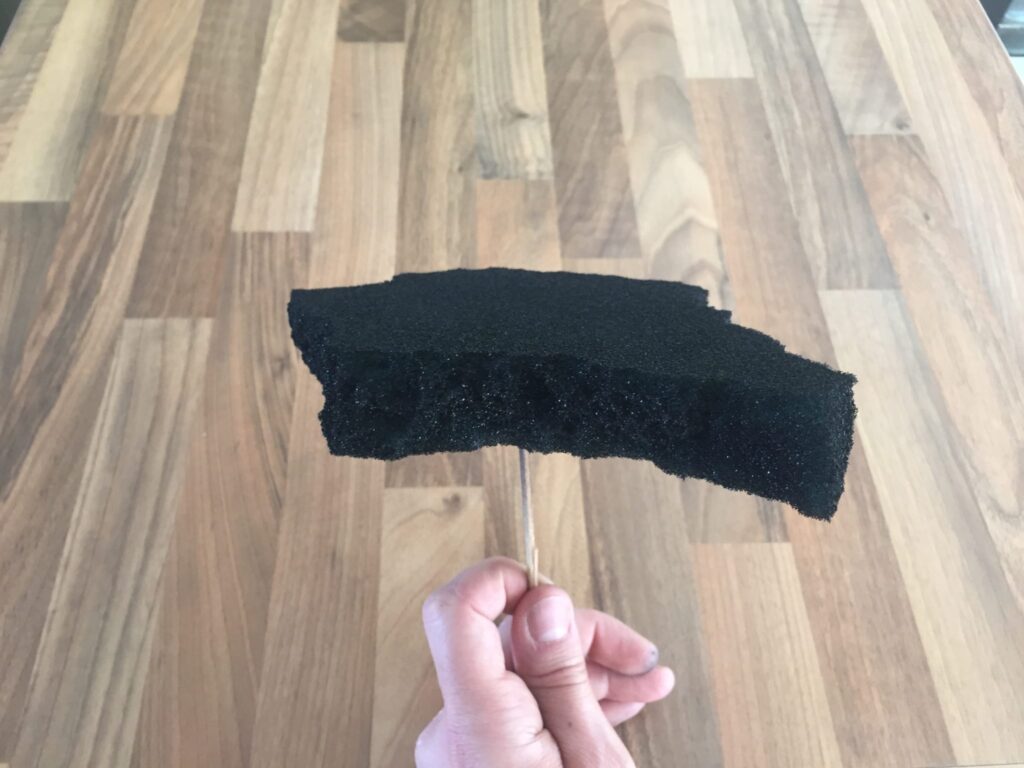
Upholstery foam?! Yes, this stuff is awesome for creating natural rock structures. It’s durable, light and when you tear it you will find it leaves a very natural earthen finish. I bought mine from Dunelm. It comes in various sizes and thicknesses. In this guide, I have used a sheet 1” thick. You will need to plan out your island or headland shapes by drawing on the sheet with a black marker pen.
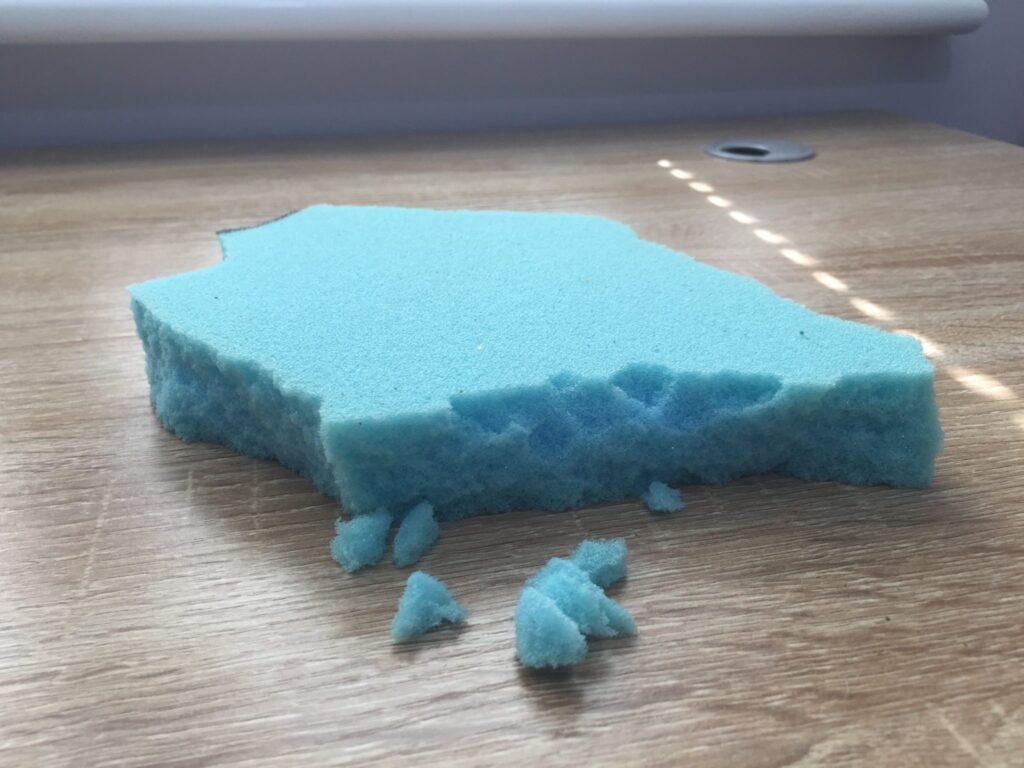
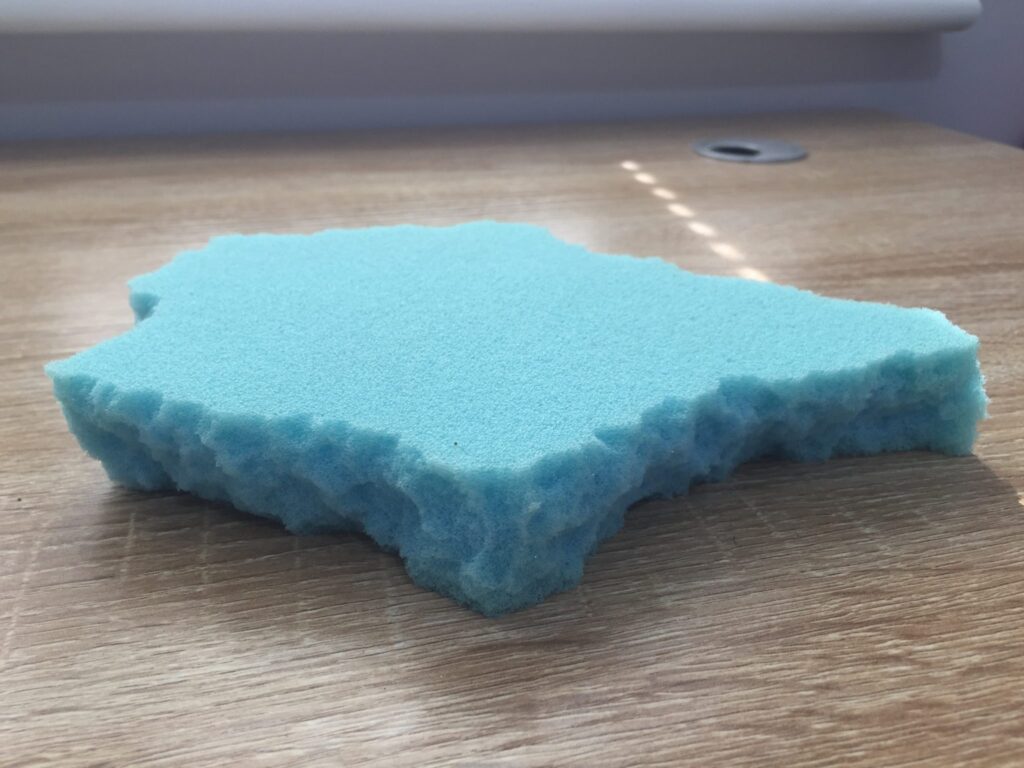
Once you have your shapes planned out you can begin tearing the sheet up, following your guidelines as best you can. You will be left with something that looks similar to the below;
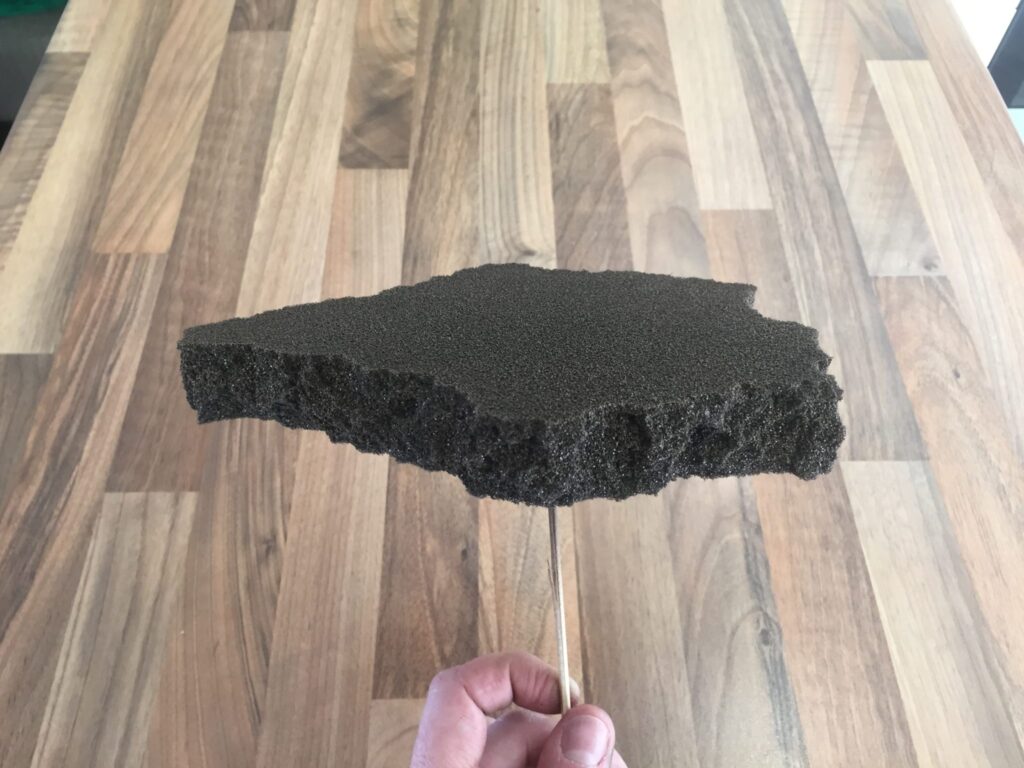
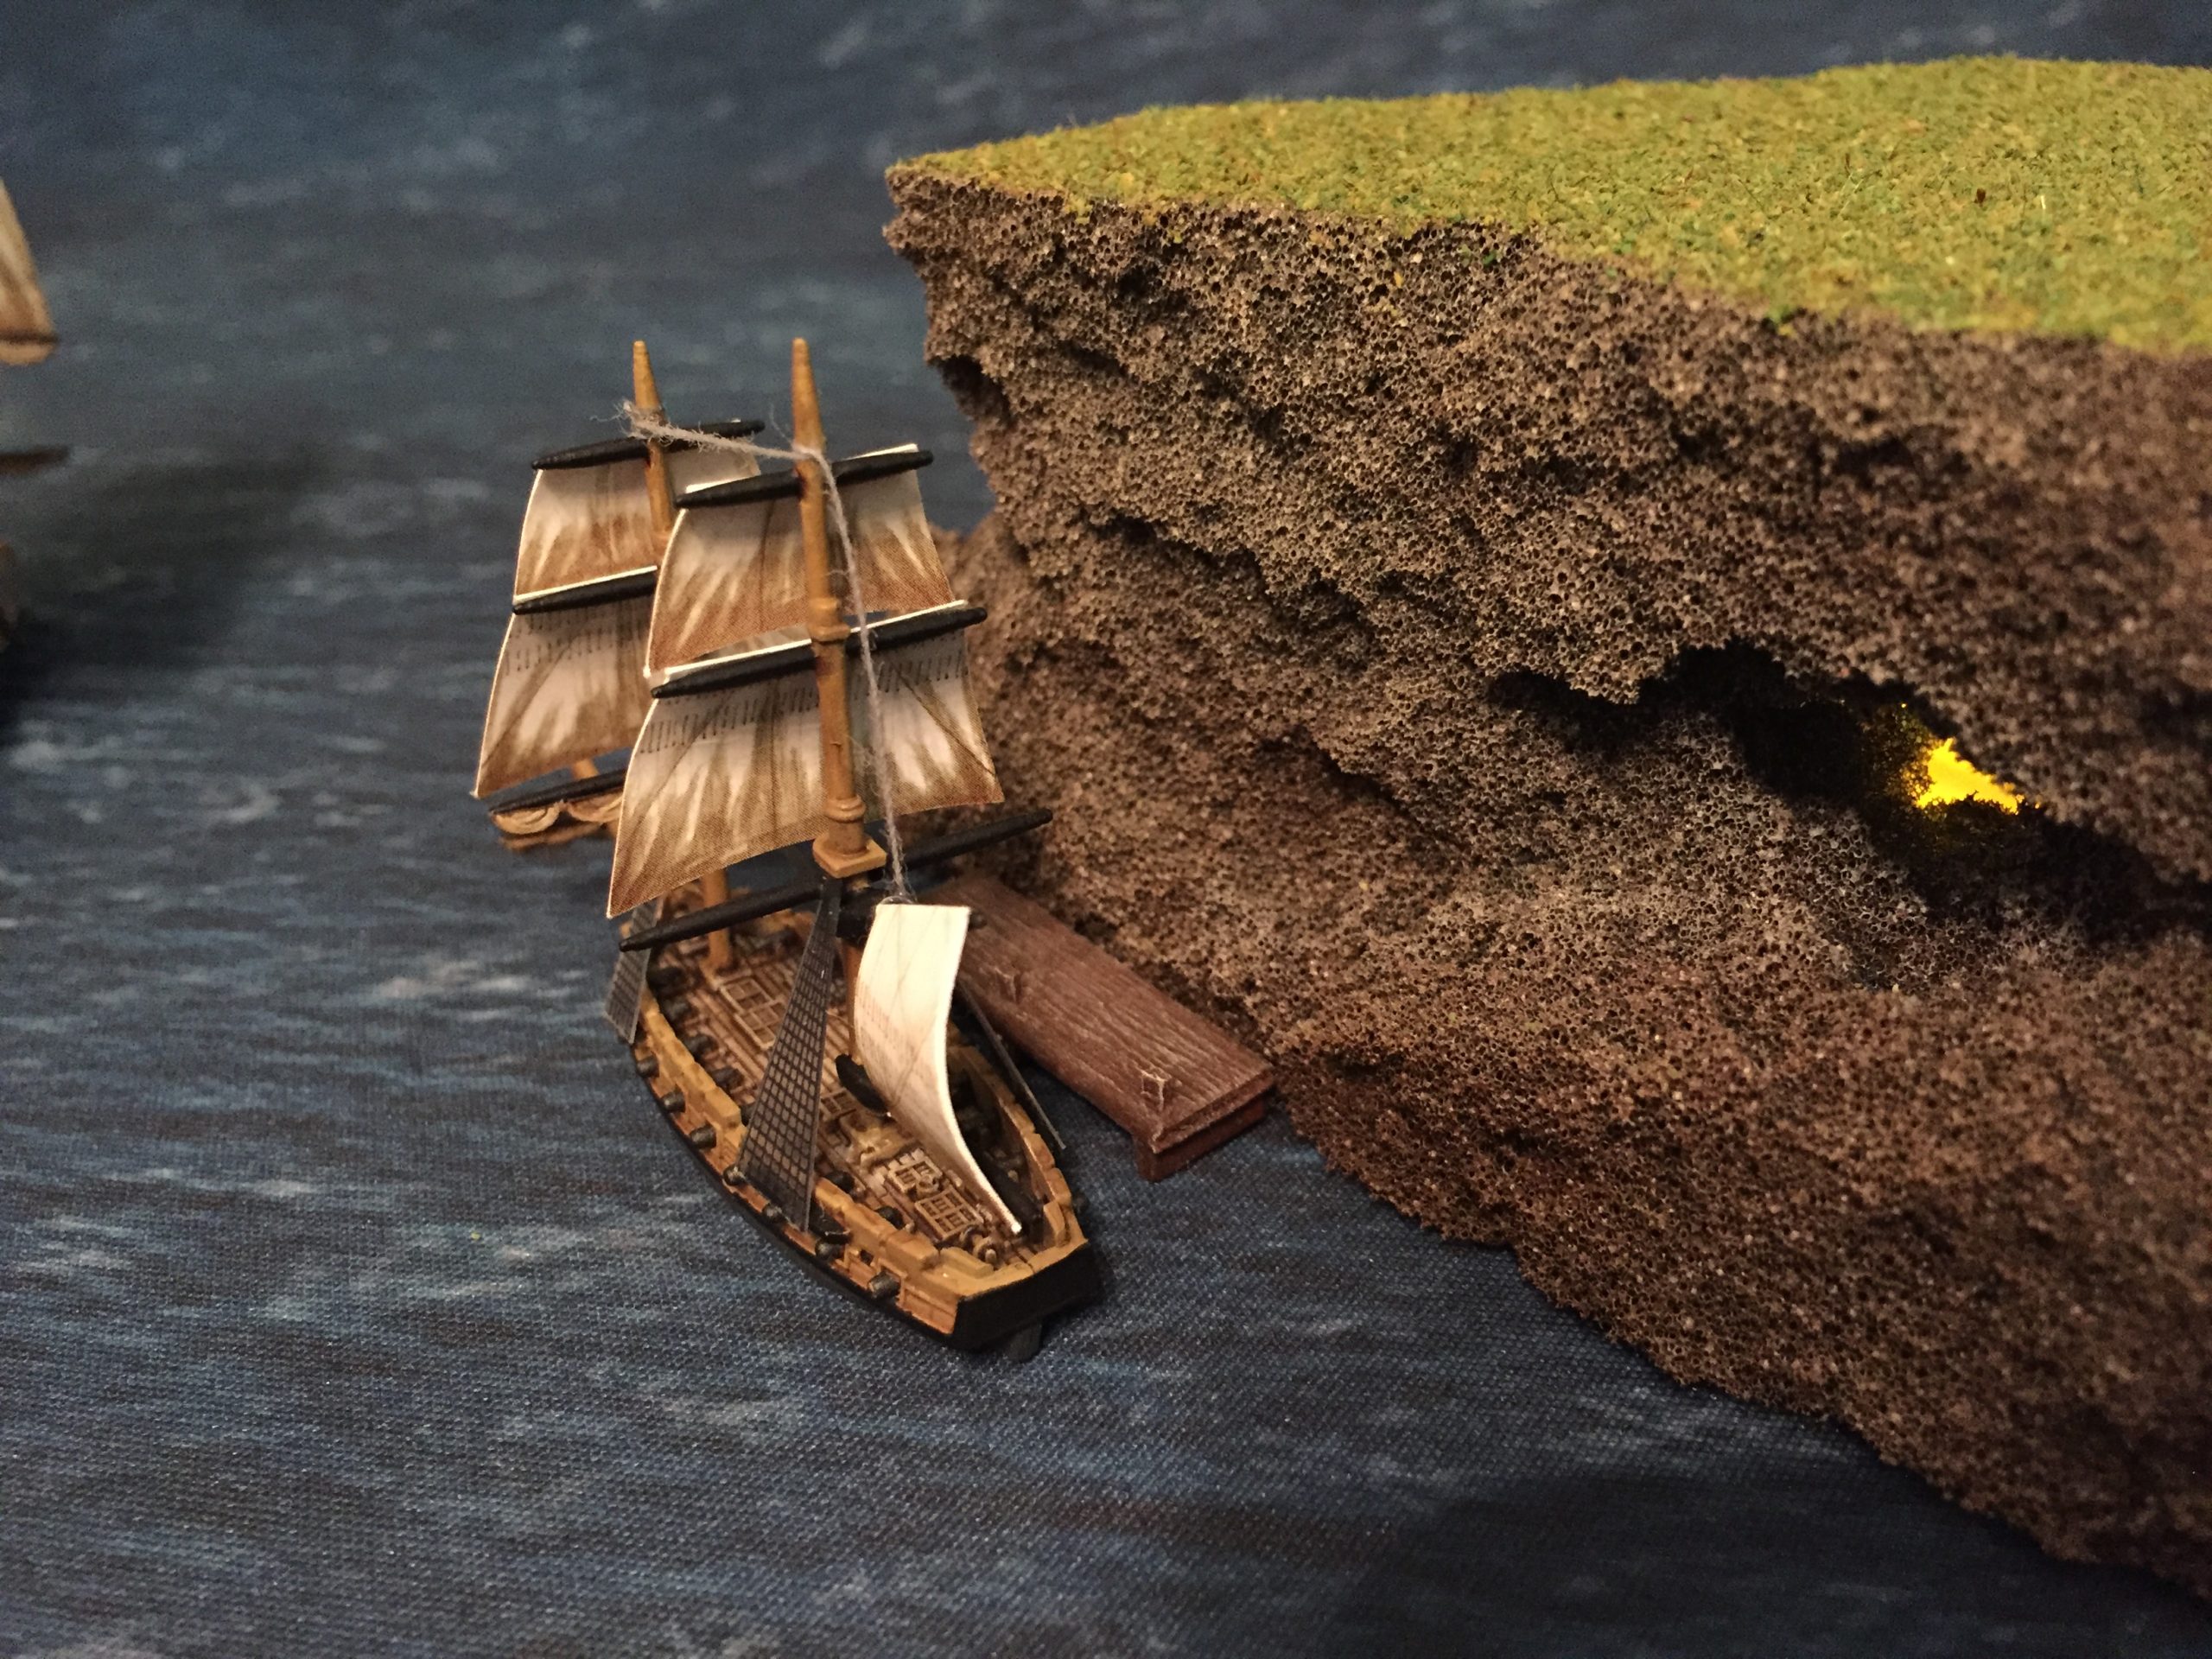
You could quite comfortably move straight on to painting it from here. However, I recommend plucking around the edges of the island to make it more uneven and to give each piece a little more character. You can pluck away caves or even make it look heavily eroded. Have fun with it.
Painting in Layers
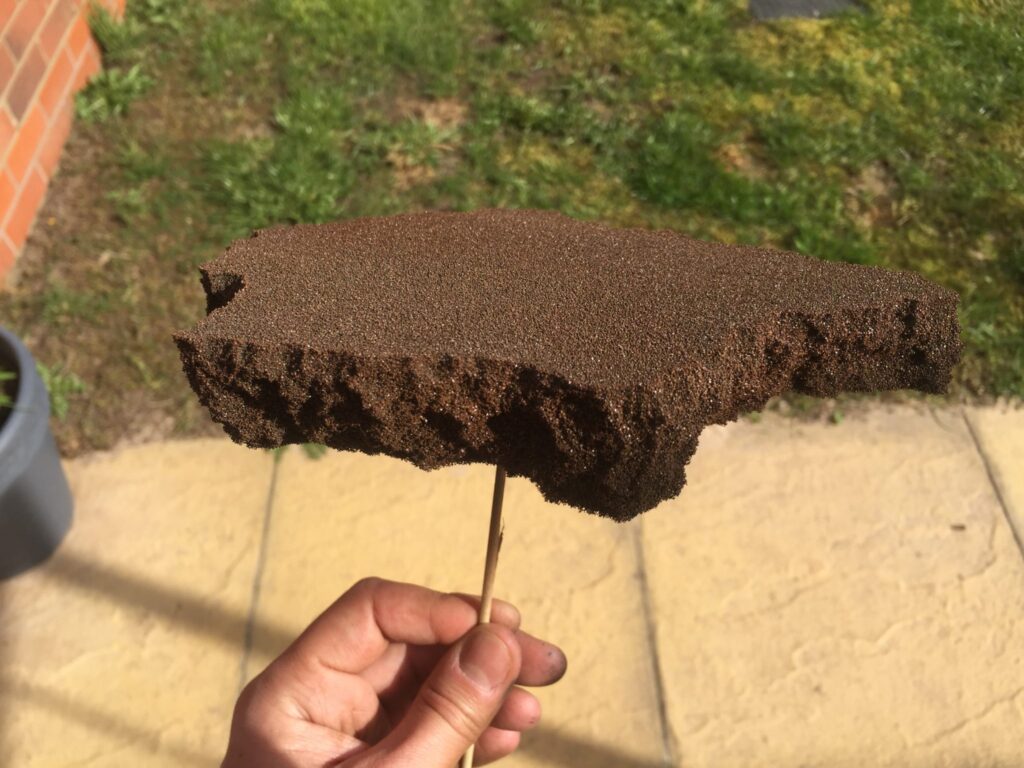
Once you are happy with the look of the island your ready to start giving it a more natural colour. This is where the aerosol paints come in. Most craft aerosols will do the trick. I have opted to use The Army Painter aerosols as I know what I am getting with those. The colours I used were Matt Black, Leather Brown, Chaotic Red and Skeleton Bone.
First thing you want to do is give it a liberal coat of Matt Black. You want to completely cover the colour of the foam (blue in my case).
The black gives you a nice dark base to work from. Once the black is down you then need to give it a good coat of Leather Brown. Over the Matt Black the Leather Brown goes on quite dark which is great. You might want to go a little lighter over the reassesses to allow for a little shading to show through.
The next step is making use of the Chaotic Red. I find that this colour gives the rocks a very rich deep colour. You only need to apply this in select areas. Perhaps focussing on the more reassessed areas to create greater depth.
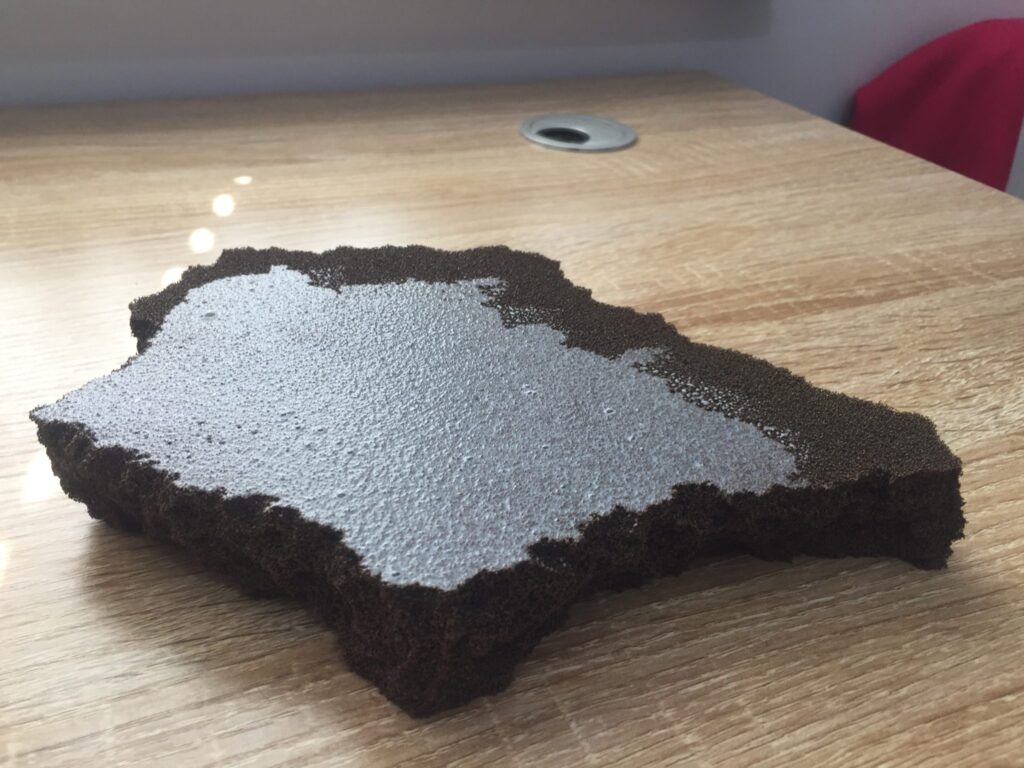
Now we’re ready to apply the final colour, Skeleton Bone. Be careful when applying the Skeleton Bone. You only need to give the island a very light dusting. If you hold the can a good 30-40cm from the island and spray across it you should just catch the raised areas.
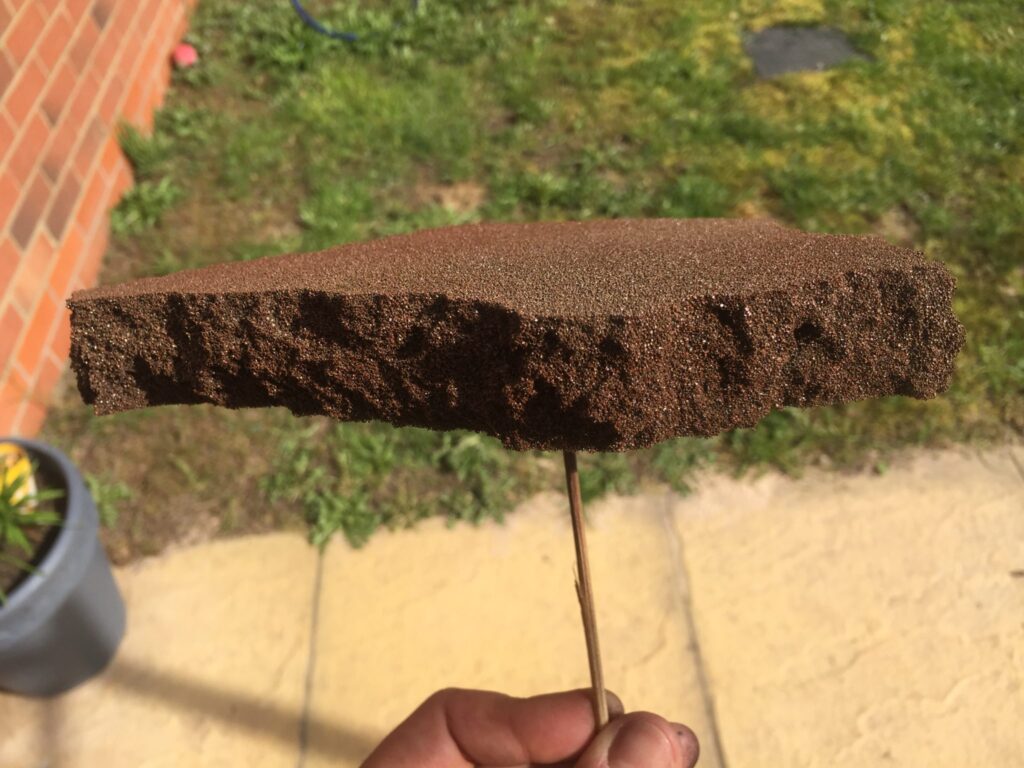
A helpful tip is not to be afraid to go back and apply a little of each of the colours where you see fit. Applying a little of the Leather Brown over the Chaotic Red or Skeleton Bone will give you a completely different shade of brown than you will have had over the Matt Black.
Flock to the Island!
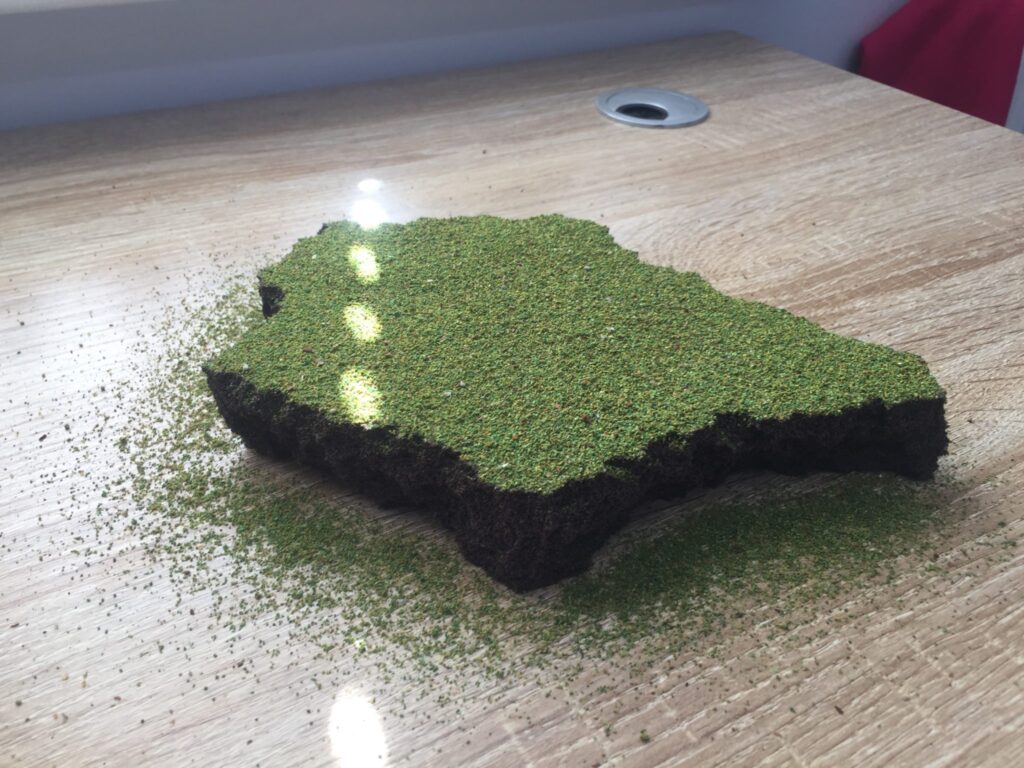
Once the paint has dried, which shouldn’t take more than ten minutes or so, you will want to apply the flock to the surface. I went for a mix of Javis fine light green and fine mid-green turf. I would avoid static grass as that will largely be too long and will look out of scale.
Before applying the flock you need to mix the PVA and water. This needs to be quite a wet mix so 50/50 PVA and water will be fine. Anything too thick will cause the island to warp as the PVA dries and contracts.
Apply the glue to the surface of the island and any other areas you want to flock. You may decide to leave a few patches clear so that you have a few bare patches of ground.
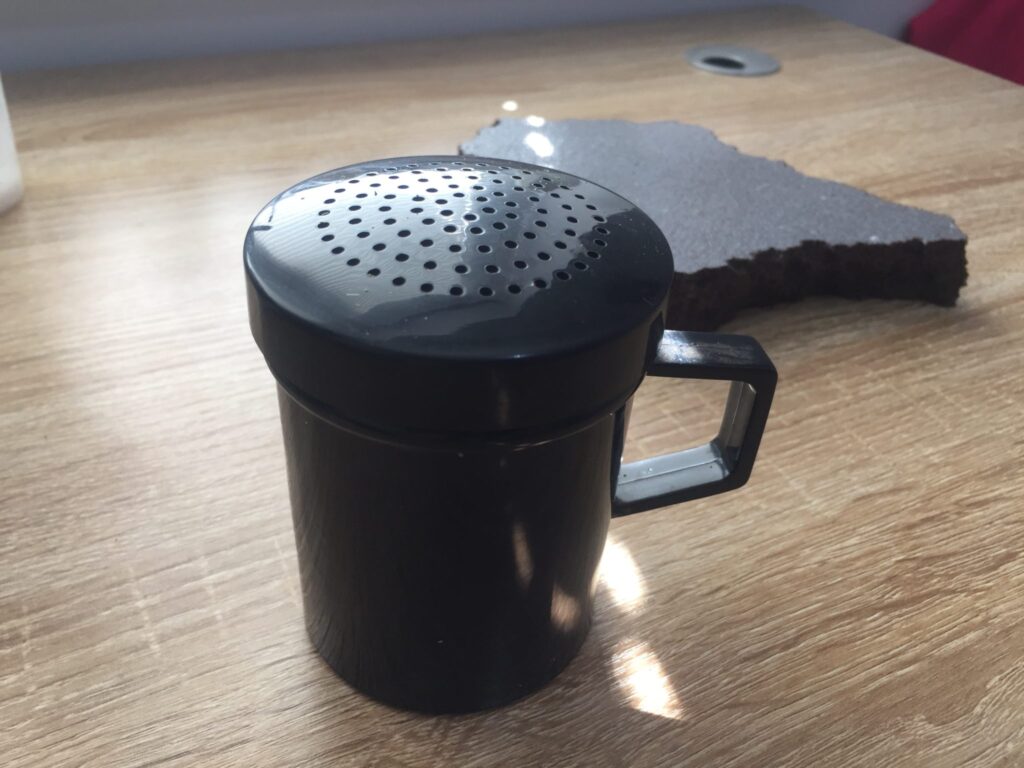
To apply the flock I use a shaking cup. Please see below image. I genuinely have no idea what the correct name is for this tool but it is great for applying flock to large surfaces!
Once you have applied the flock, give it a good shake and set it to one side to dry. It will take a few hours.
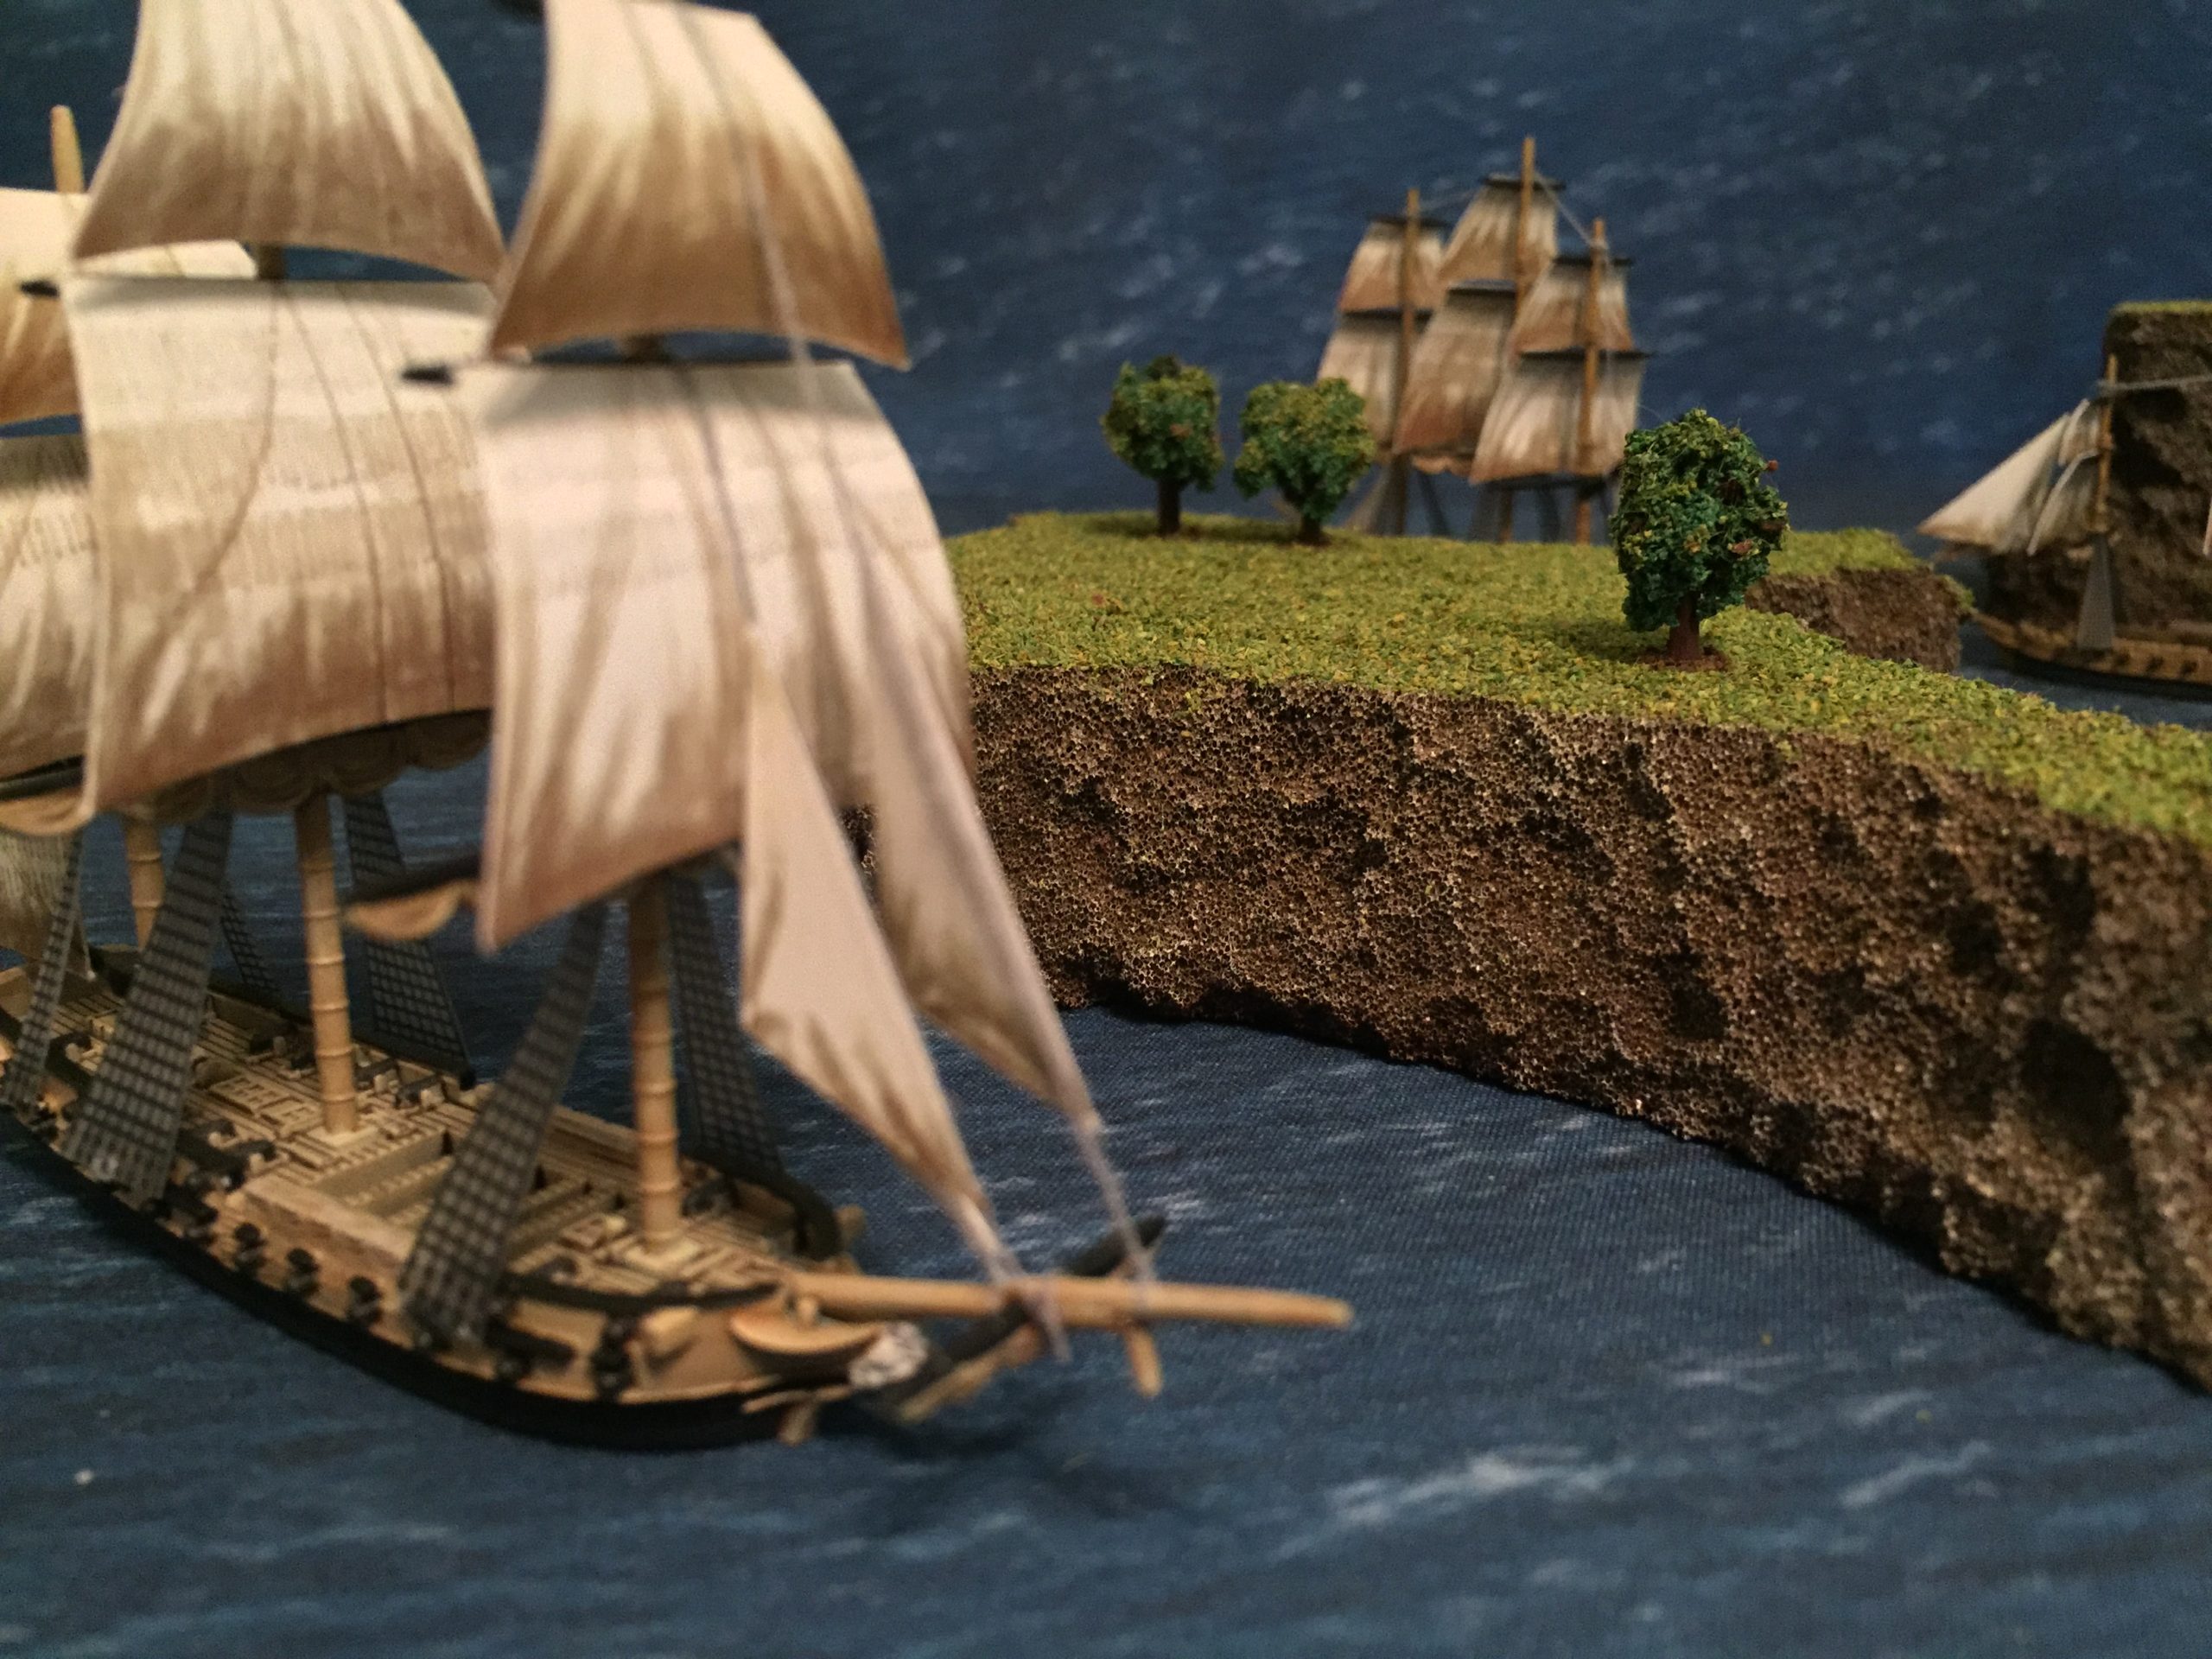
Populating the Island (with Trees)
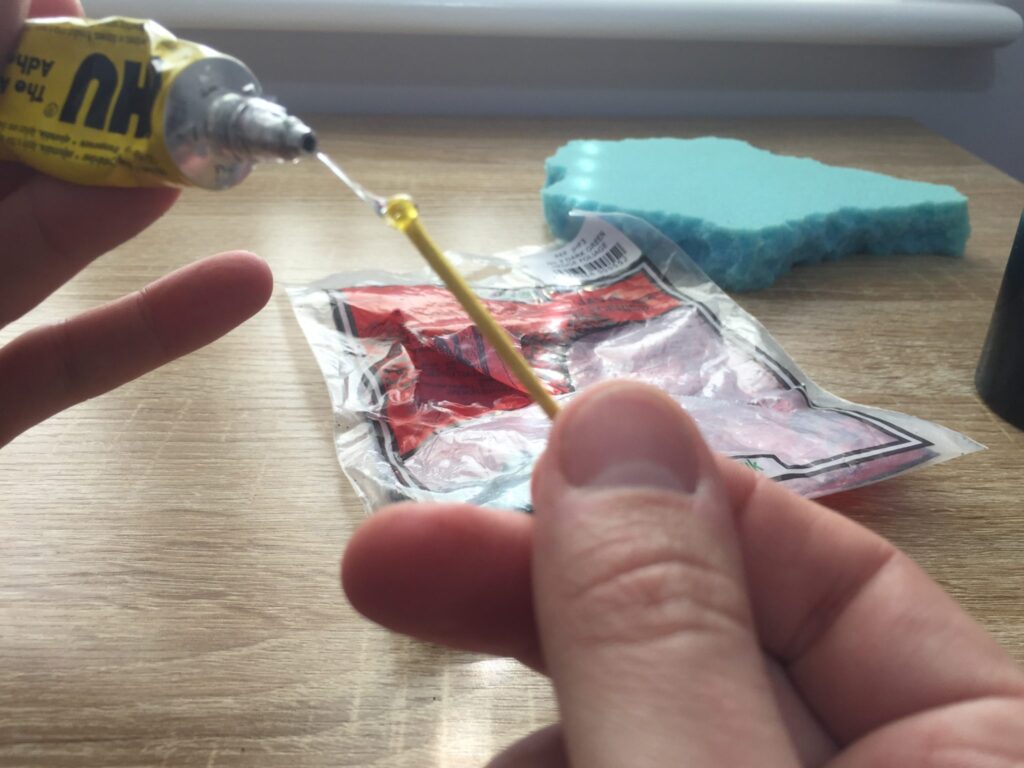
To add a little extra detail you can create a few trees to decorate the surface of the island. To do this you will need a few matchsticks, a little UHU glue, and some clump foliage of your choice. Rough up the square edges of the matchstick with sandpaper and apply a bead of UHU glue to the end.
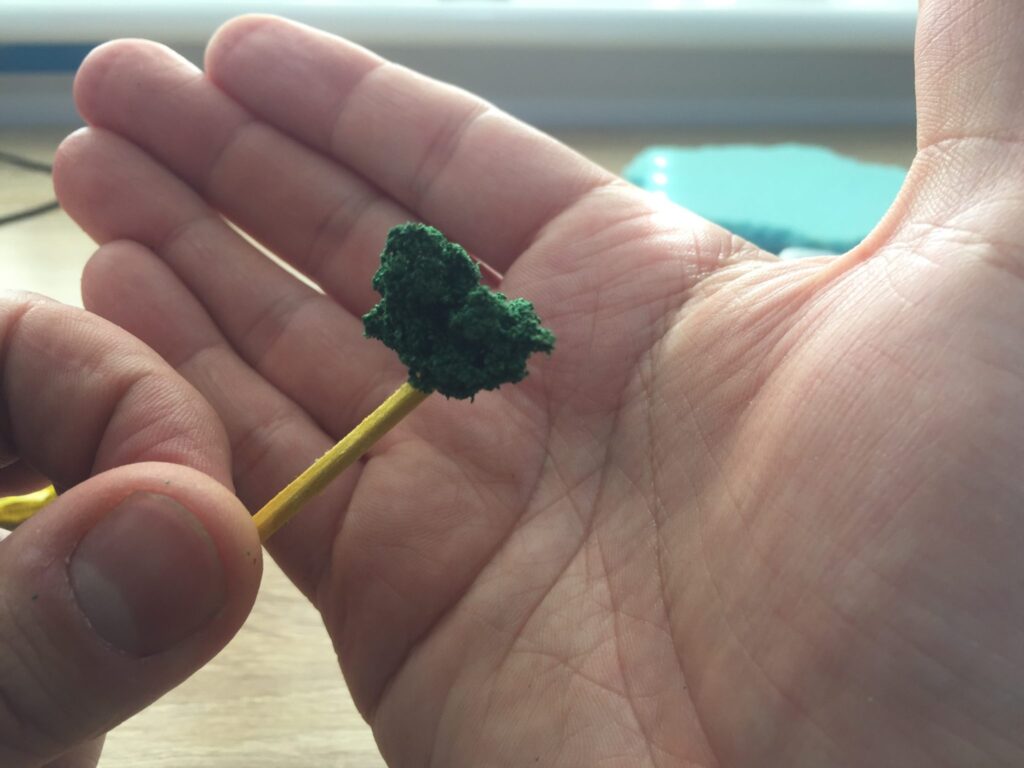
Before the UHU glue dries you need to start sticking the clump foliage to the matchstick. You may need to add a little extra UHU glue to get the desired shape. Once the UHU glue has dried, usually within 5-10 minutes, I find it useful to apply a little watered down PVA to the clump foliage to ensure it doesn’t come apart over time.
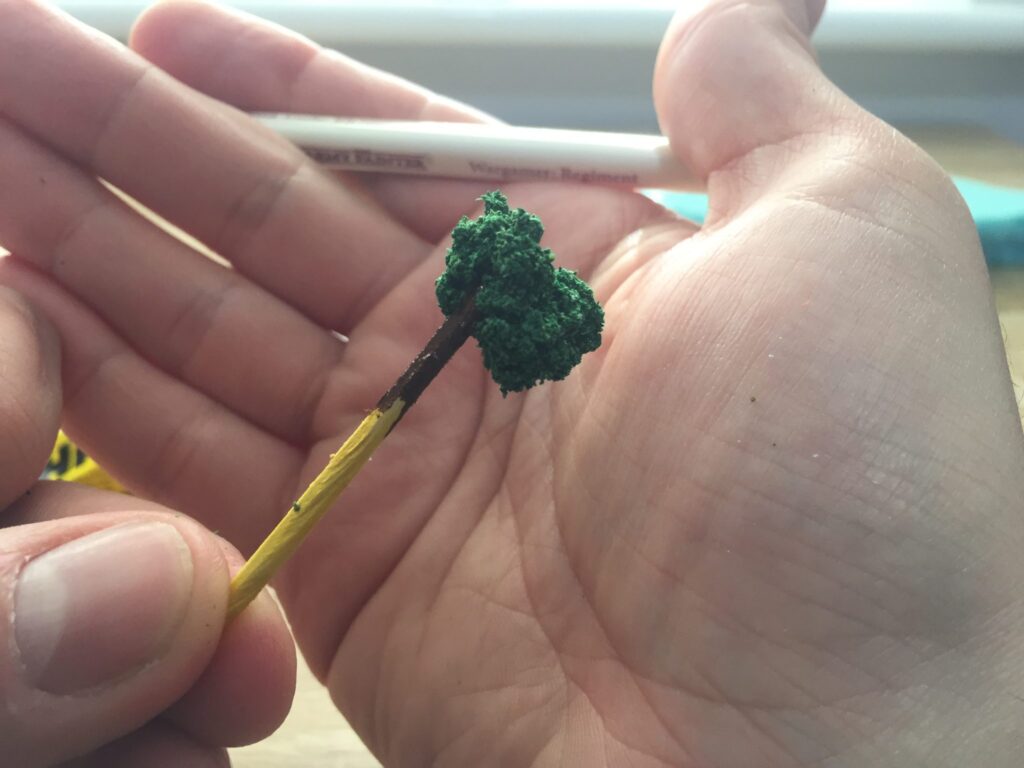
Finally, apply a brown paint to the matchstick to finish it off. Once completely dry trim the end off the matchstick at a slight angle and you will be able to push it directly into the top of the island.
And there you have it!
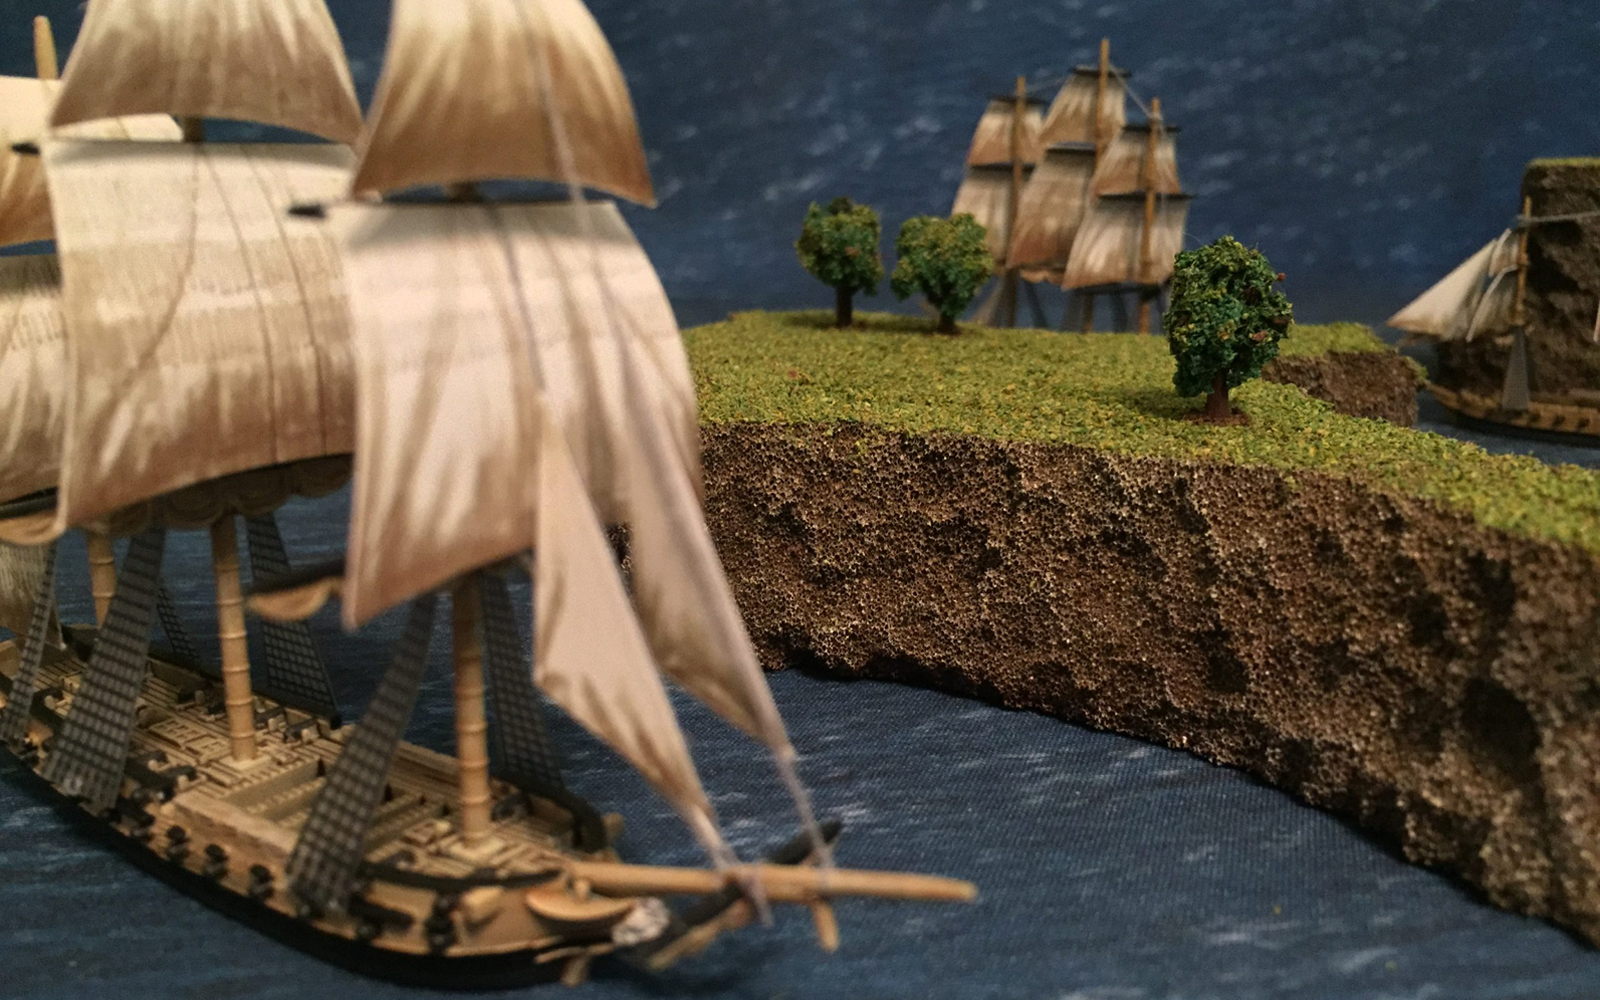
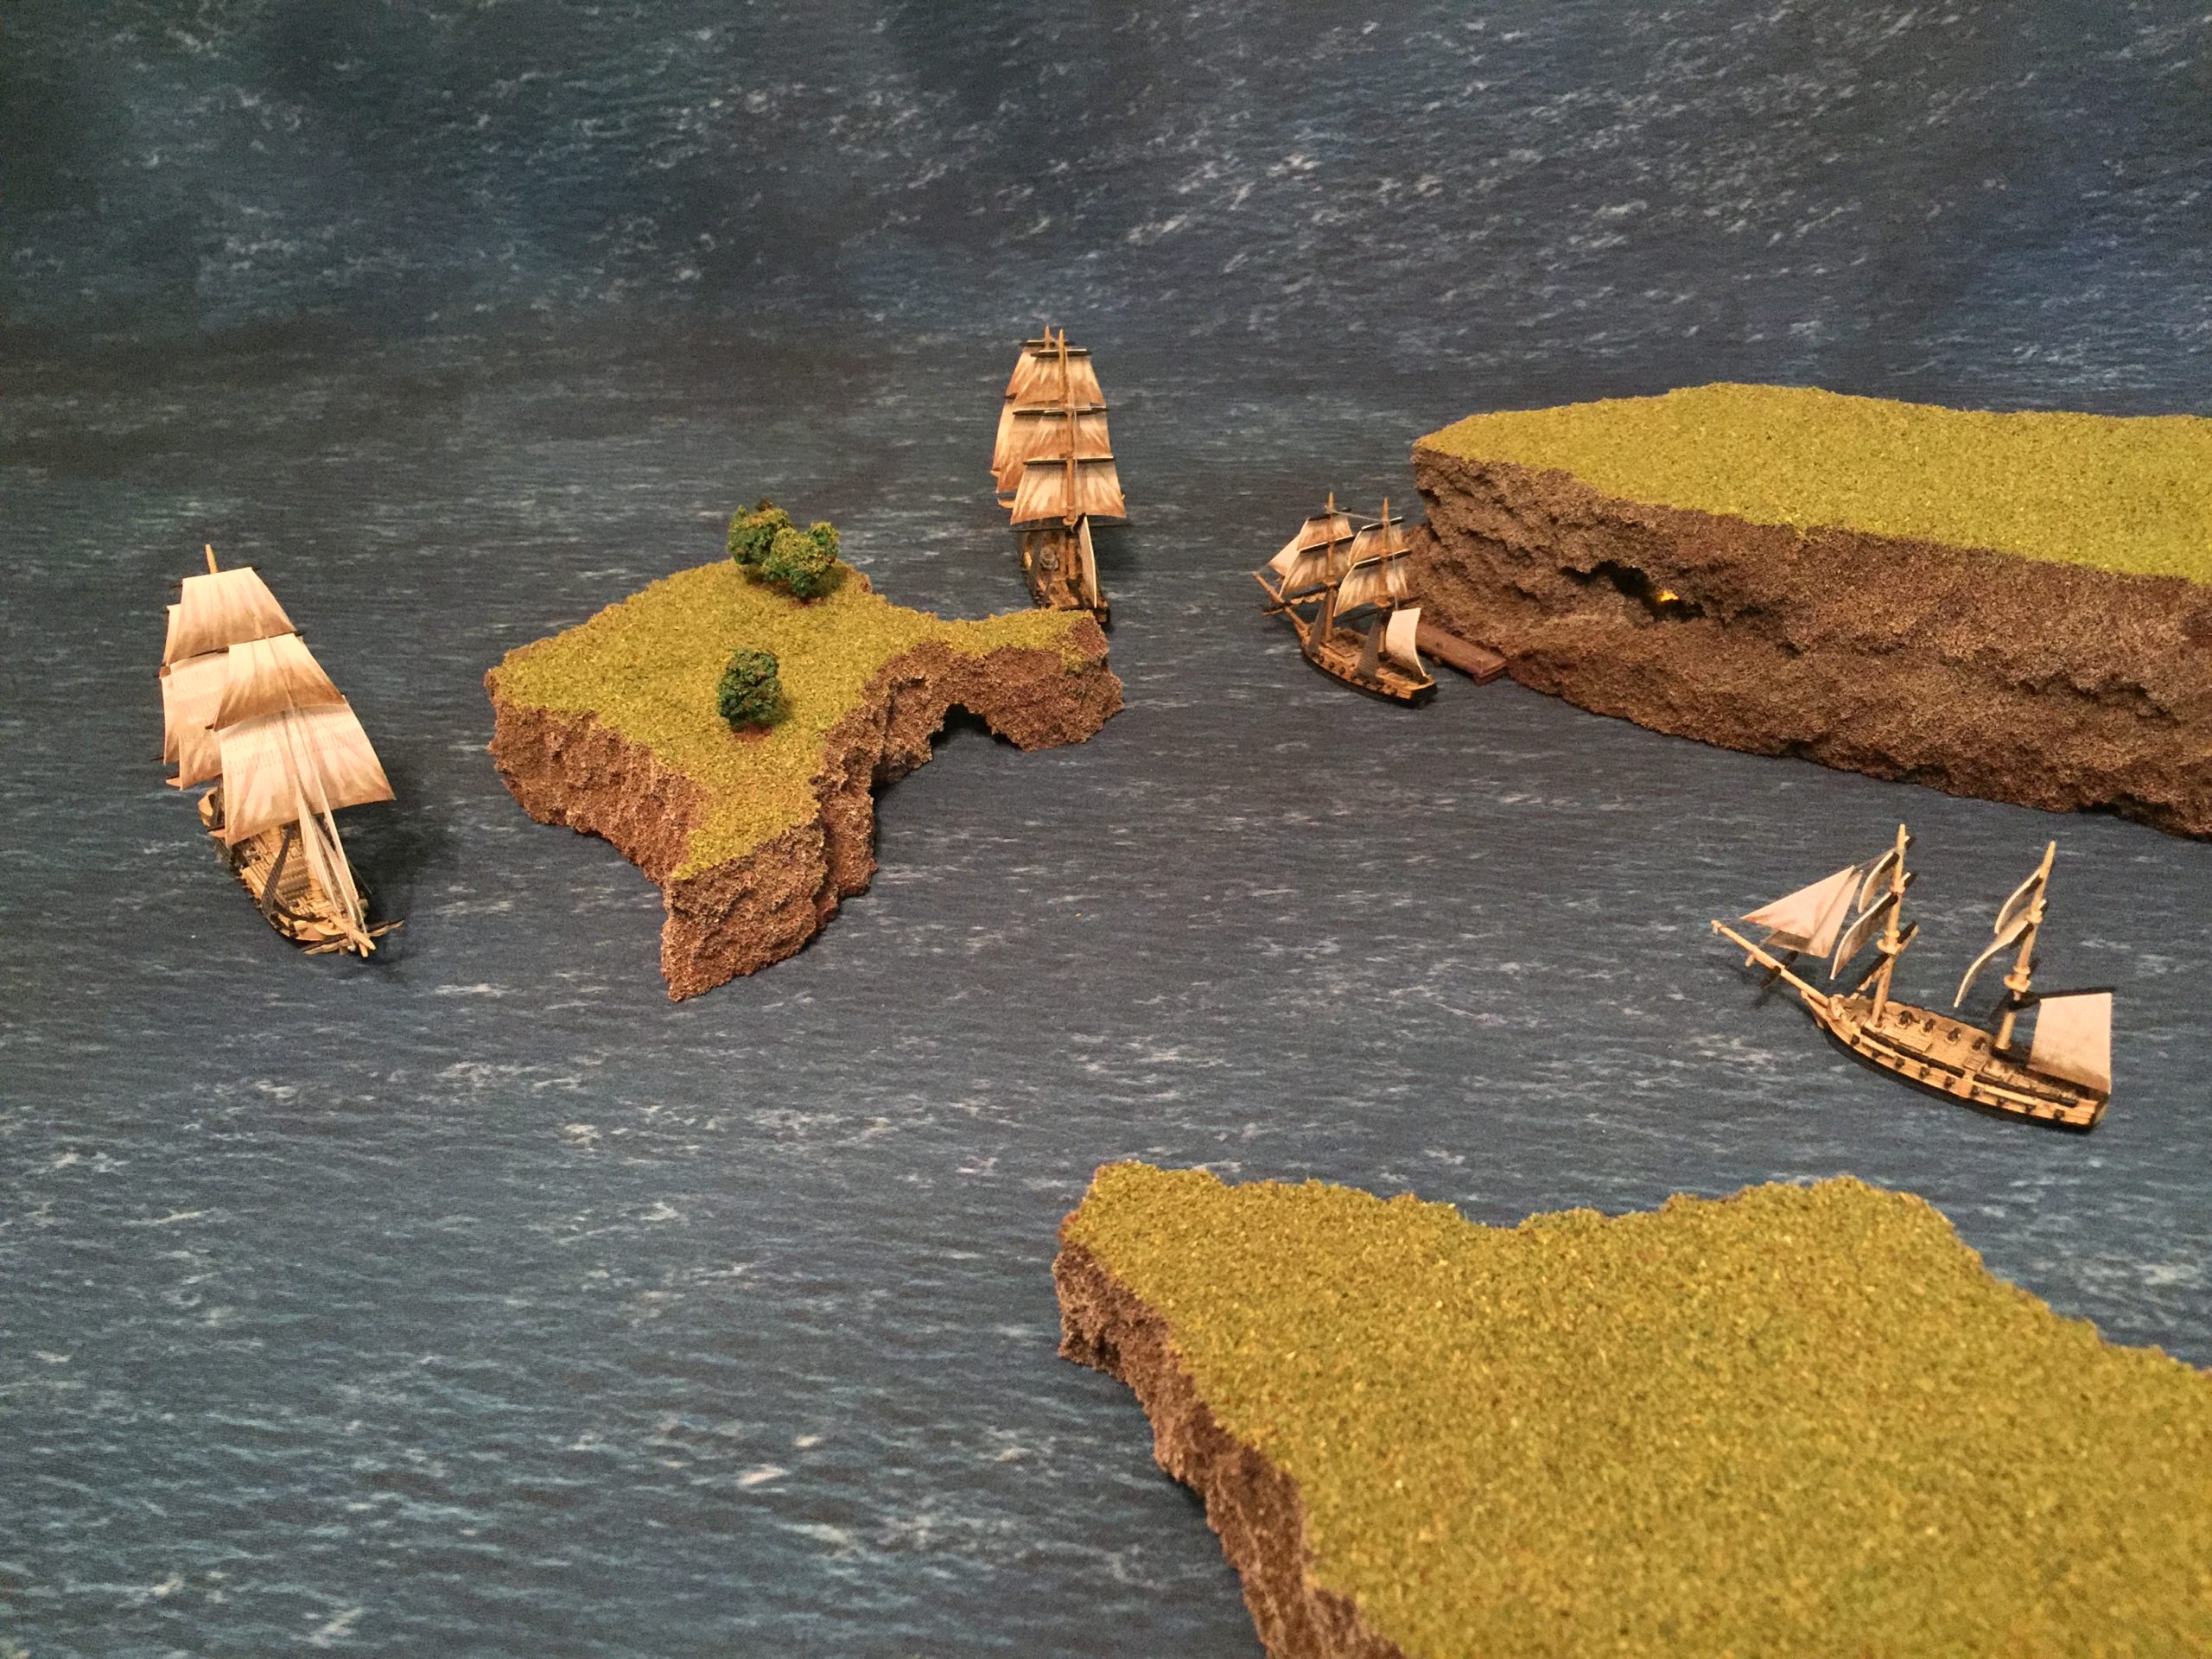
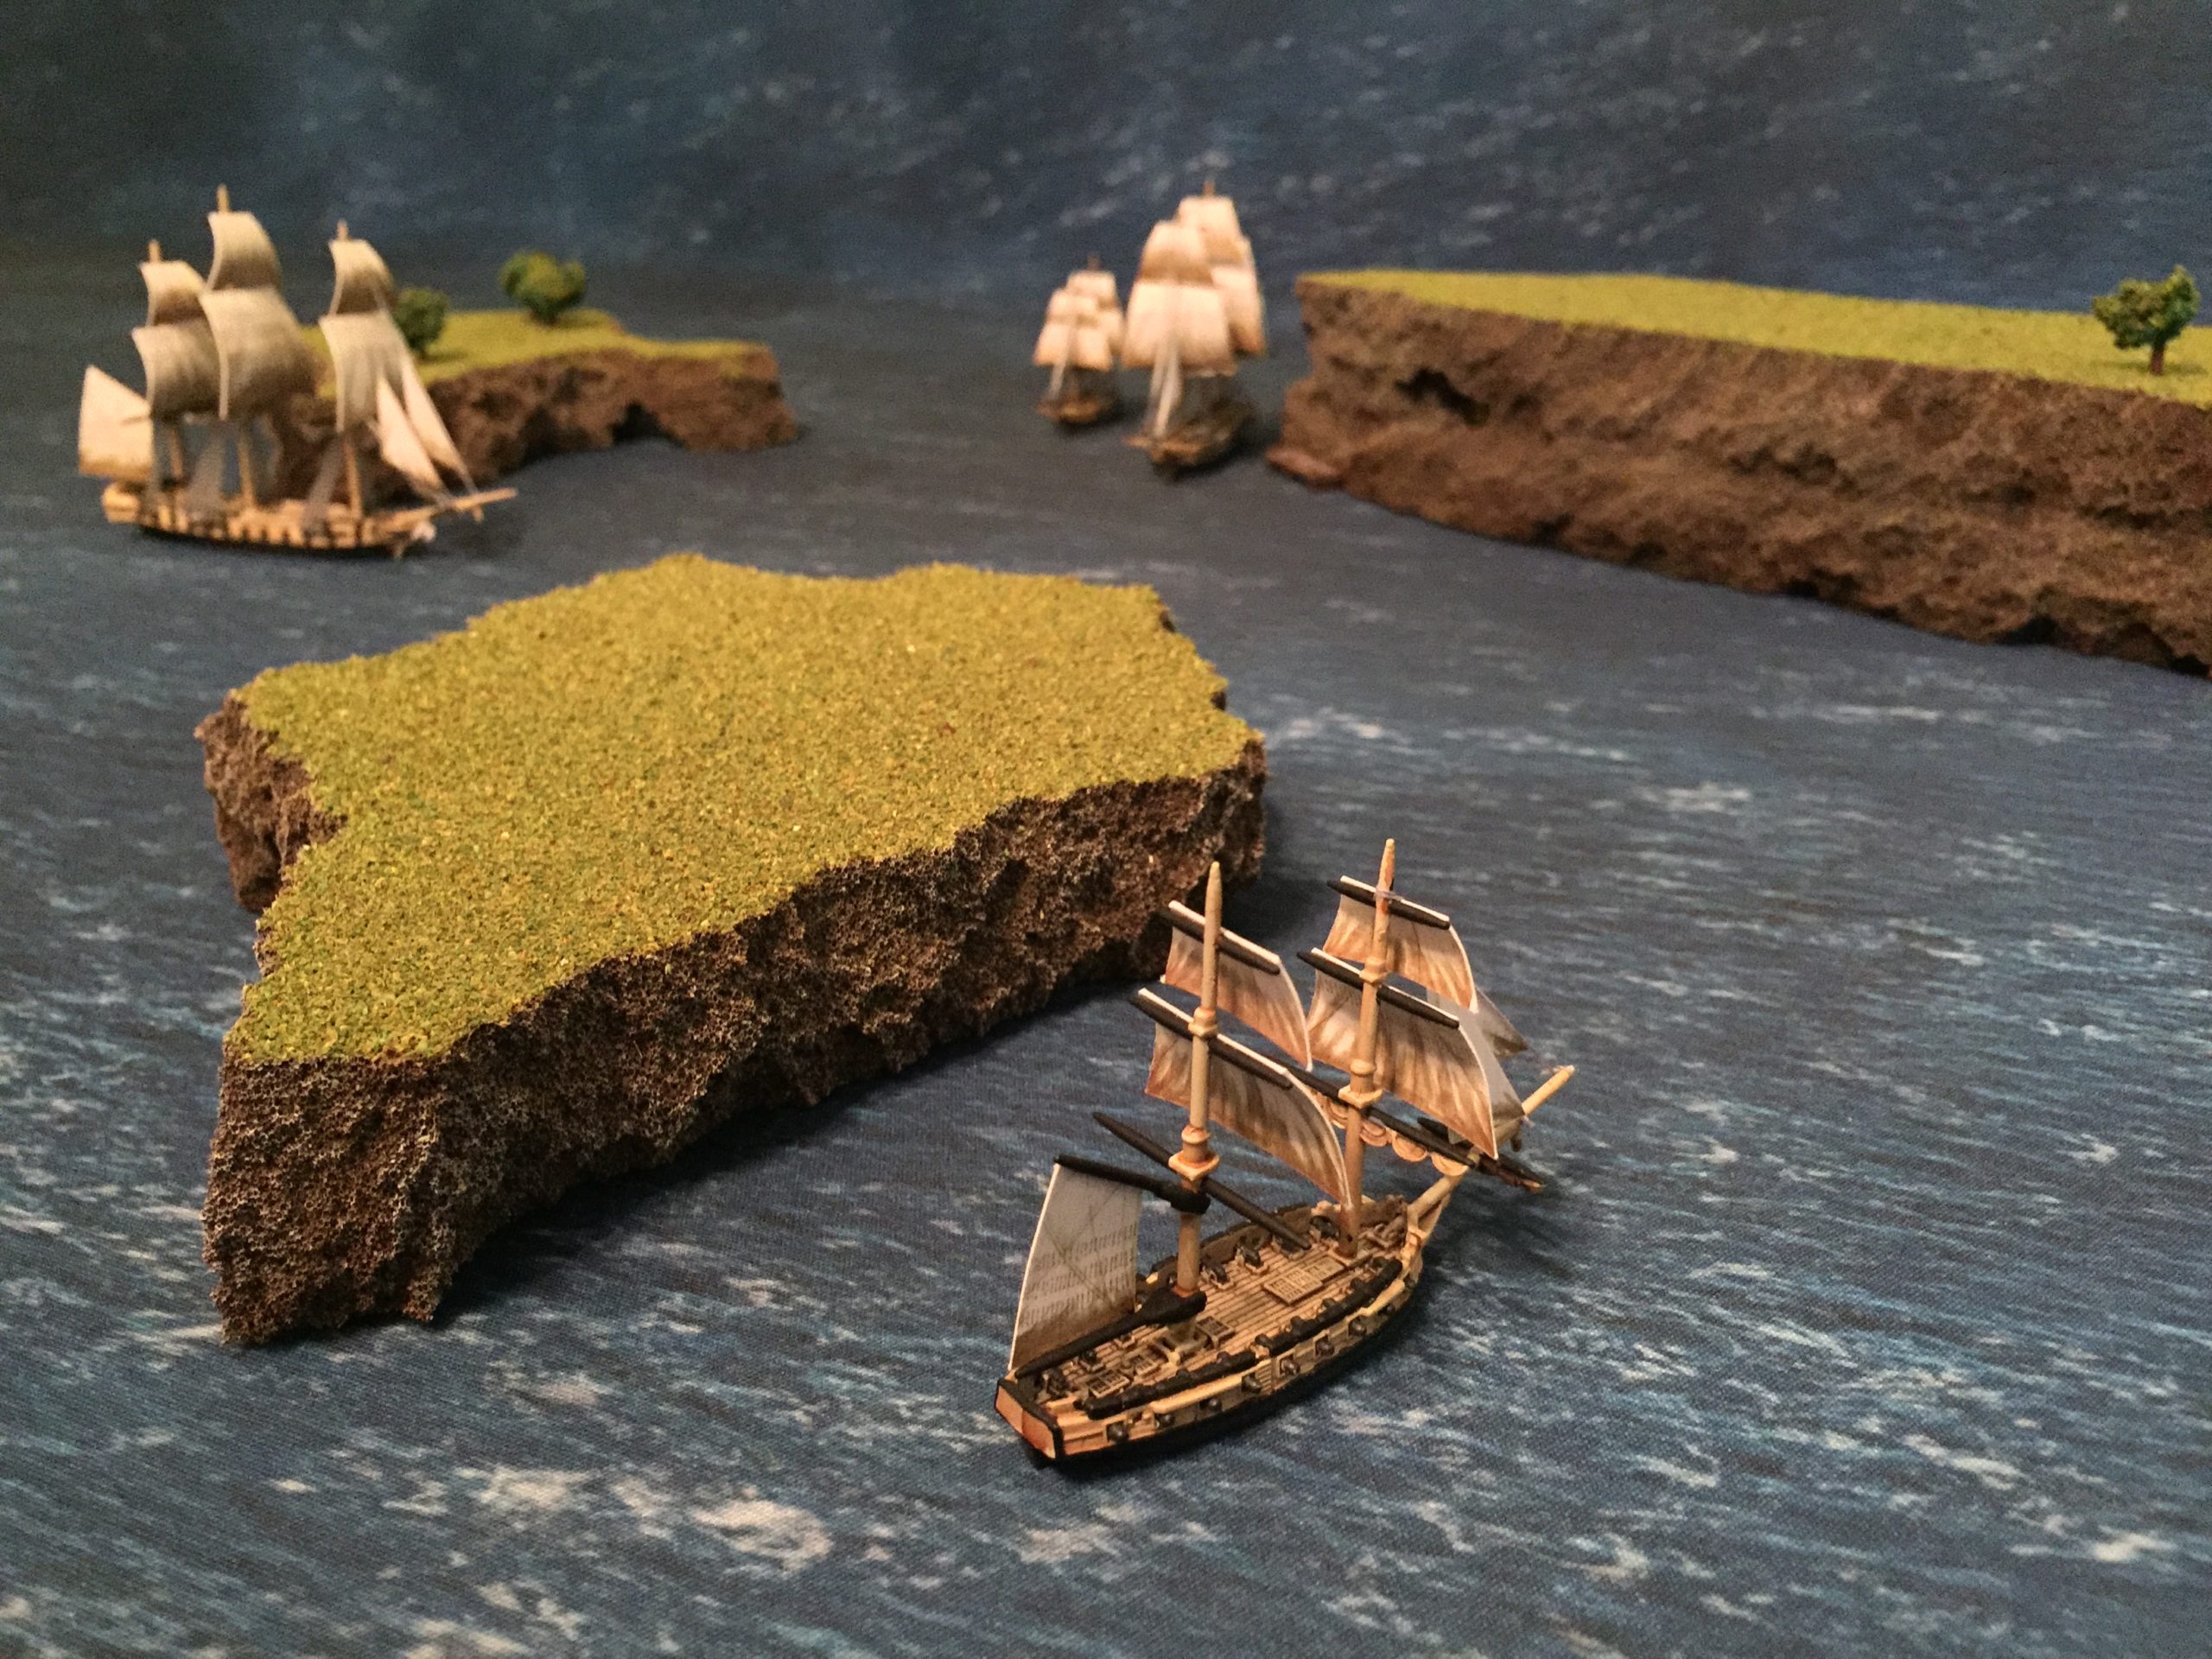
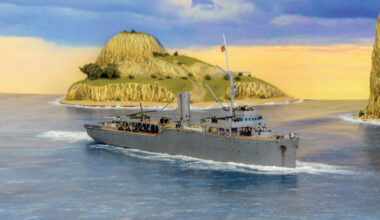
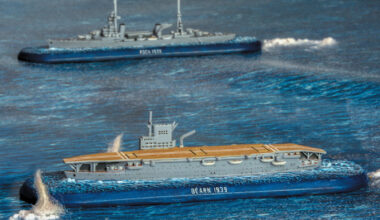
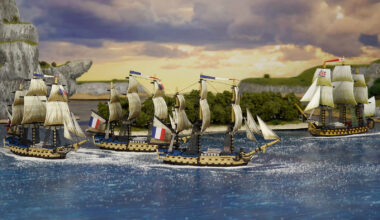
Here are a few pictures showing a few islands I have created recently on a water mat with a few Black Seas ships for scale.
1 comment
That looks amazing! And that looks like a nice and easy ( abd quick) way to get some shore lines on the board! I knew there was a.reason to safe all that old furniture foam 😀 thank you so much for the ideas
Comments are closed.