
Welcome to my new series, where I’ll be painting a variety of models from the Hail Caesar Epic Battles range! In this first article I will look at the Numidians that are currently available, and I’ll be showing you how you can get miniatures painted quickly, and then if you wish to do so complete them to a ‘high tabletop’ standard. I will be using ‘contrast type paints’ in each tutorial and will alternate between Citadel Contrast and Vallejo Xpress Colours – I’ll note throughout which paints I’ve used!
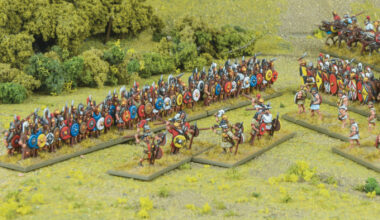
At time of writing, the Numidians are available on a couple of sprues. You can find five bow-armed skirmishers on the Allied Troops sprue and five each of cavalry and javelin-wielding skirmishers on the Carthaginian sprue. While simply attired, they are among my favourite models in this range, with very characterful faces on the infantry and clearly sculpted musculature on the horses – a real painter’s delight!
Preparation and Undercoating
As with any plastic miniatures, it’s always worth taking your time to get them cleaned up before you start painting! I cleaned off any visible mould lines with a hobby knife and smoothed out any jagged areas from the removal of the figures from the sprue with Tamiya Extra Thin Cement. Small mistakes with cutting tiny mould lines can all be made good with this brush applied plastic cement. The models were then undercoated with Halford’s White Primer.
Painting Basics
By and large, I was able to get good coverage with the spray can, so I was able to start work straight over the primer. Any areas where I had not got a good coverage of white I quickly painted with white paint with a brush. This was mainly areas such as under the horses where I had only managed a light dusting of primer. In this article I will be using Vallejo’s Xpress range of paints but if you are not familiar with these they can be easily substituted with Army Painter Speedpaints or Citadel Contrast.
Skirmishers
I’ll start with a couple of the javelin and bow-armed figures and give a two stage explanation of the methods I used. The first stage will show just the Xpress Colours used as base coats and the second how I have highlighted and dark lined each miniature, applied a matt varnish and then painted any areas that are metal. I will then give a shorter explanation about how I painted the other two types of figure, highlighting any differences in the process.
Skin and Hair
I think at times people can confuse Numidians with Nubians when painting! Nubians historically appear to have had uniformly very dark skin, whereas Numidians are rather different! In reality of course Numidian skin colour could vary but on the tabletop in Epic Battles scale should probably be fairly dark and similar to Libyans and Berbers. I decided to use Tanned Skin and for extra contrast applied two coats of this. I actually decided to not highlight the skin any further as I was so delighted with the effect! Numidians wore their hair in tightly curled ringlets and some are depicted having beards. I base coated the hair on all the figures with Hospitallier Black.
Tunics, Javelins, Shields and Belts
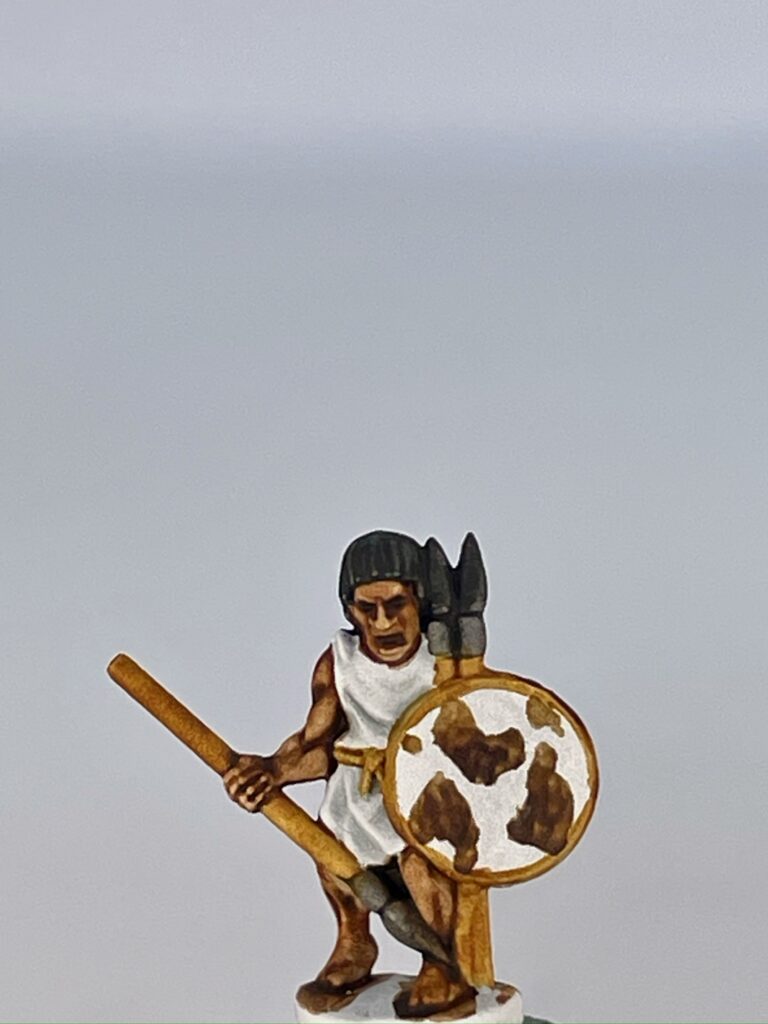
Numidians wore a short sleeveless tunic made from undyed wool. I used three different methods to paint these. You can pick one you like the look of or mix the colours you use in the same unit. I decided to keep a more ‘uniform’ look for each base. For the javelin armed troops I simply painted Templar White over the white undercoat. I also painted the shield rims, the back of the shields, the shaft of the javelin and the belts Wasteland Brown – it’s a nice, simple way to tie the model together!
Shield Details
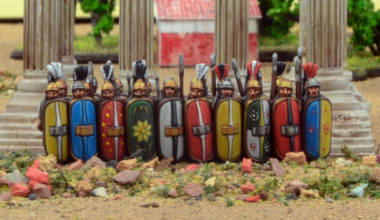
Numidians are most commonly depicted as carrying a small, round shield covered with hide. Although I have seen illustrations of these being zebra and giraffe skin, I settled on all of mine having shields made from cow hide. For reference I looked at photographs of cow hide rugs and just copied the irregular designs I had seen – you don’t need to get too fancy with your reference images! I painted these with either Mahogany or Hospitallier Black directly over the white undercoat. The last thing I did was paint the javelin heads with black as I find metallic colours work better over a black undercoat. With the javelin head painted at this stage, rather than the next, the photograph illustrates how the miniature could be considered finished at this point.
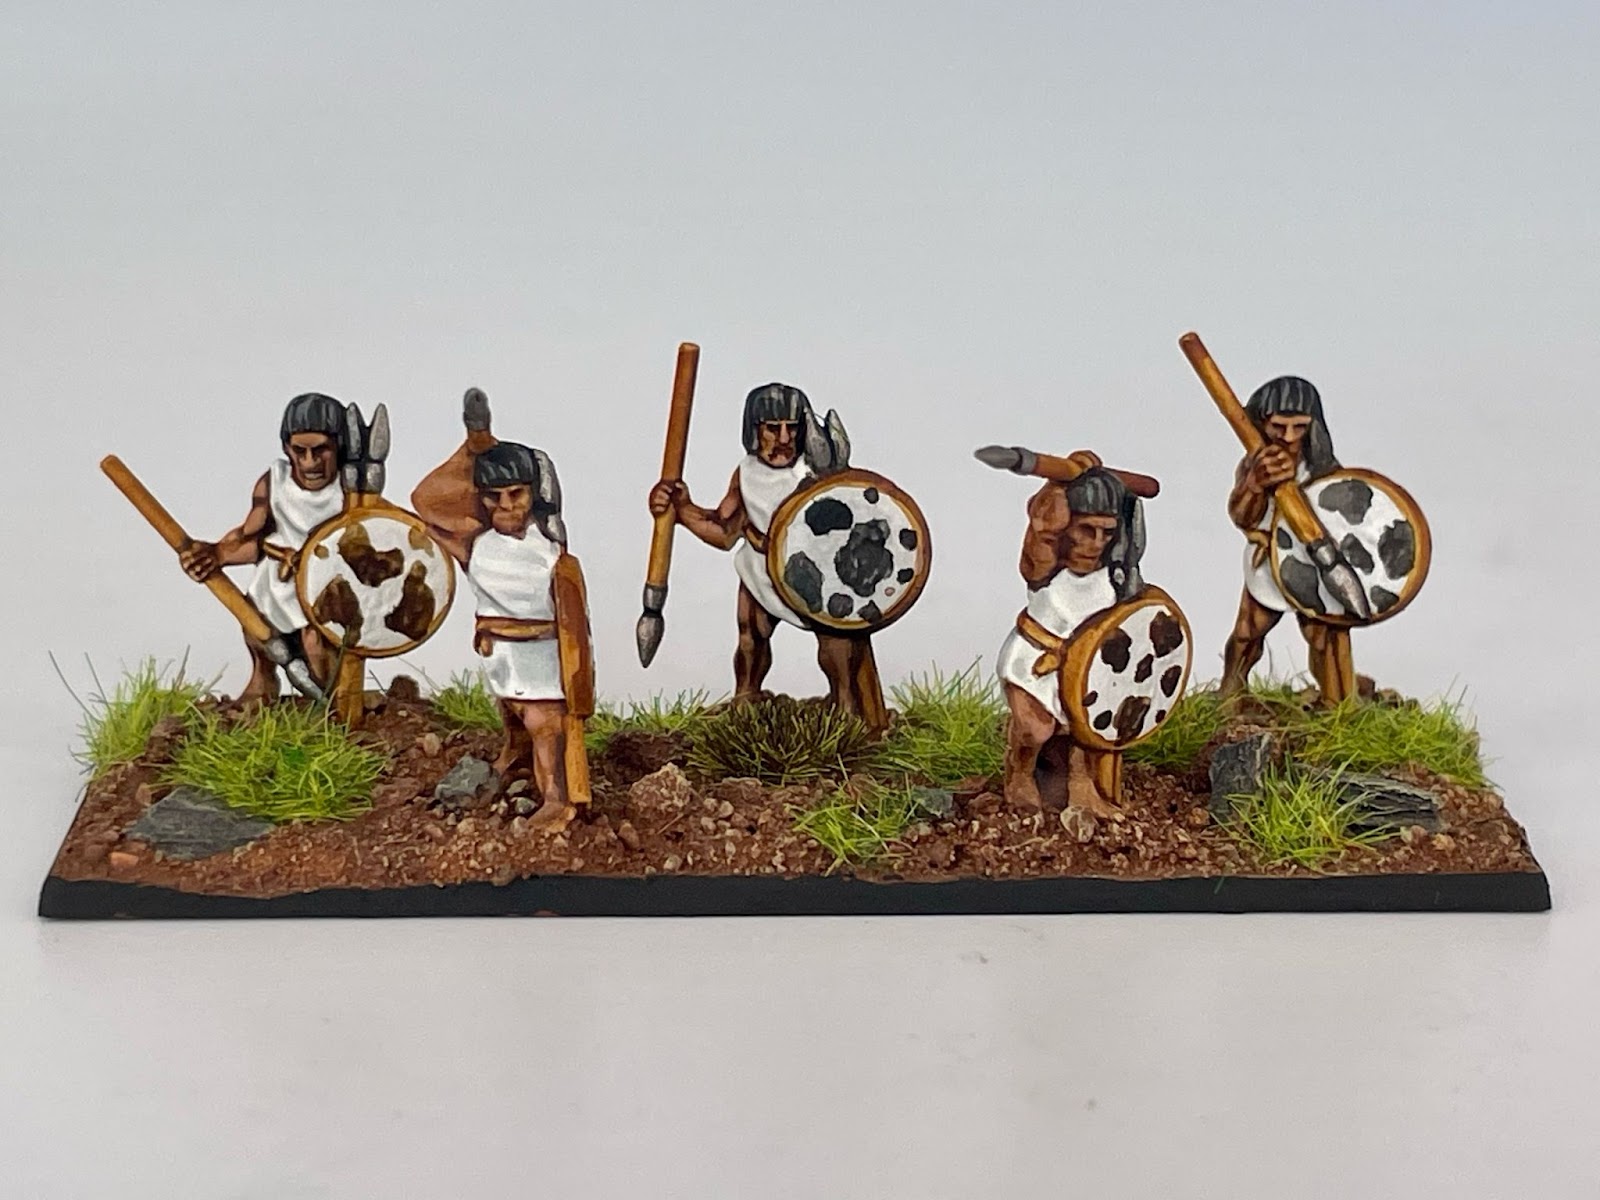
Highlights and Detailing
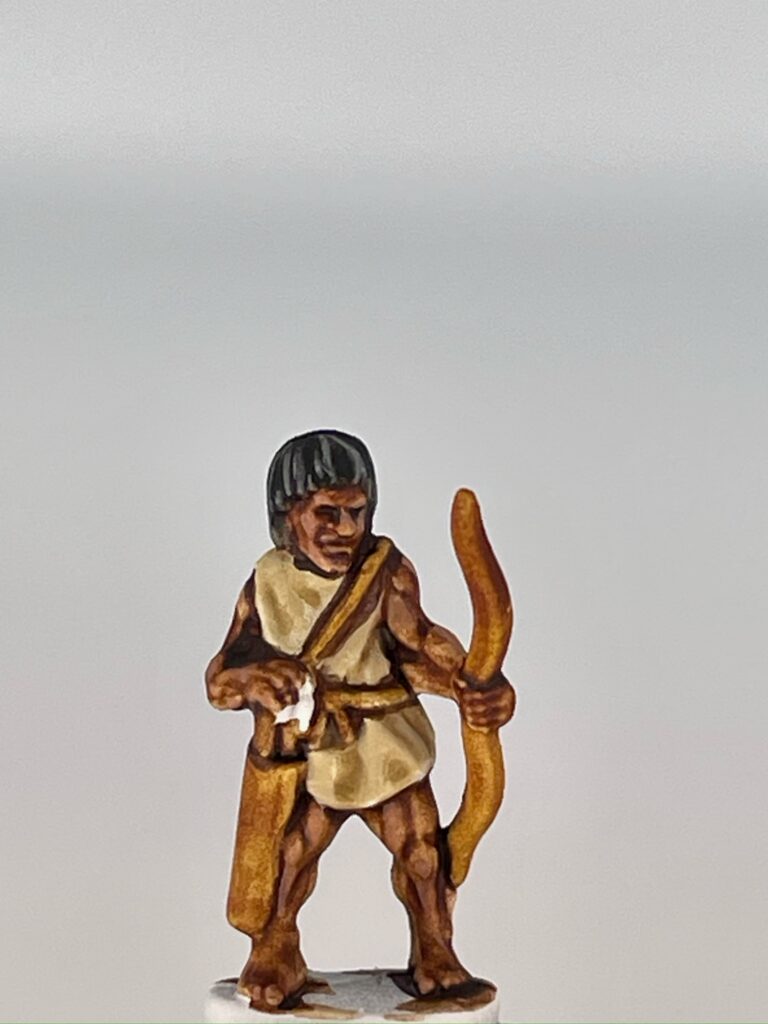
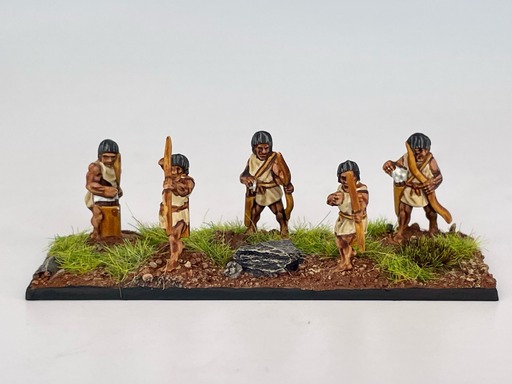
The tunic was highlighted with Vallejo Off White. Along the boundaries between different areas of colour I then applied Citadel Rhinox Hide This ‘dark lining’ technique enhances the details of the miniature and makes them stand out more effectively. The hair was highlighted with Citadel Administratum Grey, working carefully and using the side of the brush. For the skin I used Citadel Cadian Fleshtone. The figure was then varnished (I used Vallejo Matt applied with a brush) and the javelin’s points were painted with Citadel Iron Hands Steel. These archers were painted up using the exact same method except the tunics were base coated with Mummy White and then highlighted firstly with Citadel Ushabti Bone and then Flayed One Flesh
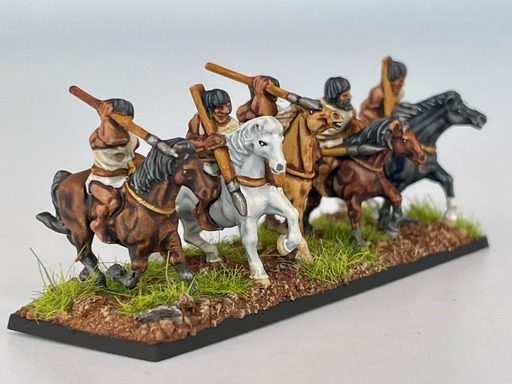
Cavalry
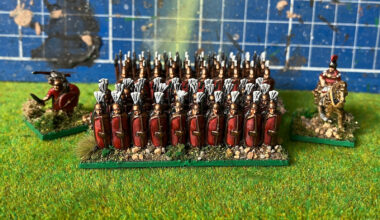
I painted the riders exactly as described above – this can be considered the ‘basic’ scheme for all my Numidians! The only difference is the tunic colours. These were painted Mummy White and highlighted with Vallejo Off White. For the horses, I’ve got a bunch of different schemes to ensure plenty of variety across the army. I work from the same white base as the infantry in all cases.
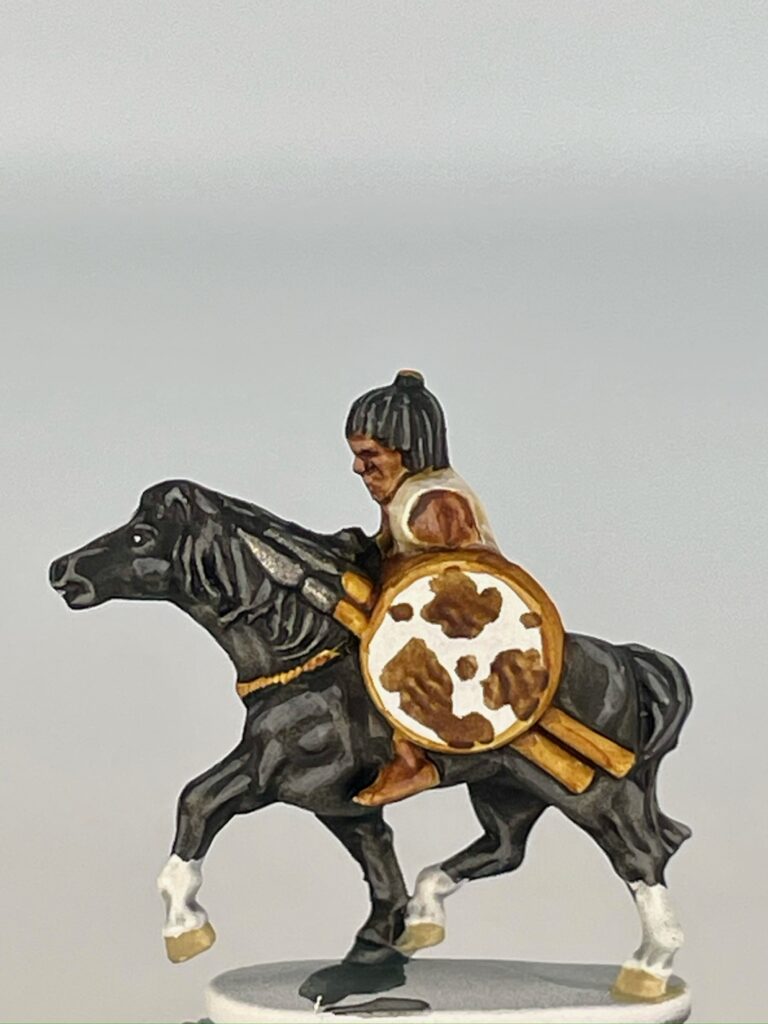
Black: The horse is painted with Hospitallier Black and three of the socks with Templar White. The hooves are left white and the rope around the horse’s neck painted with Wasteland Brown. Highlight the horse with Citadel Dawnstone and the socks with Off White. The mane and tail were highlighted with Administratum Grey. The three hooves with white socks were painted Scale 75 Thar Brown and the other one with Scale 75 Graphene Grey. All the horses’ eyes were painted black and a tiny reflective white dot highlight was placed in the centre. On a couple of the horses I picked the teeth out with Vallejo MC Ivory.
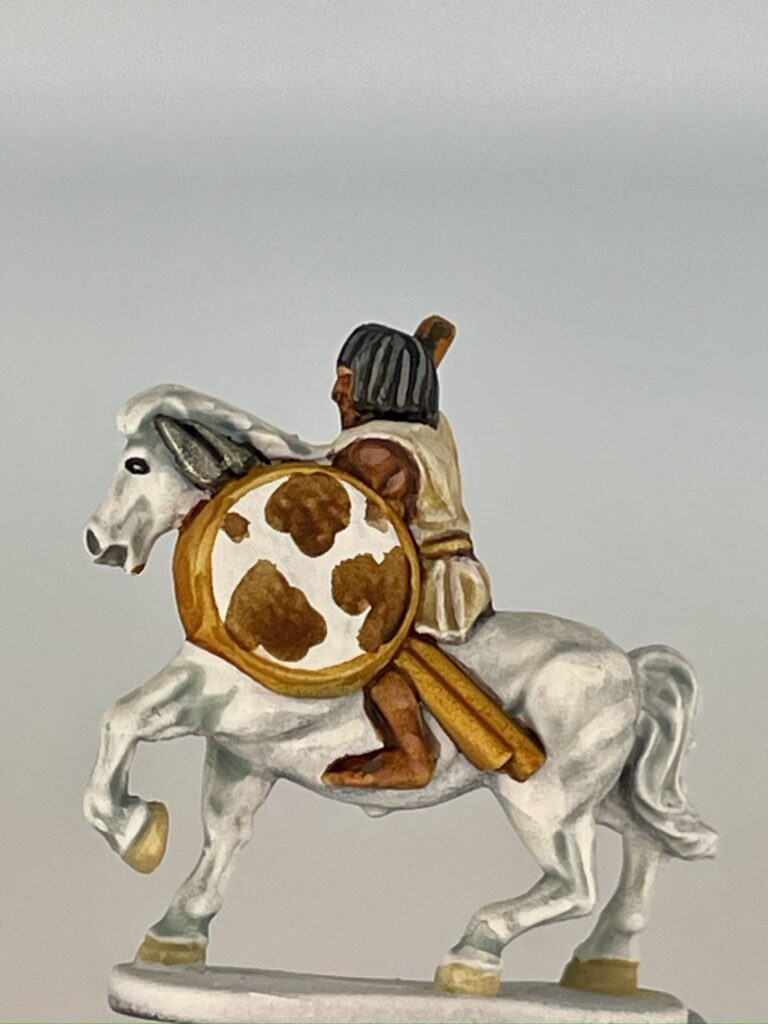
White: Paint the horse Templar White. Highlight with Off White. Make sure your paint is quite thin when you are highlighting all of the horses. This will avoid the transitions between colours looking too ‘sharp’ and will give a more natural effect. Paint the hooves Thar Brown. Couldn’t be simpler!
Brown: Paint the body of the horse Battledress Brown, and the socks, mane and tail with Hospitallier Black. Highlight the body with Citadel Zandri Dust and the socks, mane and tail with Administratum Grey. Finally, paint the hooves Graphene Grey.
And there you have it – a really simple basic scheme that lets me get a whole bunch of Numidians on the tabletop quickly, and an extra couple of steps to take them to the next level!
Want to recreate Paul’s Numidians on the Hail Caesar Epic Battles tabletop? Check out the awesome range of plastic boxed sets on sale NOW, and assemble a force worthy of Hannibal (or Scipio)!

2 comments
You’ve done such a wonderful job painting these. I hope you share more of your work.
Thanks very much John. I’ve hit quite a few tutorials coming up.
Comments are closed.