We’ve previously featured Iain Madeloso’s work, and when he came back to us with a painting guide for Epic Battles scale Pike & Shotte, we knew it would be a good ‘un! Follow on to see how you can get your models looking great, without spending hours and hours on them!
At some point in every hobbyist’s life, there comes a point where you can no longer put off starting an English Civil War project, and it seems that 2026 is the year for me. Fortunately we live in a time where everything you could possibly need in terms of research and reference illustrations is widely available in books, documentaries, and various historical websites, as well as other hobbyists sharing their own work online. All of this information was enough to provide me with a solid foundation from which to get my project started.
For my project I gave myself two targets; firstly, having painted Warlord’s Epic range before and having a set recipe, I wanted to find a new way of preparing and painting my miniatures. Secondly, I wanted to maintain the speed at which I could finish a unit and get them on the table. With this tutorial, I hope to give you a painting recipe that will provide you with a solid foundation for your own Epic Battles projects, regardless of the era or unit type.
First up, preparing your miniatures.
My usual method would have been to clip the miniatures from the sprue and glue them onto lollipop sticks, however I have recently taken to painting my miniatures while they are still on the sprue. That way the only preparation was to remove parts of the sprue that connect to the miniatures themselves, leaving only the bases connected and essentially removing a step from my usual process.
Next up, knowing I would use more ‘warm’ colours, such as browns, reds, and tans, I wanted to give a basecoat that would compliment them. I started with an undercoat of Army Painter Prairie Ochre and once dry, I added a 1:1 mix of Strong Tone and water over everything. Now, that may sound a little unusual: applying a wash to a base coat, but I find that it accentuates the details and gives just the right amount of pre-shading. Black, for example, would be a bit too harsh for what I wanted to achieve.
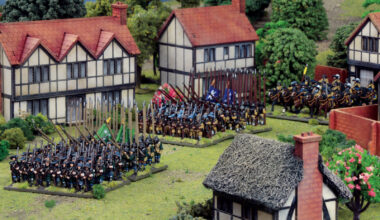
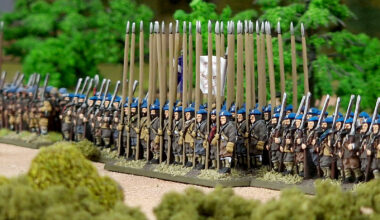
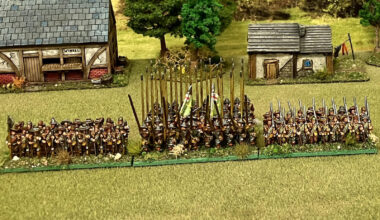
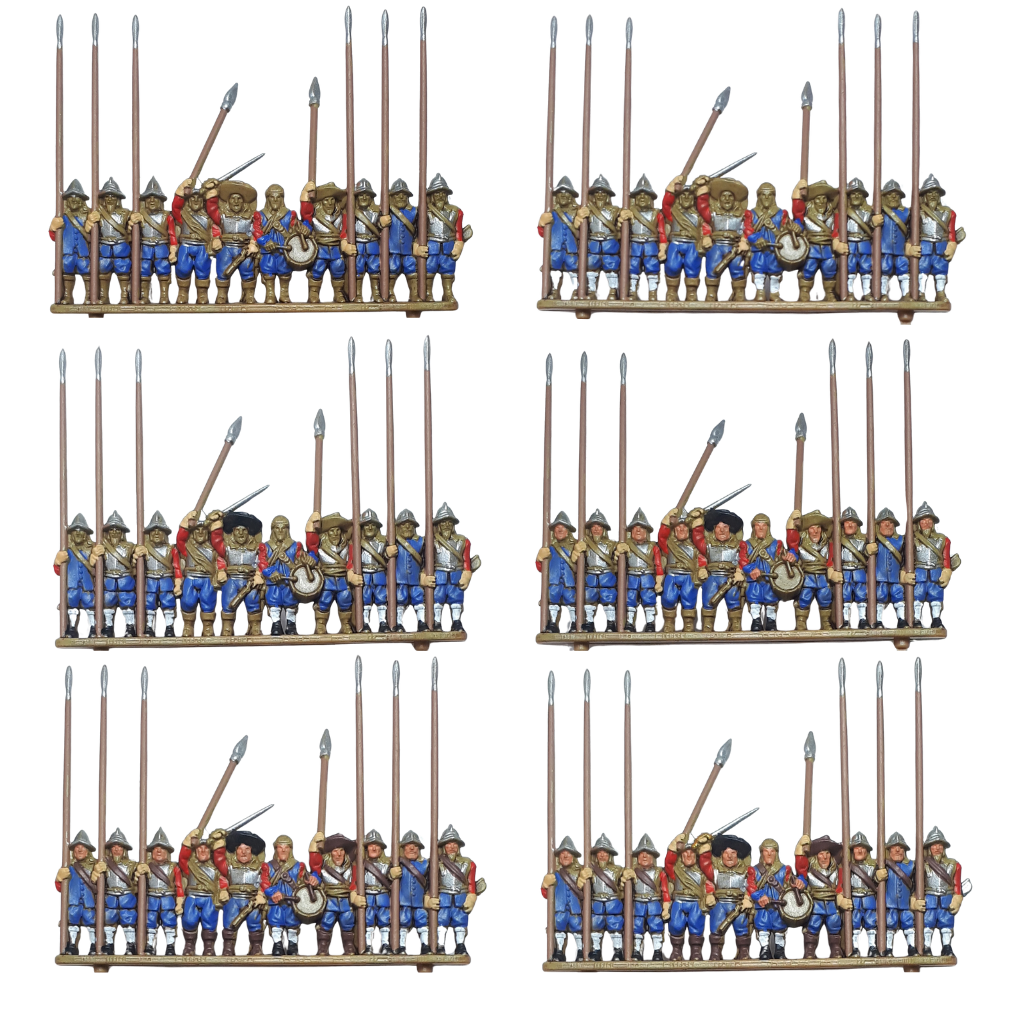
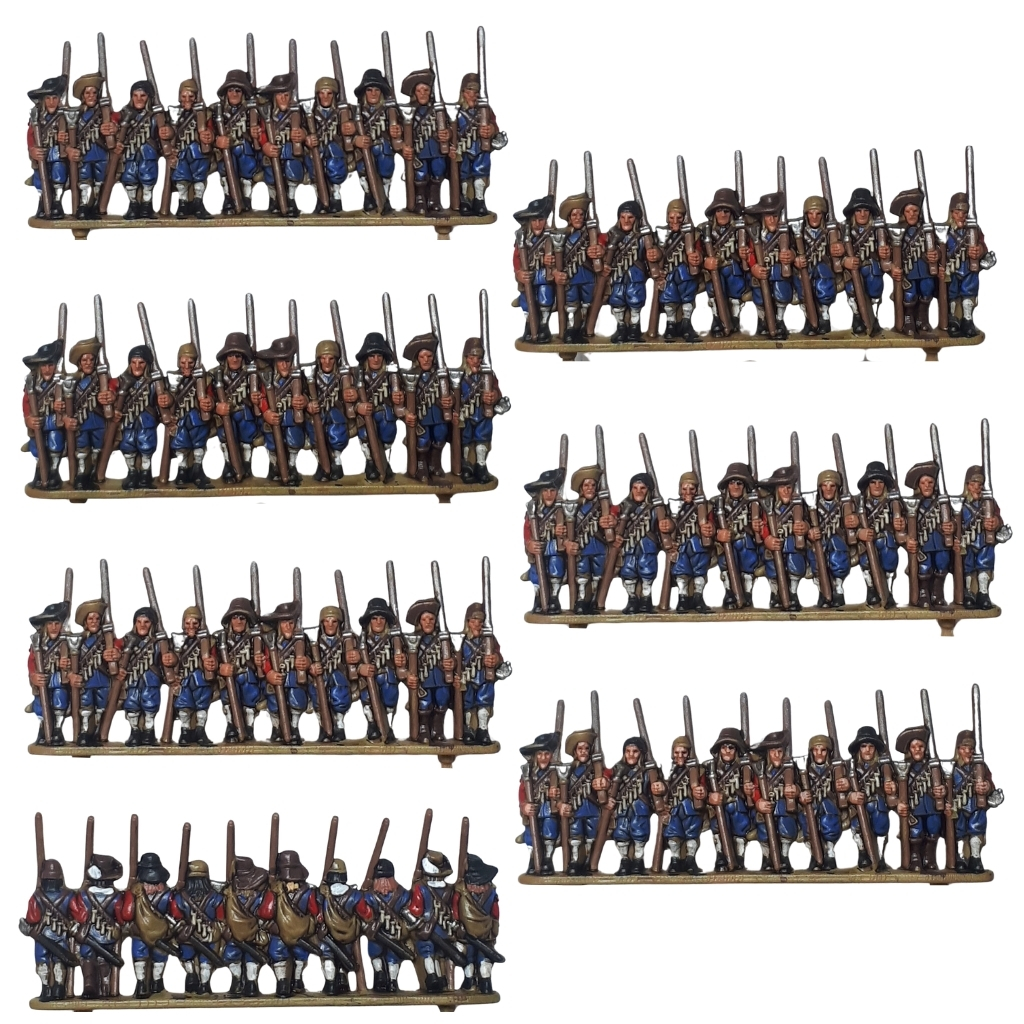
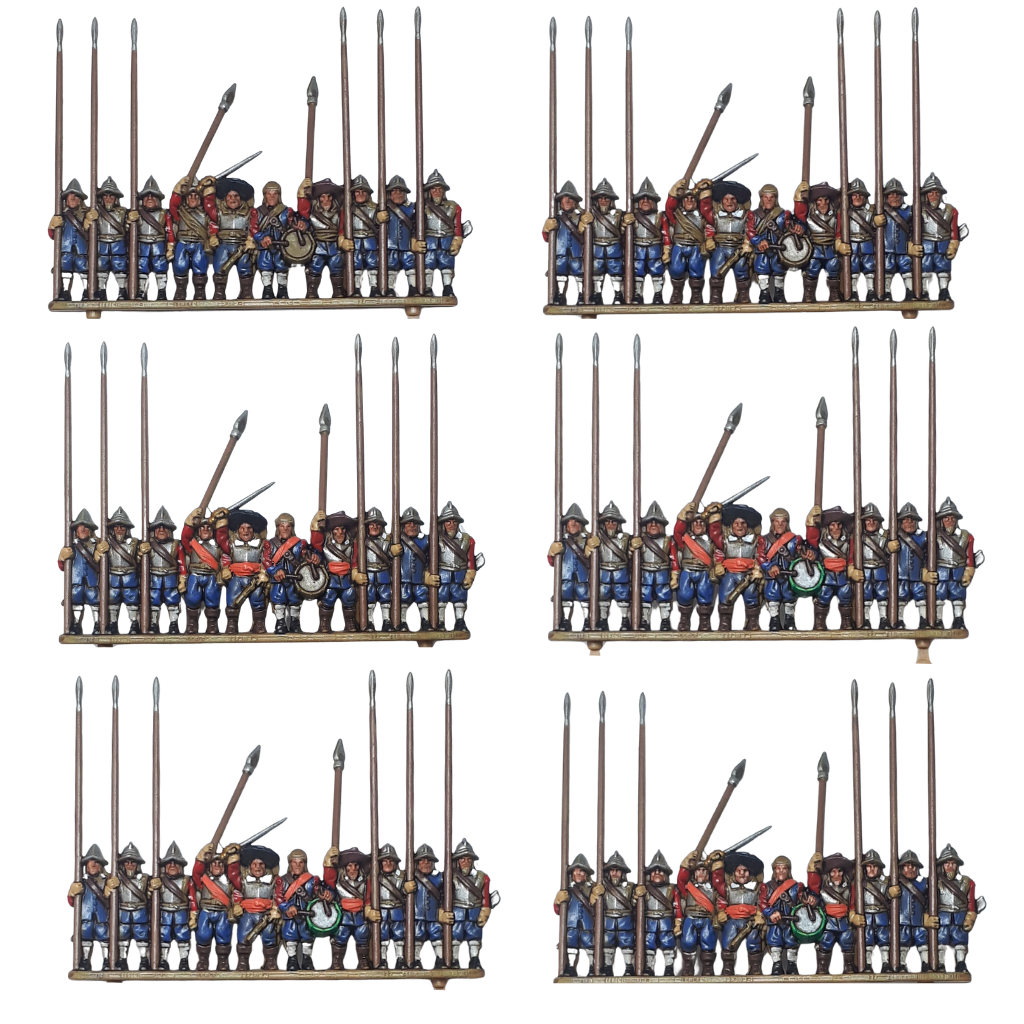
Once dry, it’s time to start blocking in the colours, starting with the jacket sleeves and as this Regiment was going to be Sir Phillip Skippon’s Regiment of Foote, I chose Blood Chalice for this, followed by Ultramarine Blue cuffs and trousers.
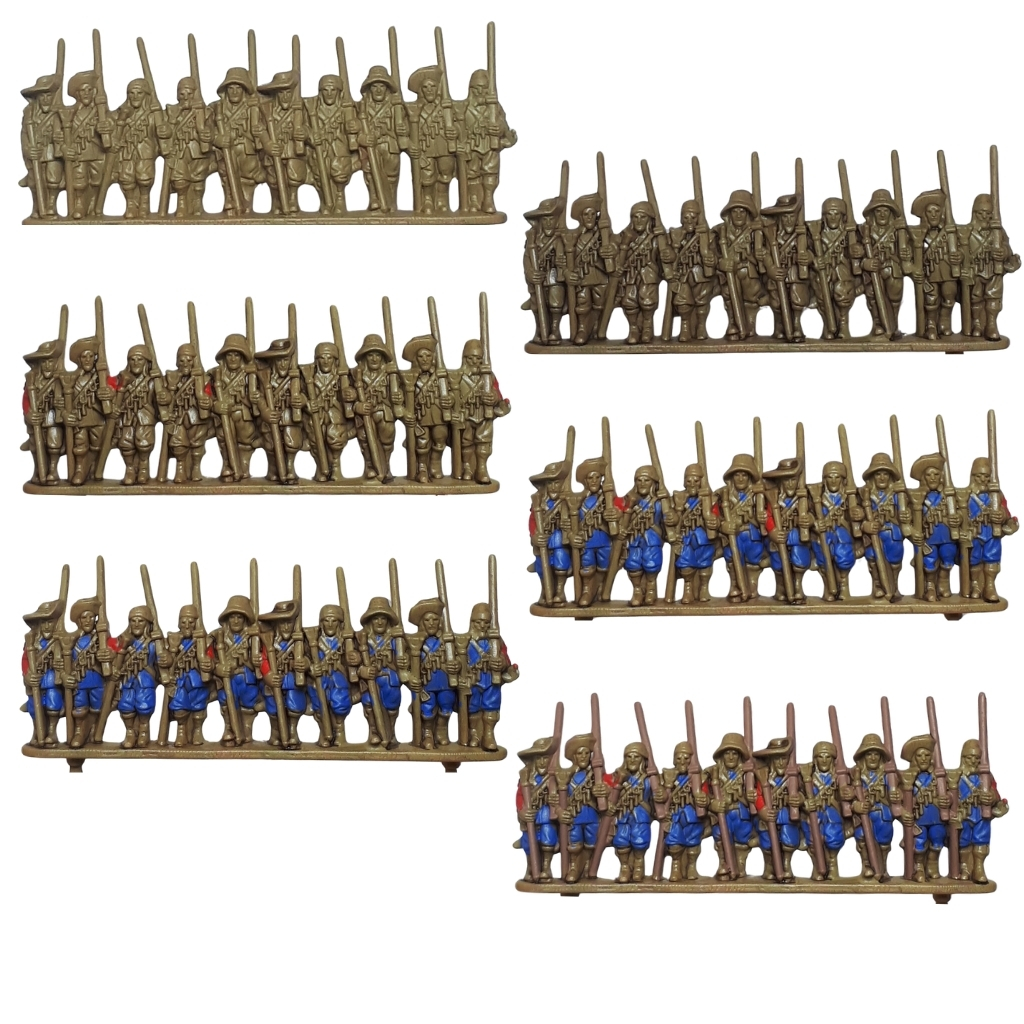
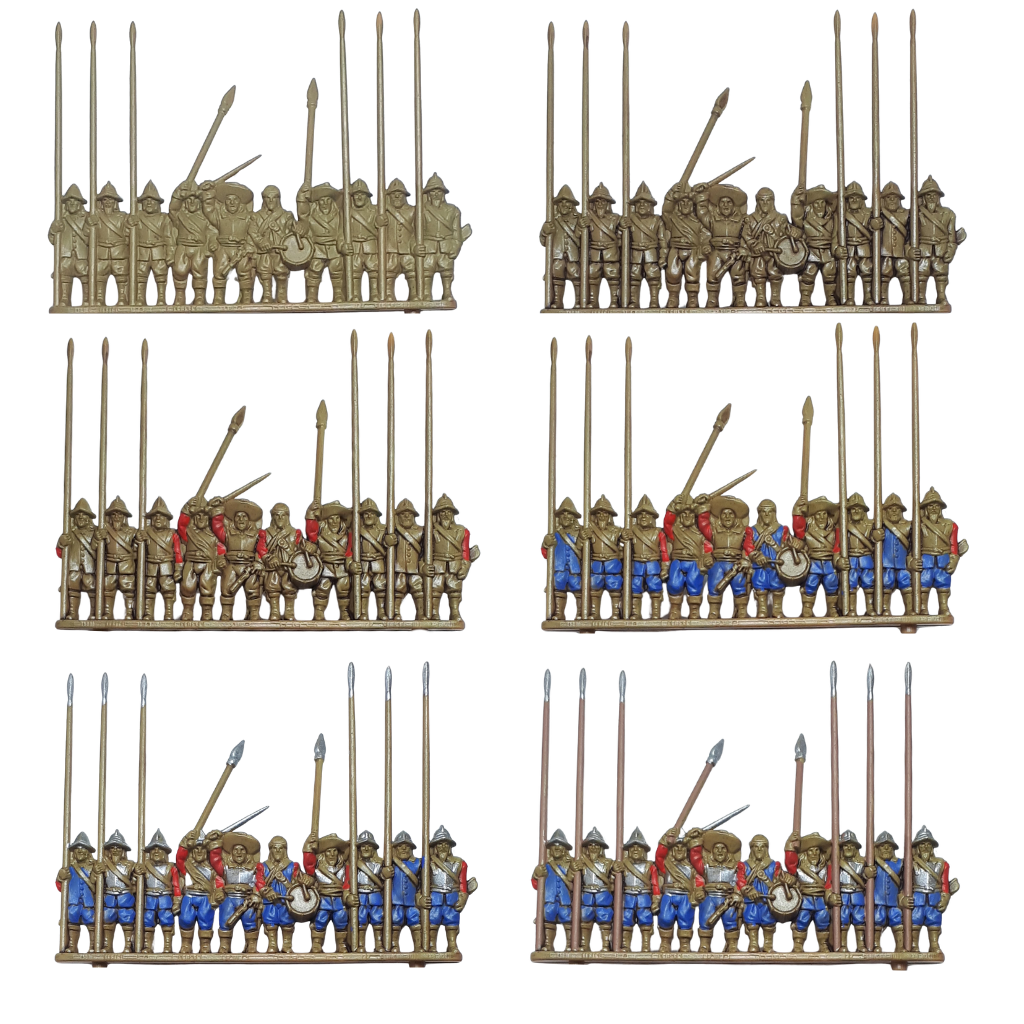
Now on to some metallics. I used Plate Mail Metal to pick out the breastplates, helmets and pike points on the pikemen. While you’re here, you can use Leather Brown to paint in the pikes, matchlock muskets and musket rests.
Sticking with the musketeers, I picked out the cartridges hanging off their crossbelts using Skeleton Bone. This may take a steady hand, but don’t worry if you make any mistakes, they can always be corrected later.
This next step uses the only different brand of paint: so, using Model Color Desert Yellow pick out the gloves of all your pikemen and then back to Army Painter for some Matt White which we’ll use to pick out the stockings.
Next up, using Matt Black, pick out the shoes and sword scabbards. I also picked out a few of the rimmed hats, just to add a bit of variety to the regiment. It’s worth remembering that, certainly during the early stages of the war, uniforms were scarce and many of the regiments wore their own civilian clothing. So it stands to reason that not all of the men in your units will be dressed the same. Conversely, there’s nothing wrong with having your troops looking exactly the same, either.
Now it’s time to add some colour to the flesh. So taking Tanned Flesh, block in the faces and hands. Again, it’s worth mentioning that pikemen tended to wear gloves, however just for the sake of variety, I’ve done mine without any. It’s all down to personal preference.
Now back to the musketeers. Taking Oak Brown, paint in the crossbelts and loops where we painted the cartridges earlier. Don’t forget to do the fronts and backs of the miniatures. While we have the Oak Brown out, you can paint a couple more of their hats too, if you wish.
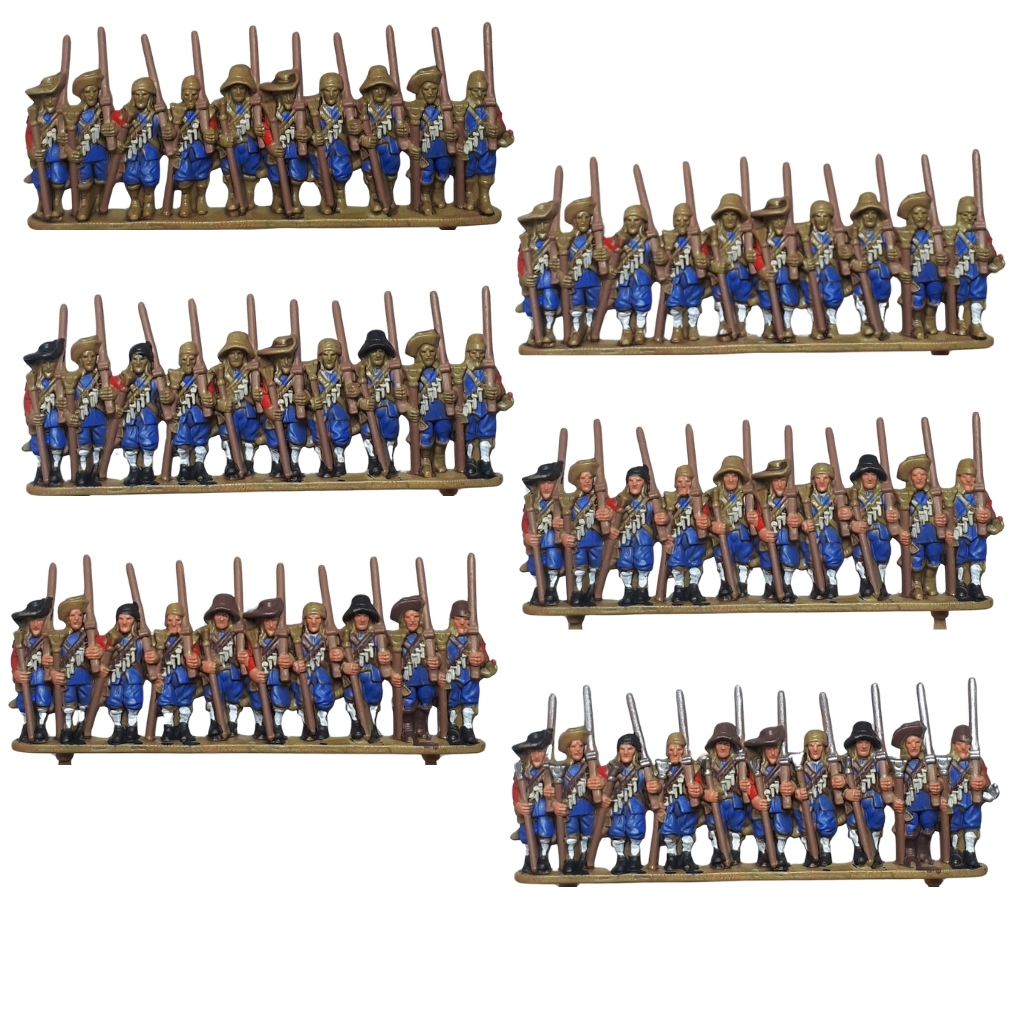
Now for some more metallics. After completing this step I think Plate Mail Metal would have been a better choice, but I used Greedy Gold to paint in the sword handles and guards on the rear of the miniatures. Again, you can mix it up a bit if you want. Next we’ll add some Plate Mail Metal to the tops of the musket rests, cocking mechanism and barrels.
All of your miniatures should now be fully painted and ready for the final stages. It’s worth stopping here and tidying any mistakes before proceeding to the next step.
Now it’s time for a second all over wash. So taking a 1:1 mix of water and Strong Tone, apply it over the miniatures entirely. Once dry, you could stop there and start gaming, however if you want to take your miniatures a stage further, then keep reading.
With the wash now dry, it’s time to pick out the highlights. Using the same Blood Chalice, Ultramarine Blue, and a steady hand, pick out the tops of any creases in the sleeves and trousers. Less is more with this step, so take your time as you don’t want to undo the work that the wash has done. If you do make a mistake, just take a small brush with a little water on and you should be able to remove it.
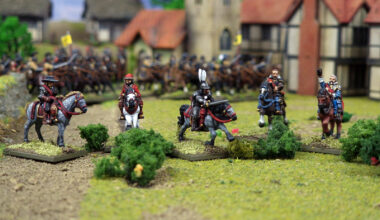
Now using some Matt White, paint in the feathers on some of the hats and the collar of the officers tunic. Then using a 1:1 mix of Blood Chalice and Daemonic Yellow, paint the orange onto the officers sash, as well as that of the standard bearers. While we’re on the command strip, paint the drum a suitable colour for your unit. I used a vibrant Greenskin for mine, followed by Skull White for the drum skin.
For the final stages of painting, using a small brush, use Barbarian Flesh to pick out noses, chins and cheeks on the faces, as well as the hands. Try not to cover over all of the skin, as you want some of the Tanned Flesh to remain in the recesses. Finally, it’s time to paint the hair. You can paint all the hair and beards the same colour for speed, however, using a variety of browns, blacks and blondes will give your ranks a more natural look. Be sure to match any beards with the same hair colour!
And with that, all that remains is to add the flags of your chosen regiment in place and glue the strips to their bases – happy gaming!
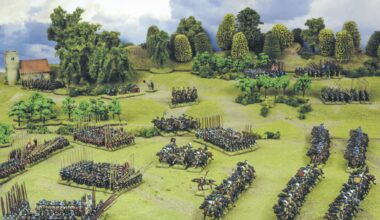
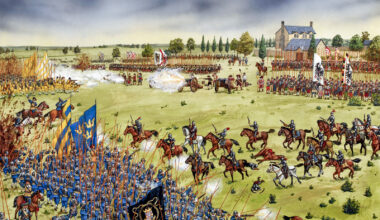
Has Iain got you inspired to start your own Pike & Shotte Epic Battles force?