We spotted some of Iain’s Celts from the Hail Caesar Epic Battles range online, and challenged him to have a go at the new Revolution! set. We think you’ll agree he’s done a fantastic job, and he’s provided an invaluable step-by-step painting guide, using a very limited palette of Army Painter colours – most are in the Warpaints Fanatic Starter Set. Over to you, Iain…
IM – When I approach a new project I always start with an Infantry Brigade box. I’ve done this with every Epic Battles release. The reason being is the infantry is not only the most intricate models in the Epic Battles ranges, but they’re also the miniatures that will take the bulk of your time, especially if you’re planning multiple battalions and going for that ‘massed ranks’ look.
As an overall rule, I try to get my miniatures on the table as fast as possible. That’s always my ultimate goal. I achieve that with the Epic ranges by following the same routine I would do with my 28mm scale miniatures, minus the step of adding multiple highlights.
The joy of painting at this scale is you can have an entire army, or at least enough to have a good battle, painted within a short space of time, and that adding to your army can take less than two hours of painting for a Regiment of infantry.
The other point worth mentioning is the way the miniatures are moulded. Having the main bulk of infantry in close order means you don’t have to worry about 100% coverage, as parts of the individual men are hidden from view. This is where the black primer works wonders. At arms’ length those darker gaps can easily look like shadow, quickening the painting time even more.
Painting Revolution! British Line Infantry – Step by Step Guide:
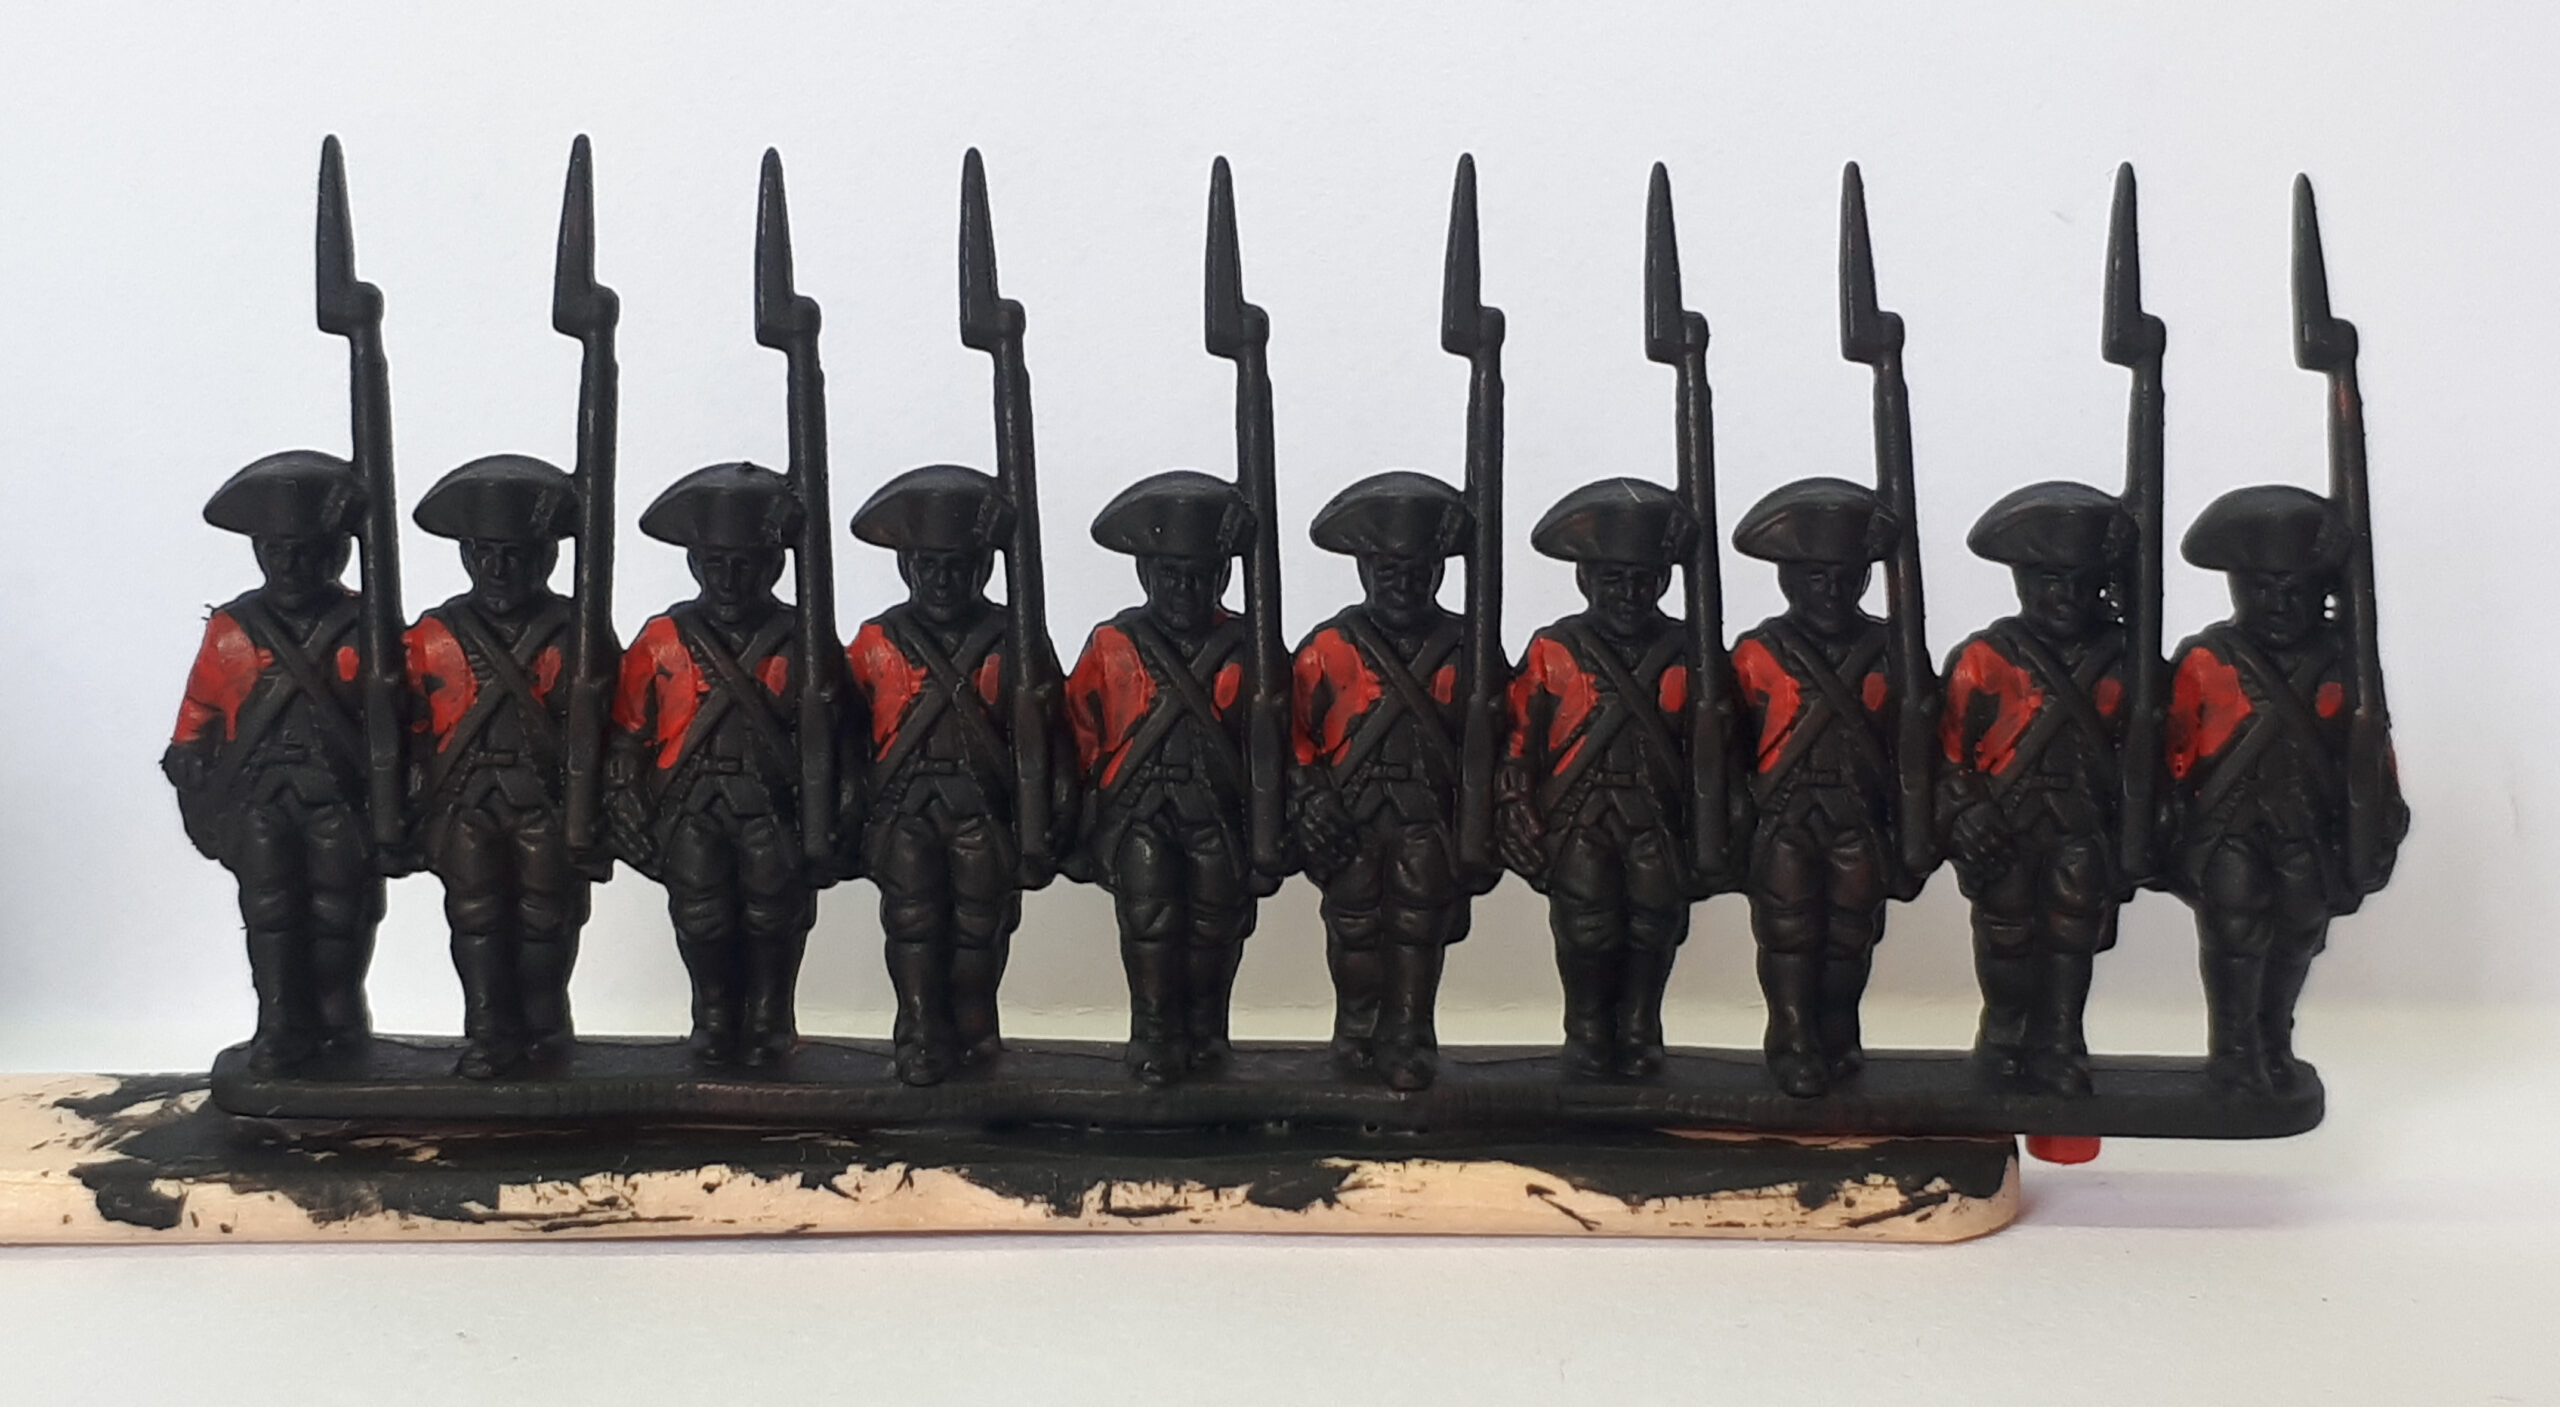
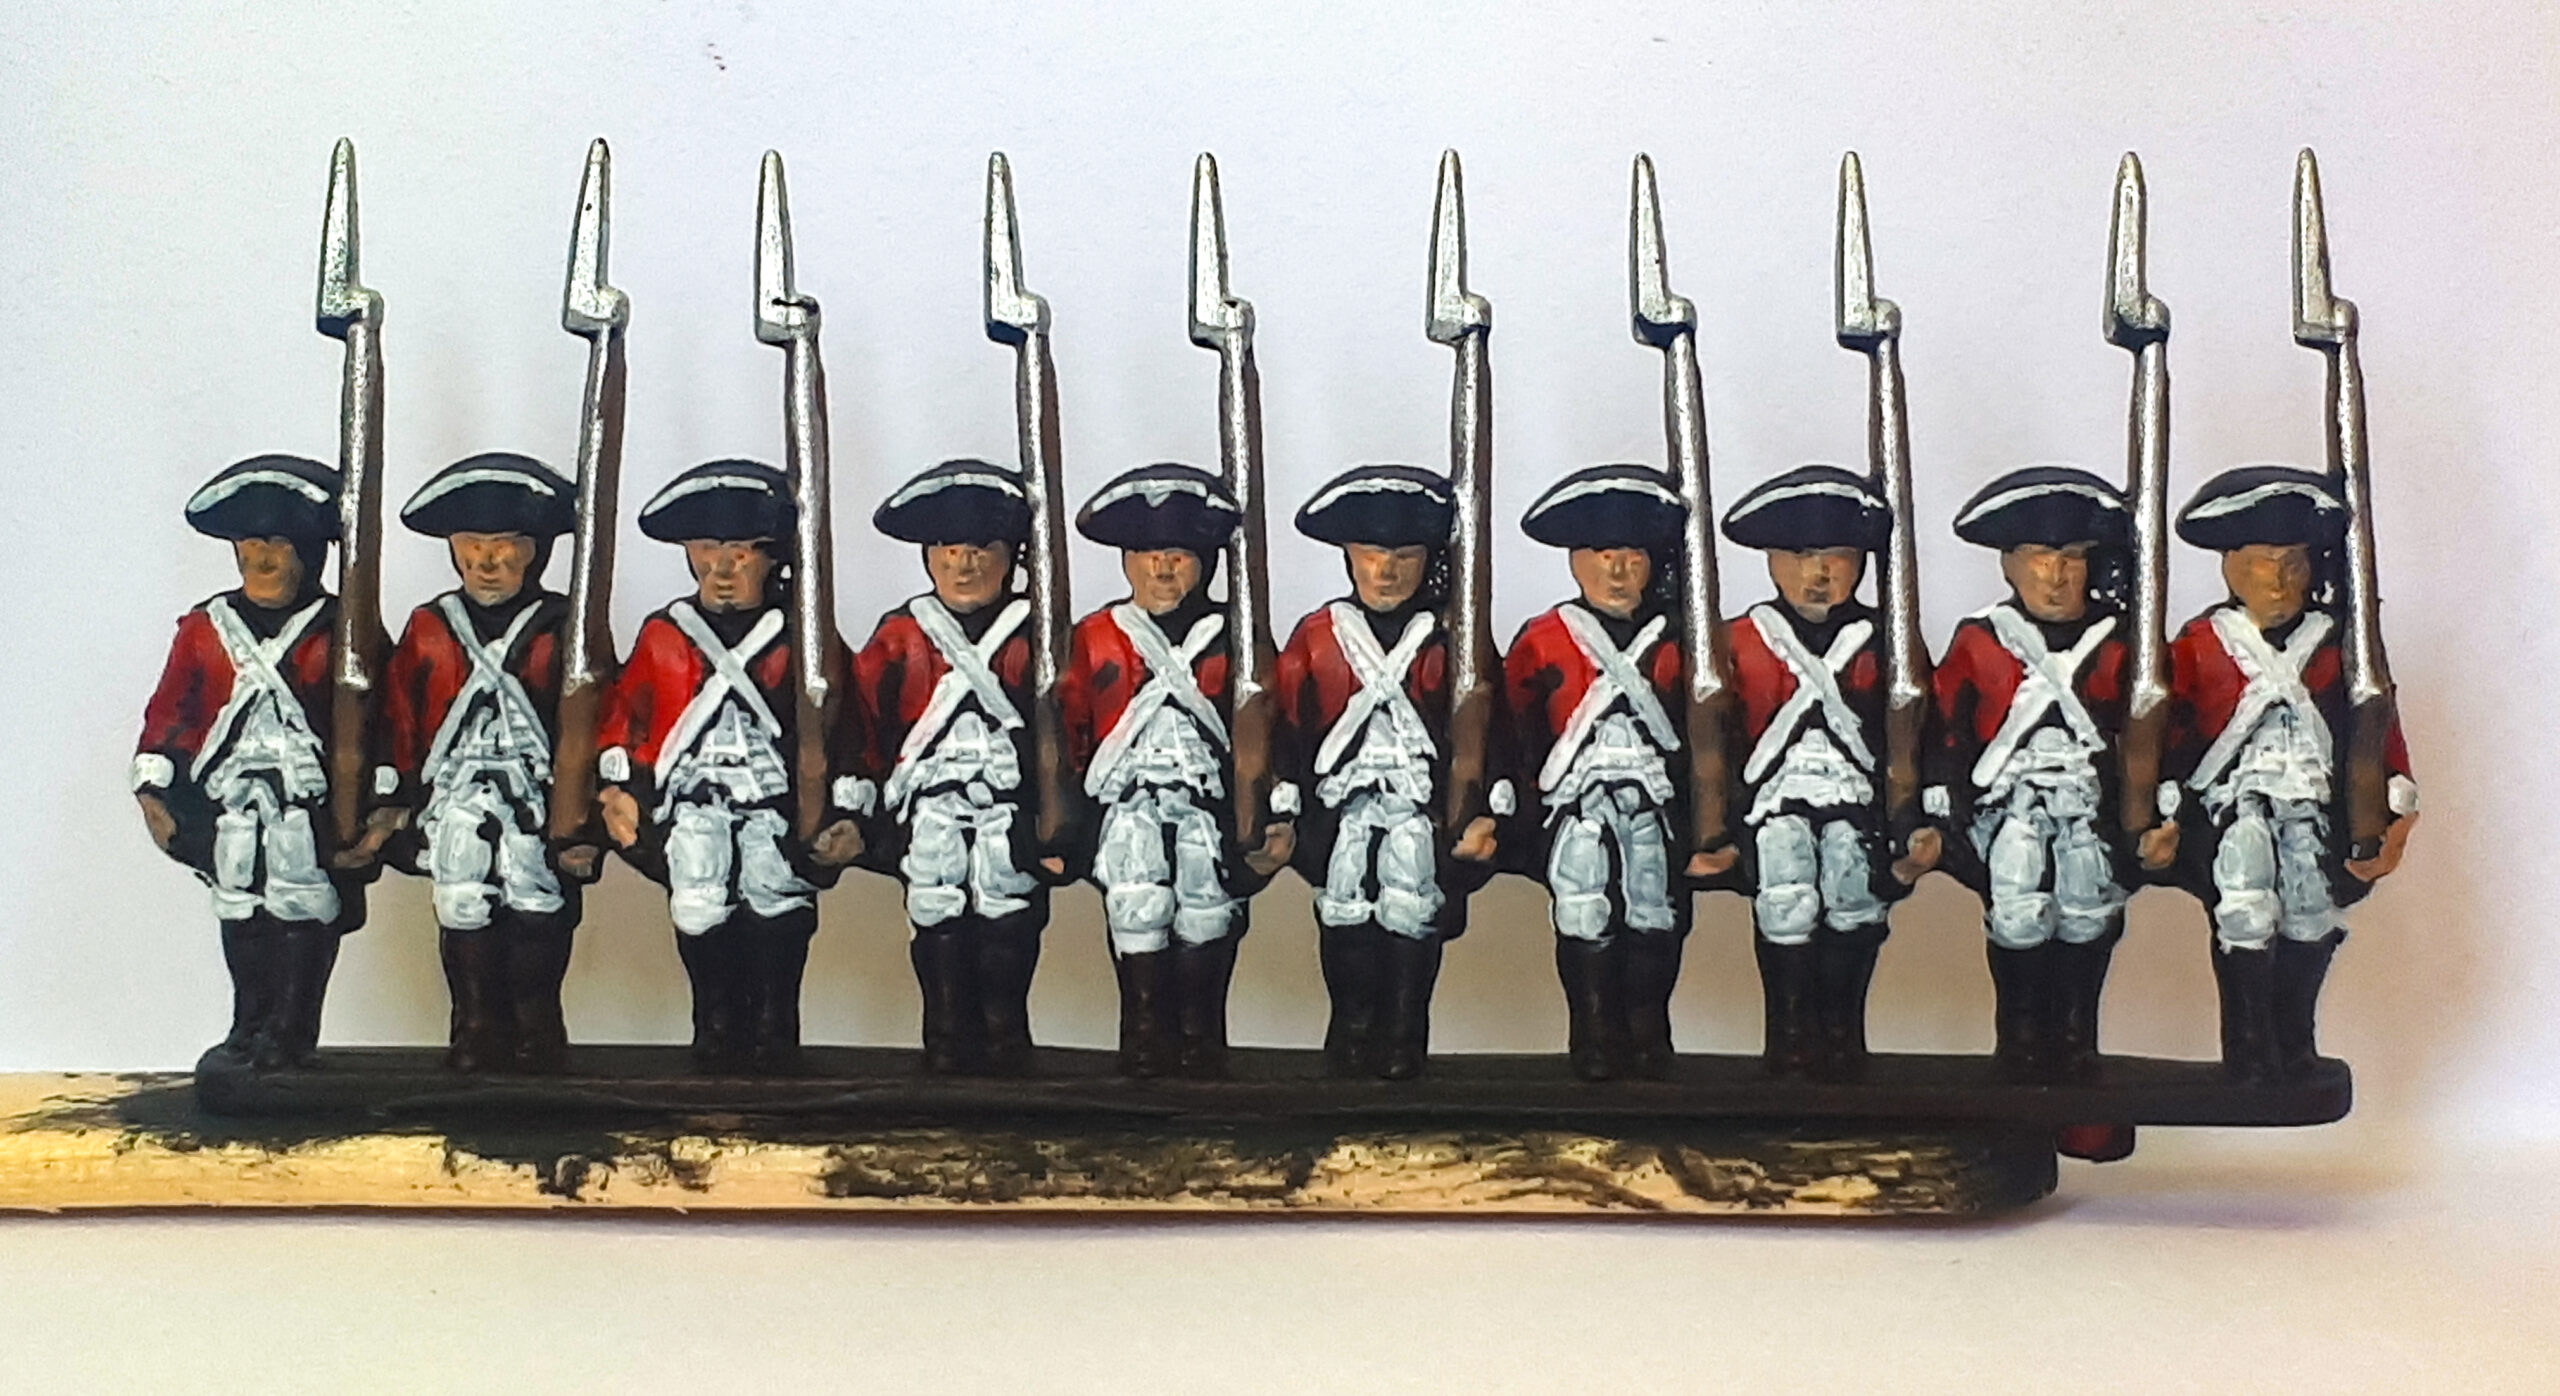
1) I prime miniatures this small with Matt Black to help add shadows and defined lines when I come to add the other colours afterwards, then start by blocking in the red tunics with Pure Red. Take your time with this stage, but don’t worry too much if you make a mistake, as this can be corrected later.
2) Next up, I pick out all of the white areas with Matt White. This includes the cross belts, the white fronted tunic facings and the trousers, as well as the rim of the headwear. Next we move onto the skin. Using Barbarian Flesh, block in the hands and faces, making sure to check the back of the minis too, as some hands are positioned by their sides and can be seen from the rear.
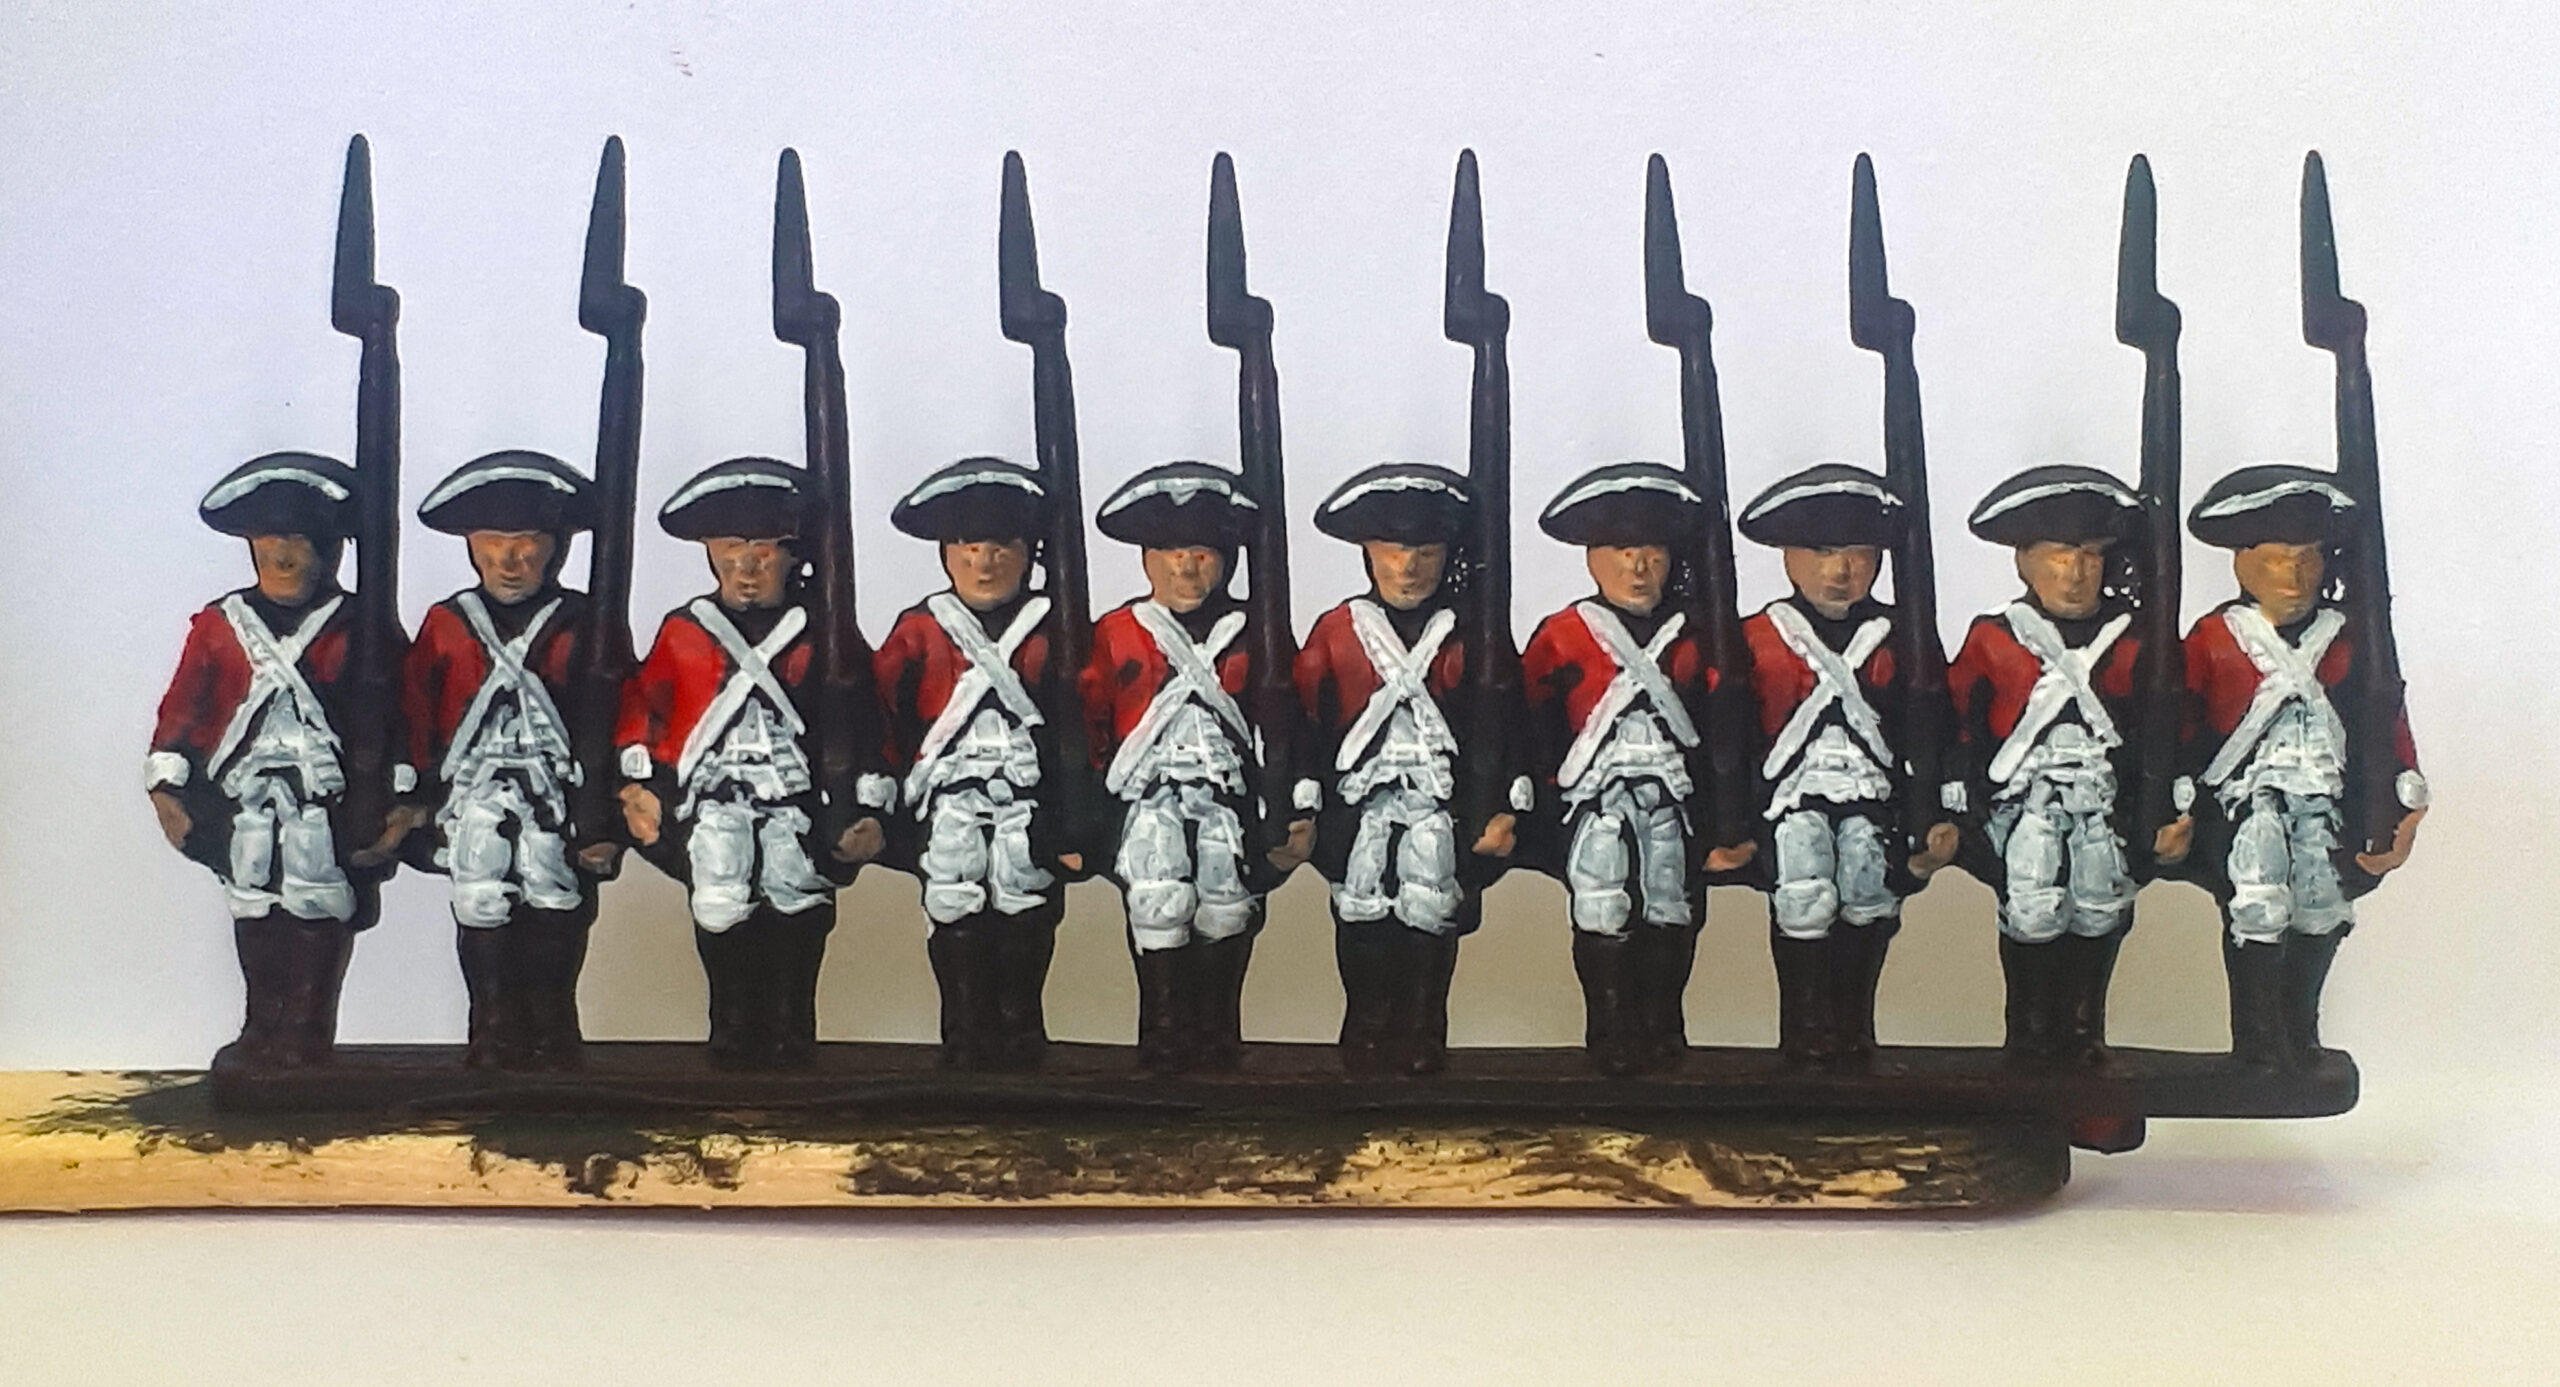
3) Taking Leather Brown, carefully block in the muskets, front and back, but leave the bayonets black. This can be a bit fiddly to get into the edges, so take your time. Now, taking Shining Silver, start painting in the bayonets. Make sure to rotate your minis and check the sides and harder to reach areas. Once they are done, move onto the musket barrels by painting along the front facing edge of the musket, all the way down to the lock.
4) This is now the main colours blocked and ready for shading. Take Dark Tone wash, and mixing 1:1 with water, apply a wash across the entire row, front and back.
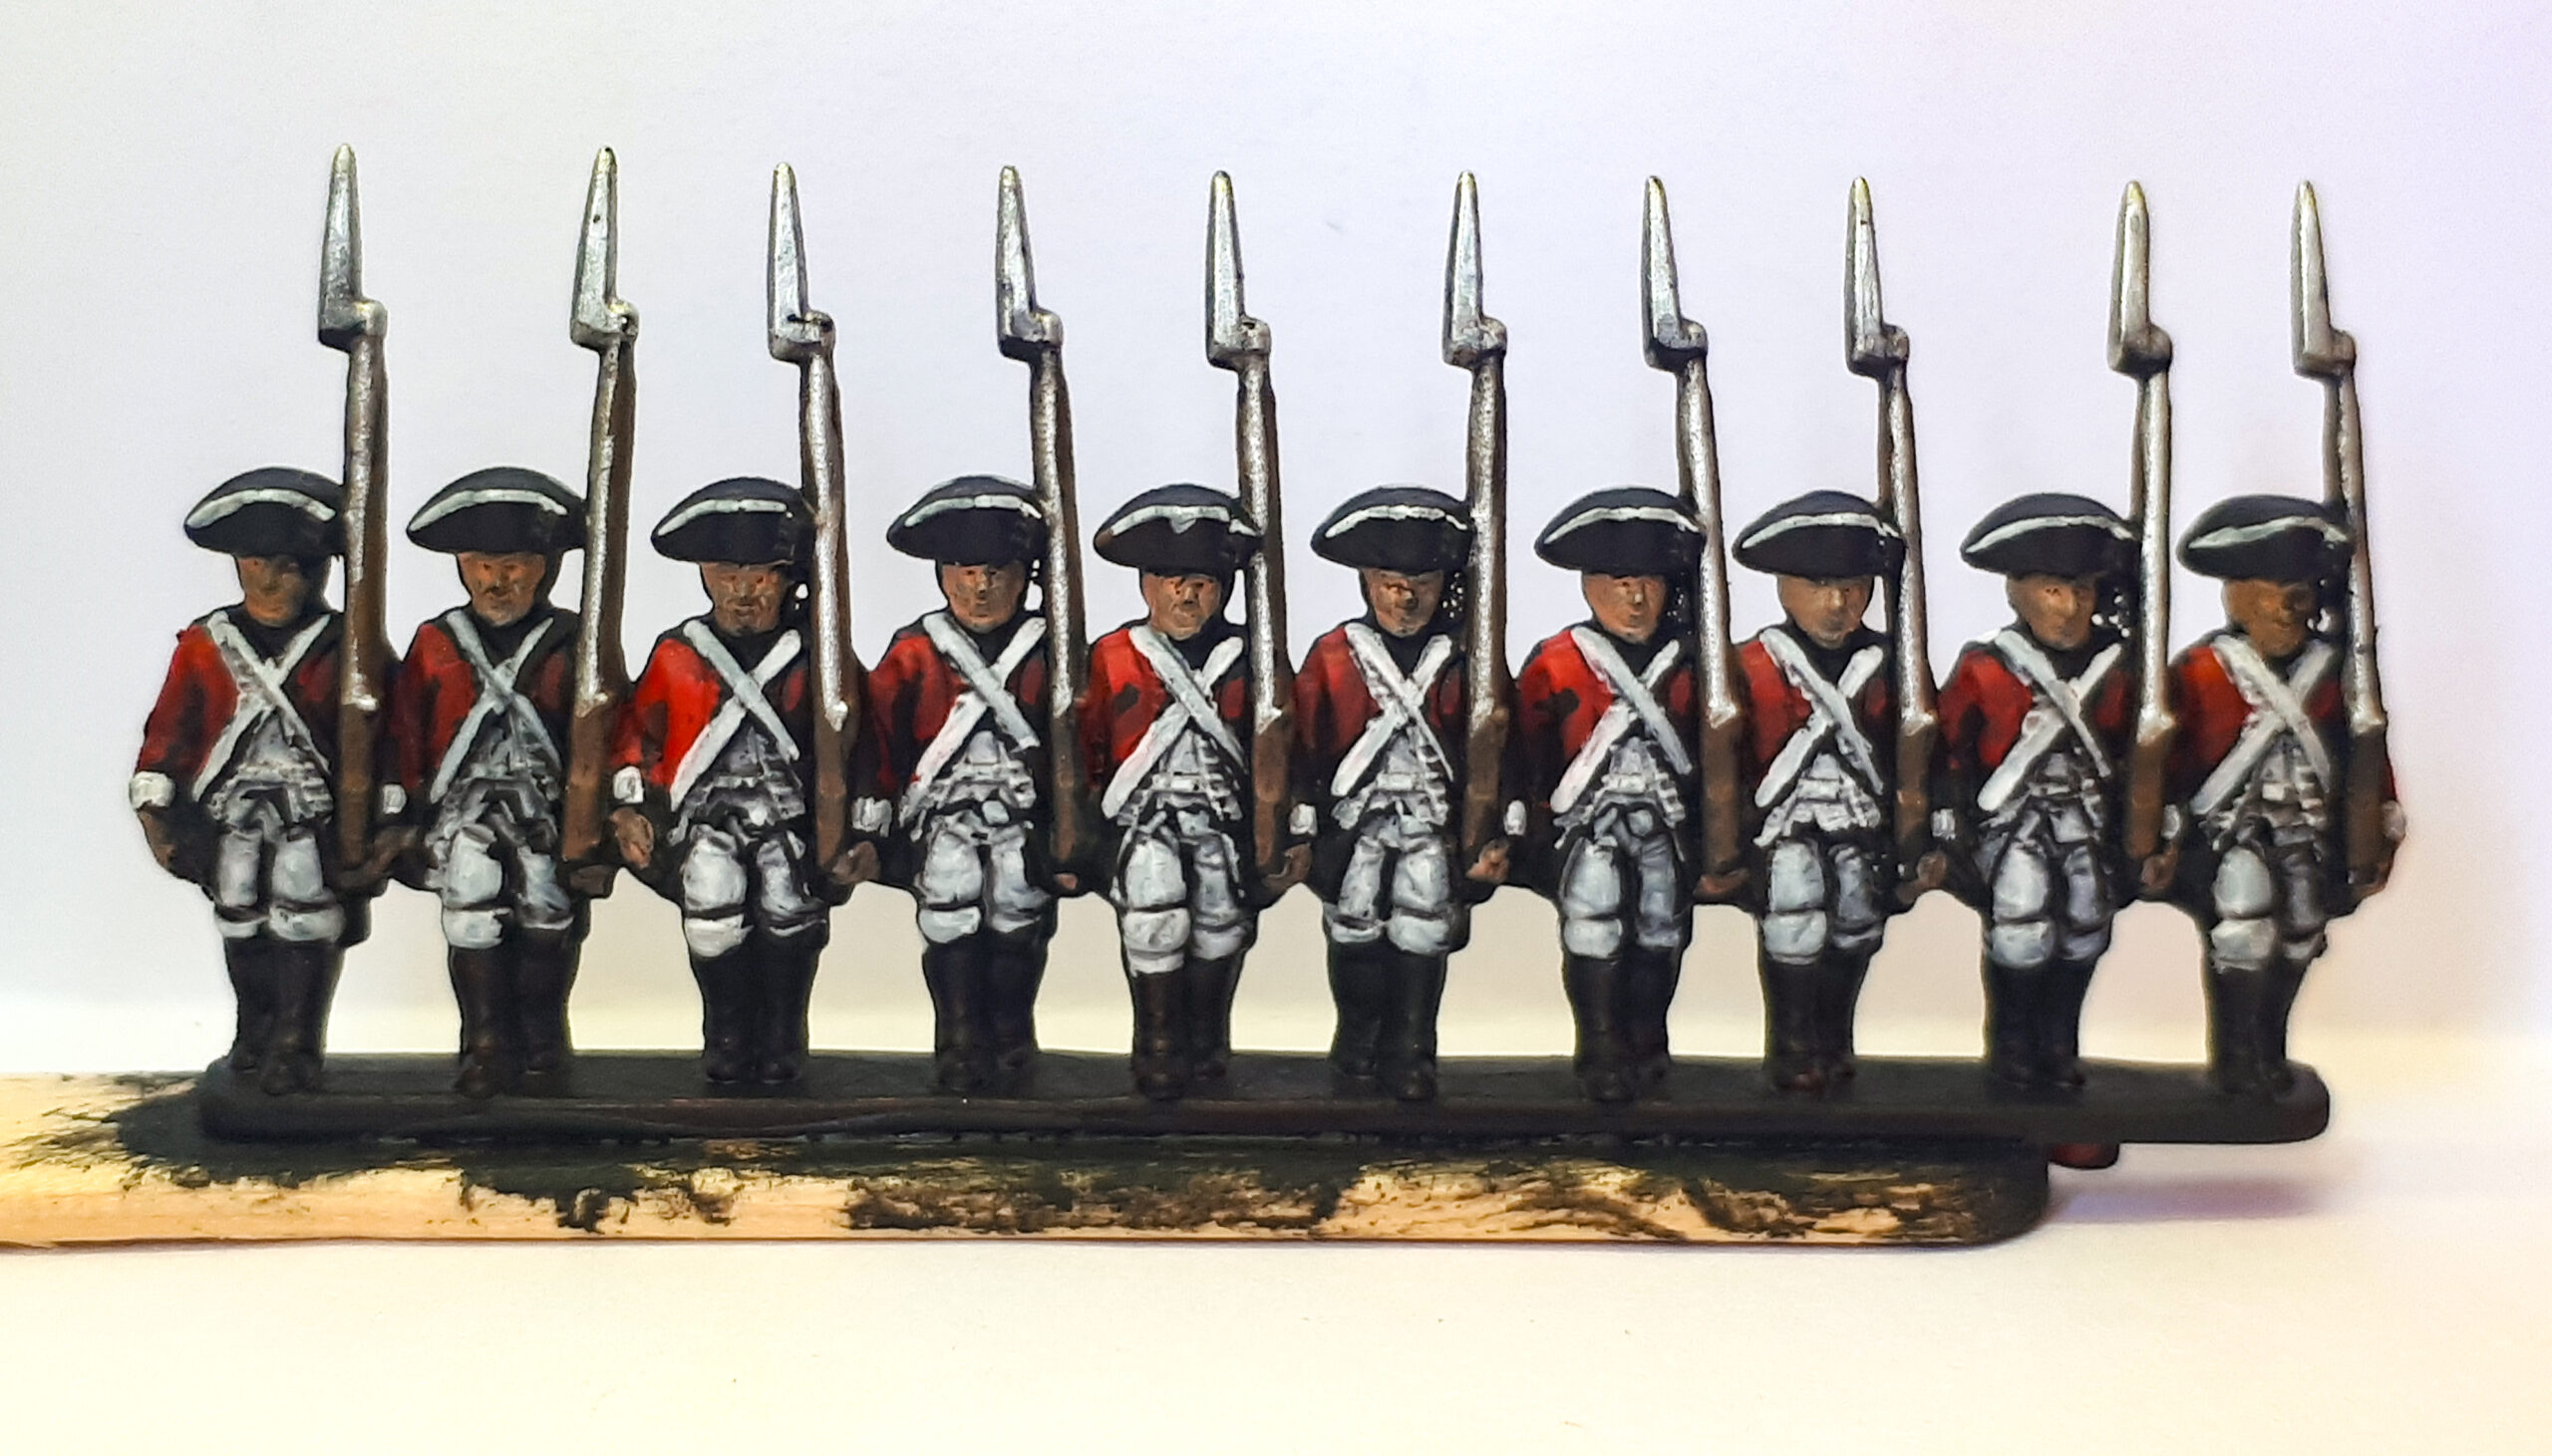
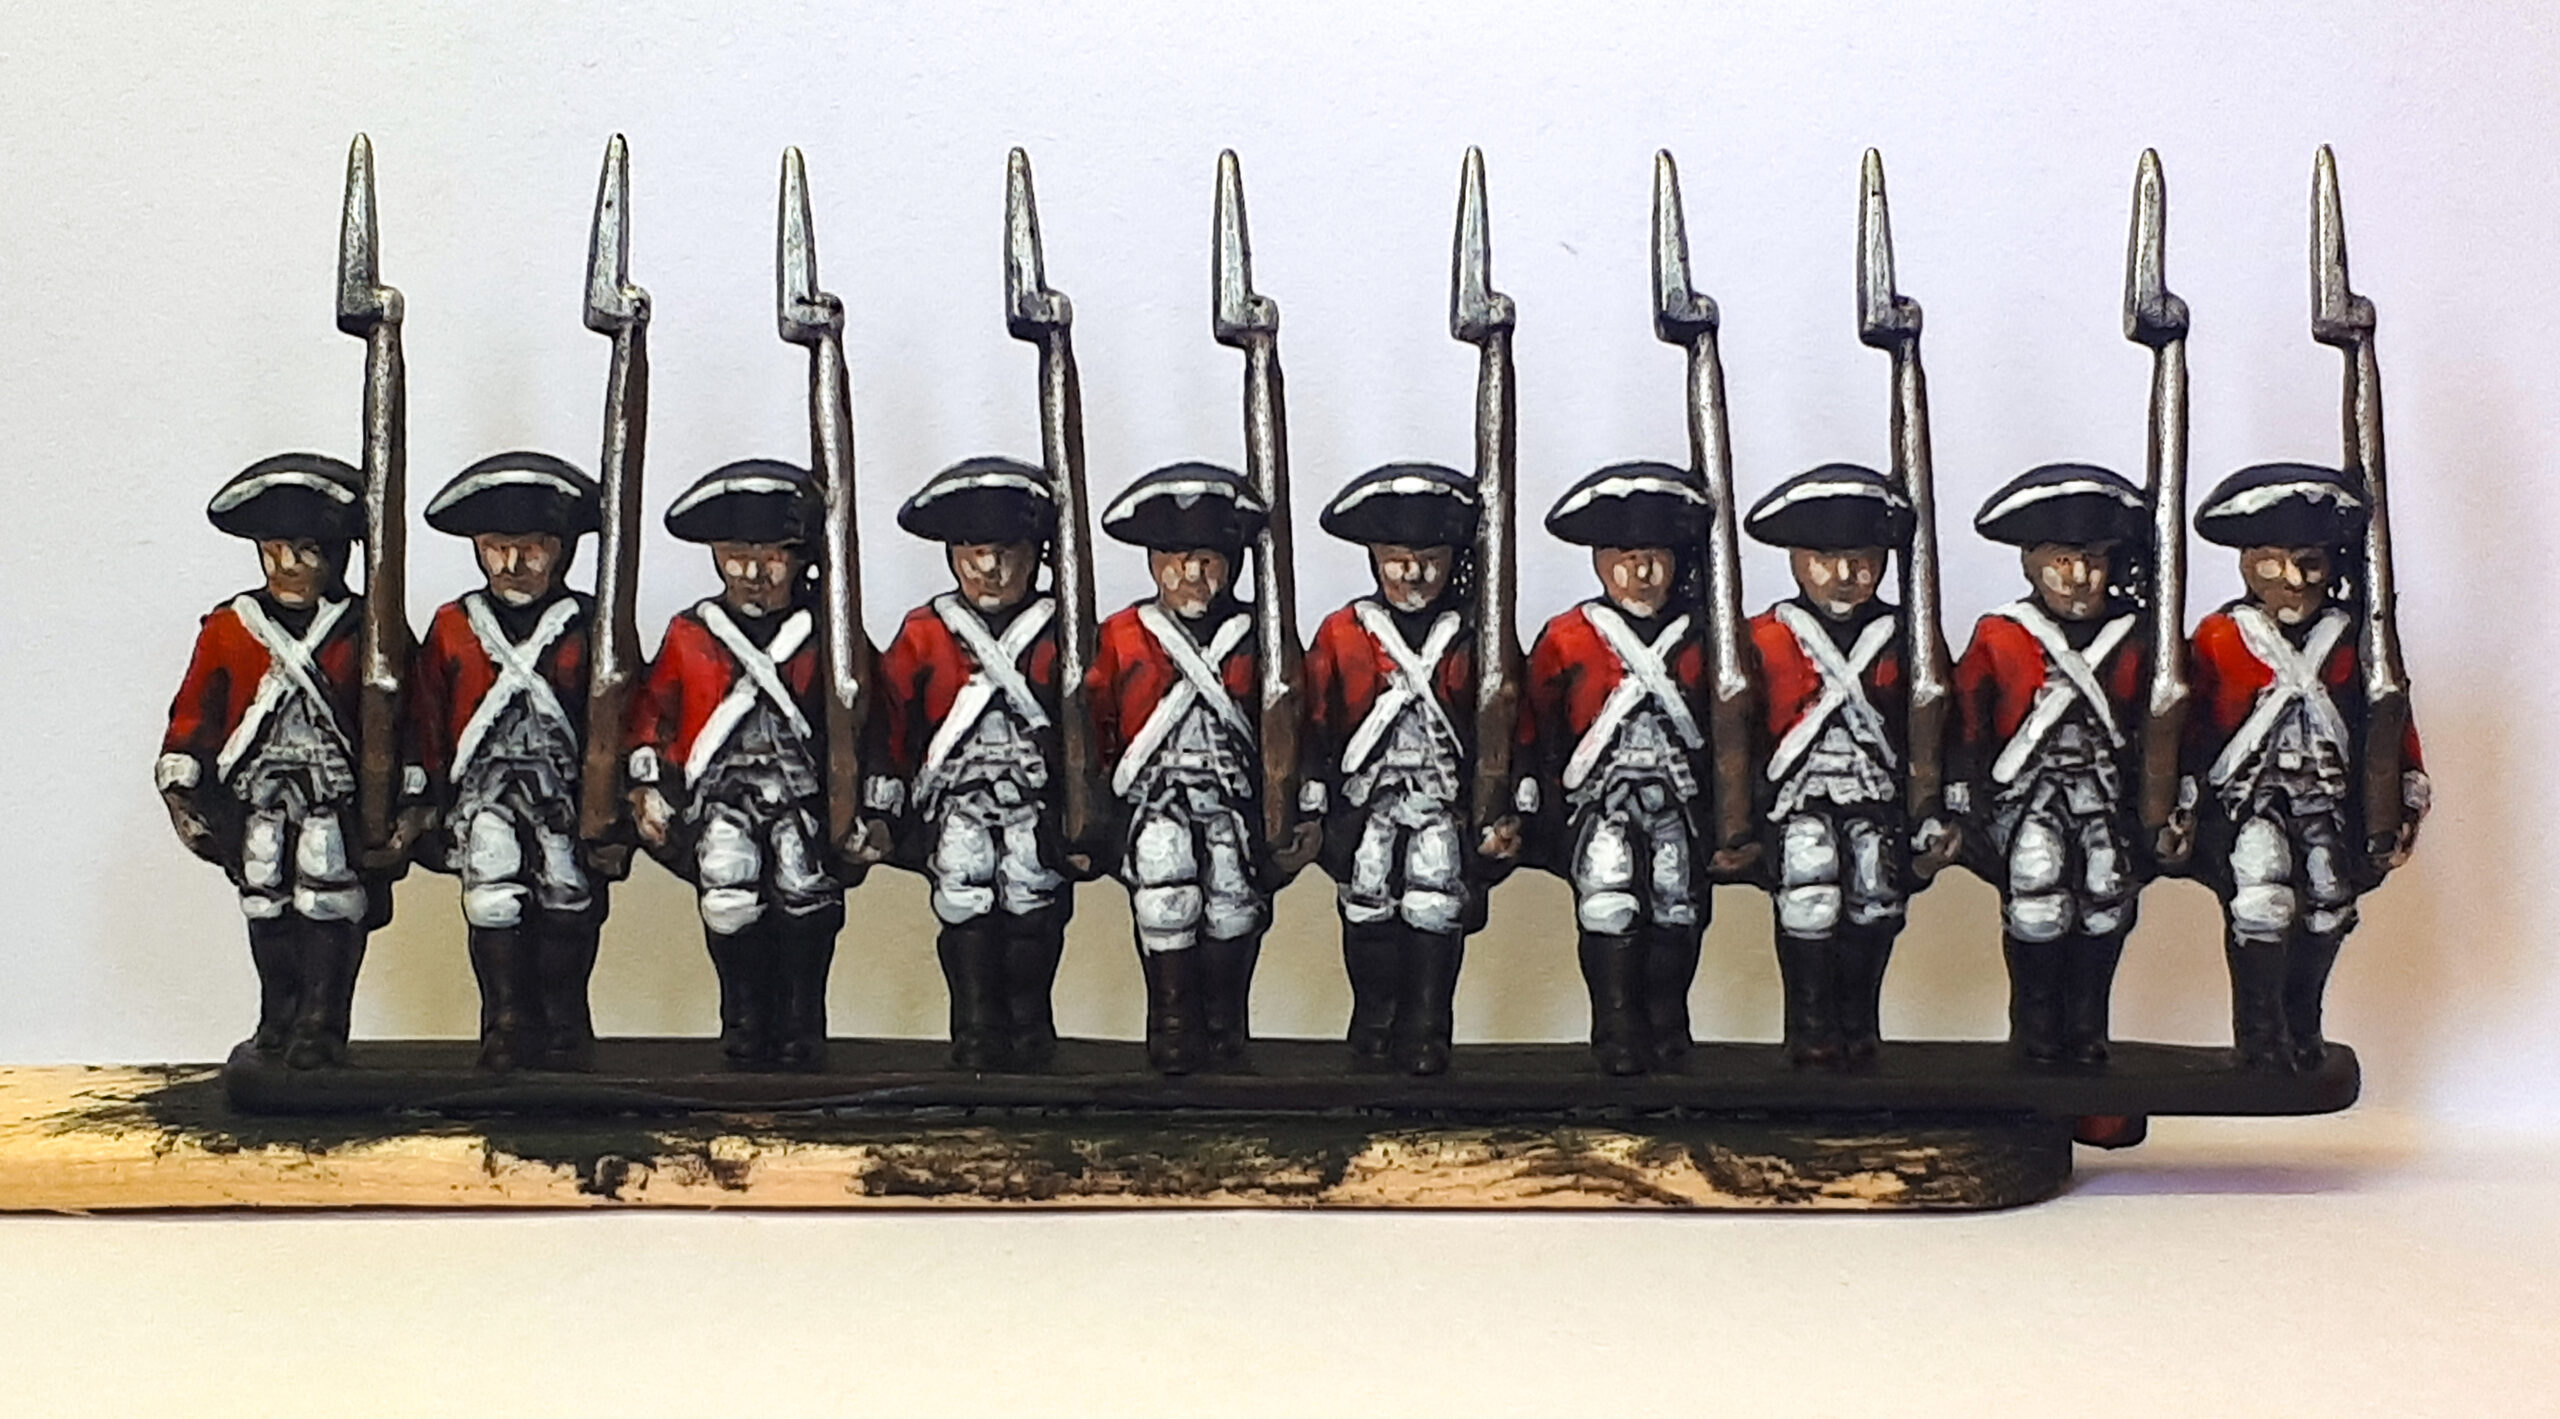
5) With the wash now thoroughly dry, we can move on to highlighting the miniature and general tidy up. Using the same colours we started with, apply a 1:1 mix of the starting colours and water and begin to highlight the miniatures. Don’t cover over all of the miniature, just raised areas, such as tunic elbows and ruffled material. If you cover the entire miniature, you’ll lose those shadows we created with the wash. Do the same with the trousers and cross belts on the chest too.
For the skin, take a 1:1 mix of Barbarian Flesh and Matt White and pick out the nose, cheek bones and chins of each mini, as well as any knuckles or finger tips on the hands. Again, take your time with this.
6) Once this stage is done, your miniatures are now ready for basing. I glue mine with white glue and once that’s dry, I apply some Vallejo Dark Earth Texture paste. Once that dry, give the base a wash with Strong Tone to help it blend with your miniatures. I finish up by painting the base edge with Leather Brown and, once dry, I add a matt varnish.
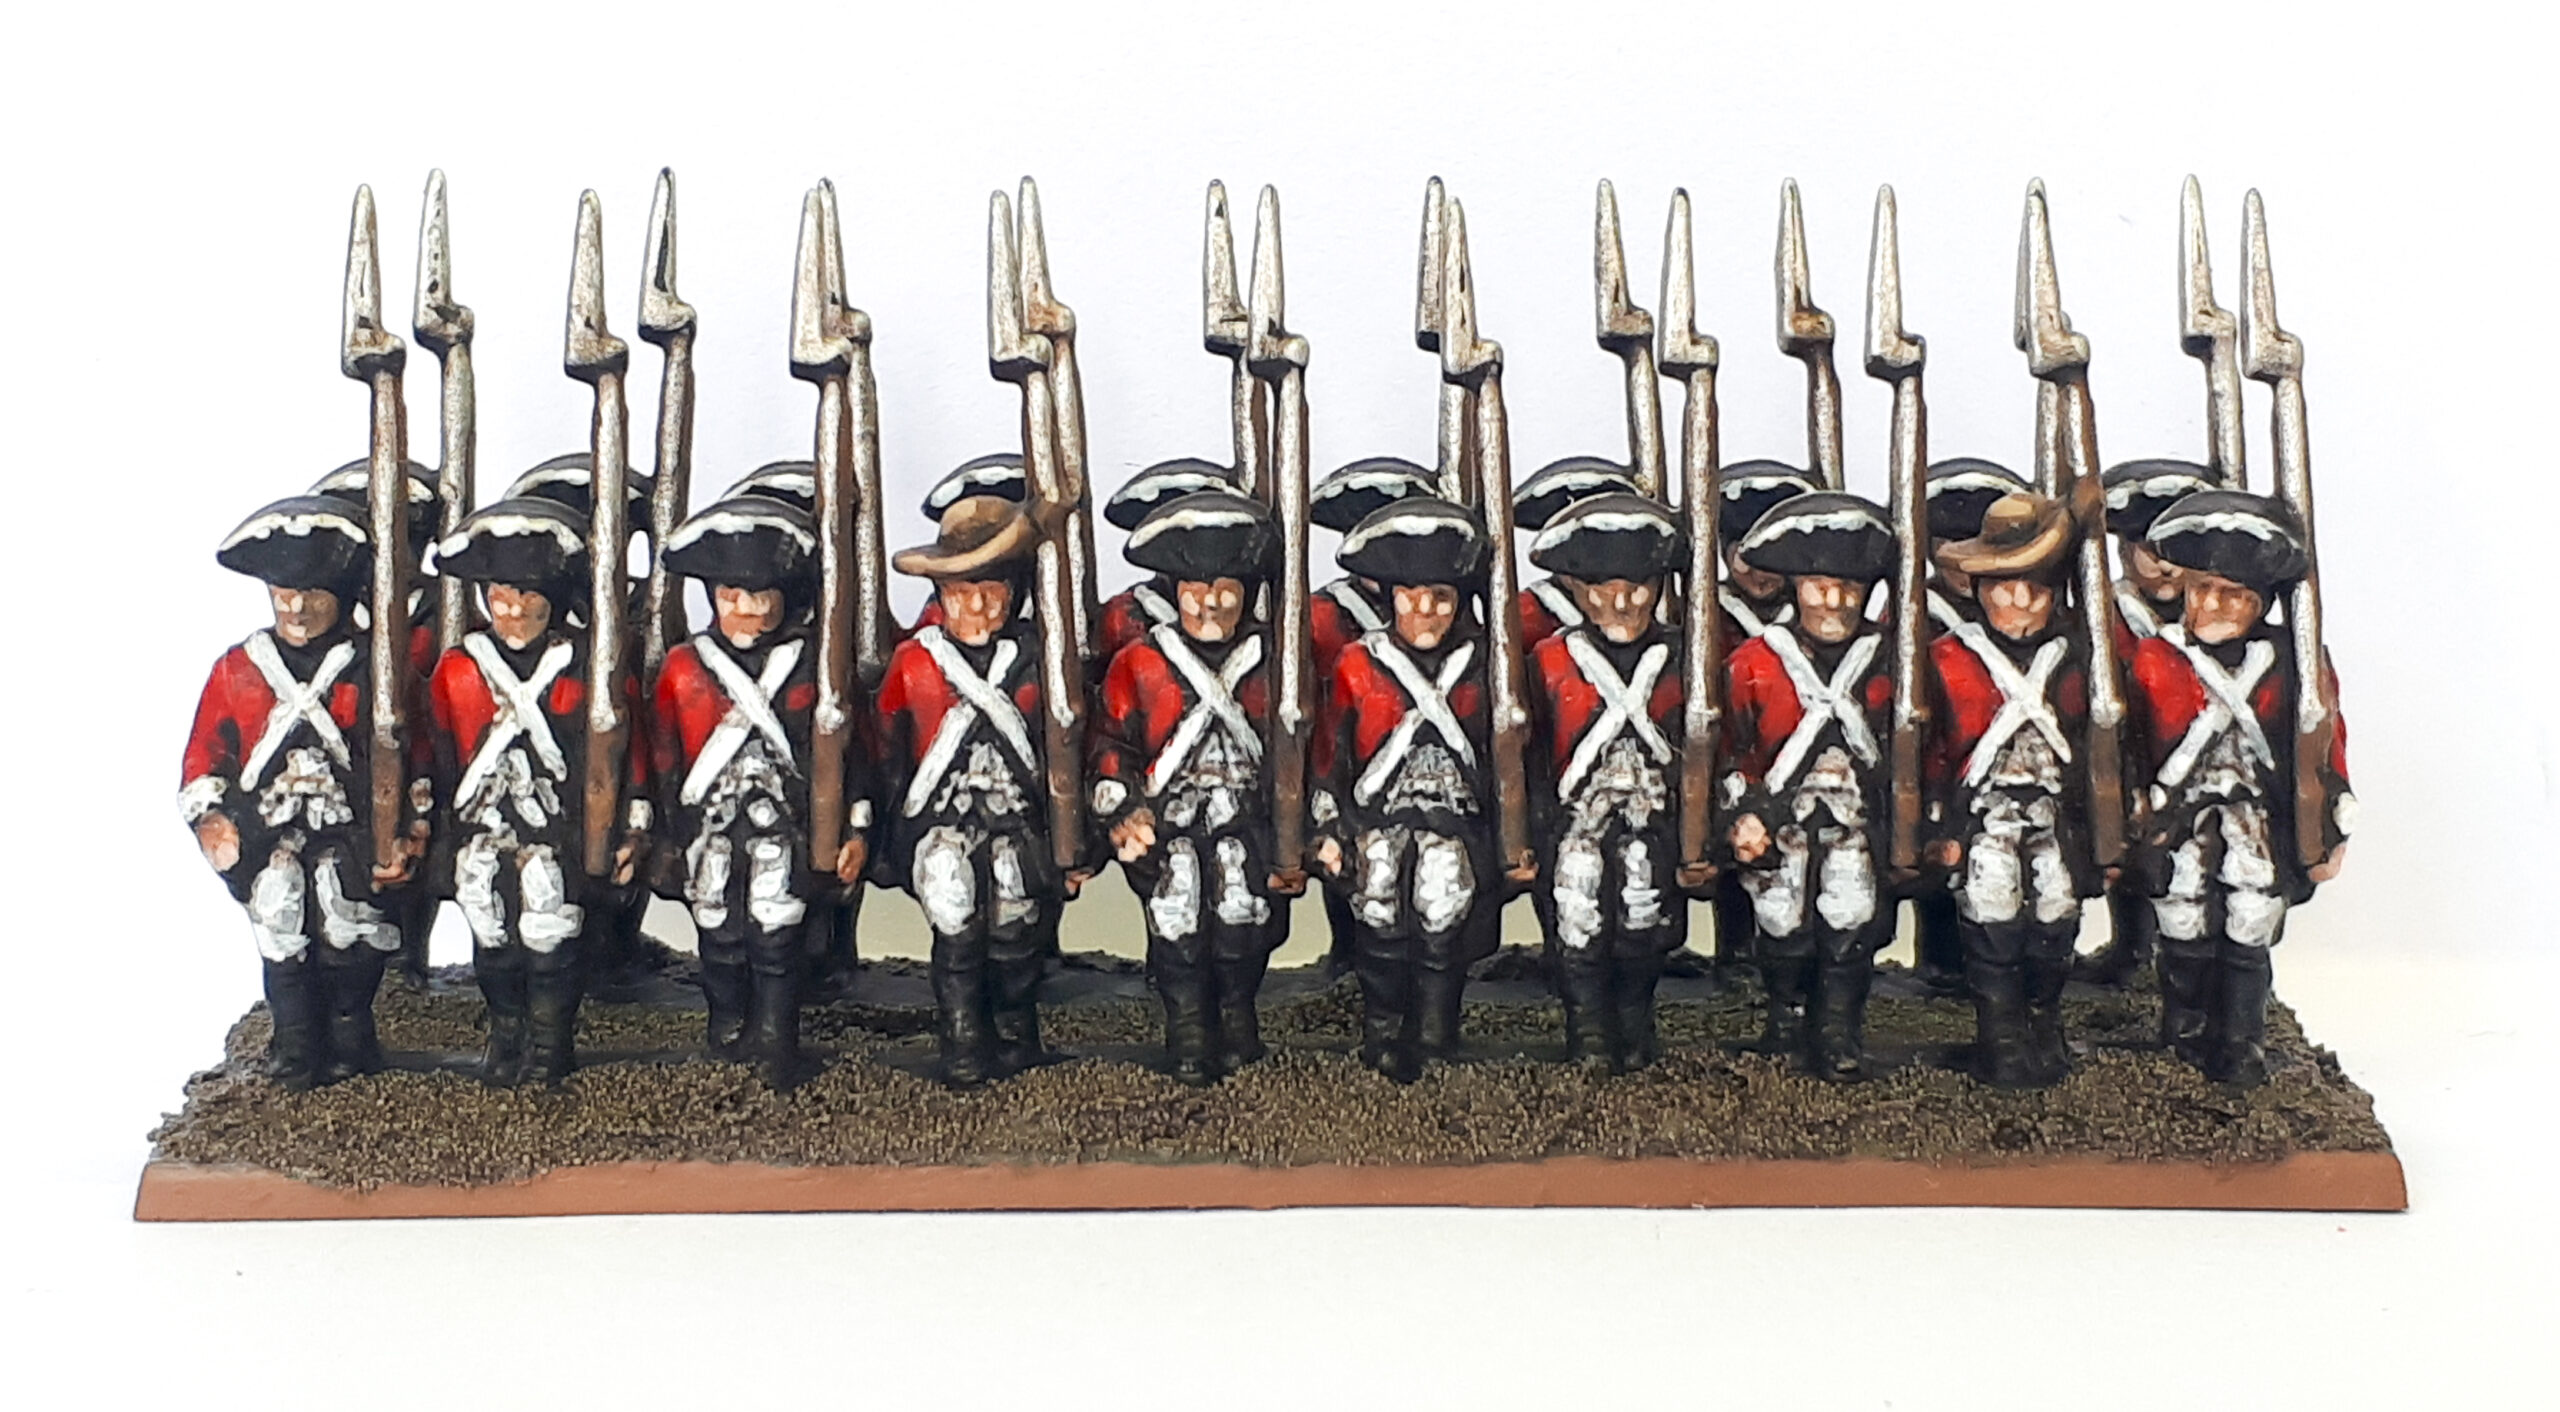
And with that, your miniatures are finished and ready for battle!
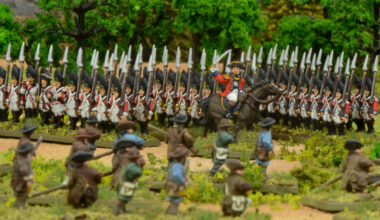
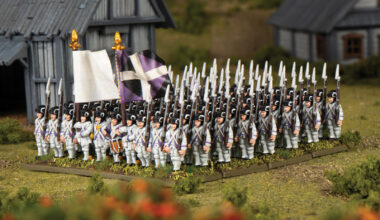
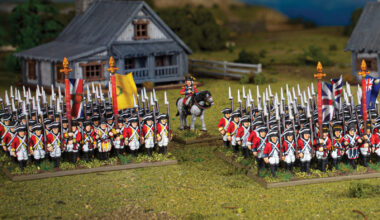
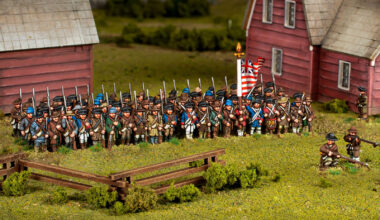
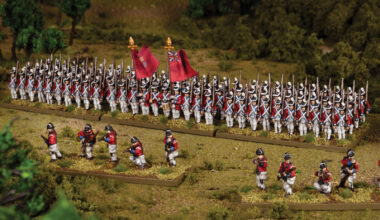
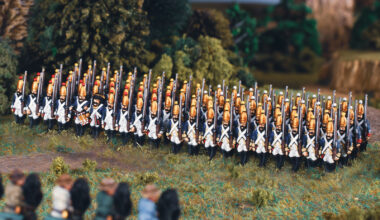
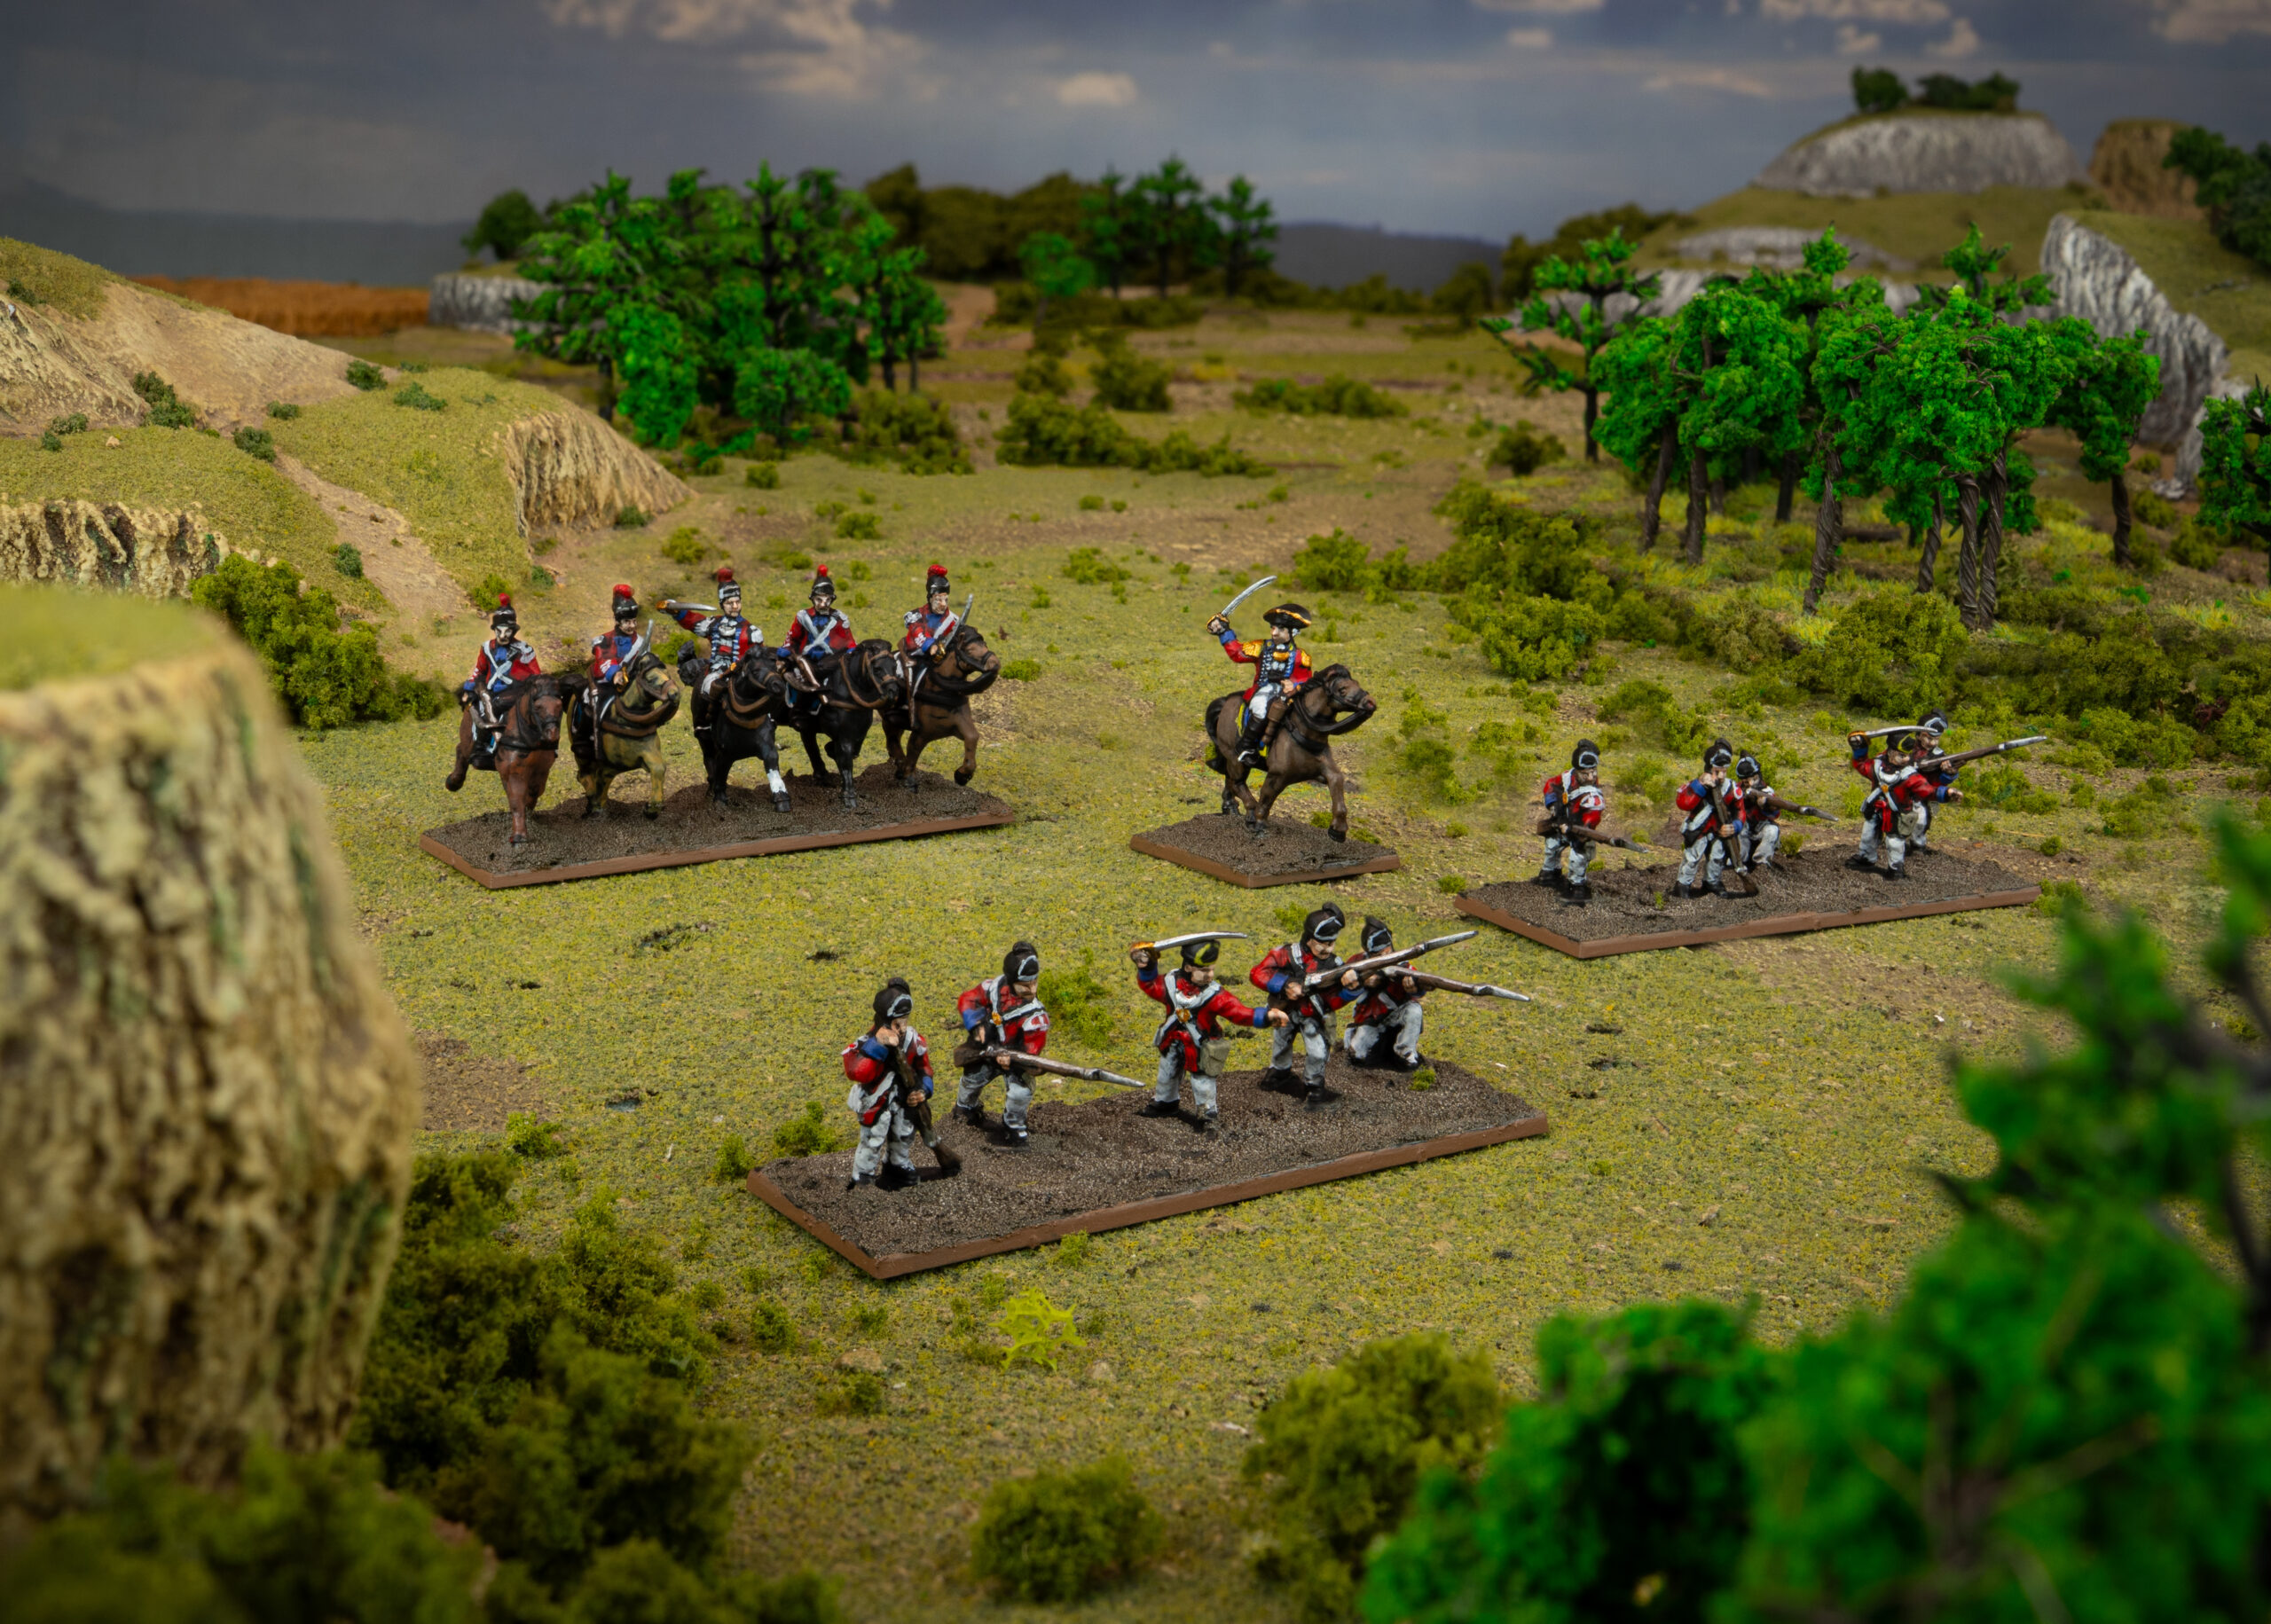
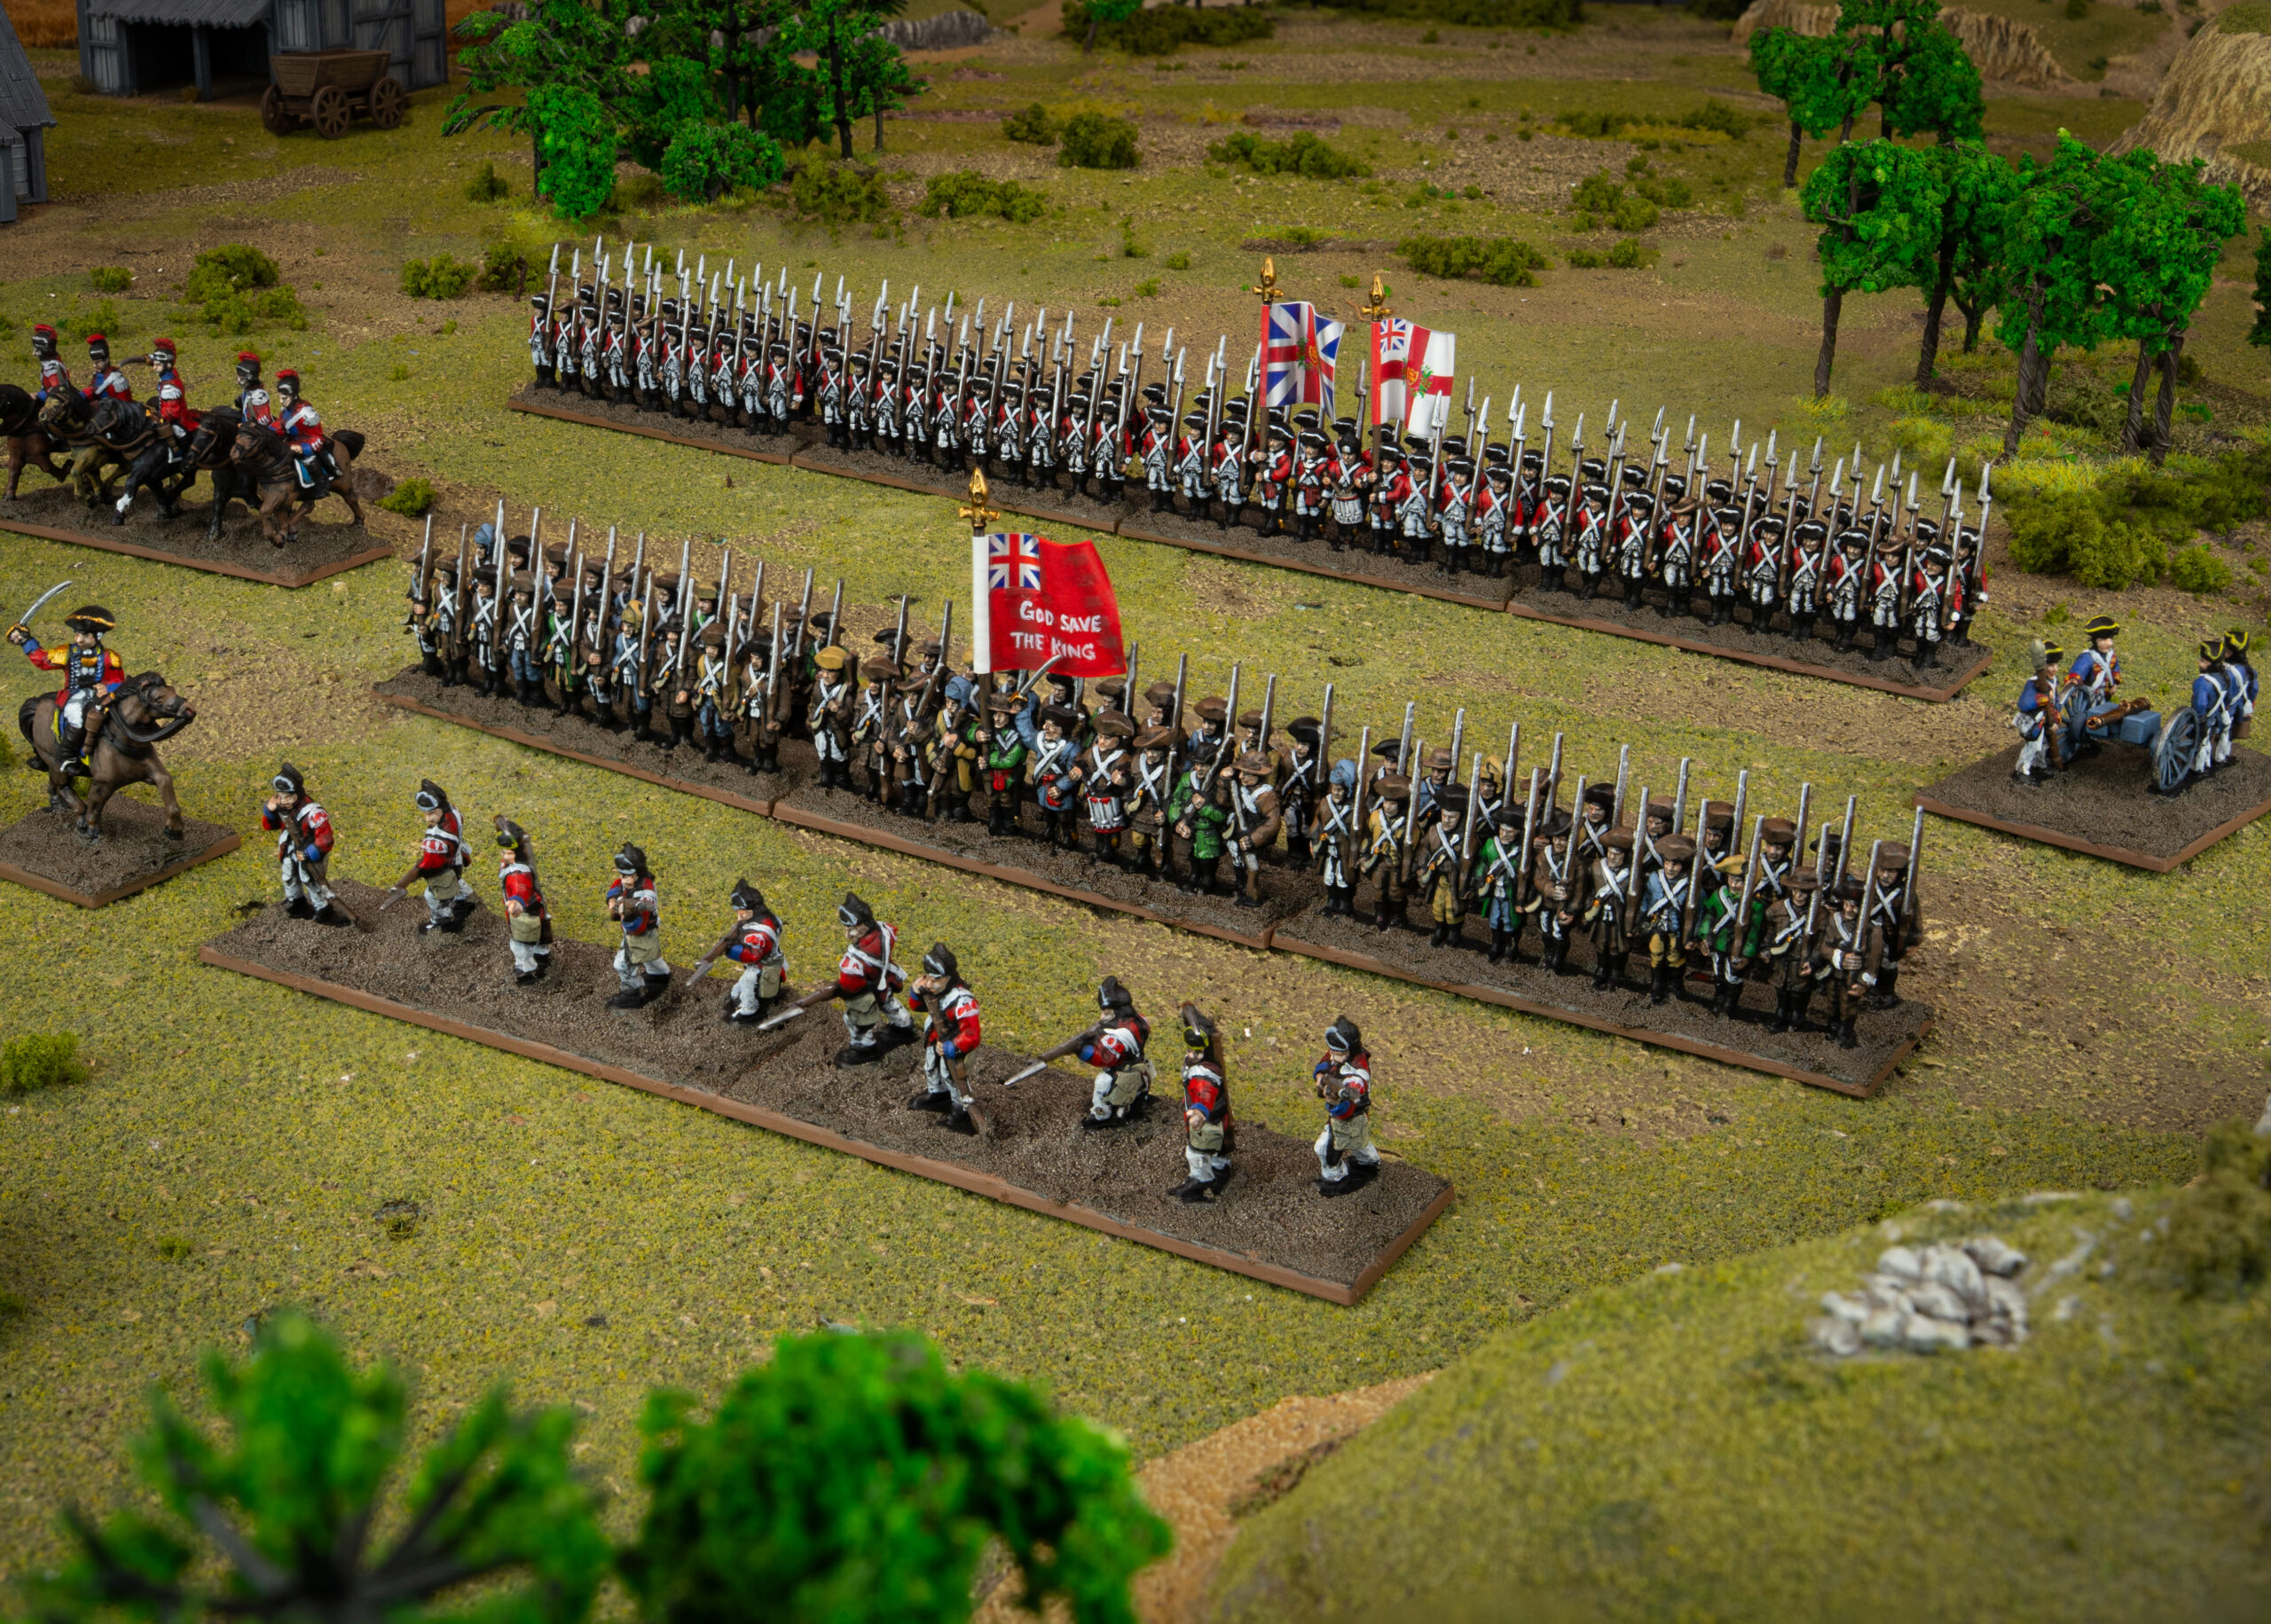
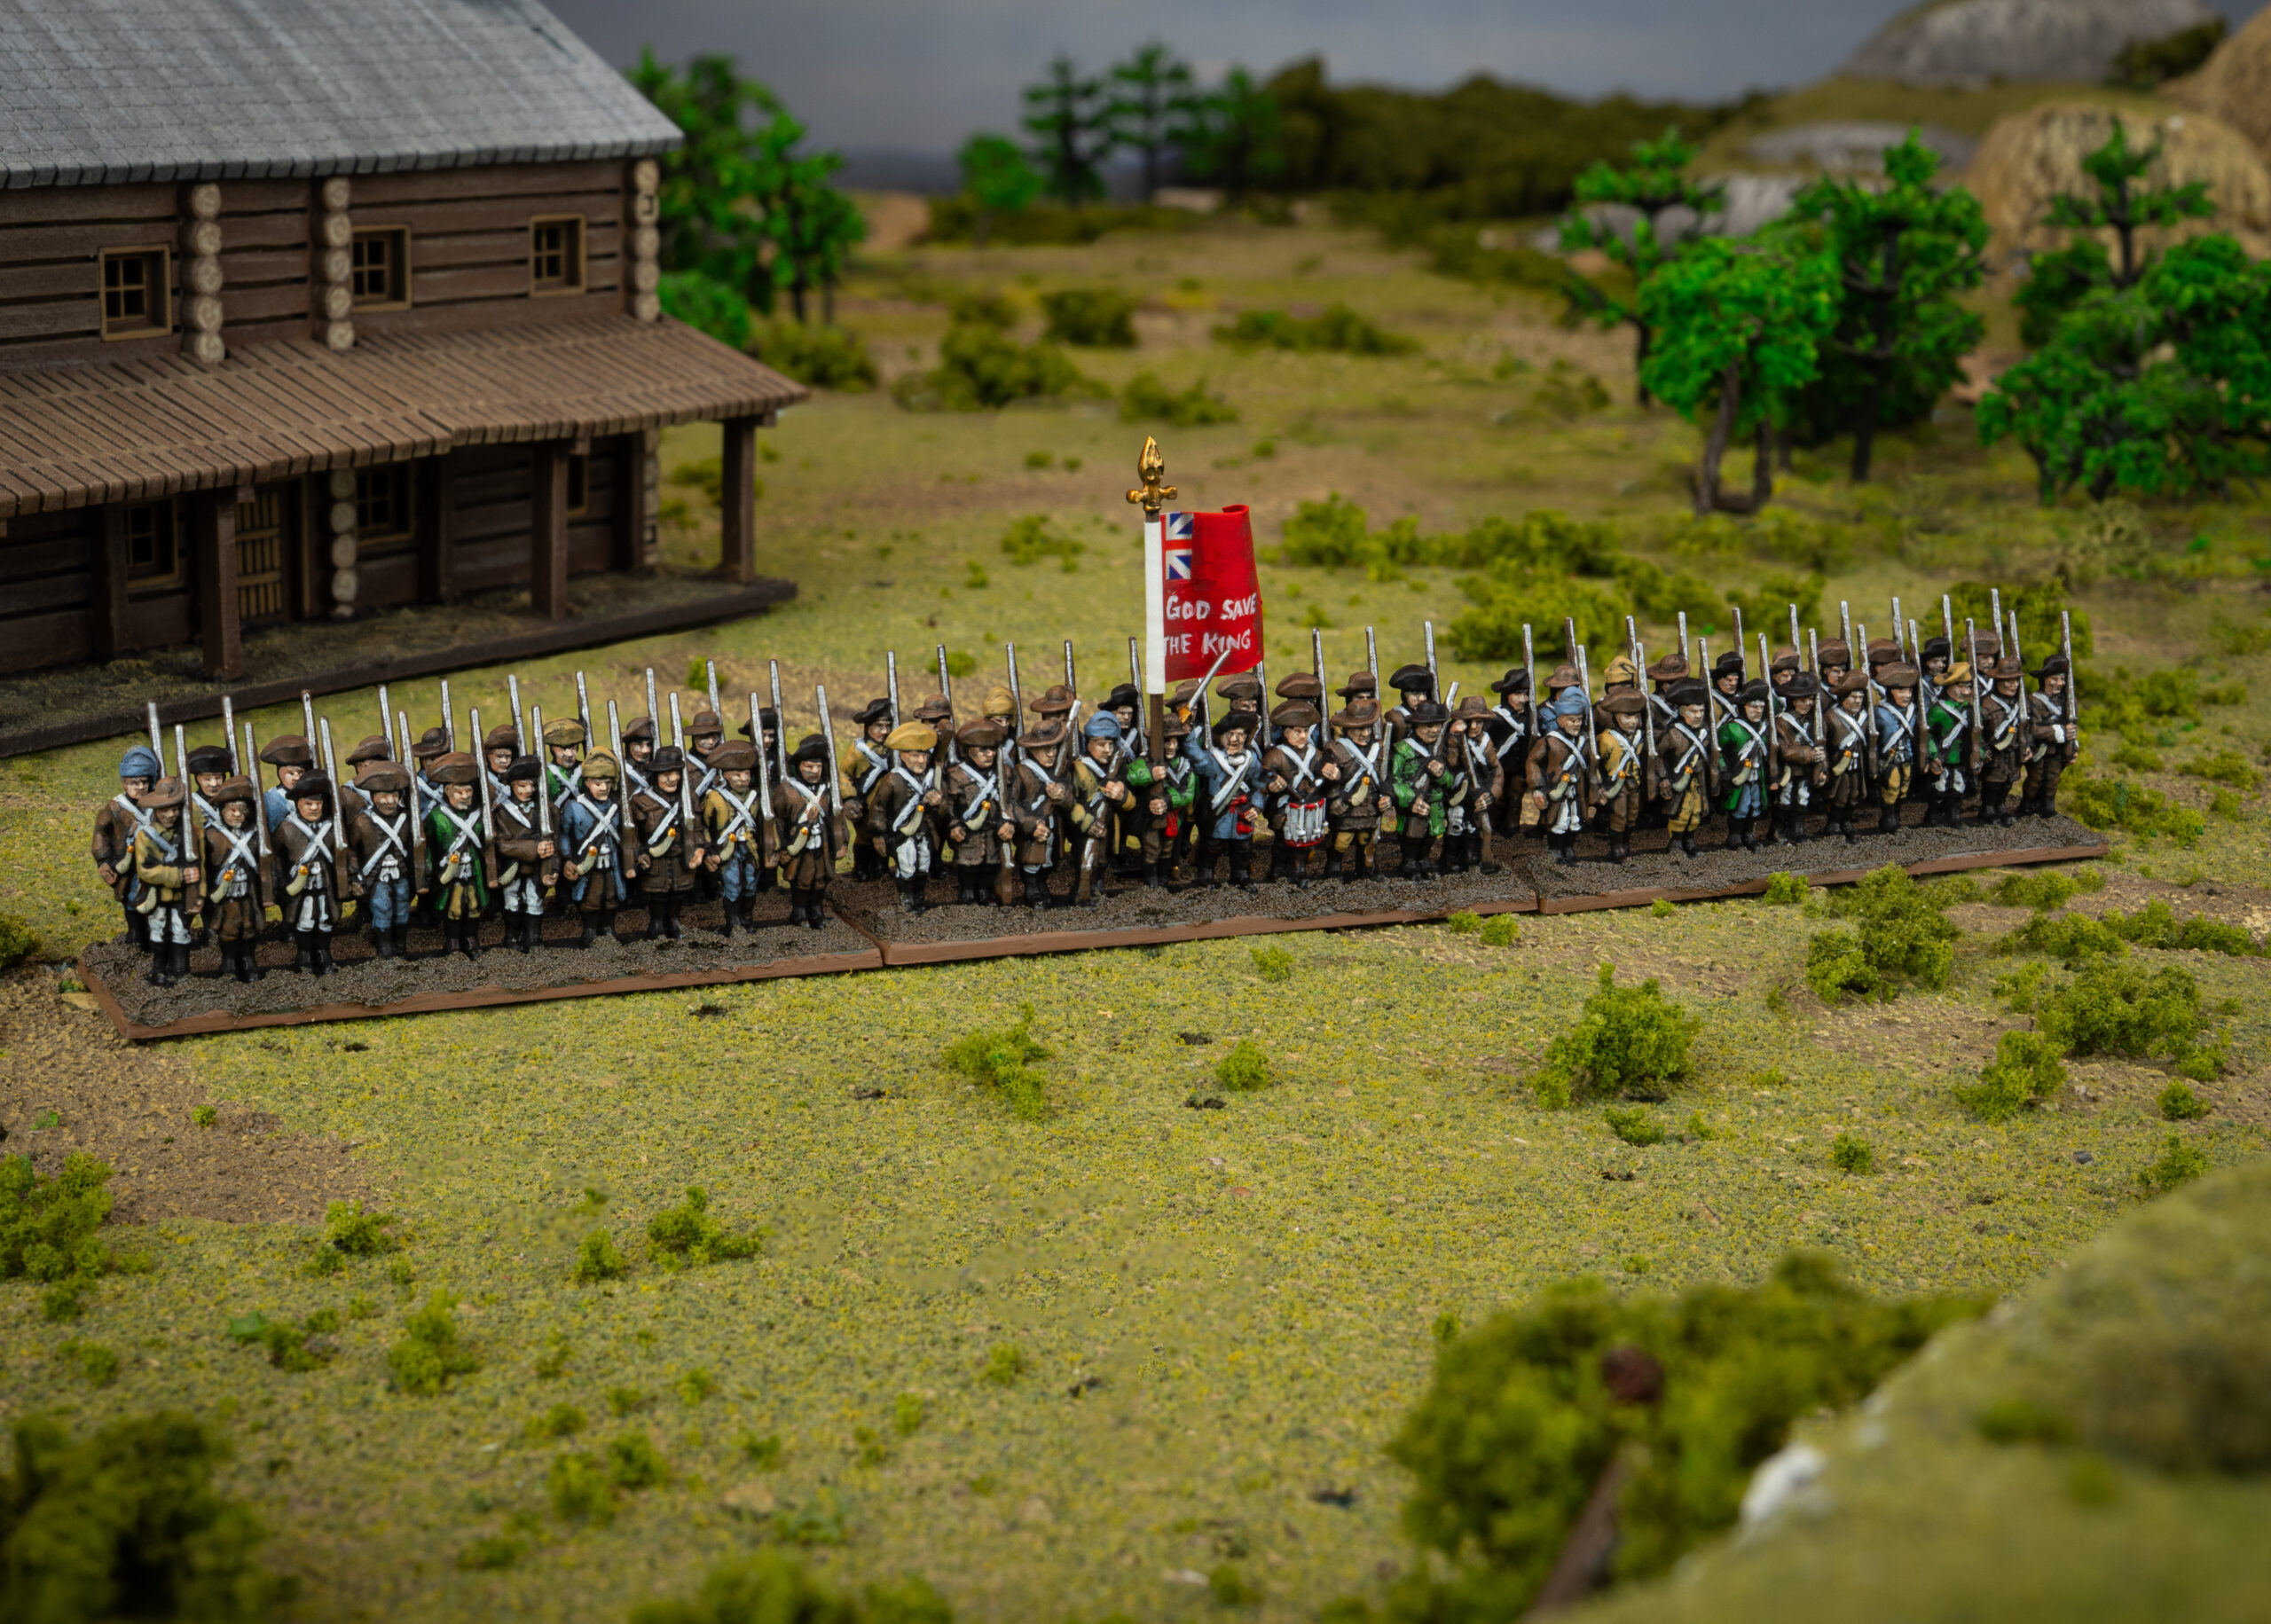
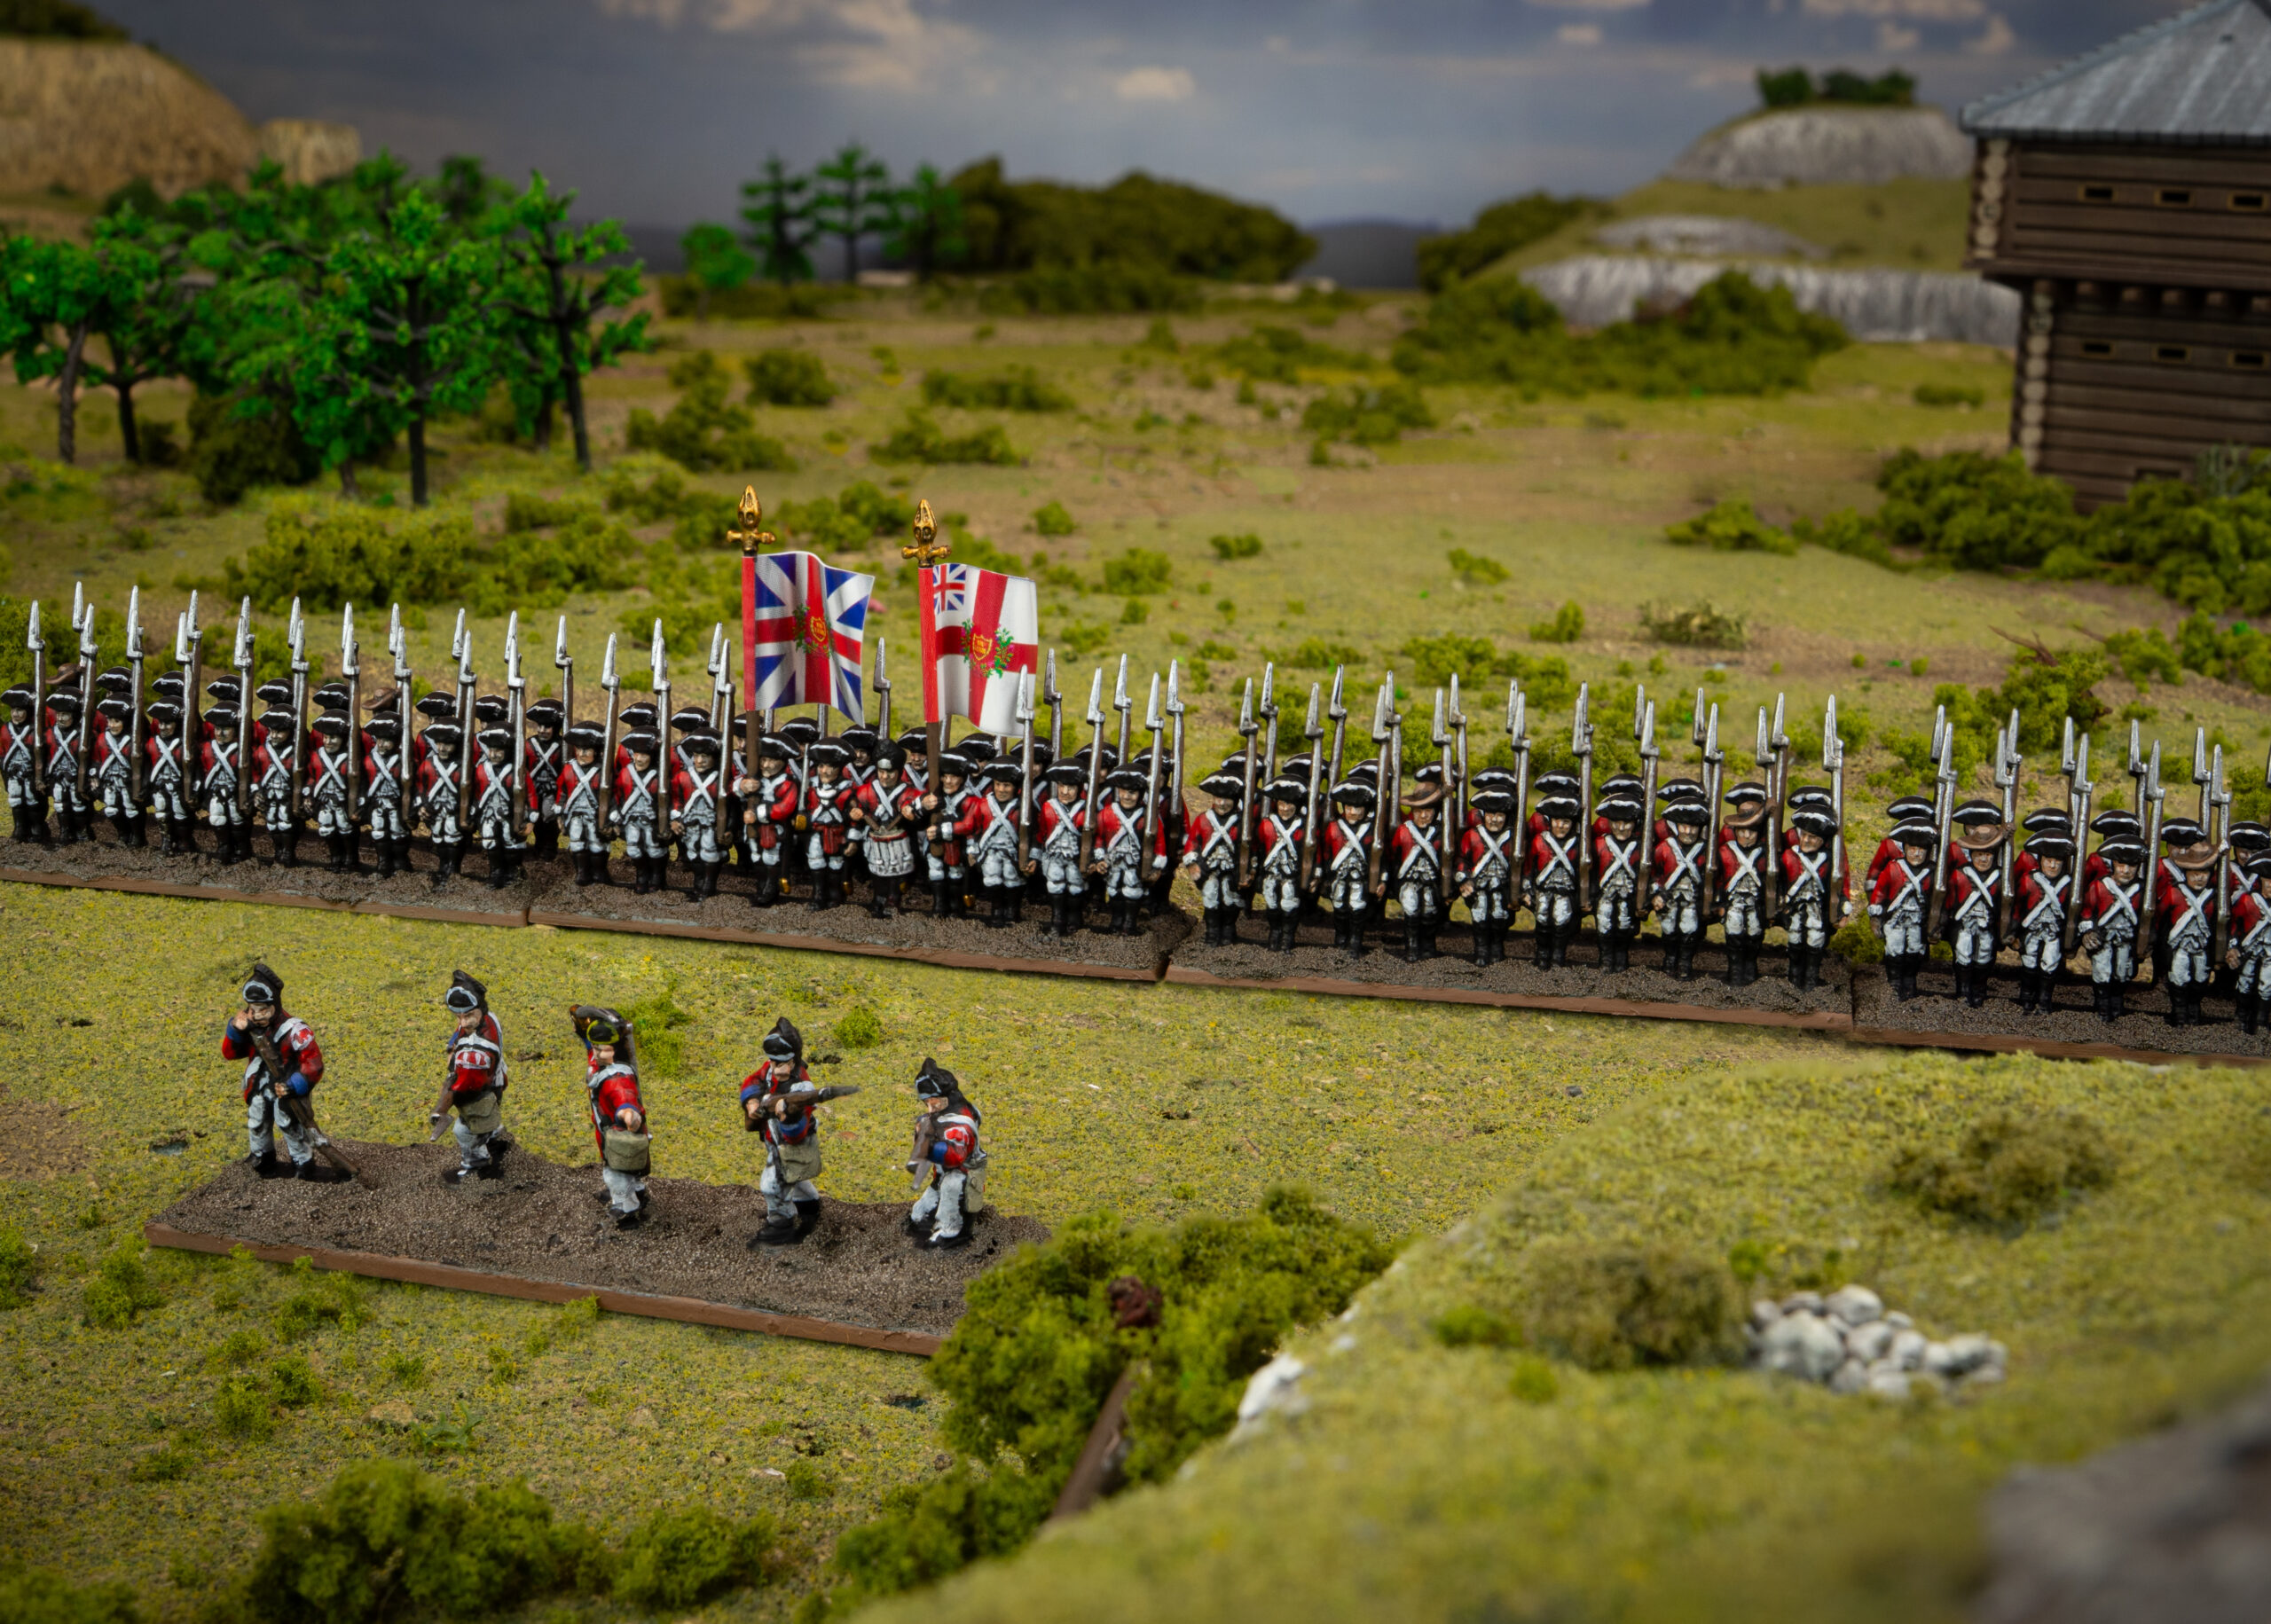
Thanks Iain! we think this is a great demonstration of how a few simple techniques (and a little bit of patience) can get you truly splendid results. Just look how they come out on the tabletop!
Has Iain’s work got you inspired to start your own Epic Battles: Revolution! project?