Let’s start with a statement of fact: my job is pretty awesome. I get to spend a lot of time thinking and writing about toy soldiers, and having the kind of nerdy conversations I have with my friends in real life with you all on the internet! One thing I have noticed, though, is that the longer we talk about wargaming and hobby, the further and deeper into ‘niche’ content we end up going.
Don’t get me wrong, I love talking about the lunatic fringes of our hobby, whether it be hyper-competitive Bolt Action list building, obscure Seventeenth Century battles, or the finer points of Napoleonic uniforms, but sometimes it’s nice to go back to the basics. What better way to do that than stick some toy soldiers together?
Bolt Action is by far my most played game (although Konflikt ‘47 has been mounting a pretty serious challenge of late!), and it’s also the game I’m most prone to getting into the weeds with competitively. When you’re so zoomed in on a specific aspect of a system, constantly thinking about it in terms of points efficiency, damage output, and list optimisation, sometimes you can forget why you fell in love with the game in the first place. I’m out to remind myself of one of the pure joys of Bolt Action – building a simple force based in history – and also challenging myself to approach it as though it’s my first time. Come along with me on this adventure, and let’s start over again!
In choosing my force, I wanted something absolutely iconic – a ‘famous’ Second World War force that’s instantly recognisable. I took my cue from classic film and television, and the choice was obvious: Band of Brothers is one of the very best shows about the period, and puts the legendary US Airborne front and centre on and around D-Day. Handily, we’ve not long released a plastic kit for these paratroopers, and it’s one I’ve been wanting to build since it came out. While I’ve always had an American force knocking around for Bolt Action, both my Marines and Rangers were built as Second Edition tournament forces. Not so with these Airborne – it’s all about the history and vibes.
With the nation and force decided, the next question was the starting point. The obvious choice would be the Starter Army, but I wanted to push my challenge even further. A Platoon box is £37 – less than a posh lunch for two (I tried using this logic with my partner. The reaction was… mixed!) and significantly cheaper than a modern ‘triple A’ video game. Just how much could I build out of a single plastic box, and could I turn it into a starter force to teach a new player the game with? I reckoned I could – game on!
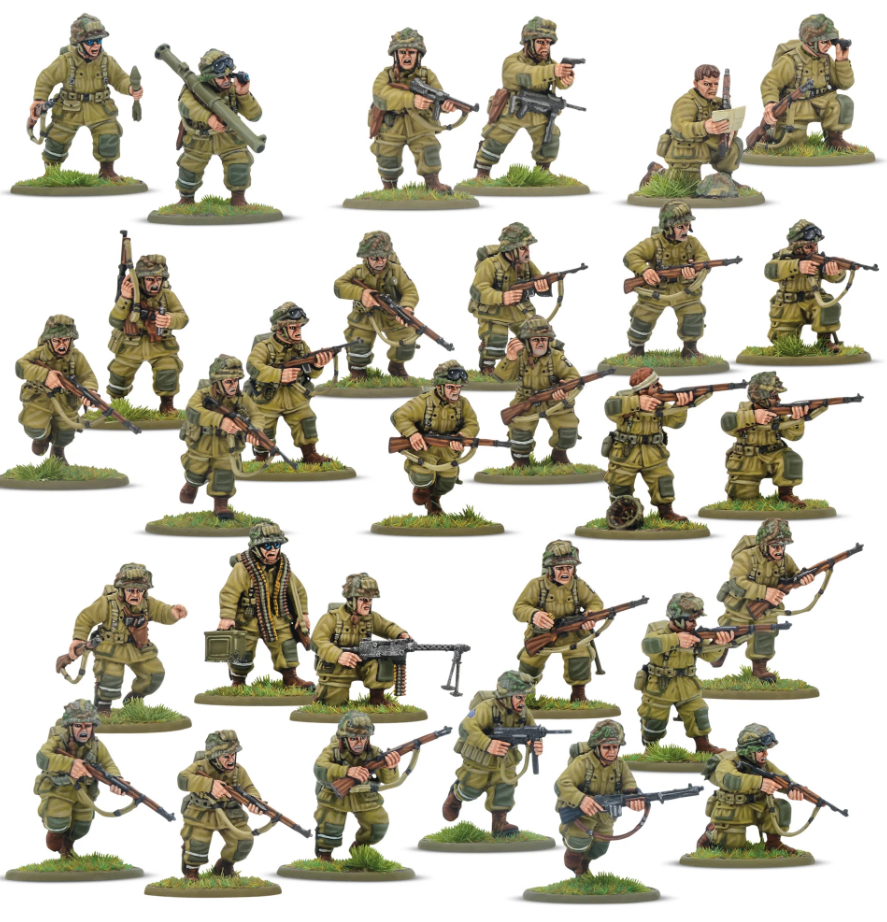
With the box in hand, I needed to make an army list – or at least a part of one – to work out what to build. Ordinarily, I’d be diving into my bits box to stretch the sprues as far as possible, but since I was approaching this as a ‘new’ Bolt Action player, it was off-limits, meaning I had only the contents of the Platoon to work with – no more, no less. Firing up the App, I was extremely pleasantly surprised to see that I could get almost 600 points’ worth of Rifle Platoon out of the box – see the list below:
| Rifle Platoon | ||||
| Unit Name | Experience | Total Men | Upgrades | Points |
| Platoon Commander | Veteran | 3 | 3x SMG, Airborne | 80 |
| Pathfinders Squad | Veteran | 6 | 3x SMG | 102 |
| US Paratrooper Squad | Veteran | 12 | 2x SMG, 1x Automatic Rifle, 1x LMG | 197 |
| US Paratrooper Squad | Veteran | 6 | 1x SMG, 1x Automatic Rifle, 1x LMG | 109 |
| Medic | Veteran | 1 | Airborne | 31 |
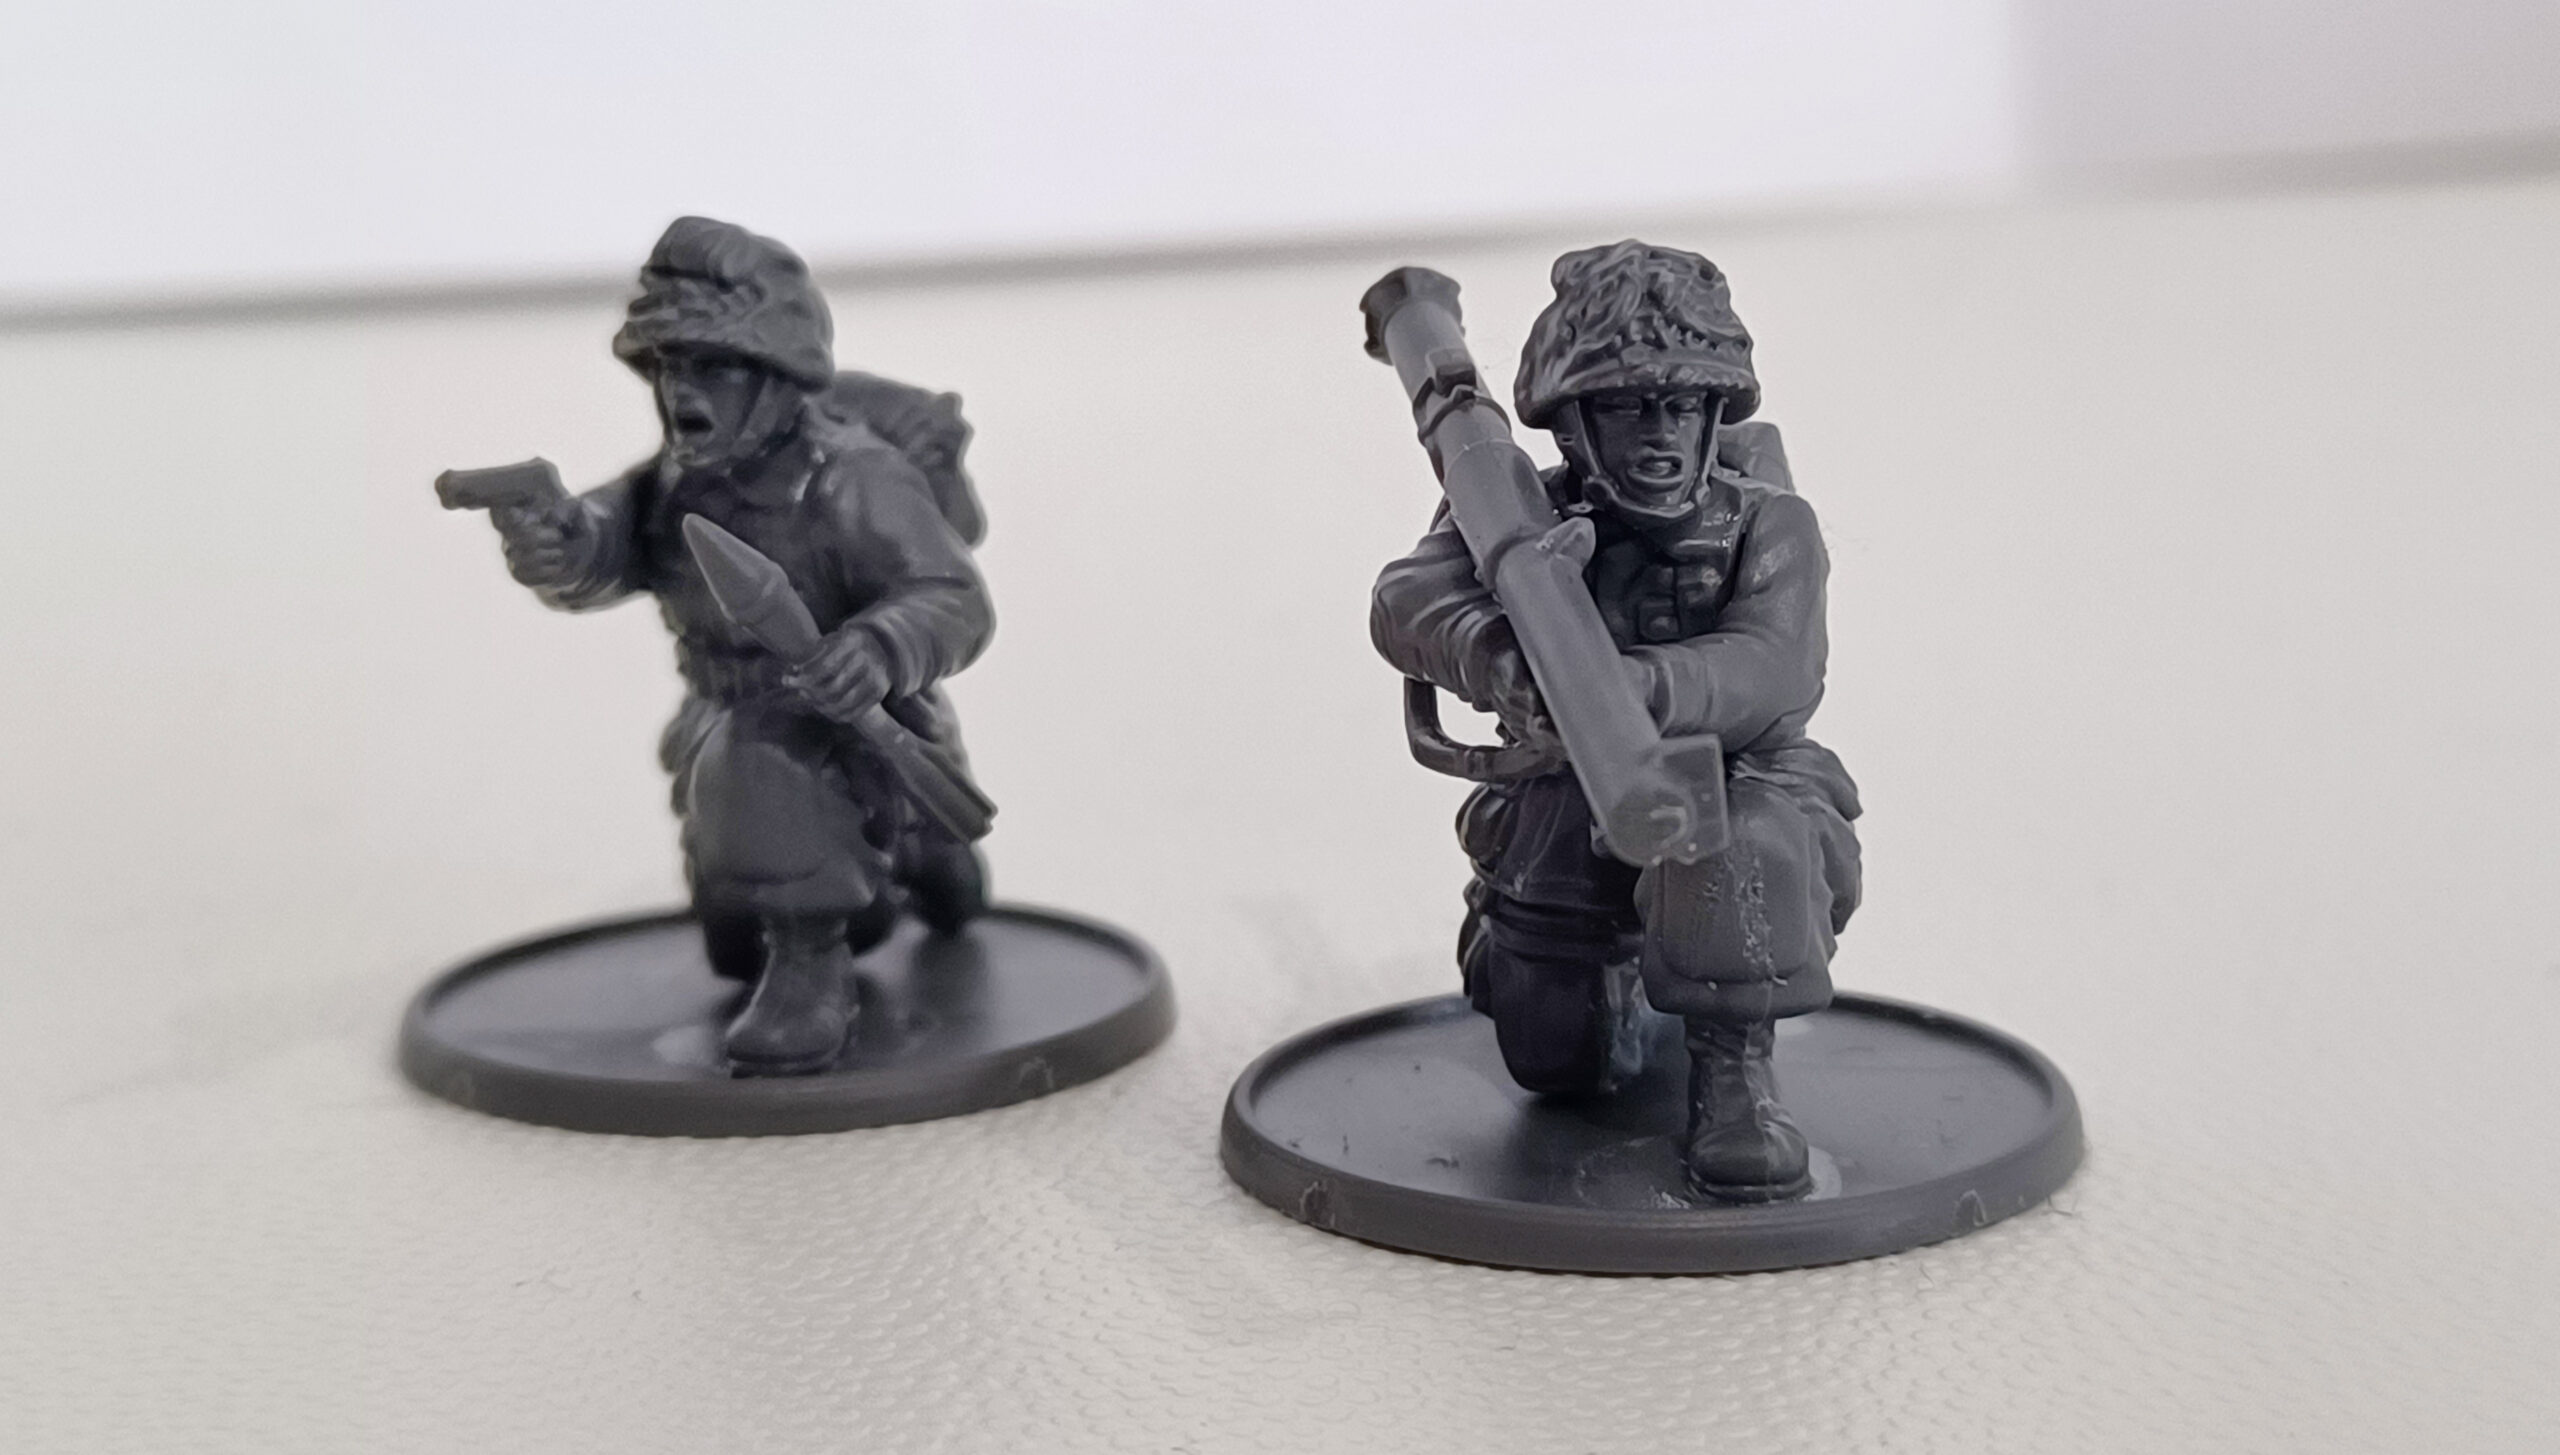
| Bazooka Team | Veteran | 2 | Airborne | 80 |
| Points | Order Dice | Models | ||
| 599 | 6 | 30 |
Now, this is explicitly not a competitive list. Instead, it’s more of a ‘greatest hits’ of cool US Airborne units, intended to represent the paratroopers dropping into Normandy on D-Day. I’m not sure whether I’ll paint them as 101st or 82nd Airborne yet, but that’s a question for later. Similarly, ‘rule of cool’ trumped strict historical accuracy when assembling squad loadouts. The limiting factor on how big the force was ended up simply being the number of bodies (30) in the box, but 600 points and six Order Dice is plenty to have a small game with. I’ve also managed to get some really iconic units into the force, which means the next bit will be even more fun. On to the building step!
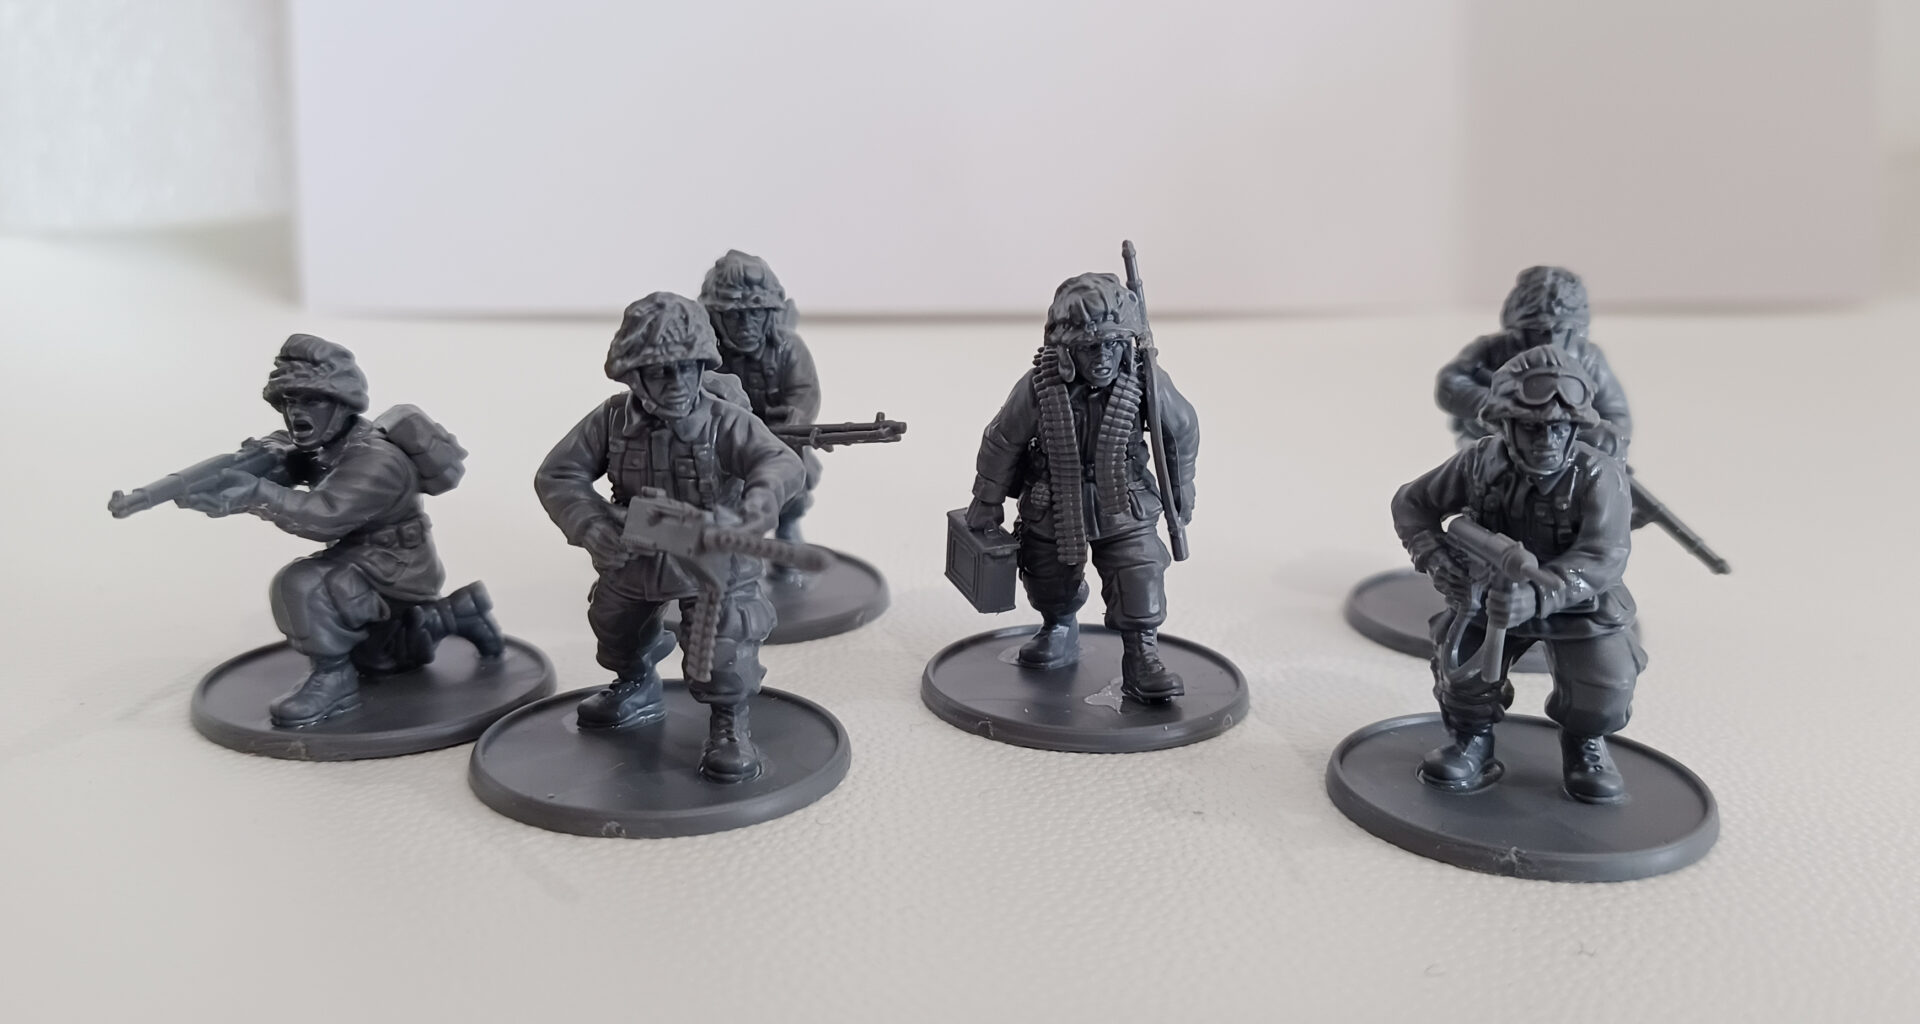
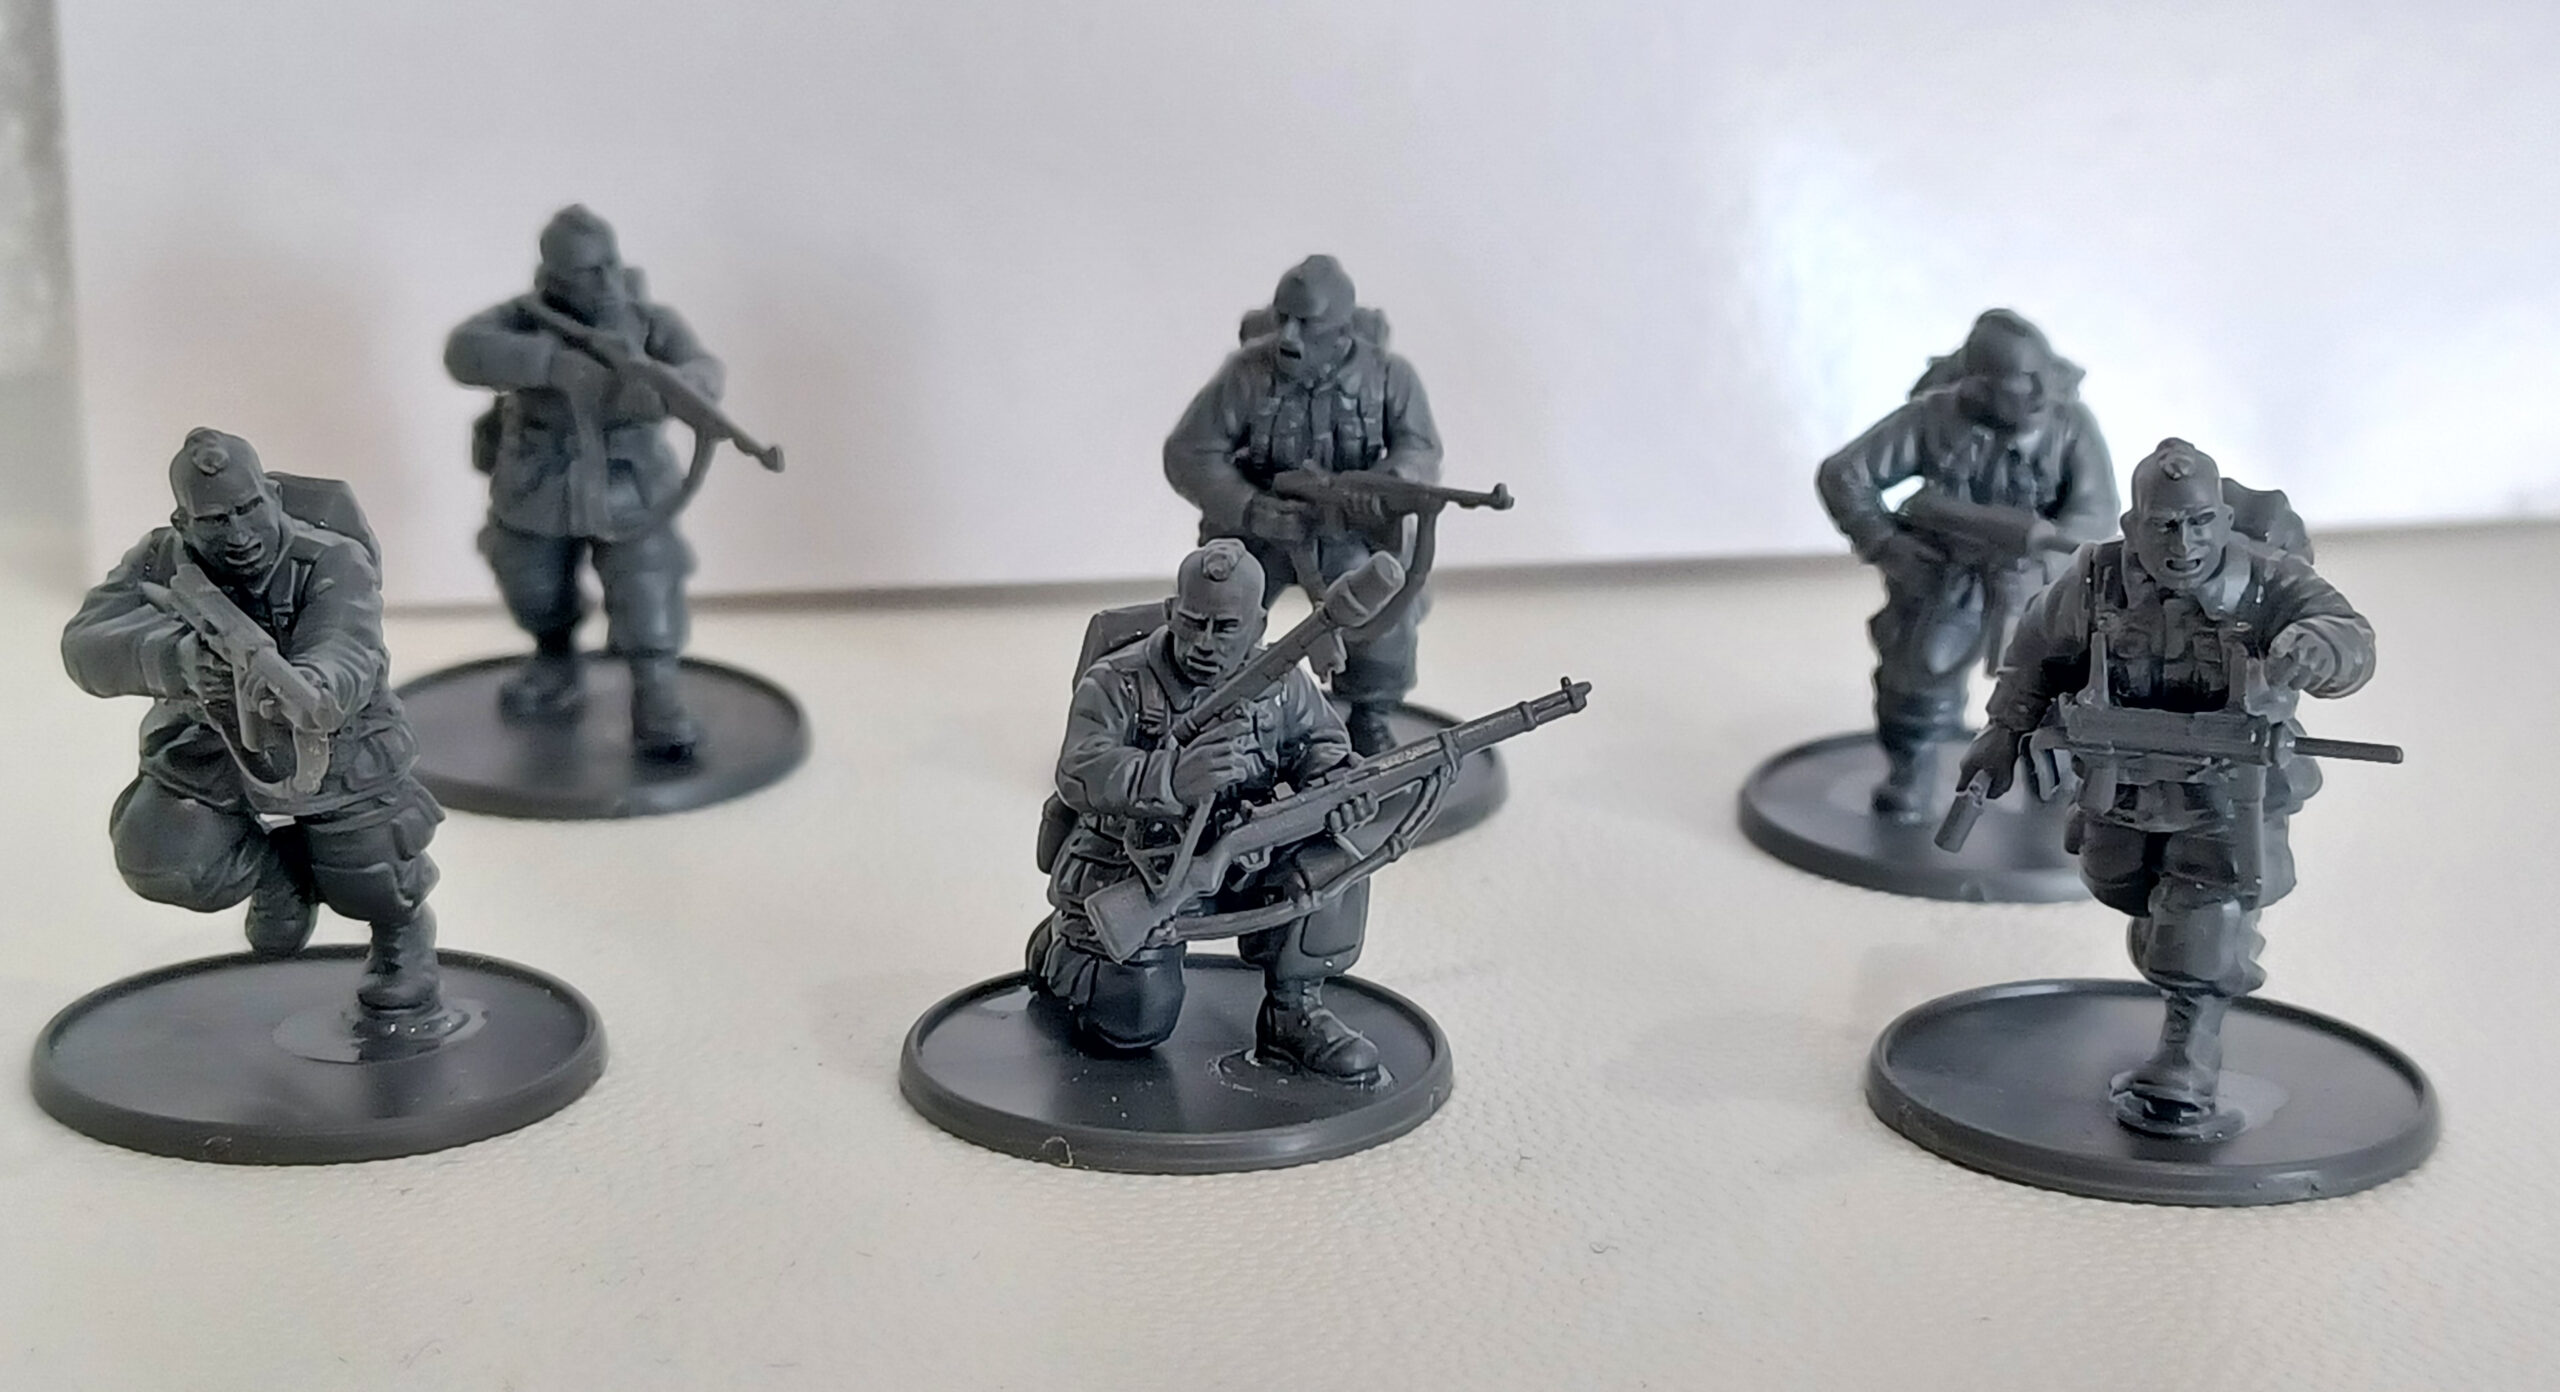
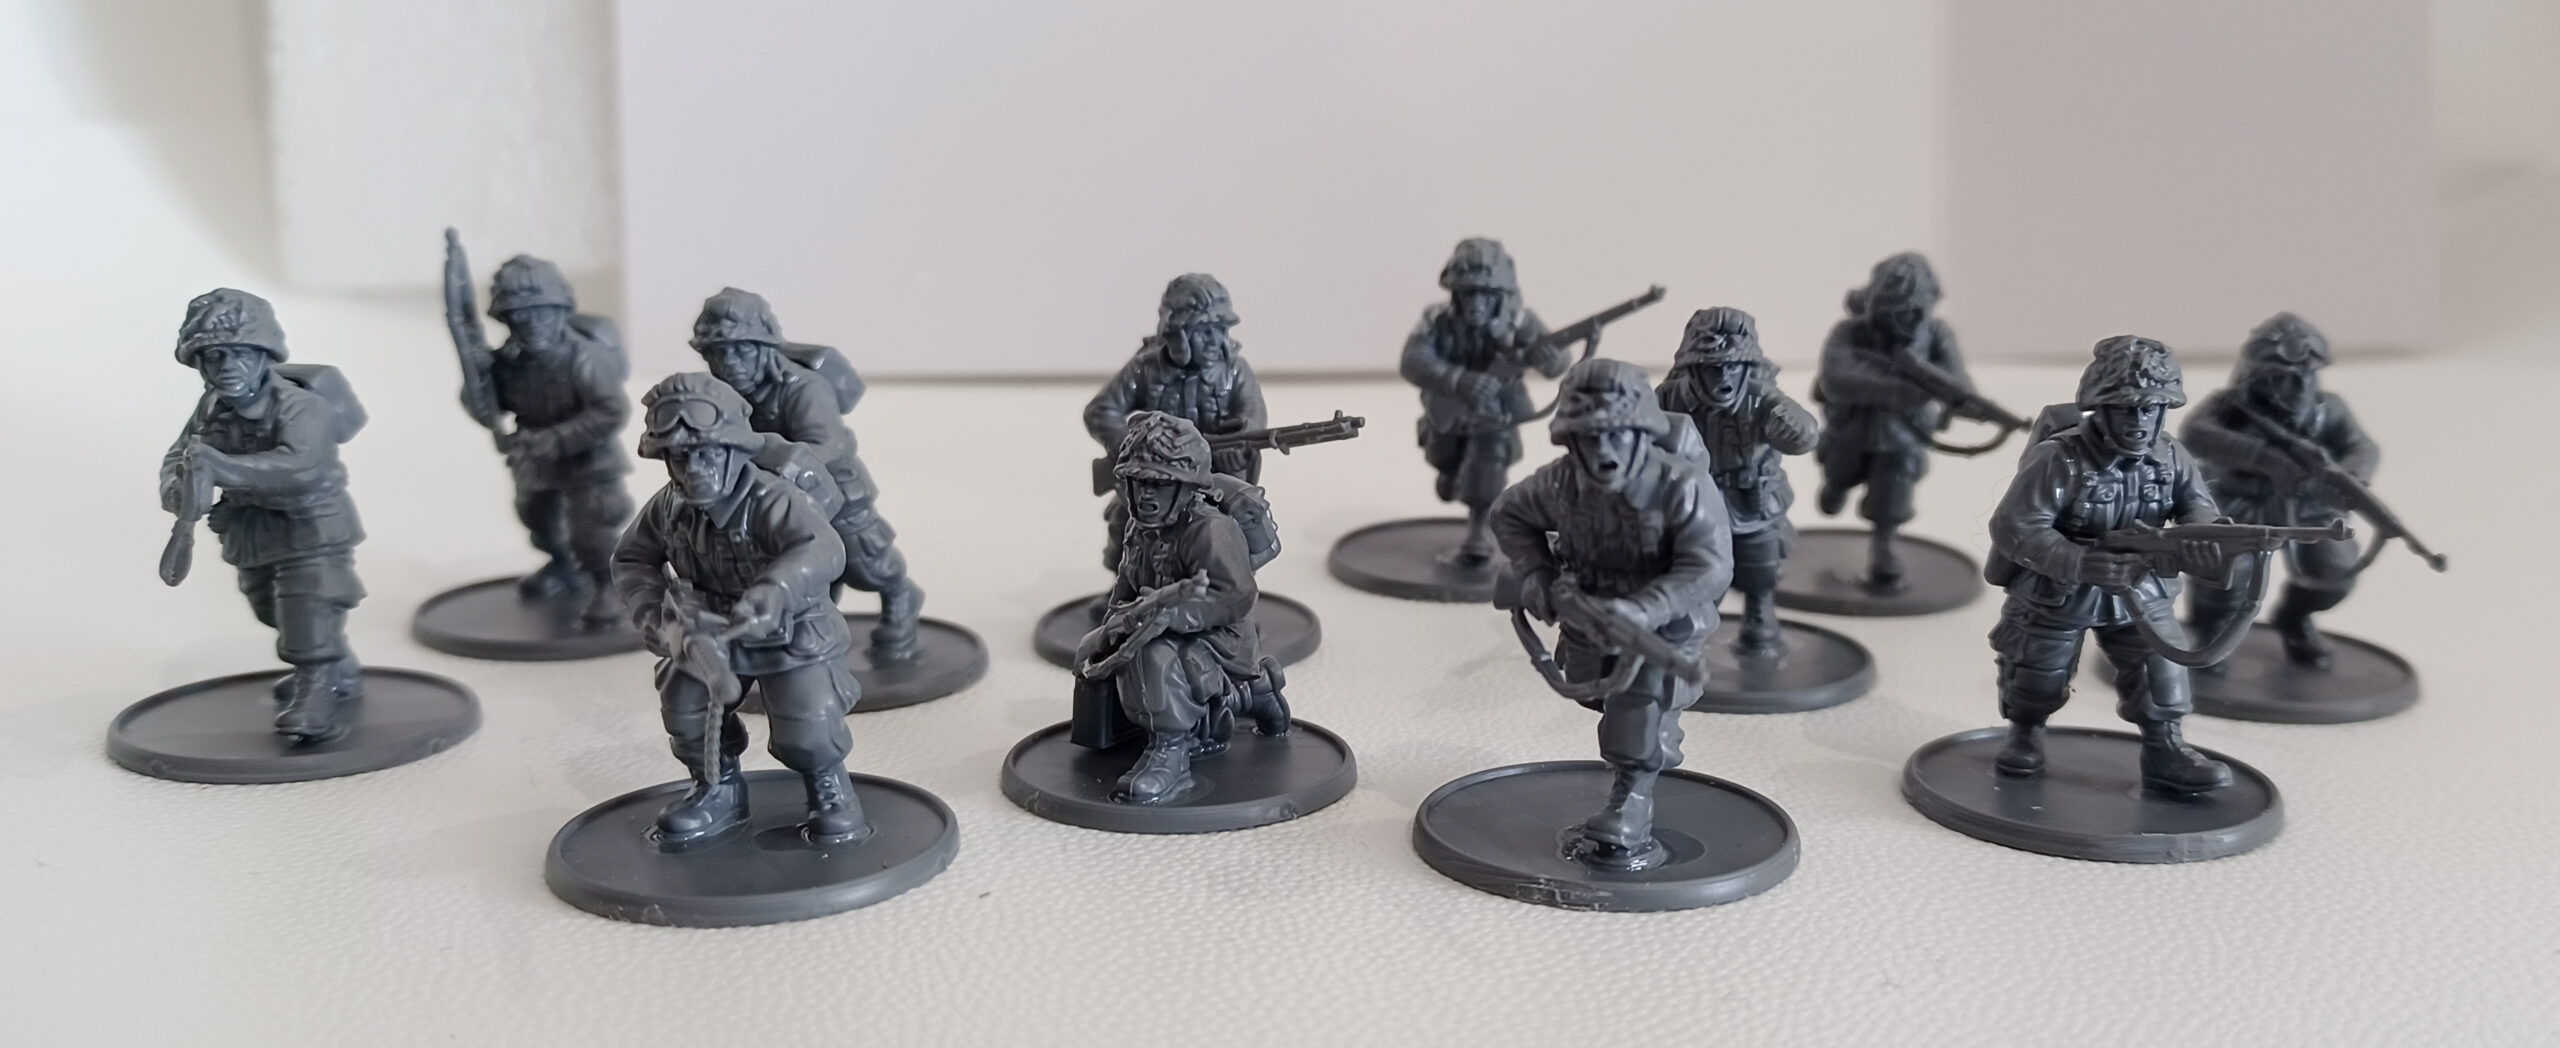
I don’t care how long you’ve been wargaming, cracking open a brand new box of miniatures will always be a fun moment. There’s so much potential, and so many goodies on the sprues just waiting to be built. As one of our newer kits, the D-Day Airborne are absolutely packed with detail, and designed to be easy to build. I decided to start with just a random ‘bod’ from one of the Paratrooper Squads, to get a feel for the kit and how it all went together. Usually when I’m building a tournament army, I tend to assemble my models with the absolute bare minimum of extra equipment to make them as quick to paint as possible, but since time wasn’t a consideration I decided to aim for a middle ground, adding backpacks and a few extra ‘belt kit’ details.

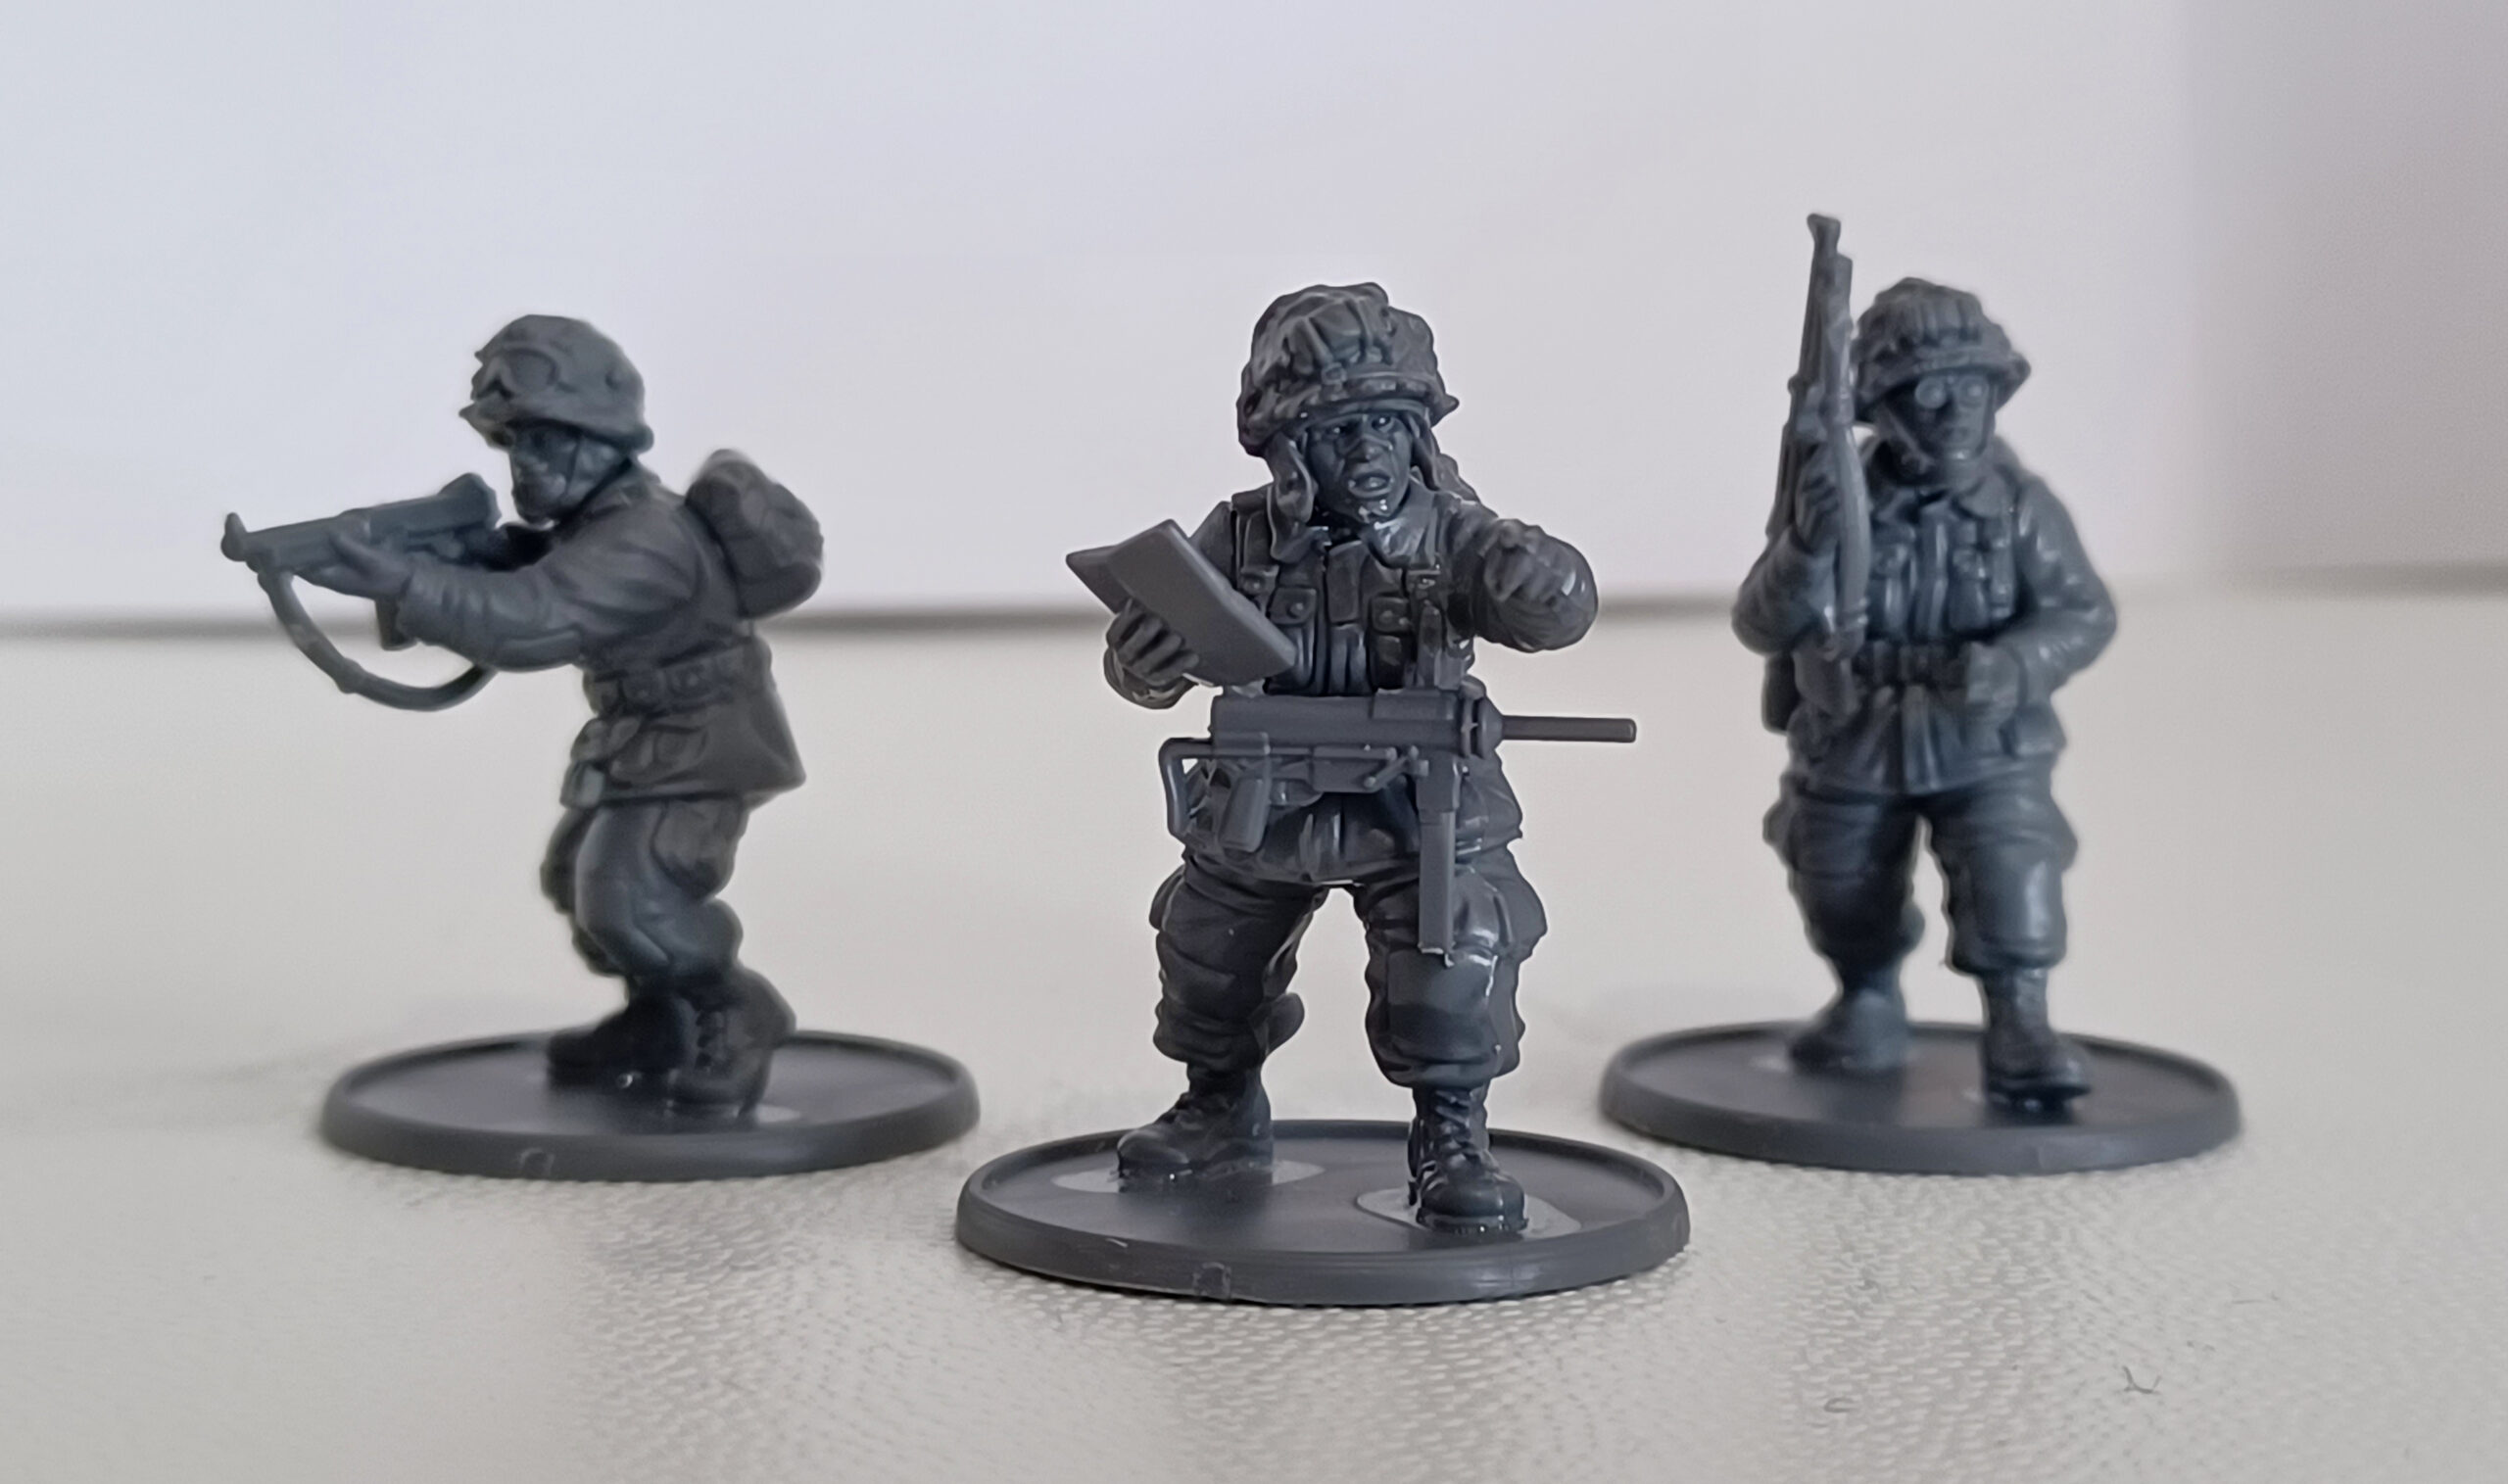
The first model went together really nicely, which I always take as a good omen for a project. There’s nothing worse than building one figure and realising that the next twenty or thirty are going to be a slog – fortunately, not the case here! For the force proper, I started with the ‘coolest’ unit – the Pathfinders! These elite troopers are what most people think of when they imagine US Airborne on D-Day, and the mohawked heads included on the sprues are perfect for representing these hardcases. While it might not be strictly historically accurate, as these heads actually depict the infamous ‘Filthy Thirteen’, on the tabletop they’ll mark the Pathfinders out at a glance from their comrades. The Pathfinders were also a good opportunity to get some of the more specialised kit like the M-227 Signal Lamp (the thing that looks like a flamethrower) into the force.
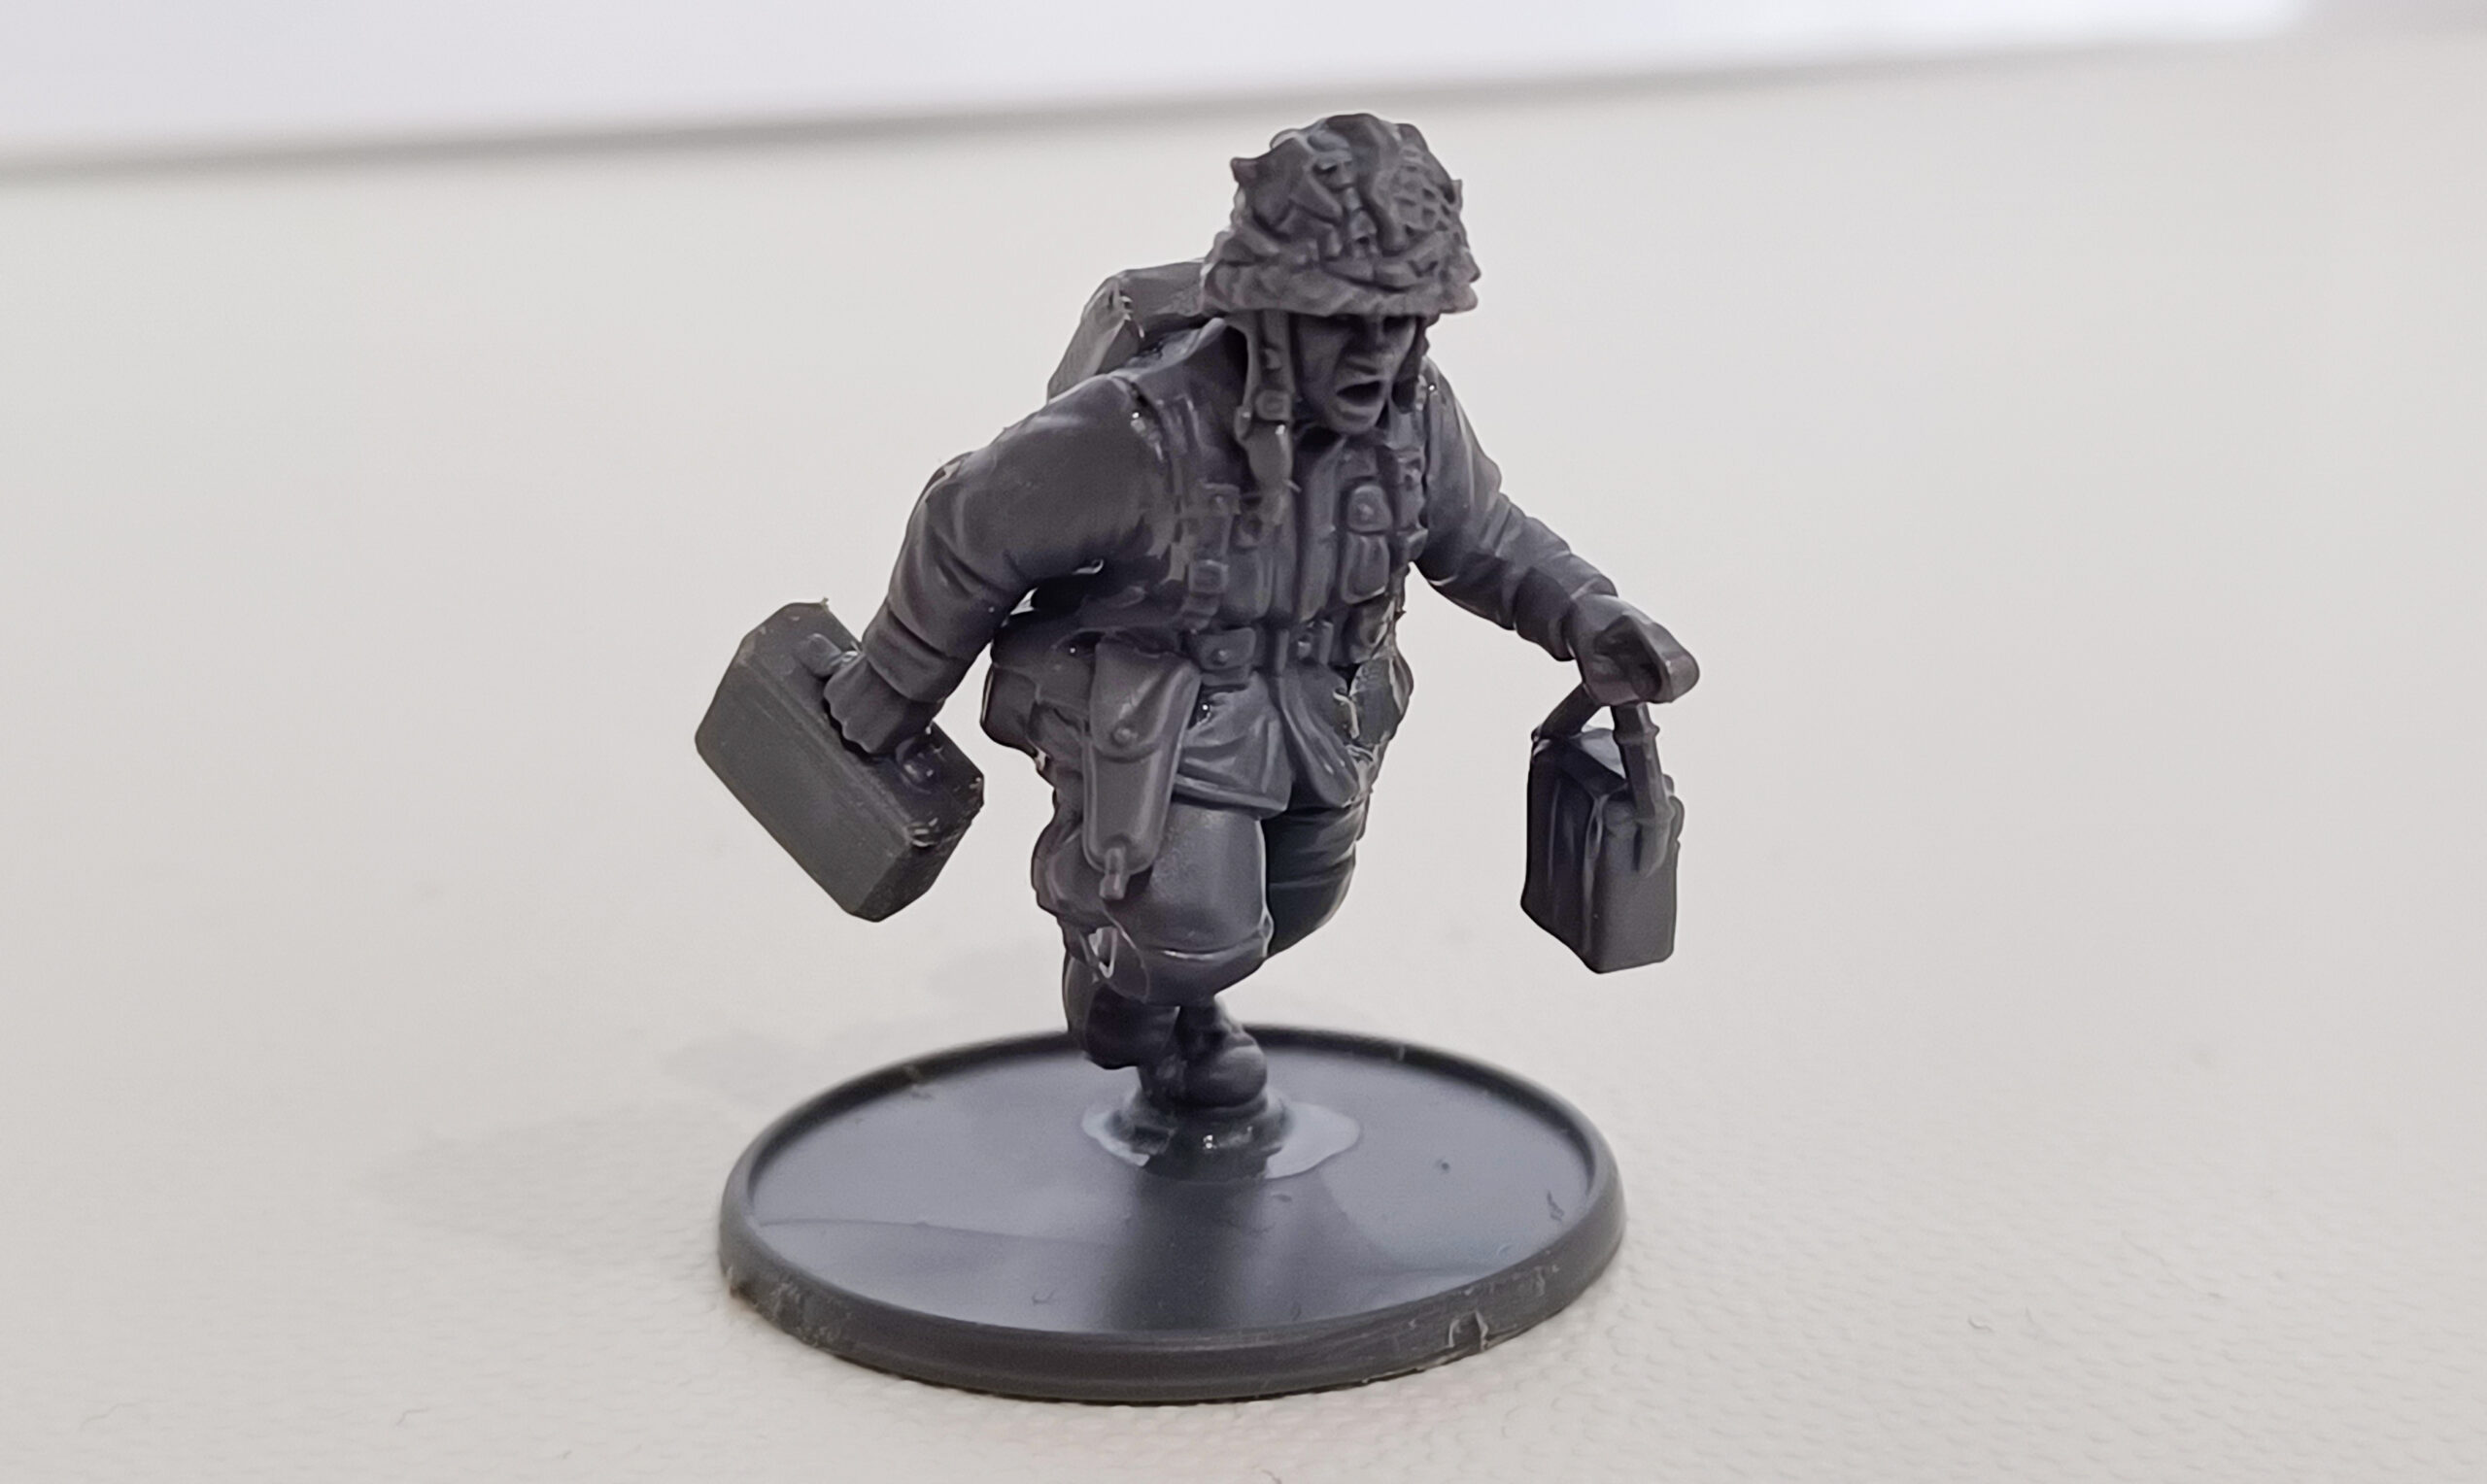
I always like to try and tell a story with the miniatures in an army, and the dynamic poses on this kit really lend themselves to this. The Medic is a good example – he’s a unit I’d never dream of taking in a competitive list, but historically he’s one of the most important men in the force! I’ve built mine dashing through enemy fire to rescue a wounded man, using both the satchel on the sprue and a .30cal ammo can which I filed and cut into an approximation of a leather doctor’s bag. This is one where I would usually have dived into the bits box for a suitable bag from another sprue, but by working to the brief of ‘this is the only kit I have’ I was forced to find another solution, and I had fun doing so!
I always like to get the ‘easy wins’ out of the way early to build momentum while assembling and painting – the smaller units that make you feel like you’ve really accomplished something early on. In this force, it was the Pathfinders, Medic, Platoon Commander, and Bazooka Team. All three units went together nice and quickly, and meant that by the time it came to the second half of the job – the ‘standard’ squads – I was well acquainted with the kit.
For each unit in this army (as in any project I do!) I started by clipping out all of the parts needed for each model in the squad, and making separate piles – so many heads, so many backpacks, torsos, and so on. Then I cleaned all the torsos and bases, glued them together, and from there assembled one model to completion at a time. This lets me churn out models quickly, but with enough variation in tasks to keep me from going completely mad! I didn’t need any special equipment or tricks for the build, just plastic glue, superglue, clippers, a hobby knife, and a small file – the staples of any hobby toolbox.
Once I was well into my stride, I tackled the remaining 18 models – the big 12-man Paratrooper Squad, and their half-sized counterpart. Across the whole force, I went for weaponry that seemed thematic and cool, rather than aggressively optimised. This ensured I didn’t get bored building endless rifles or SMGs, and let me vary the poses across the army, which is important when you consider that this is all done using six ‘base’ bodies! Big infantry units can sometimes be a bit of a chore, but these weren’t too bad at all, helped by the minimal clean-up needed before assembly. I didn’t do anything crazy with poses or equipment – the most involved ‘conversion’ in the entire force was the Medic’s bag mentioned earlier – and this meant that the squads came together far quicker than I was anticipating.

All in all, so far this project has taken me about five hours of hobby (I would have been quicker, but I had – what else? – Band of Brothers on in the background), ten minutes to write the army list, and a single box. At this stage, I’ve got a compact army that can absolutely play a basic game of Bolt Action, which was the initial aim, and I’ve had fun doing it! The next stage is painting, and if you’ve read any of my army project articles in the past, you’ll know that it’s not my absolute favourite bit of the hobby. However, I’ll be approaching it with the same ‘first time’ mentality as the building stage, and hopefully I can show that if I can get these Airborne looking good, anyone can!
The mad thing about these platoon boxes is just how packed with options they are, and just how many of them there are these days (seriously – there’s about 30-odd!). I had a quick flick through Armies of the United States to see how many other units I could have realistically made using just the contents of the box, and I reckon there’s another nine squads and teams that I didn’t even touch on! For me, the platoon box is the absolute backbone of any Bolt Action collection, and (as I’ve shown here) you can even turn one into a force in its own right. Enough procrastination, though – I’ve got painting to do!
Want to join me and field a US Airborne force of your own?